Product Photography: The Best Books, In Order
This curriculum takes a beginner from zero photography knowledge to confidently shooting polished, conversion-driving product images for e-commerce. The four stages build deliberately: first mastering the camera and light (the non-negotiables), then learning to style and compose products beautifully, and finally applying everything to a commercial, sales-focused workflow.
Foundations: Camera & Light Literacy
BeginnerUnderstand how a camera works, how to control exposure, and how light behaves — the essential vocabulary before touching a product.
▸ Study plan for this stage
Pace: 6–8 weeks, ~40–50 pages/day, with 2–3 days per week dedicated to hands-on exercises and review
- The exposure triangle: aperture, shutter speed, and ISO — how each controls light capture and creative outcomes
- How meters read light and why exposure compensation is necessary for non-average subjects
- The inverse square law and how light intensity diminishes with distance
- Specular vs. diffuse reflection and how surfaces interact with light differently
- Color temperature and how light sources affect the appearance of products
- Practical lighting setups: key light, fill light, and modifiers (softboxes, reflectors, diffusers)
- Histograms and how to read them to confirm proper exposure in-camera
- The relationship between focal length, depth of field, and product isolation
- How do aperture, shutter speed, and ISO interact, and how would you adjust each to photograph a shiny metal product without motion blur?
- Why does a light meter sometimes give you the wrong exposure, and how do you correct for a white or dark product?
- Explain the inverse square law and describe how moving a softbox closer to a product changes the quality and intensity of light
- What is the difference between specular and diffuse reflection, and how would you light each type of surface differently?
- How does color temperature affect product appearance, and when would you use gels or white balance adjustments?
- Describe a three-light setup (key, fill, back) and explain the purpose of each light in product photography
- How do you use a histogram to confirm exposure, and what does it tell you that your eyes might miss?
- Why is depth of field important in product photography, and how does your choice of aperture affect both exposure and composition?
- Shoot the same product (e.g., a mug, watch, or bottle) using all nine combinations of aperture (f/2.8, f/5.6, f/16), shutter speed (1/1000s, 1/60s, 1s), and ISO (100, 800, 3200) at constant exposure; compare results and note depth of field and noise changes
- Photograph a white product, a black product, and a mid-tone product using your camera's meter in auto mode, then in manual mode with exposure compensation; document the differences and explain why the meter 'failed'
- Set up a single light source at three distances (1 ft, 3 ft, 6 ft) from a product and measure light intensity with a light meter or smartphone app; plot the results and verify the inverse square law
- Photograph the same product with specular surfaces (polished metal, glass) and diffuse surfaces (matte ceramic, fabric) using identical lighting; experiment with direct light, diffused light, and reflectors to control highlights and shadows
- Create a simple three-light setup (key, fill, back) using household lamps or DIY softboxes; photograph a product and adjust each light individually, documenting how each affects the final image
- Shoot the same scene under three different light sources (tungsten, daylight, LED) without white balance correction, then with correction; compare color casts and discuss color temperature in Kelvin
- Photograph a product in aperture priority mode at f/2.8, f/8, and f/16; analyze the histograms and depth of field in each, and explain which is best for your product and why
- Create a 'lighting journal': photograph a product using five different modifier combinations (bare bulb, softbox, reflector, diffuser, bounce card); annotate each with notes on light quality, direction, and suitability for product work
Next up: This stage equips you with the technical and optical vocabulary needed to move into the next stage, where you'll apply these principles to solve real product photography challenges—choosing the right setup for specific materials, controlling reflections, and composing shots that sell.
The single best-known beginner book for demystifying aperture, shutter speed, and ISO. Reading this first ensures you can control your camera intentionally rather than accidentally.
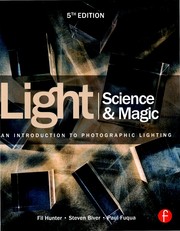
The definitive technical guide to how light reflects off different surfaces — metals, glass, fabric, skin — which is the core challenge of product photography. It belongs here, early, to build the right mental model of light before you start styling.
Lighting for Products: Studio Craft
BeginnerSet up and control artificial and natural light specifically for products, including diffusion, reflectors, and multi-light setups.
▸ Study plan for this stage
Pace: 4–5 weeks, ~25–30 pages/day with frequent breaks for reflection and photo review
- Flash as a primary light source and how to control its output and direction for product work
- Diffusion techniques to soften harsh light and create flattering product illumination
- Reflector placement and selection to fill shadows and shape product highlights
- Multi-light setups using flash units to create depth, dimension, and visual separation
- Exposure compensation and metering strategies when mixing ambient and artificial light
- The relationship between flash power, distance, and light quality in controlled product environments
- Practical problem-solving: adapting McNally's techniques to small-space and budget-conscious product shoots
- How does flash distance and power affect the quality and intensity of light on a product?
- What are the main differences between using a single diffused flash versus a multi-light setup for product photography?
- How do you use reflectors to control shadows and create dimension on a product without adding extra light sources?
- What exposure and metering adjustments are necessary when combining ambient light with off-camera flash for product work?
- How would you adapt McNally's techniques to photograph a reflective product (e.g., jewelry or glassware) in a small home studio?
- What is the practical workflow for testing and refining a multi-light setup before the final product shot?
- Set up a single off-camera flash with a diffuser and photograph a simple product (mug, book, or bottle) from three different angles; document how distance and diffusion affect the light quality
- Create a two-light setup using one main flash and one reflector; photograph the same product and compare the results to the single-light version
- Photograph a reflective product (glass, metal, or ceramic) using only reflectors and ambient light, then add one flash; analyze how the flash changes the image
- Meter and shoot the same product setup with three different exposure compensation settings (–1, 0, +1 EV); evaluate which best reveals product detail and texture
- Recreate one lighting diagram or setup from The Hot Shoe Diaries using available equipment; document your process and results in writing
- Shoot a product series (5–10 images) using a multi-light setup, adjusting flash power and position between shots; select the best image and explain your lighting choices
Next up: This stage equips you with hands-on mastery of artificial light control and multi-light composition, preparing you to combine these studio techniques with post-processing refinement and advanced styling strategies in the next stage.

Focuses on small, portable flash — the most common lighting tool for e-commerce shooters working without a full studio. Reading it after Studio Lighting Anywhere deepens your control over off-camera light shaping.
Styling, Composition & Backgrounds
IntermediateLearn how to style products, choose and build backgrounds, and compose shots that are both beautiful and brand-consistent.
▸ Study plan for this stage
Pace: 4–5 weeks, ~25–30 pages/day. Start with "The Photographer's Eye" (weeks 1–2.5, ~200 pages), then move to "Plate to Pixel" (weeks 2.5–5, ~250 pages). Allocate 2–3 days per book section for reflection and note-taking.
- Visual hierarchy and focal points: how to guide the viewer's eye through intentional composition choices
- The rule of thirds, leading lines, and framing: foundational compositional tools that create balance and tension
- Color theory and contrast: using color relationships to enhance product appeal and brand identity
- Lighting direction and quality: how hard vs. soft light, direction, and modifiers shape form and mood
- Background selection and construction: choosing or building surfaces that complement rather than compete with products
- Styling principles: prop selection, negative space, and arrangement that tell a cohesive visual story
- Brand consistency through visual language: maintaining a recognizable aesthetic across multiple product shots
- Depth of field and perspective: using focus and camera angle to isolate products and create dimensionality
- How do you use the rule of thirds and leading lines to create a compelling focal point in a product shot?
- What is the difference between hard and soft light, and when would you choose each for product photography?
- How do you select or build a background that enhances your product without overwhelming it?
- What role do props and negative space play in styling a product shot, and how do they support brand messaging?
- How can you maintain visual consistency across a series of product photographs while keeping each shot fresh?
- How do color relationships (complementary, analogous, triadic) influence the viewer's perception of your product?
- Photograph 3 products using the rule of thirds: compose one shot with the product on a third line, one off-center, and one centered. Compare the visual impact of each.
- Create two styled setups for the same product—one with a minimal background and one with supporting props. Evaluate which better communicates your brand story.
- Build or source two different backgrounds (e.g., wood, marble, fabric, painted surface) and photograph the same product against each. Document how the background changes the product's perceived value and mood.
- Shoot the same product with hard light (direct sun or undiffused flash) and soft light (diffused or bounced). Analyze how each reveals or hides texture and form.
- Style a flat-lay or overhead shot using negative space intentionally—leave at least 40% of the frame empty. Reflect on how emptiness affects the composition's strength.
- Photograph a series of 5 related products (e.g., a skincare line or kitchen tools) and ensure visual consistency through color palette, lighting angle, and background choice. Create a mood board showing your decisions.
Next up: This stage equips you with the compositional and styling vocabulary to create visually cohesive, on-brand product images; the next stage will build on these foundations by introducing technical execution—lighting setups, camera settings, and post-processing—to refine and perfect the shots you've learned to compose here.
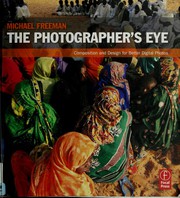
A rigorous, widely respected guide to visual design and composition. It gives you the language of framing, balance, and negative space that separates a snapshot from a deliberate product image.

Though focused on food, this is the most practical and widely recommended book on product styling, prop selection, and building cohesive backgrounds. Its principles transfer directly to any small-product e-commerce shoot.
Commercial Product Photography & E-Commerce Workflow
IntermediateShoot, edit, and deliver product images that meet marketplace standards (Amazon, Shopify, etc.) and are optimized to drive sales.
▸ Study plan for this stage
Pace: 4–5 weeks, ~25–30 pages/day with 2–3 dedicated shooting/editing sessions per week
- Client expectations and commercial photography business fundamentals (contracts, licensing, pricing models)
- Lighting setups and techniques specifically for product photography (key light, fill, backlighting, diffusion)
- Camera settings and technical execution for consistent, marketplace-ready product images
- Post-processing and color correction workflows to meet e-commerce platform standards
- Workflow optimization from shoot planning through final delivery and file management
- Understanding marketplace requirements (image dimensions, file formats, background standards for Amazon/Shopify)
- Building a repeatable system for shooting multiple products efficiently in commercial settings
- What are the key contractual and business considerations when taking on commercial product photography work, and how do they differ from personal or artistic photography?
- How would you set up a three-point lighting system for a reflective product, and what adjustments would you make for a matte or transparent product?
- What camera settings and shooting techniques ensure consistent, sharp product images that meet e-commerce marketplace technical requirements?
- Walk through your complete post-processing workflow for a product image: from initial import through color correction, retouching, and final export for Amazon or Shopify.
- How would you plan and execute a shoot for 50 similar products in a single session to maximize efficiency without sacrificing quality?
- What are the specific image dimension, file format, and background requirements for major e-commerce platforms, and why do these standards exist?
- Set up a basic product photography station at home or in a studio space, then shoot 3–5 different product types (reflective, matte, transparent) using different lighting configurations; document which setup works best for each.
- Photograph the same product using 5 different lighting setups (front-lit, side-lit, backlit, three-point, and one creative setup), then compare results to understand how light direction affects perceived product quality.
- Take 20 product images in a single session, then batch-edit them using a consistent color correction and retouching workflow; time yourself to identify efficiency bottlenecks.
- Create a detailed shot list and lighting diagram for a hypothetical 30-product shoot (e.g., jewelry, electronics, or apparel), including estimated time per product and setup changes.
- Export a finished product image in multiple formats and dimensions (JPG, PNG, TIFF at 1000×1000px, 2000×2000px, etc.) and test upload to a mock Shopify or Amazon template to verify compliance.
- Write out your complete pre-shoot checklist, lighting setup guide, camera settings template, and post-processing action list; use this as a reference for your next three shoots and refine based on real results.
Next up: This stage equips you with the technical and business foundation to execute professional product shoots and deliver marketplace-compliant images; the next stage will likely deepen specialized techniques (advanced retouching, lifestyle product integration, or scaling to high-volume commercial operations) or expand into adjacent commercial domains (fashion, food, or architectural photography).
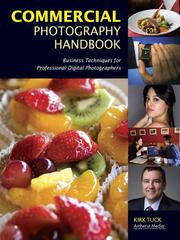
Tuck covers the full professional product-photography workflow — client briefs, shot lists, retouching, and file delivery — giving you the business and technical framework to shoot for real e-commerce clients.
Discussion
Keep reading
Paths that share books, cover the same subject, or open a related topic.