Food Photography: Best Books to Shoot and Style Delicious Photos
This curriculum takes a beginner from zero to confident food photographer across four carefully sequenced stages. It starts by building core photography and visual literacy fundamentals, then moves into food-specific lighting and styling, before tackling advanced compositional and creative mastery — ensuring every new concept has a solid foundation to land on.
Foundations of Photography
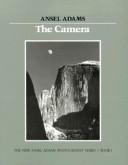
BeginnerUnderstand how a camera works, master exposure (aperture, shutter speed, ISO), and develop an eye for light and composition before any food-specific technique is introduced.
▸ Study plan for this stage
Pace: 8–10 weeks, ~20–25 pages/day (alternating between both books; allow 2–3 days per chapter for reflection and practice)
- The exposure triangle: how aperture, shutter speed, and ISO interact to control light and image quality
- Aperture's dual role: controlling light transmission and depth of field (shallow vs. deep focus)
- Shutter speed as a tool for freezing motion or creating intentional blur
- ISO sensitivity and the trade-off between brightness and image noise
- Light as the fundamental building block of photography—quality, direction, and intensity
- Composition fundamentals: balance, leading lines, framing, and visual hierarchy
- How the photographer's eye develops through deliberate observation of light and form in everyday scenes
- Metering modes and exposure compensation to achieve intentional creative control
- How do aperture, shutter speed, and ISO work together, and what creative trade-offs must you make when adjusting each?
- What is the relationship between aperture and depth of field, and how would you use this to isolate a subject versus show context?
- How does shutter speed affect motion in an image, and when would you choose a fast shutter versus a slow one?
- What are the differences between light quality (hard vs. soft) and direction (front, side, back), and how does each affect mood and form?
- What are the key compositional principles Freeman discusses, and how do they guide the viewer's eye through an image?
- How do you use metering and exposure compensation to intentionally override your camera's default exposure for creative effect?
- Exposure triangle drills: Photograph the same subject using three different aperture settings (f/2.8, f/5.6, f/16) while maintaining proper exposure by adjusting shutter speed; compare depth of field results
- Shutter speed exploration: Capture motion (flowing water, moving hand, etc.) at 1/1000s, 1/30s, and 2 seconds; analyze how each conveys different information
- ISO comparison: Shoot the same low-light scene at ISO 400, 1600, and 6400; examine noise levels and determine your camera's practical ISO limits
- Light direction study: Photograph a simple object (fruit, cup, face) under front lighting, side lighting, and backlighting; journal observations about how each reveals form and creates mood
- Composition analysis: Select 5 photographs (from Freeman's examples or your own) and map the leading lines, focal points, and balance; reframe the same scene using different compositional principles
- Metering modes practice: Use spot metering, center-weighted, and evaluative metering on high-contrast scenes; note how each meter differently and adjust exposure compensation accordingly
Next up: This foundation in exposure control, light literacy, and compositional thinking equips you to apply these principles specifically to food—understanding how to light a dish, control depth of field to isolate details, and compose a frame that makes food visually compelling.
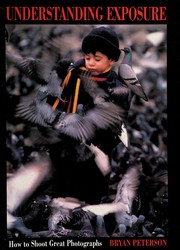
The single best beginner book for demystifying the exposure triangle with clear, visual examples — essential vocabulary before picking up a food camera.
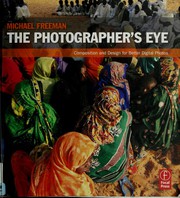
Trains the eye to see and organize a frame intentionally; the compositional grammar learned here applies directly to every food shot you will ever compose.
Introduction to Food Photography
BeginnerApply photography fundamentals specifically to food: understand natural light, basic camera settings for food, simple styling principles, and how to shoot your first appealing images.
▸ Study plan for this stage
Pace: 4–5 weeks, ~25–30 pages/day, with 2–3 days per week dedicated to hands-on shooting practice
- Natural light as the primary tool for food photography: how to find, position, and modify it for different food types
- Essential camera settings for food (aperture, shutter speed, ISO) and why they differ from general photography
- Composition and framing techniques specific to food: angles, depth of field, and the rule of thirds applied to plates and dishes
- Food styling fundamentals: props, surfaces, garnishes, and color theory to make food visually appealing
- The relationship between camera position and food presentation: overhead, 45-degree, and straight-on angles
- Building a simple home studio setup with minimal equipment for consistent, repeatable results
- Post-processing basics: editing for color, contrast, and clarity without over-processing food images
- How do you identify and use natural light sources in your home or kitchen, and what are the differences between direct and diffused light for food photography?
- What camera settings (aperture, shutter speed, ISO) would you use to photograph a glossy dessert versus a textured bread, and why?
- How do angle of view (overhead, 45-degree, straight-on) change the story or appeal of a food image, and which angles work best for different dishes?
- What role do props, surfaces, and color play in food styling, and how do you choose them to complement rather than distract from the food?
- How would you set up a simple, repeatable natural-light food photography workspace with items you already have at home?
- What are the key differences between editing food photography and general photography, and how do you maintain the food's natural appearance while enhancing the image?
- Photograph the same dish (e.g., a bowl of pasta, a slice of cake) from three different angles—overhead, 45-degree, and straight-on—and compare how each angle changes the visual story
- Create a natural-light setup in your kitchen using only a window and white paper or fabric as a reflector; shoot 5–10 images of a simple food item and note how the light changes throughout the day
- Style and photograph 3 different dishes using only props and surfaces you already own; experiment with color combinations and negative space
- Shoot the same food item with three different aperture settings (f/2.8, f/5.6, f/16) and analyze how depth of field affects the composition and viewer focus
- Build a simple overhead rig or flat-lay setup using a tripod or DIY stand, then photograph a styled flat-lay of breakfast or a beverage with garnishes
- Edit 5 of your food photos using basic adjustments (exposure, contrast, saturation, white balance) and create before/after comparisons to understand the impact of post-processing
- Photograph a 'progression series' of a meal being prepared or eaten (e.g., ingredients → plated → partially eaten) to practice narrative food photography
Next up: This foundation in natural light, camera fundamentals, and basic styling prepares you to move into intermediate techniques—such as artificial lighting setups, advanced composition, and specialized food photography genres (restaurant, editorial, commercial)—where you'll build on these core skills with more sophisticated equipment and creative control.

A purpose-built beginner guide that bridges general photography skills to food subjects, covering natural light, white balance, and simple styling in a step-by-step format.

One of the most widely recommended food photography books; it deepens natural-light technique and introduces the concept of 'hero shots,' building directly on Young's foundations.
Lighting, Styling & Composition Mastery
IntermediateTake deliberate control of light (natural and artificial), develop a food stylist's eye for props and surfaces, and compose images with professional intentionality and mood.
▸ Study plan for this stage
Pace: 4–5 weeks, ~25–30 pages/day with breaks for practice shoots
- Food styling as visual storytelling—using props, surfaces, and arrangement to convey narrative and mood
- Natural light mastery: positioning, diffusion, and time-of-day considerations for food photography
- Artificial lighting techniques: key light, fill light, and backlighting to sculpt food and create dimension
- Prop and surface selection: color theory, texture, and period/cultural authenticity to support the food subject
- Composition principles specific to food: rule of thirds, leading lines, depth of field, and camera angles (flat lay, 45°, straight-on)
- Styling for different food categories: beverages, baked goods, plated dishes, and raw ingredients with category-specific tricks
- The food stylist's toolkit: essential materials, heat-resistant tricks, and quick fixes for on-set challenges
- Intentional mood creation: how lighting, styling, and composition work together to evoke emotion and appetite appeal
- How do you position natural light sources and use diffusion to highlight texture and form in food without creating harsh shadows?
- What is the difference between key light and fill light in artificial setups, and when would you use each for food photography?
- How do you select props and surfaces that enhance rather than distract from the food, and what role does color theory play in this decision?
- What styling and compositional adjustments would you make differently for a beverage versus a plated entrée versus a raw ingredient?
- How do you create intentional mood through the combined use of lighting, props, and composition—and what visual choices signal 'luxury' versus 'comfort' versus 'fresh and natural'?
- What are three quick fixes or heat-resistant tricks from the stylist's toolkit that you would use to keep food camera-ready during a shoot?
- Shoot the same dish under three different lighting scenarios (morning natural light, afternoon natural light, and one artificial setup) and compare how mood and appetite appeal shift
- Create a mood board for a specific food category (e.g., desserts, salads, soups) using props and surfaces from your home; photograph the styled setup from three different angles and camera heights
- Practice a 'flat lay' composition of a simple breakfast scene, then a '45-degree angle' shot of the same scene; analyze which tells a clearer story and why
- Conduct a color theory exercise: style the same dish against three different background colors and document how each changes the visual impact and perceived flavor profile
- Set up a simple artificial lighting rig (key and fill) for a food subject and shoot a series of test images, adjusting light position and intensity to sculpt dimension and highlight texture
- Recreate a food photograph from a published source (cookbook, food magazine, or advertisement) by reverse-engineering the styling choices, lighting direction, and props used
Next up: This stage equips you with the deliberate technical and aesthetic control needed to execute professional food photography; the next stage will build on this foundation by teaching you how to adapt these skills to different contexts—editorial shoots, commercial campaigns, and personal branding—and how to work efficiently with clients, art directors, and production teams.

The industry-standard reference for food styling; reading this transforms how you see and prepare food before the lens, making every subsequent shoot more intentional.
Focuses exclusively on light — natural, reflectors, and artificial setups — with practical diagrams that let you replicate professional lighting scenarios immediately.
Advanced Creative Vision & Professional Practice
ExpertDevelop a personal visual style, work with artificial studio lighting at a professional level, and understand the commercial and editorial side of food photography.
▸ Study plan for this stage
Pace: 8–10 weeks, ~40–50 pages/day with 2–3 days per week dedicated to hands-on lighting experiments
- The physics of light behavior: reflection, refraction, diffusion, and absorption as they apply to food surfaces and materials
- Inverse square law and how distance and angle of light sources dramatically affect food appearance and mood
- Specular vs. diffuse reflection and how to control each for different food photography aesthetics
- Three-point and multi-light setups adapted specifically for food: key light, fill light, and backlight positioning and ratios
- Color temperature, white balance, and how different light sources (tungsten, LED, HMI, natural) render food colors authentically
- Softbox, beauty dish, octabox, and reflector selection and placement for sculpting food form and texture
- Creating repeatable, controllable studio lighting systems that produce consistent results across editorial and commercial shoots
- Developing a personal lighting signature that differentiates your work and communicates a distinct visual voice
- How do the inverse square law and angle of incidence affect the appearance of a glossy sauce or oil on food, and how would you adjust your light placement to control this?
- What is the difference between specular and diffuse reflection, and how would you use this knowledge to light a shiny apple versus a textured loaf of bread?
- Describe a three-point lighting setup for food photography: where would you place the key light, fill light, and backlight, and what ratios would you use for a moody versus bright aesthetic?
- How do different light sources (tungsten, LED, daylight, HMI) render food colors differently, and what white balance and color correction strategies would you use in post-production?
- What softbox size and shape would you choose for a particular food subject, and why? How does this choice affect the quality of shadows and highlights?
- How would you design a repeatable studio lighting system that allows you to shoot multiple food products consistently while maintaining your personal visual style?
- Set up a basic three-point lighting rig with a key light, fill light, and backlight using household or affordable studio lights. Photograph the same food item (e.g., a bowl of pasta, a glass of wine) with different light ratios (3:1, 5:1, 8:1) and compare the emotional impact of each.
- Create a 'light study' series: photograph one food subject (e.g., a croissant, a plate of berries) using five different light sources (tungsten, LED, daylight, HMI if available, and a reflector-only setup). Document color temperature, white balance settings, and post-production adjustments.
- Build a reference library of specular vs. diffuse reflections: photograph shiny foods (glazed donuts, caramelized surfaces, oils) and matte foods (bread, vegetables, chocolate) under identical lighting, then adjust light placement to control highlight quality and shadow softness.
- Design and execute a 'signature lighting style' shoot: choose 3–4 food subjects and light them using a consistent, repeatable setup that reflects your personal aesthetic. Document your light positions, distances, power settings, and modifier choices so you can replicate the setup.
- Experiment with inverse square law in practice: position a light source at different distances from a reflective food surface (e.g., a plate with sauce) and photograph the changes in highlight intensity and falloff. Calculate and verify the inverse square law predictions.
- Shoot a 'before and after' series: light a complex food scene (e.g., a styled table setting with multiple dishes) first with flat, even lighting, then redesign the lighting to create depth, mood, and visual hierarchy. Document your decision-making process.
Next up: This stage grounds you in the scientific and technical mastery of professional studio lighting, preparing you to apply these principles strategically in commercial briefs, editorial assignments, and personal projects where lighting becomes a tool for storytelling and brand differentiation.
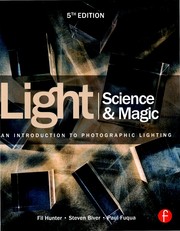
The definitive technical deep-dive into how light behaves on surfaces and textures; at this stage it unlocks full control over studio and artificial lighting for food work.
Discussion
Keep reading
Paths that share books, cover the same subject, or open a related topic.