Take photos that look professional
This four-stage curriculum takes a beginner from "I just point and shoot" to someone who sees light, composes deliberately, and polishes images in post. Each stage builds on the last: you first develop an eye and a vocabulary, then master light, then deepen compositional and creative thinking, and finally gain control in the digital darkroom — so no stage feels premature or redundant.
Foundations: Seeing Like a Photographer
BeginnerUnderstand how cameras see differently from human eyes, learn the exposure triangle, and start noticing composition instinctively before worrying about technique.
▸ Study plan for this stage
Pace: 6–8 weeks total: Weeks 1–3 on "Understanding Exposure" (~25–30 pages/day, including re-reading dense sections on aperture/shutter/ISO relationships); Weeks 4–7 on "The Photographer's Eye" (~20–25 pages/day, slower pace to allow time for visual study of Freeman's example images); Week 8 is a consolid
- The Exposure Triangle: how aperture, shutter speed, and ISO interact as a unified system, not three separate dials (Peterson, Ch. 1–3)
- Equivalent exposures: understanding that multiple aperture/shutter/ISO combinations can produce the same brightness, but with radically different creative results (Peterson, Ch. 4)
- Aperture as a storytelling tool: how f-stop controls depth of field and separates subject from background or keeps a scene sharp front-to-back (Peterson, Ch. 2)
- Shutter speed as motion language: freezing action vs. implying movement through blur, and how Peterson's 'action-stopping' vs. 'panning' techniques serve different narratives (Peterson, Ch. 3)
- Light metering and the 18% gray standard: why cameras expose for middle gray and how to recognize and override metering errors in high-contrast or all-white/all-black scenes (Peterson, Ch. 5–6)
- The frame as a design decision: Freeman's argument that every edge, corner, and division of the rectangle is an active compositional force, not a neutral border (Freeman, Ch. 1–2)
- Visual weight, balance, and the geometry of placement: how the position of a subject within the frame creates tension, harmony, or narrative direction — including the rule of thirds as one tool among many (Freeman, Ch. 3–5)
- Light as structure, not just illumination: Freeman's treatment of how direction, quality, and contrast of light define the graphic elements a photographer works with (Freeman, Ch. 6–7)
- Given a scene with a bright white snowfield, why will your camera's meter underexpose it, and what specific exposure compensation would Peterson recommend to correct it?
- You want a portrait with a blurred background AND a fast enough shutter to avoid camera shake at 50mm — walk through the aperture/shutter/ISO trade-offs Peterson describes to achieve both goals simultaneously.
- Peterson introduces the concept of 'equivalent exposures.' Give three different aperture/shutter combinations that produce the same exposure value, and explain what changes creatively between each.
- Freeman argues that the edges and corners of the frame are compositionally active. Looking at one of your own recent photos, describe how the subject's placement relative to the frame edges creates or destroys visual tension.
- What does Freeman mean when he says a photographer must 'design' rather than simply 'record'? How does this shift in mindset change what you look for before pressing the shutter?
- How does the direction and quality of light (hard vs. soft, side vs. front) affect the graphic structure of an image according to Freeman, and how does that interact with the exposure decisions Peterson teaches?
- **The Exposure Triangle Drill (Peterson-based):** Pick one static subject (a coffee cup, a plant, a parked car). Shoot it at five different equivalent exposures — same brightness, different aperture/shutter/ISO combos. Print or display them side by side and write one sentence describing the creative difference each combination produces.
- **Metering Override Practice (Peterson-based):** Find three high-contrast or tonally extreme scenes: a snow scene or white wall, a dark shadowed alley or black object, and a backlit portrait. Photograph each first on full auto metering, then apply Peterson's exposure compensation logic. Compare the pairs and note where the camera's 18% gray assumption failed.
- **Shutter Speed Motion Study (Peterson-based):** Go to any location with movement — a street, a fountain, a busy café. Shoot the same moving subject at 1/1000s, 1/250s, 1/60s, 1/15s, and 1/4s. Arrange the sequence and write a caption for each describing the 'story' the shutter speed tells.
- **Frame Dissection Journal (Freeman-based):** Choose 10 published photographs (from a magazine, photobook, or online archive). For each, draw a thumbnail sketch marking: the horizon line placement, the subject's position relative to thirds lines, and the direction of any implied lines or gazes. Write one sentence on whether Freeman's framing principles are at work.
- **Compositional Walk (Freeman-based):** Go on a 30-minute walk with your camera and shoot only 12 frames. Before each shot, pause and verbally state (or write in a pocket notebook) your answer to Freeman's implicit question: 'What is the single graphic idea of this frame?' Review the 12 images and grade yourself on whether the final image matched your stated intention.
- **Integration Shoot — Light + Exposure + Composition:** Plan one 1-hour golden-hour shoot (sunrise or sunset). Apply Peterson's exposure triangle deliberately (choose aperture first for depth-of-field intent, then set shutter, then ISO). Apply Freeman's framing awareness (consider edges, balance, and light direction before shooting). Select your three best frames and write a short paragraph for ea
Next up: Mastering the exposure triangle through Peterson and developing compositional instinct through Freeman gives the reader a stable technical and visual grammar — the essential foundation for the next stage, which can now build confidently toward more advanced topics such as working in specific genres, mastering light in complex conditions, or developing a personal photographic style.
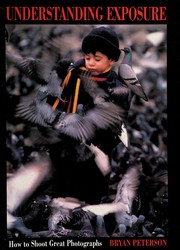
The single best entry point for beginners: Peterson demystifies aperture, shutter speed, and ISO with plain language and vivid examples, giving you the technical vocabulary every later book assumes you have.
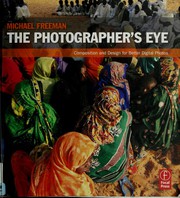
Read this immediately after gaining exposure basics — Freeman teaches you WHY certain compositions work by breaking down design elements like balance, geometry, and the decisive moment, building the visual grammar you'll use forever.
Light: The Raw Material of Every Photo
BeginnerLearn to read, chase, and shape natural and available light so that ordinary scenes become luminous and three-dimensional.
▸ Study plan for this stage
Pace: 8–10 weeks total. Weeks 1–5: "Light: Science and Magic" (~25–30 pages/day, 4–5 days/week) — read methodically, pausing to sketch diagrams of light families and surface interactions. Weeks 6–10: "Sketching Light" (~15–20 pages/day, 4–5 days/week) — read slowly and visually, treating each chapter as a
- The two families of light (direct/specular vs. diffuse) and how surface finish — matte, glossy, or translucent — determines which family you must use to reveal texture and form (Light: Science and Magic)
- The inverse-square law: how light intensity falls off with distance, and why moving a light source even slightly has dramatic, non-linear consequences on exposure and mood (Light: Science and Magic)
- The geometry of highlight and shadow: how the angle of incidence equals the angle of reflection, and how controlling that geometry lets you place a specular highlight exactly where you want it (Light: Science and Magic)
- Light size relative to subject distance — why a large, close source is soft and wrapping while the same source moved far away becomes hard and directional (Light: Science and Magic)
- Reading existing light in the real world: identifying the quality (hard/soft), direction (front/side/back/top), and color temperature of any available light before touching a camera setting (Sketching Light)
- The concept of 'sketching' — McNally's practice of making fast, exploratory exposures to map the light in a scene before committing to a final frame, treating the camera as a notebook (Sketching Light)
- Using reflectors, scrims, and simple modifiers to shape and redirect available light without adding artificial sources — the photographer as light sculptor (Sketching Light)
- The emotional and narrative language of light: how direction and quality communicate mood, depth, and story rather than just illumination (Sketching Light)
- After reading Light: Science and Magic, can you explain why a large softbox close to a subject produces softer shadows than a bare flash at the same distance — using the concept of light-source size relative to subject?
- How does the angle of incidence/reflection rule help you predict and control where a specular highlight will appear on a shiny object, and how would you use this to eliminate an unwanted glare?
- What does the inverse-square law tell you about the practical difference between moving a light 1 foot vs. 3 feet away from a subject?
- After reading Sketching Light, how would you describe McNally's 'sketching' workflow — what is he actually doing, and why does he do it before finalizing a shot?
- Looking at a scene lit only by a north-facing window, how would you characterize the light's quality, direction, and color temperature, and what simple tools from Sketching Light could you use to improve it?
- How do the scientific principles in Light: Science and Magic show up in the intuitive, on-location decisions McNally makes in Sketching Light — give at least two concrete examples?
- Surface & Family Audit (tied to Light: Science and Magic): Gather 5 household objects with different surface finishes (mirror, matte ceramic, translucent glass, brushed metal, fabric). Using only a single desk lamp, photograph each object and deliberately place the specular highlight or diffuse wrap exactly where you intend. Label each result with the light family used and why.
- Inverse-Square Law Ladder (tied to Light: Science and Magic): Set your camera on a tripod, aim a flashlight or lamp at a white card, and shoot the card at 1 ft, 2 ft, and 4 ft without changing any camera settings. Compare the exposures to see the law in action, then repeat while adjusting exposure to compensate — building muscle memory for the relationship.
- Golden-Hour & Open-Shade Sketch Sessions (tied to Sketching Light): On three separate days shoot the same subject (a friend's face or a textured wall) in three available-light conditions: harsh midday sun, open shade, and golden-hour sidelight. Make 10–15 'sketch' exposures per session as McNally prescribes, then select the single best frame and write two sentences on what the light is doing narra
- Reflector & Scrim Experiment (tied to Sketching Light): Using a piece of white foam-core as a reflector and a single layer of white fabric as a scrim, photograph a portrait subject near a window. Shoot four versions — no modifier, reflector only, scrim only, both — and compare how each version changes shadow depth, highlight intensity, and mood.
- Light-Reading Walk: Walk through your home or neighborhood at two different times of day and photograph 10 scenes purely to document the light, not the subject. For each frame, write a caption that names the light's quality, direction, color temperature, and emotional tone — connecting the analytical vocabulary of Light: Science and Magic with the intuitive eye trained by Sketching Light.
- Before/After Reshaping Challenge: Find a 'bad light' situation (harsh overhead fluorescent, flat overcast, direct noon sun). Using only tools available to you — position, reflectors, scrims, or waiting for the light to change — transform the scene and document the before and after. Write a short paragraph explaining every decision using terminology from both books.
Next up: ">Mastering how to read and shape light in its raw, available form gives you the perceptual foundation to understand why artificial lighting tools — strobes, speedlights, and continuous sources — are designed the way they are, making the next stage on controlled and studio lighting immediately intuitive rather than overwhelming.
Widely considered the definitive guide to understanding how light behaves — reflection, diffusion, and contrast — giving you a mental model that applies whether you're shooting indoors, outdoors, or with flash.

McNally's visual storytelling approach shows how to see and sculpt light in real-world situations; reading it after Hunter's theory grounds the concepts in practical, inspiring photographic results.
Composition & Vision: Developing a Personal Eye
IntermediateMove beyond rules to develop a personal visual voice — understanding narrative, moment, and the deeper 'why' behind striking images.
▸ Study plan for this stage
Pace: 10–12 weeks total, reading roughly 20–25 pages per day: ~2–3 weeks for "Ways of Seeing" (160 pp.), ~4–5 weeks for "The Art of Photography" (400+ pp.), and ~3–4 weeks for "On Photography" (210 pp.). Allow 1–2 buffer days per book for reflection journaling before moving on.
- Ways of Seeing — The Male Gaze & Constructed Meaning: Berger's argument that every image encodes the values, power structures, and assumptions of its maker and culture, challenging you to interrogate *why* you frame a subject the way you do.
- Ways of Seeing — Mystification & Reproduction: How mechanical reproduction (prints, screens) strips context from images and how photographers can fight back by anchoring meaning through deliberate intent.
- The Art of Photography — Visualization: Barnbaum's core discipline of mentally 'seeing' the final image before the shutter fires — previsualization as the bridge between technical craft and personal vision.
- The Art of Photography — Creativity vs. Technique: Barnbaum's insistence that technique is a servant of expression, not an end in itself; rules of composition exist to be understood deeply before they are broken purposefully.
- The Art of Photography — Light, Tone & Mood: Reading a scene's tonal relationships and emotional temperature, and making deliberate exposure/contrast choices that serve the image's narrative rather than mere accuracy.
- On Photography — The Photograph as Interpretation, Not Truth: Sontag's critique that photographs feel like reality but are always a selective, ideologically loaded slice — essential for developing honest self-awareness about your own editorial choices.
- On Photography — Surrealism & the Photographic Inventory: How photography accumulates the world into a vast, democratized archive, and what that means for originality, cliché, and finding a genuinely personal subject.
- Synthesized Vision — Personal Visual Voice: The through-line of all three books — moving from 'what looks good' (rule-following) to 'what do I believe and want to say' (authorship), using Berger's cultural criticism, Barnbaum's craft intentionality, and Sontag's philosophical skepticism as three len
- After reading Berger, can you identify at least two hidden assumptions or power dynamics encoded in one of your own recent photographs — who or what is centered, who is absent, and why?
- How does Barnbaum's concept of visualization differ from simply 'planning a shot,' and can you describe a specific moment when you previsualized a final image before pressing the shutter?
- Barnbaum argues that personal creativity cannot be taught but can be cultivated — what specific habits or practices does he recommend, and which have you begun to adopt?
- Sontag claims that 'to photograph is to appropriate the thing photographed.' What are the ethical implications of this for documentary, portrait, and street photography, and how does it change the way you approach consent and subject relationships?
- How do Berger's and Sontag's critiques of image-making complement or contradict each other, and where does Barnbaum's practitioner perspective fit between their two philosophical stances?
- Can you articulate, in two or three sentences, what your current personal visual voice is — what subjects, moods, or ideas you are drawn to and *why*, grounded in the ideas from all three books?
- 'Ways of Seeing' Deconstruction Shoot: Choose an advertisement or famous photograph and write a 200-word Berger-style analysis of its encoded assumptions. Then go out and deliberately re-photograph the same subject or theme, consciously subverting those assumptions. Compare the two images side by side.
- Visualization Journal (Barnbaum): For one full week, before raising the camera on any shot, stop and write or sketch in a small notebook exactly what you intend the final image to look, feel, and mean. After processing, compare your previsualized intention with the actual result and note the gaps.
- Tonal Mood Series (Barnbaum): Photograph the same single subject (a doorway, a tree, a person's hands) five times across different lighting conditions and times of day. For each frame, write one sentence describing the emotional narrative the tonal range creates — practice Barnbaum's language of light.
- Sontag's Inventory Challenge: Spend one week photographing only within a 500-meter radius of your home. At the end, curate 10 images into a coherent sequence with a title. This forces originality within constraint and confronts Sontag's point about the photographic archive and cliché.
- Cross-Book Critique Circle: Share three of your images with a peer or online group and ask them to apply one lens from each book: (1) What does Berger say this image assumes? (2) Does Barnbaum's visualization feel present or absent? (3) What is this image 'appropriating' in Sontag's sense? Use the feedback to write a one-page artist statement.
- Personal Vision Manifesto: After finishing all three books, write a one-page manifesto (inspired by Berger's polemical style) declaring what you believe photography is *for*, what subjects matter to you and why, and what visual or ethical commitments you will hold yourself to going forward. Revisit and revise it at the end of the entire curriculum.
Next up: By internalizing Berger's cultural awareness, Barnbaum's intentional craft, and Sontag's philosophical skepticism, the reader now has a personal 'why' behind every image — a foundation that makes the next stage's deeper technical or genre-specific study feel purposeful rather than mechanical.

A short, paradigm-shifting book on how we interpret images; reading it mid-curriculum rewires how you look at any photograph and pushes you to ask what your images are actually communicating.
Barnbaum bridges technique and artistic intent more thoroughly than almost any other photography book, helping you connect your camera skills to genuine creative expression — the right book once foundations are solid.
Sontag's essays challenge you to think critically about what photographs mean and do in the world, deepening your intentionality as a shooter at exactly the stage when technique is no longer the bottleneck.
Editing: The Digital Darkroom
IntermediateMaster post-processing workflows in Lightroom and understand tonal and color editing so that your vision in the field is fully realized on screen.
▸ Study plan for this stage
Pace: 8–10 weeks total: Weeks 1–5 cover Martin Evening's "Adobe Photoshop Lightroom Classic CC Book" (~40–50 pages/day, focusing one week each on Library/Import, Develop module basics, tonal editing, color editing, and output/export); Weeks 6–10 cover Jeff Schewe's "The Digital Negative" (~25–35 pages/day
- Non-destructive editing philosophy: how Lightroom's catalog and adjustment metadata preserve the original RAW file, as detailed throughout Evening's workflow chapters
- The Develop module's tonal hierarchy: understanding the relationship between Exposure, Highlights, Shadows, Whites, and Blacks sliders and how Evening teaches them as an ordered correction sequence
- Color editing fundamentals: using the HSL/Color panel and White Balance tools in Lightroom to achieve accurate and creative color grading, per Evening's color correction chapters
- The RAW file as a digital negative: Schewe's core argument that RAW capture is analogous to a film negative — latent, unprocessed, and requiring intentional development decisions
- Camera Calibration and input profiles: Schewe's deep dive into how camera profiles affect the starting point of every edit and why choosing the right profile matters before any slider is touched
- Tone mapping and the histogram: reading and targeting a healthy histogram, avoiding clipping, and using the targeted adjustment tool — bridged across both Evening's practical walkthroughs and Schewe's theoretical grounding
- Local adjustments: mastering Lightroom's Masking tools (Radial, Linear, Subject, Sky) to apply targeted tonal and color corrections, as covered in Evening's advanced Develop chapters
- Export and output sharpening: Evening's systematic approach to export presets, output sharpening for screen vs. print, and maintaining a clean, repeatable delivery workflow
- After reading Evening, can you describe the exact order in which you would apply global tonal corrections in the Develop module, and explain why that sequence matters?
- How does Schewe define 'the digital negative,' and what does his analogy reveal about the responsibilities a photographer takes on during RAW processing that a JPEG shooter does not?
- What is the difference between adjusting White Balance for technical accuracy versus using it as a creative color-grading tool, and where does each approach appear in Evening's and Schewe's texts?
- How do camera input profiles (covered by Schewe) affect the baseline of an edit, and why should they be set before any exposure or color slider is moved?
- Using Evening's guidance on local adjustments, how would you isolate and correct a blown-out sky without affecting the foreground exposure?
- What output-sharpening strategy does Evening recommend for a photo destined for web display versus one going to a fine-art inkjet print, and what is the reasoning behind the difference?
- Build a Lightroom Develop preset library: after completing Evening's tonal and color chapters, create at least five named presets (e.g., 'Neutral Correction Start,' 'Warm Portrait,' 'High-Contrast Landscape') and apply them to 20+ of your own RAW files to internalize the slider relationships he describes
- Complete a 'digital negative audit': select 10 RAW files and, following Schewe's camera-profile chapter, compare the same image edited from three different input profiles (Adobe Standard, Camera Faithful, Camera Landscape). Export side-by-side JPEGs and write two sentences on how each profile shifts your editing decisions
- Histogram correction drill: import 15 RAW files with intentionally varied exposures (underexposed, overexposed, flat). Using only Evening's recommended tonal sliders in the order he prescribes, bring each image to a full-range histogram without clipping. Screenshot before/after histograms for review
- Local adjustment masking challenge: choose five portraits and five landscapes from your own library. On each, use at least two different masking tools (e.g., Subject + Linear Gradient) as taught in Evening's masking chapters, and write a one-paragraph edit rationale for each image explaining why you chose those masks
- End-to-end workflow simulation: pick one shoot (minimum 50 RAW files), run it through the complete Evening workflow — import with metadata presets, cull, global develop, local adjustments, export with output sharpening — timing yourself to establish a personal benchmark and identify bottlenecks
- Schewe deep-read annotation exercise: as you read 'The Digital Negative,' keep a running glossary of every technical term Schewe introduces (e.g., linear gamma, rendering intent, perceptual quantizer). After finishing, write a one-page summary connecting three of Schewe's theoretical concepts to specific sliders or panels you already used in Evening's book
Next up: Mastering Lightroom's tonal and color tools and understanding the RAW file's full potential sets a strong technical and visual foundation, preparing the reader to tackle more advanced creative and compositional decisions — such as intentional in-camera choices, advanced lighting, and fine-art printing — that build directly on a polished, repeatable post-processing workflow.

The most comprehensive and authoritative Lightroom reference available — read it last so you already know what you want your images to look like before learning the tools to achieve it.

Schewe focuses on raw processing philosophy and tonal control, complementing Evening's workflow guide by explaining the 'why' behind editing decisions rather than just the 'how.'
Discussion
Keep reading
Paths that share books, cover the same subject, or open a related topic.