The Best Books to Learn Stop-Motion Animation, in Order
This curriculum is designed for learners who already have some familiarity with animation or filmmaking and want to go deep into the craft of stop-motion. It begins by building a solid conceptual and historical foundation, moves into the hands-on technical craft of puppet-making, set construction, and camera work, and finally advances into professional-level production design and artistic refinement — mirroring the pipeline of a real stop-motion production.
Foundations & The Art Form
IntermediateUnderstand the history, vocabulary, and core principles of stop-motion animation — what makes it distinct, how it evolved, and the major techniques (puppet, clay, object, pixilation) before touching any equipment.
▸ Study plan for this stage
Pace: 4–5 weeks, ~25–30 pages/day (approximately 140–150 pages total across both books)
- The historical evolution of stop-motion from early cinema to contemporary practice, and how technological advances shaped the form
- Core vocabulary: key terms like 'frame rate', 'armature', 'replacement animation', 'tie-downs', and 'in-betweening' in the context of stop-motion specifically
- The four major stop-motion techniques (puppet animation, clay animation, object animation, and pixilation) and their distinct aesthetic and practical characteristics
- Principles of movement and timing unique to stop-motion, including how frame rate affects perceived motion and the importance of planning before shooting
- The role of design, sculpture, and craftsmanship in creating believable characters and objects that will be animated
- How stop-motion differs fundamentally from other animation forms (2D, CGI) in terms of workflow, constraints, and creative possibilities
- The relationship between planning (storyboarding, animatic creation) and execution in stop-motion production
- What are the major historical periods in stop-motion animation, and what key innovations or filmmakers defined each era?
- Explain the differences between puppet animation, clay animation, object animation, and pixilation—when would you choose each technique and why?
- What is an armature, and why is its design critical to successful puppet animation?
- How does frame rate affect the perceived speed and quality of motion in stop-motion, and what are industry standards?
- What is the relationship between planning (storyboards, animatics) and the actual animation process in stop-motion?
- How does the physical, tactile nature of stop-motion constrain and enable creative choices compared to other animation forms?
- Create a detailed timeline of stop-motion animation history (1900–present) identifying 5–7 major milestones, key films, and pioneering animators from your reading
- Write a 2–3 page comparative analysis of two different stop-motion techniques (e.g., puppet vs. clay), explaining when each is most effective and citing specific examples from the books
- Sketch and annotate a simple armature design for a humanoid character, labeling joints, tie-down points, and materials based on principles from Priebe's book
- Analyze a short stop-motion film (3–5 minutes) by identifying the technique used, estimating frame rate, and explaining how the animator solved specific movement challenges
- Create a mock storyboard and animatic plan (rough drawings + timing notes) for a 10-second stop-motion sequence of a simple action (e.g., a ball rolling, a character walking), applying principles from both books
- Write a reflective journal entry (500–750 words) comparing stop-motion to another animation form you're familiar with, discussing the unique constraints and creative freedoms of stop-motion based on your reading
Next up: This stage equips you with the conceptual foundation and vocabulary needed to move into hands-on production, where you'll apply these principles by building your first armature, setting up a workspace, and executing simple test animations.

The single most comprehensive introductory-to-intermediate text on stop-motion; it covers history, techniques, puppet construction, and camera basics in one cohesive arc — the ideal starting point for an intermediate learner.

Written by the co-founder of Aardman Animations, this book demystifies the Aardman approach to character and story in clay/puppet animation, giving essential creative vocabulary before diving into technical craft.
Puppet & Character Construction
IntermediateBuild fully poseable, camera-ready puppet armatures and characters using professional materials and techniques, understanding the relationship between a puppet's construction and its on-screen performance.
▸ Study plan for this stage
Pace: 4–5 weeks, ~25–30 pages/day, with 2–3 dedicated build days per week
- Professional armature design principles: ball-and-socket joints, tie-downs, and weight distribution for on-camera stability
- Material selection for puppet construction: foam latex, silicone, thermoplastics, and their performance characteristics under repeated animation
- Building poseable joints that balance flexibility with holding power—the core relationship between construction and performance
- Puppet rigging and support systems: how to keep characters stable during shooting without visible rigs
- Character-specific construction: tailoring armature complexity and materials to match the demands of your character's movement and story
- Troubleshooting construction problems: identifying and fixing joint slippage, breakage, and performance issues mid-production
- The iterative relationship between puppet design, animation capability, and final on-screen appearance
- What are the trade-offs between different joint types (ball-and-socket, hinge, universal) and how do you choose the right one for a specific character?
- How does the choice of puppet material (foam latex vs. silicone vs. thermoplastic) affect both construction time and animation performance?
- Why is weight distribution critical to puppet stability, and how do you test whether a puppet can hold poses under hot lights?
- What is the relationship between a puppet's construction and its ability to perform specific movements convincingly on camera?
- How do you design and implement a rigging system that supports your puppet without creating visible artifacts in the final shot?
- What are the most common construction failures during animation, and how can you prevent or repair them?
- Build a simple ball-and-socket joint prototype using Priebe's specifications; test its range of motion and holding power under load
- Construct a full poseable armature (torso, limbs, neck) for a humanoid character, focusing on joint stability and weight distribution
- Create a puppet head with a replaceable mouth/expression system; practice swapping parts quickly and cleanly
- Design and build a character-specific rig system (tie-down points, support rods) that keeps your puppet stable during a 30-second animation test
- Animate a 10–15 second sequence with your constructed puppet, identifying and fixing any construction issues that arise during shooting
- Compare the performance of two puppets built with different materials (e.g., foam latex vs. silicone) by animating the same movement on both and analyzing the differences
Next up: This stage equips you with the technical mastery to build puppets that perform reliably under camera, setting the foundation for the next stage where you'll apply these construction skills to solve complex animation challenges and refine performance through advanced rigging and problem-solving in production.

Priebe's follow-up goes deeper into armature fabrication, foam latex, silicone skin, and replacement animation — read after his first book so the vocabulary is already in place.
Sets, Lighting & the Camera
IntermediateDesign and build believable miniature sets, light them for cinema-quality results, and operate a camera with the precision that frame-by-frame shooting demands.
▸ Study plan for this stage
Pace: 4–5 weeks, ~40–50 pages/day (with breaks for technical setup and experimentation)
- Resourcefulness and constraint-driven creativity: how to build cinematic sets and lighting on minimal budgets using everyday materials
- Camera operation fundamentals: frame composition, shot selection, and the technical demands of frame-by-frame precision shooting
- Lighting as storytelling: using practical lights and reflectors to create mood, depth, and visual hierarchy in miniature spaces
- Set design principles: spatial planning, practical construction techniques, and how to create believable environments at small scales
- The relationship between camera placement, lighting, and set design: how these three elements work together to create cinematic images
- Problem-solving on set: adapting to technical limitations and using constraints to drive creative solutions rather than inhibit them
- What are the core principles Rodriguez advocates for building sets and lighting on a minimal budget, and how do they apply to stop-motion production?
- How does Rodriguez approach camera operation and composition, and what specific techniques can you apply to frame-by-frame stop-motion shooting?
- What is the relationship between lighting, set design, and camera placement in creating a cinematic image, according to Rodriguez's philosophy?
- How can you use practical, everyday materials to build believable miniature sets, and what construction techniques does Rodriguez emphasize?
- What strategies does Rodriguez recommend for problem-solving when technical resources are limited, and how do these apply to stop-motion animation?
- How does understanding Rodriguez's approach to visual storytelling through camera, lighting, and set design prepare you to execute a complete stop-motion sequence?
- Build a small-scale set (2–3 feet wide) using only materials found in your home or purchased for under $20; document the construction process and photograph the final result from multiple angles
- Light your miniature set using only practical lights (desk lamps, phone flashlights, candles, reflective materials); experiment with 3–5 different lighting setups and photograph each one, noting how mood and depth change
- Plan and shoot a 10–15 second stop-motion sequence in your miniature set using a smartphone or basic camera; focus on consistent frame composition and smooth camera movement (if applicable)
- Analyze a scene from a Rodriguez film (or another low-budget film) by identifying the camera angle, lighting sources, and set materials used; write a one-page breakdown of how these elements work together
- Create a detailed set design sketch for a short stop-motion sequence (30 seconds) that tells a simple story; include notes on lighting placement, camera angles, and material choices
- Shoot a before-and-after comparison: light your miniature set poorly (flat, harsh lighting), then redesign the lighting to create depth and mood; document both versions and reflect on the differences
Next up: This stage equips you with the practical skills and resourceful mindset to design, build, and light believable miniature environments and operate a camera with precision—the foundational technical competencies needed to move into the next stage, where you'll integrate these elements into full character animation and storytelling.
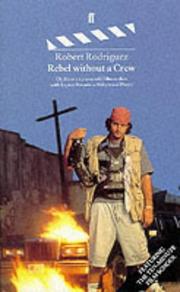
Though not stop-motion-specific, Rodriguez's guerrilla filmmaking philosophy teaches low-budget cinematography problem-solving and creative camera thinking that translates powerfully to independent stop-motion production.
Frame-by-Frame Movement & Performance
ExpertMaster the animator's eye — timing, spacing, weight, anticipation, and character performance — applied specifically to the physical, tactile medium of stop-motion.
▸ Study plan for this stage
Pace: 6–8 weeks, ~25–30 pages/day (alternating between both books; Williams for animation principles, Shaw for stop-motion specifics)
- Spacing and timing: how frame intervals create the illusion of weight, momentum, and emotional intent
- Anticipation and follow-through: preparing the audience for action and settling poses to ground character believability
- Arcs of motion: how curved paths convey organic movement versus mechanical rigidity in stop-motion puppets
- Weight and balance: translating physical mass and center of gravity into puppet performance through incremental positioning
- Overlapping action: layering secondary movements to create complexity and naturalism in tactile, frame-by-frame work
- Character performance through micro-adjustments: using subtle facial expressions, body tension, and pose shifts unique to stop-motion's physical constraints
- The stop-motion-specific workflow: armature limitations, material properties, and how they shape timing and performance choices
- Shooting mechanics and their impact on performance: frame rate, lighting consistency, and how technical decisions affect perceived motion quality
- How does spacing (the distance between key poses) communicate weight and emotional state differently in stop-motion than in drawn animation?
- What is anticipation, and how do you apply it to a stop-motion puppet with limited articulation points?
- Explain how overlapping action and follow-through prevent a stop-motion character from feeling stiff or robotic.
- Why are arcs of motion important in stop-motion, and what physical constraints might force you to deviate from perfect arcs?
- How does the choice of frame rate (12 fps vs. 24 fps) affect the perceived timing and weight of a stop-motion performance?
- Describe a specific facial performance technique in stop-motion that relies on incremental adjustments rather than smooth interpolation.
- Animate a simple stop-motion puppet performing a 2–3 second walk cycle, focusing on spacing to convey weight; compare 12 fps and 24 fps versions and analyze the difference in perceived heaviness.
- Create a 5-frame anticipation sequence (e.g., a puppet preparing to jump or reach): photograph each frame, then review to ensure the anticipation reads clearly and preps the viewer for the action.
- Shoot a 10-frame overlapping action sequence (e.g., a puppet waving while turning its head): adjust secondary movements to settle at different rates and observe how this adds naturalism.
- Film a character performance (sad, happy, confused) using only facial micro-adjustments across 20–30 frames; document your frame-by-frame choices and reflect on how subtle shifts communicate emotion.
- Animate a puppet moving along a curved arc (e.g., reaching for an object) and then along a straight line; photograph both and compare readability, weight, and appeal.
- Shoot a 15-frame sequence of a puppet picking up an object, deliberately varying spacing in different sections (fast spacing for the approach, slow spacing for the grip) and analyze how spacing communicates intent.
Next up: This stage equips you with the animator's vocabulary and physical intuition for stop-motion performance; the next stage will apply these principles to narrative and complex scenes, teaching you how to orchestrate multiple characters, manage pacing across longer sequences, and solve real-world production challenges.
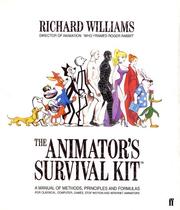
The definitive text on animation principles; though drawn-animation-focused, its laws of timing, weight, and movement are the universal grammar every stop-motion animator must internalize before refining physical performance.
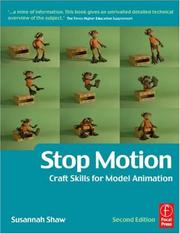
A Focal Press professional handbook written by a practitioner; it focuses specifically on translating animation principles into physical puppet performance, tying together everything learned in prior stages.
Professional Production & Artistic Vision
ExpertUnderstand how professional stop-motion films are produced end-to-end — from concept and storyboard through post-production — and develop a personal artistic voice within the medium.
▸ Study plan for this stage
Pace: 4–5 weeks, ~25–30 pages/day with dedicated annotation and reflection time
- Visual storytelling through composition, camera movement, and spatial design—how every frame communicates narrative intent
- Character development and emotional arcs expressed through movement, expression, and blocking rather than dialogue alone
- Storyboarding as a planning tool that bridges concept to execution, including thumbnail sketches, shot lists, and timing considerations
- Directorial decision-making: how to make intentional choices about framing, pacing, and visual metaphor that serve the story
- Translating script and concept into a visual language specific to stop-motion's unique constraints and possibilities
- Building visual consistency and coherence across a full production through design, color, and compositional principles
- Developing a personal artistic voice by understanding classical storytelling principles and then making deliberate departures from them
- How does Glebas define the relationship between visual composition and narrative meaning in film?
- What are the key steps in the storyboarding process, and how do they differ from a simple script-to-screen translation?
- How can a director use camera placement, movement, and framing to guide the viewer's attention and emotional response?
- What techniques does Glebas recommend for developing character through movement and blocking in scenes with minimal or no dialogue?
- How do you identify and articulate your personal artistic vision, and what role does understanding classical storytelling play in that process?
- What are the practical constraints of stop-motion production, and how should they inform directorial and storyboarding decisions?
- Analyze 3–5 stop-motion sequences (from films like Coraline, Kubo and the Two Strings, or Fantastic Mr. Fox) by breaking down shot composition, camera movement, and how each choice serves the emotional beat of the scene
- Create a detailed storyboard (minimum 20 panels) for a 30–60 second original stop-motion scene, including thumbnail sketches, shot descriptions, camera directions, and character blocking notes
- Write a visual analysis of a single scene from a professional stop-motion film, explaining how the director's compositional choices, color palette, and framing communicate character emotion or story theme
- Develop a mood board and visual style guide for a short stop-motion concept (3–5 minutes), defining color, lighting, composition rules, and visual metaphors that reflect your artistic voice
- Practice quick-sketch storyboarding: given a short narrative beat (e.g., a character discovering something unexpected), create multiple storyboard versions exploring different camera angles, framing, and pacing
- Conduct a 'directorial intent' exercise: choose a scene from a stop-motion film you admire, document every directorial choice (framing, movement, timing, color), then rewrite the scene with different choices and explain how the meaning shifts
Next up: This stage equips you with the visual storytelling and directorial frameworks needed to move into hands-on technical production—where you'll apply these principles to actual puppet rigging, set building, lighting design, and frame-by-frame animation.

A visual storytelling and storyboarding guide from a Disney story artist; at this advanced stage it helps the learner think like a director — composing shots and structuring narrative — which is the final layer of mastery in stop-motion filmmaking.
Discussion
Keep reading
Paths that share books, cover the same subject, or open a related topic.