Cartooning: The Best Books to Learn It, In Order
This curriculum takes a beginner from the very first marks on the page all the way to crafting funny, expressive cartoon characters with personality and life. Each stage builds on the last: you first learn to see and capture movement, then unlock the language of facial expression and emotion, then develop original characters, and finally master the art of visual comedy and storytelling through drawing.
Foundations: Seeing & Gesture
BeginnerTrain your eye and hand to capture life, energy, and movement through loose, confident mark-making — the essential foundation for all expressive cartooning.
▸ Study plan for this stage
Pace: 4–5 weeks, ~20–25 pages/day with daily sketching practice (30–45 minutes)
- Right-brain drawing: Shifting from symbolic, left-brain thinking to direct visual perception and intuitive mark-making
- Gesture drawing: Capturing the essence, energy, and movement of a subject in quick, loose strokes rather than precise outlines
- Line quality and confidence: Using varied line weight, speed, and pressure to convey form, emotion, and vitality
- Proportions and basic anatomy: Understanding simplified cartoon proportions and how they differ from realistic anatomy
- Expressive mark-making: Developing a personal, loose style that prioritizes feeling and movement over photorealism
- Observation skills: Training your eye to see negative space, angles, and relationships between forms
- Pencil control and hand-eye coordination: Building muscle memory through repetitive, playful practice
- Cartoon fundamentals: Basic head shapes, feature placement, body construction, and silhouette clarity
- What is the difference between left-brain symbolic drawing and right-brain perceptual drawing, and why does Edwards argue the latter is essential for artists?
- How do gesture drawings differ from finished drawings, and what specific information should a gesture drawing capture?
- What role does line quality play in cartooning, and how can you use line weight and speed to convey energy and form?
- How do cartoon proportions simplify realistic anatomy, and what are the key differences in head, body, and limb construction?
- What is the relationship between observation, confidence, and expressive mark-making in developing your cartooning style?
- How do you construct a believable cartoon character from basic shapes, and why is silhouette clarity important?
- Complete Edwards' contour drawing and blind contour exercises daily for 10–15 minutes to retrain your perception and loosen your hand
- Perform 5–10 minute gesture drawing sessions (from life, photos, or video) at least 4 times per week, focusing on capturing movement and energy in 3–5 strokes
- Copy Hart's and Loomis's demonstration drawings of heads, faces, and expressions, paying close attention to proportions and feature placement
- Draw the same subject (person, animal, or object) 10 times in quick succession, each time loosening your line and trusting your hand more
- Practice basic cartoon head construction using Loomis's ball-and-plane method, then add features and expressions to create variations
- Sketch from life in public spaces (coffee shops, parks) for 20–30 minutes, focusing on capturing poses and silhouettes of moving people
- Create a personal 'line study' sheet exploring different line weights, speeds, and qualities to discover your natural mark-making style
- Combine observation and cartooning: Draw the same person realistically, then as a cartoon, noting which proportions and features you simplified
Next up: Mastering loose, confident gesture and foundational cartoon construction prepares you to layer on character design principles, storytelling, and the specific techniques needed to convey personality and narrative through cartooning.

Rewires how you see before you draw, teaching you to observe shapes, lines, and relationships rather than symbols — a critical first step for any cartoonist who wants their work to feel alive.
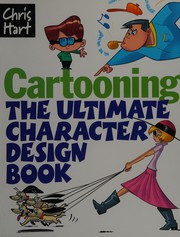
A beginner-friendly, cartoon-specific introduction that bridges basic drawing skills into the cartoon idiom, giving you vocabulary for proportion, simplification, and stylization right away.
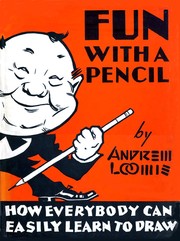
Loomis's lightest and most playful book teaches construction of cartoon heads and faces from simple shapes, building the geometric intuition every cartoonist needs before tackling expression.
Expression & Emotion
BeginnerMaster the face — learn how eyes, brows, mouths, and body language combine to communicate a full spectrum of emotion clearly and exaggeratedly in cartoon form.
▸ Study plan for this stage
Pace: 4–5 weeks, ~25–30 pages/day (approximately 2 weeks on Williams, 2–3 weeks on Simon)
- The 12 principles of animation as applied to facial expression and emotion
- Eye design and pupil placement as the primary driver of emotional clarity in cartoons
- Eyebrow shape, angle, and position to convey mood and intention
- Mouth shapes and asymmetry to express emotion with exaggeration and appeal
- Head tilt, body posture, and gesture as reinforcement of facial emotion
- Timing and spacing in animated expressions to enhance emotional impact
- The contrast between subtle and exaggerated expressions for different cartoon styles
- How do the 12 principles of animation (from Williams) specifically apply to creating believable and appealing facial expressions?
- What is the relationship between eye placement, pupil size, and the emotional clarity of a cartoon character?
- How do eyebrow shape and angle work together with eye position to communicate specific emotions like anger, sadness, or surprise?
- Why is asymmetry in mouth shapes important for expressing emotion, and how does it differ from realistic portrayal?
- How does body language and head position reinforce or contradict facial expression, and what does this teach about emotional communication?
- What is the difference between a 'held' expression and a 'moving' expression in animation, and when should each be used?
- Draw 20 pairs of eyes (10 pairs from Williams' principles, 10 original) showing distinct emotions using only pupil placement, size, and lid position—no other facial features
- Create a character's face in 6 key emotional states (happy, sad, angry, surprised, afraid, disgusted) using Simon's facial expression framework, then refine each for maximum clarity
- Animate or storyboard a 3-frame sequence of a single emotion (e.g., confusion → realization → joy) showing how the eyes, brows, and mouth transition using timing principles from Williams
- Sketch 10 different eyebrow shapes and angles, label the emotion each conveys, then compare your interpretations with Simon's examples
- Draw the same mouth shape paired with 4 different eye/brow combinations to demonstrate how the full face creates emotional meaning, not individual features
- Create a 'emotion chart' for one original character showing all 6 basic emotions with body language included (head tilt, shoulder position, posture) to see how the whole figure communicates
Next up: This stage equips you with the anatomical and expressive vocabulary to convincingly portray emotion, preparing you to layer in character design, personality, and narrative context in the next stage.
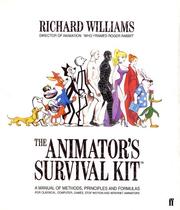
Though rooted in animation, Williams's deep breakdown of weight, anticipation, and emotional posing is the single best resource for understanding how bodies and faces express feeling — directly applicable to cartooning.

A photographic and illustrated reference covering hundreds of real human expressions, giving you a reliable visual library to study and then exaggerate into cartoon form.
Character Design & Personal Style
IntermediateDesign original, memorable cartoon characters with consistent construction, distinct silhouettes, and personalities that read at a glance.
▸ Study plan for this stage
Pace: 6–8 weeks, ~25–30 pages/day with daily character sketching practice
- Silhouette design: creating instantly recognizable character shapes that communicate personality without detail
- Construction methods: underlying geometric and anatomical frameworks that ensure consistency across multiple drawings
- Color theory and palette selection: using color to reinforce character personality and visual hierarchy
- Lettering integration: how typography complements character design and supports visual storytelling
- Compositional framing: positioning characters within scenes to guide viewer attention and convey narrative intent
- Stylistic consistency: maintaining a cohesive personal art style while designing diverse character types
- Visual storytelling through design: ensuring characters' appearances immediately communicate their role, personality, and function in the narrative
- How would you design a silhouette for a character that immediately communicates they are a villain versus a hero, without relying on facial features?
- What construction method would you use to ensure a cartoon character remains on-model across 50+ drawings, and how does this differ from realistic figure drawing?
- How does color choice reinforce character personality, and what are the risks of poor color-to-character pairing in comics?
- How should lettering style and placement interact with character design to enhance rather than compete with the visual storytelling?
- When composing a scene with multiple characters, how do you use framing and positioning to direct the reader's eye to the most important character?
- What makes a personal cartooning style recognizable and distinct, and how do you develop one while studying multiple reference sources?
- Design 5 original characters using only silhouettes (solid black shapes, no internal detail). Test them by showing the silhouettes to others—can they guess the character's personality or role?
- Construct one character using basic geometric shapes (circles, rectangles, triangles) as an underlying framework, then redraw that same character 20 times in different poses to test construction consistency
- Create a color palette for 3 different characters (hero, villain, comic relief) and write a paragraph explaining how each color choice reinforces that character's personality
- Design a character, then create 3 different lettering styles for their dialogue. Sketch them speaking the same line in a comic panel and evaluate how lettering choice affects character perception
- Compose a scene with 3 characters of varying importance. Use framing, positioning, and overlap to guide the viewer's eye to the protagonist first, then secondary characters
- Sketch the same character in your personal style, then deliberately imitate the style of one of the books' featured artists, then return to your own style. Reflect on what elements define your personal approach
Next up: This stage establishes the foundational skills of designing memorable, consistent characters with distinct visual personalities—skills that the next stage will build upon by teaching how to animate those characters, sequence them through narrative, and bring them to life through movement and timing.

A professional-level look at how working character designers approach shape language, appeal, and personality — ideal at this stage to expose you to a wide range of styles and design thinking.
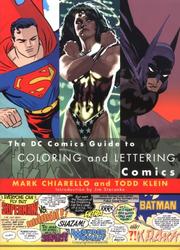
Introduces the visual grammar of how characters are presented on the page, helping you understand how design choices serve storytelling and readability in sequential art.

Teaches visual storytelling through composition and staging — at this stage you learn how to place your characters in a frame so their expressions and designs land with maximum impact.
Drawing Funny: Comedy & Expressive Cartooning
IntermediateUnderstand what makes a cartoon genuinely funny — timing, exaggeration, staging, and the specific drawing choices that generate laughter and delight.
▸ Study plan for this stage
Pace: 6–8 weeks, ~25–35 pages/day, with 2–3 days per week dedicated to drawing practice and exercises
- The 12 principles of animation as applied to comedy timing and character expression
- Exaggeration and distortion as tools for generating emotional and comedic impact
- Staging and composition: how to direct the viewer's eye and set up the punchline
- Character design choices that signal personality, emotion, and comedic intent
- The evolution of cartoon style from classical to modern digital approaches
- Pacing and rhythm in sequential art—how panels and page layout control comedic timing
- The relationship between drawing economy and comedic clarity in webcomics and digital formats
- Audience expectations and subversion: how to surprise and delight through visual storytelling
- How do the 12 principles of animation from *The Illusion of Life* specifically enhance comedic timing and character expression in static cartoons?
- What drawing and design choices did modern cartoonists adopt to move away from classical animation styles, and how do these choices affect humor?
- How does exaggeration function differently in character design versus in a single comedic moment or gag?
- What role does staging and composition play in setting up and delivering a visual punchline?
- How can you use panel layout, pacing, and page composition to control comedic timing in sequential art?
- What are the practical constraints of webcomic production, and how do you maintain comedic impact and expressive drawing within those limits?
- Analyze 5–10 comedic moments from classic cartoons (referenced in *The Illusion of Life*) and identify which of the 12 principles are at work; sketch quick thumbnails showing how each principle contributes to the laugh
- Redesign a simple character three times using different levels of exaggeration; test each design by drawing it in 3–4 emotional states and evaluate which exaggeration level reads most clearly and feels funniest
- Storyboard a 4–6 panel comedic sequence focusing on staging: draw the same joke three different ways, varying camera angle, character placement, and composition, then compare which staging lands the punchline hardest
- Study 10–15 pages from a modern cartoon style (as discussed in *Cartoon Modern*) and a classical style; identify specific drawing shortcuts, line weights, and design simplifications, then redraw the same character in both styles
- Create a 3–4 page webcomic strip (8–12 panels total) with a clear setup and punchline, deliberately controlling pacing through panel size and spacing; iterate based on whether the timing feels right
- Draw the same comedic expression or action 5 different ways, varying line economy and detail level; determine the minimum amount of drawing needed to read the joke clearly and maintain expressive impact
Next up: This stage equips you with the visual and conceptual tools to generate laughter through intentional drawing choices and timing, preparing you to move into the next stage where you'll apply these principles to develop a sustained comedic voice, build a consistent cast of characters, and create longer-form narratives that sustain humor across multiple pages or episodes.
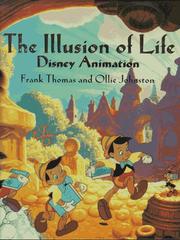
The definitive text on making drawn characters feel alive and emotionally real; its principles of exaggeration, squash-and-stretch, and appeal are the backbone of all great comedic cartooning.
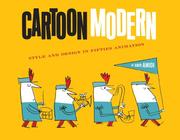
A richly illustrated history of the golden age of stylized, funny cartoon design — studying these masters gives you a deep well of inspiration and teaches you what bold, graphic simplicity can achieve.
Grounds all your expressive and comedic drawing skills in the practical craft of putting funny, character-driven panels together — the perfect capstone for applying everything you've learned to real, finished work.
Discussion
Keep reading
Paths that share books, cover the same subject, or open a related topic.