Makeup Artistry: The Best Books, In Order
This curriculum takes a beginner from zero makeup knowledge to professional-level artistry in four carefully sequenced stages. It opens with the visual and anatomical foundations (color theory and face shapes), moves into hands-on techniques, and closes with the business and portfolio skills needed to work professionally. Each stage builds the vocabulary and eye needed to fully absorb the next.
Foundations: Color & the Artist's Eye
BeginnerUnderstand how color works — hue, value, contrast, undertones, and harmony — so every product choice and blending decision has a logical basis.
▸ Study plan for this stage
Pace: 6–8 weeks, ~25–30 pages/day. Start with "The Elements of Color" (weeks 1–4, ~150 pages), then "Color and Light" (weeks 5–8, ~200 pages). Allocate 2–3 days per week for hands-on color exercises and makeup application practice.
- The color wheel, primary/secondary/tertiary colors, and how hues relate to one another
- Value (lightness and darkness) as the most critical dimension for contrast and depth in makeup
- Saturation and intensity: how pure vs. muted colors affect skin tone and visual harmony
- Undertones (warm, cool, neutral) in both pigments and skin, and why matching them matters
- Color harmony principles (complementary, analogous, triadic) and their application to face design
- How light behaves physically: reflection, absorption, and transparency in makeup products
- Simultaneous contrast: how adjacent colors influence each other's appearance on the face
- Practical color mixing and layering to achieve desired hues and effects without muddy results
- What is the difference between hue, value, and saturation, and why does each matter independently in makeup application?
- How do warm and cool undertones in both products and skin interact, and how do you identify undertones in a client's complexion?
- What are the three main color harmony schemes (complementary, analogous, triadic), and how would you use each to create a cohesive eye look?
- Explain simultaneous contrast: why does a cool-toned shadow appear cooler when placed next to a warm tone?
- How does light physically interact with makeup pigments (reflection, absorption, transparency), and how does this affect how colors appear on skin?
- When and why would you choose a muted (low-saturation) color over a pure (high-saturation) one for a specific client or look?
- Create a personal color wheel using makeup pigments, eyeshadows, and blushes you own—organize by hue and note warm vs. cool undertones for each
- Practice value studies: apply a single hue in three different values (light, medium, dark) on the back of your hand or a practice palette to see how value creates dimension
- Analyze 5 makeup looks (from social media, magazines, or tutorials) and identify which color harmony scheme each uses; sketch the color relationships
- Undertone matching exercise: identify the undertone of 3 different skin tones (warm, cool, neutral) and select eyeshadow/blush colors that harmonize with each
- Simultaneous contrast test: apply two complementary colors side by side on paper or skin and observe how each makes the other appear more vibrant; repeat with analogous colors
- Mix and layer exercise: using 3–4 eyeshadow or paint colors, practice layering to create new hues and observe how transparency and overlap affect the final color
Next up: This stage equips you with the visual literacy and color logic needed to move into product knowledge and application techniques, where you'll translate these principles into specific makeup choices and blending strategies for different face shapes, skin tones, and looks.

The definitive primer on color theory from the Bauhaus master; reading this first gives you the universal language of color that all makeup decisions rest on.

Bridges abstract color theory into how light behaves on three-dimensional surfaces — directly applicable to understanding how makeup interacts with facial planes and skin.
Anatomy of the Face: Shapes, Proportions & Structure
BeginnerRead face shapes, bone structure, and facial proportions accurately so you can make informed decisions about contouring, highlighting, and corrective makeup.
▸ Study plan for this stage
Pace: 4–5 weeks, ~25–30 pages/day. Start with "Making Faces" (approximately 200 pages) over 2 weeks, then move to "Face Forward" (approximately 150 pages) over 2–3 weeks, allowing time for reflection and practice between sections.
- The five basic face shapes (oval, round, square, heart, oblong) and how to identify them on diverse faces
- Bone structure fundamentals: cheekbones, jawline, forehead, and nose prominence and how they define facial architecture
- Facial proportions and the 'rule of thirds'—dividing the face into equal horizontal sections and understanding ideal spacing
- How to assess individual variations in proportion (wide-set vs. close-set eyes, high vs. low cheekbones) to customize makeup application
- Contouring and highlighting principles: using shadow and light to enhance, diminish, or reshape perceived facial structure
- The relationship between face shape, bone structure, and makeup placement for corrective and transformative effects
- How to analyze a face systematically before applying makeup to determine the most flattering approach
- How do you identify the five basic face shapes, and what specific measurements or landmarks do you use to determine which category a face belongs to?
- Explain how bone structure (cheekbones, jawline, forehead) influences makeup placement and why understanding this is essential for contouring.
- What is the 'rule of thirds' in facial proportions, and how do you use it to identify areas that need highlighting or contouring?
- Given a face with close-set eyes and a prominent jawline, what corrective makeup techniques would you apply and why?
- How do shadow and light work together in contouring and highlighting to reshape the perceived structure of the face?
- Walk through your systematic process for analyzing a face before applying makeup—what do you look for and in what order?
- Measure and map your own face using the rule of thirds; identify your face shape and document your bone structure landmarks (cheekbones, jawline, forehead) with photos and written notes.
- Study the before-and-after transformations in 'Making Faces' and 'Face Forward'; for each, identify the face shape, describe the bone structure, and explain which contouring/highlighting techniques Kevyn Aucoin used and why.
- Practice analyzing 5–10 diverse faces (friends, family, or reference photos) without makeup; write a brief assessment of each person's face shape, proportions, and key structural features.
- Create a 'face shape reference guide' with sketches or printed images labeled with bone structure landmarks, proportions, and the contouring/highlighting approach suited to each shape.
- Apply corrective makeup to yourself or a willing partner based on a specific face shape or proportion challenge (e.g., widening a narrow face, balancing a prominent forehead); document with before-and-after photos and explain your choices.
- Conduct a 'proportion audit' on 3 different faces: measure eye width, distance between eyes, forehead height, and jawline width; compare findings to the rule of thirds and note variations.
Next up: Mastering face shapes, bone structure, and proportions gives you the anatomical foundation needed to move into the next stage—color theory and product selection—where you'll learn which shades and finishes best complement different skin tones and facial features to enhance the structure you've now learned to read.
A legendary makeup artist's visual breakdown of face shapes and corrective techniques; its before-and-after transformations make facial anatomy immediately intuitive for beginners.
Aucoin's follow-up goes deeper into sculpting and reshaping features, reinforcing the face-shape vocabulary from the previous book with more advanced transformations.
Core Techniques: Application, Skin & Eyes
IntermediateMaster the hands-on fundamentals — skin prep, foundation matching, contouring, eye looks, and blending — with step-by-step technical guidance.
▸ Study plan for this stage
Pace: 4–5 weeks, ~40–50 pages/day. Start with Davis's handbook (technical foundations), then move to Brown's manual (application mastery). Allocate 2–3 days per major technique section for practice between reading sessions.
- Skin analysis and preparation: assessing skin type, texture, and undertones before any application
- Foundation selection and matching: undertone identification, formula choice (liquid, powder, cream), and shade matching to jawline and neck
- Blending techniques: seamless transitions using brushes, sponges, and stippling for natural-looking coverage
- Contouring and highlighting: strategic placement of warm/cool tones to sculpt and enhance facial features
- Eye anatomy and eyeshadow application: lid shape assessment, color theory, and multi-step shadow placement for dimension
- Brush selection and maintenance: understanding tool purpose, bristle types, and proper cleaning for technique execution
- Corrective makeup: using color theory (concealer, correctors) to neutralize discoloration and blemishes
- Setting and longevity: powder, spray, and primer techniques to ensure makeup durability throughout the day
- How do you identify a client's undertone, and why does it matter for foundation and concealer selection?
- What are the key steps in skin preparation, and how does each step improve makeup application and longevity?
- Describe the difference between contouring and highlighting, and explain how placement affects facial proportions.
- What is the purpose of blending, and which tools and techniques create the most seamless transitions?
- How do you assess eye shape and lid space, and what eyeshadow placement strategies suit different eye types?
- Explain the relationship between primer, foundation, and setting products—why is each necessary?
- Skin prep practice: Perform a full skin analysis on 3–5 different skin types (oily, dry, combination, sensitive). Document texture, tone, and undertone; select appropriate primers and moisturizers for each.
- Foundation matching: Test 5–8 foundation shades on your jawline and neck in natural light. Photograph results and identify the perfect match; repeat on 2–3 different people to practice shade selection across skin tones.
- Blending drills: Apply foundation with 3 different tools (brush, sponge, stippling) on separate face sections. Compare blending quality, coverage, and finish; identify your preferred technique.
- Contouring and highlighting: Create 3 different face shapes (round, square, long) using cream or powder contour and highlight. Photograph before/after and explain your placement choices.
- Eye look creation: Complete 5 different eyeshadow looks (neutral, smokey, colorful, cut crease, monochromatic) following Davis and Brown's step-by-step guidance. Practice on yourself and at least one other person.
- Corrective makeup application: Practice color-correcting 3 common concerns (redness, dark circles, hyperpigmentation) using appropriate correctors and concealers; document the process with photos.
Next up: This stage establishes the technical foundation needed to advance to specialized applications—once you master skin prep, foundation, and eye techniques, you'll be ready to explore advanced looks (editorial, special effects, bridal) and client consultation strategies in the next stage.
An industry-standard technical manual covering every application technique from skin prep to special effects; its systematic approach is ideal after you have the color and anatomy groundwork.
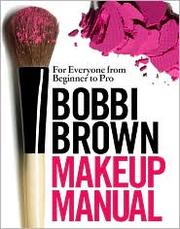
A comprehensive, product-agnostic guide to real-world techniques for all skin tones and types; its clear instructions make it the ideal companion for building consistent, repeatable results.
Discussion
Keep reading
Paths that share books, cover the same subject, or open a related topic.