Special-Effects Makeup: The Best Books, In Order
This curriculum is designed for an intermediate learner who already has basic makeup knowledge and wants to master the full pipeline of special-effects makeup — from understanding materials and prosthetics to advanced creature and character design. The four stages build deliberately: first solidifying core SFX techniques and materials, then diving into molding and casting, then mastering wounds and aging, and finally tackling full creature and character design at a professional level.
SFX Foundations & Prosthetics Essentials
IntermediateEstablish a strong working vocabulary of SFX materials, tools, and prosthetic application techniques — the shared language needed for every stage that follows.
▸ Study plan for this stage
Pace: 4–5 weeks, ~25–30 pages/day with hands-on practice sessions 3–4 times per week
- Material properties and selection: silicones, alginates, plasters, and foams — when and why to use each for different prosthetic applications
- Essential SFX tools and their functions: sculpting tools, mold-making equipment, application brushes, and safety gear
- Prosthetic application workflow: from mold creation through sculpting, casting, and final attachment to skin
- Skin preparation and adhesive systems: primers, tackifiers, and removal techniques that protect the actor's skin
- Blending and finishing techniques: seaming, stippling, and color correction to integrate prosthetics seamlessly with natural skin
- Safety protocols and material handling: proper ventilation, chemical exposure limits, and actor comfort during extended wear
- Troubleshooting common application failures: bubbling, slippage, and color mismatch — and how to prevent them
- What are the key differences between silicone and foam latex prosthetics, and when would you choose one over the other for a specific character design?
- Walk through the complete prosthetic application process from mold-making to final blending — what is the purpose of each step?
- How do you prepare an actor's skin before prosthetic application, and what adhesive systems does Debreceni recommend for different skin types and wear durations?
- What are the most common prosthetic application failures (bubbling, slippage, color mismatch), and what preventative measures does the book outline?
- Describe the tools and techniques used for blending prosthetic edges and achieving color continuity with an actor's natural skin tone.
- What safety precautions must be taken when working with SFX materials, and how do you minimize actor discomfort during long wear periods?
- Create a material comparison chart: list silicones, foams, alginates, and plasters with their properties, working times, and best-use scenarios based on Debreceni's guidance
- Organize your SFX toolkit: gather and label the essential tools mentioned in the book (sculpting implements, brushes, mold-making supplies), then photograph and document their specific functions
- Practice mold-making with alginate: create a simple mold of a hand or face section following Debreceni's step-by-step process, document each stage with photos
- Conduct a skin-prep protocol drill: on a volunteer or yourself, practice the full skin preparation sequence (cleansing, priming, tackifier application) and time each step
- Build a small prosthetic piece: sculpt a simple scar or wound in clay, create a mold, cast it in silicone or foam latex, and practice application and blending on a practice head or arm
- Create a troubleshooting reference guide: document the common application problems Debreceni describes (bubbling, slippage, color mismatch) with photos or sketches of causes and solutions
Next up: This stage equips you with the technical vocabulary, material knowledge, and foundational application skills needed to tackle character-specific prosthetic designs and advanced techniques in the next stage.
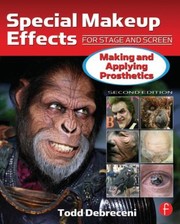
The most comprehensive and widely-used professional reference for SFX makeup; covers prosthetics, materials science, and application in a logical, step-by-step manner that anchors the entire curriculum.
Molding & Casting Mastery
IntermediateUnderstand the full lifecycle of a prosthetic piece: sculpting, mold-making in plaster and silicone, and casting in foam latex, silicone, and gelatin.
▸ Study plan for this stage
Pace: 8–10 weeks, ~25–30 pages/day with 2–3 hands-on lab sessions per week
- The complete prosthetic lifecycle: from original sculpture through mold-making to final casting
- Plaster mold construction: mother molds, keys, and undercuts for durability and reusability
- Silicone mold-making: RTV (room-temperature vulcanizing) silicone properties, release agents, and advantages over plaster
- Foam latex casting: mixing ratios, gelling agents, baking schedules, and achieving consistent density and skin texture
- Silicone casting: shore hardness selection, pigmentation, and cure times for flexible prosthetics
- Gelatin casting: advantages for soft, skin-like pieces and temperature management during application
- Mold maintenance and storage: preventing degradation and extending mold lifespan
- Troubleshooting common casting defects: bubbles, incomplete fills, shrinkage, and surface imperfections
- What are the key differences between plaster and silicone molds, and when would you choose one over the other for a given prosthetic?
- Explain the purpose of a mother mold and how undercuts in your original sculpture affect mold-making strategy.
- Walk through the complete foam latex casting process from mixing through demolding, including critical timing and temperature considerations.
- How do you select the appropriate shore hardness for a silicone prosthetic, and what does this choice affect in the final piece?
- What are the main advantages and limitations of gelatin casting compared to foam latex and silicone?
- Describe three common casting defects, their causes, and how you would prevent or correct each one.
- Create a simple plaster mother mold around a pre-made plaster positive, including keys and registration marks; document the process with photos.
- Mix and pour an RTV silicone mold from a small original sculpture, practice release agent application, and assess mold quality after cure.
- Prepare foam latex according to James's recipe, pour into a silicone mold, gel, bake, and demolding—record temperature and timing at each stage.
- Cast the same mold in two different silicone shore hardnesses (e.g., 10A and 30A); compare flexibility, tear resistance, and application feel.
- Prepare and cast a gelatin prosthetic piece; practice heat management and application to skin or a practice head.
- Deliberately introduce a casting defect (e.g., trapped air, incomplete fill) in a test piece, document it, then correct your technique in a second attempt and compare results.
Next up: Mastery of mold-making and casting techniques establishes the technical foundation needed to move into advanced topics like multi-piece mold systems, undercut management in complex sculptures, and production-scale prosthetic fabrication.
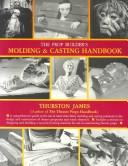
A canonical, material-agnostic guide to mold-making and casting that covers plaster, alginate, urethane, and silicone — directly applicable to prosthetic production and widely trusted in the industry.
Wounds, Aging & Practical Gore
IntermediateCreate convincing trauma effects — cuts, burns, bruises, and aged skin — using both prosthetic appliances and direct skin-applied techniques.
▸ Study plan for this stage
Pace: 6–8 weeks, ~25–30 pages/day with 2–3 days/week dedicated to hands-on practice
- Anatomy of trauma: understanding wound structure, tissue layers, and realistic color/texture progression for cuts, lacerations, and punctures
- Prosthetic appliance creation: sculpting, molding, and casting techniques for dimensional wound and burn effects using foam latex and gelatin
- Direct skin application methods: stippling, layering, and blending with liquid latex, scar wax, and pigments for seamless trauma effects
- Aging skin techniques: creating realistic wrinkles, liver spots, texture changes, and sagging using prosthetics and makeup to simulate decades of aging
- Bruise color theory and progression: understanding how bruises evolve from fresh (red/purple) through yellow/green stages, and applying this knowledge with pigments
- Gore and blood effects: creating realistic blood consistency, application techniques, and integration with wounds for maximum believability
- Problem-solving on set: adapting techniques for different skin types, lighting conditions, and durability requirements during filming or performance
- Savini's signature realism approach: learning how to prioritize anatomical accuracy and subtle detail over theatrical exaggeration
- What are the key anatomical layers you need to consider when creating a realistic laceration, and how do Savini's techniques account for subcutaneous tissue visibility?
- Describe the step-by-step process for sculpting and casting a prosthetic burn wound using the methods outlined in Smith's book, including material choices and curing times.
- How does the color progression of a bruise change over 5–7 days, and what pigment combinations would you use to simulate each stage?
- What is the difference between direct skin application (liquid latex/scar wax) and prosthetic appliance techniques, and when would you choose each method for a trauma effect?
- How would you create aged skin on a younger actor's face using both prosthetic and direct-application methods, and what specific techniques from Smith's work apply?
- What are the critical steps for ensuring a prosthetic wound or appliance stays secure and realistic during a full day of filming or performance?
- Create a fresh laceration using liquid latex and stippled scar wax on a practice face or arm; photograph it under different lighting to assess realism and adjust color/depth.
- Sculpt a small prosthetic burn wound in clay, create a mold, and cast it in foam latex or gelatin; apply it to skin and age it with pigments to show healing stages.
- Practice bruise progression: create four versions of the same bruise on practice skin or silicone, each representing a different day (fresh, 2 days, 5 days, healing), using only makeup pigments.
- Design and execute a full-face aging makeup on a volunteer using both prosthetic appliances (forehead, nasolabial folds) and direct application (stippling, shading); document before/after.
- Create a realistic blood mixture (using corn syrup, food coloring, and other materials per Savini's guidance) and practice application techniques—dripping, pooling, saturation—on a test wound.
- Build a complex trauma effect combining multiple techniques: a laceration with visible tissue, surrounding bruising, and blood flow; critique your work against reference photos from the books.
Next up: Mastery of wound, aging, and gore effects establishes the technical foundation needed to tackle advanced topics like creature design, character transformation, and full-body prosthetics in the next stage.

A legendary, first-person account from the master of practical gore; Savini's breakdowns of wound construction, blood formulas, and on-set problem-solving are essential reading before tackling complex trauma effects.

Written by the father of modern SFX makeup, this classic covers aging, wounds, and appliance techniques with a clarity and authority that remains unmatched, reinforcing and deepening the wound-work chapter of the curriculum.
Discussion
Keep reading
Paths that share books, cover the same subject, or open a related topic.