Film photography: an ordered reading list for beginners
This curriculum takes you from absolute beginner to confident darkroom practitioner across four carefully sequenced stages. Each stage builds on the last — starting with how cameras and light work, moving through the craft of exposure and seeing, then into the chemistry of film development, and finally into the art and technique of darkroom printing.
Foundations: Cameras, Light & the Analog Mindset
BeginnerUnderstand how film cameras work, grasp the exposure triangle, and develop the slow, intentional mindset that analog photography demands.
▸ Study plan for this stage
Pace: 4–5 weeks, ~25–30 pages/day. Start with "Understanding Exposure" (weeks 1–3, ~200 pages), then move to "Film Is Not Dead" (weeks 3–5, ~150 pages). Allocate 2–3 days per week for hands-on practice.
- The exposure triangle: aperture, shutter speed, and ISO—how each controls light and creative outcomes
- How light meters work and why understanding light is foundational to all photography
- Film speed (ISO) and how it affects image grain, sensitivity, and tonal range
- The mechanical and optical principles of film cameras—how shutters, apertures, and lenses function
- The intentional, meditative mindset of analog photography: fewer shots, more planning, and embracing constraints
- How film stocks differ in characteristics, color rendition, and aesthetic qualities
- The relationship between exposure decisions and final image quality in film
- Why analog photography demands a shift from digital habits: no instant feedback, commitment to each frame
- Explain the exposure triangle and how adjusting one element requires compensating with another. Give a concrete example.
- What is the relationship between aperture, depth of field, and light transmission? How would you use this creatively?
- How do shutter speed and subject motion interact, and what creative choices does this enable?
- What does ISO measure, and how does changing it affect both exposure and image quality in film?
- Describe the psychological and practical differences between shooting film and digital. Why does the analog mindset matter?
- How do different film stocks (color, black & white, various speeds) influence the look and feel of final images?
- Using a light meter (phone app or handheld), take meter readings of the same scene at different times of day and in different lighting conditions. Record the readings and note how they change.
- Shoot a test roll with a manual film camera, deliberately varying aperture and shutter speed combinations to achieve the same exposure. Compare the resulting images to understand depth of field and motion blur trade-offs.
- Create an exposure chart: document 5–10 real-world scenes with their meter readings, your chosen settings, and the resulting images. Annotate why you made each choice.
- Photograph the same subject using two different film stocks (e.g., Tri-X and HP5, or Portra and Ektar). Compare the grain, tonal range, and color rendition to internalize how film choice affects aesthetics.
- Practice the 'one frame per minute' exercise: spend 60 seconds observing a scene before taking a single shot. Repeat 5 times. Reflect on how this intentionality changes your decision-making.
- Shoot a full roll (24–36 frames) with self-imposed constraints: e.g., one focal length, one aperture, or one shutter speed. Document your creative problem-solving within these limits.
Next up: Mastering the exposure triangle and developing the analog mindset prepares you to move into composition and visual storytelling, where you'll apply these technical foundations to create intentional, compelling images with purpose and meaning.
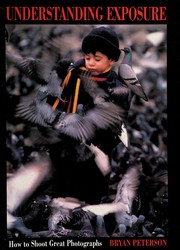
The single best starting point for learning aperture, shutter speed, and ISO in plain language — builds the core vocabulary every later book assumes you have.

A visually rich, approachable guide written specifically for shooting film; it demystifies camera types, film stocks, and the analog workflow for complete beginners.
Seeing & Shooting: Craft and Composition
BeginnerTrain your eye to compose strong images and make deliberate creative decisions before pressing the shutter — essential before moving into technical mastery.
▸ Study plan for this stage
Pace: 4–5 weeks, ~25–30 pages/day. Allocate 2–3 weeks for "The Photographer's Eye" (Freeman's visual analysis is dense; allow time for re-reading key chapters and studying images), then 1.5–2 weeks for "Ways of Seeing" (shorter, more essay-like; builds conceptual depth). Intersperse shooting practice thro
- Visual geometry and framing: how lines, shapes, and spatial relationships within the frame create meaning and guide the viewer's eye
- Composition rules and their intentional breaking: understanding rule of thirds, balance, depth, and when to violate conventions for effect
- The decisive moment and timing: recognizing and capturing the peak instant when all visual elements align
- Seeing vs. looking: training yourself to actively observe light, form, and relationships rather than passively recording what's in front of you
- Cultural and personal perspective in image-making: understanding how context, convention, and individual vision shape what we photograph and how others interpret it
- Foreground, middle ground, and background as compositional layers: using depth to create visual hierarchy and narrative
- Light as a compositional tool: how light reveals form, creates mood, and directs attention independent of subject matter
- What is the difference between 'looking' and 'seeing' in photography, and how does this distinction change the way you approach composition?
- How do lines, shapes, and spatial relationships within a frame guide a viewer's eye and create visual meaning?
- When and why might you deliberately break a composition rule like the rule of thirds, and what effect would that create?
- How do foreground, middle ground, and background work together to create depth and visual hierarchy in a single frame?
- What role does light play in composition beyond simply illuminating a subject?
- How do cultural conventions and personal perspective influence what you choose to photograph and how viewers interpret your images?
- Study 10 images from 'The Photographer's Eye' in detail: for each, trace the lines, identify the focal point, describe how your eye moves through the frame, and note what compositional choices create that path
- Shoot a contact sheet (12–24 frames) of a single subject or scene from multiple angles and distances; analyze which frames have the strongest composition and why, using Freeman's vocabulary (balance, depth, line, shape)
- Create a 'rule of thirds' series: photograph the same subject three ways—once centered, once following rule of thirds, once with deliberate asymmetry—then compare and reflect on how each changes the image's impact
- Practice 'seeing light' by photographing the same location at three different times of day; focus on how light transforms form, mood, and compositional possibilities without changing your position
- Select one photograph from a photographer you admire (not from the books) and deconstruct it using Berger's framework: what cultural codes or conventions does it rely on? What perspective or bias does it reveal?
- Shoot a series exploring foreground-middle ground-background relationships: take at least 8 frames where you deliberately use all three layers to create visual depth and narrative
Next up: Mastering composition and visual decision-making here provides the foundation for the next stage, where you'll learn to control exposure, focus, and film choice to execute your compositional vision with technical precision.
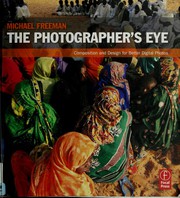
Teaches the visual grammar of composition and design in a format-agnostic way, giving you a framework for intentional image-making that applies directly to the slower pace of film.

A short but transformative read on how we look at images; placed here to deepen your critical eye before you dive into technical darkroom work.
Going Deeper: Exposure Mastery & Film Development
IntermediateMaster the Zone System and precise exposure control, then learn to develop your own black-and-white film from start to finish with confidence.
▸ Study plan for this stage
Pace: 8–10 weeks, ~25–35 pages/day. Start with "The Negative" (weeks 1–4, foundational theory), move to "The Darkroom Cookbook" (weeks 4–7, practical application), then "Way Beyond Monochrome" (weeks 7–10, refinement and advanced techniques). Allow 1–2 weeks for overlap and hands-on experimentation betwee
- The Zone System as a tool for visualizing and controlling tonal values from exposure through development
- Exposure metering, film speed rating, and how to expose for the shadows while developing for the highlights
- The relationship between film speed, aperture, shutter speed, and light to achieve precise exposure control
- Chemical processes in black-and-white film development: developer, stop bath, fixer, and their effects on contrast and density
- Temperature, time, agitation, and dilution as variables that shape the final negative and print
- Testing and calibration workflows (personal film speed, development times, contrast grades) to achieve consistent, predictable results
- Advanced tonal separation and color sensitivity in monochrome photography for artistic intent
- Troubleshooting common development problems (uneven development, grain, contrast issues) and how to prevent them
- How does the Zone System help you plan an exposure before you take the photograph, and what role does the light meter play in this process?
- Explain the relationship between film development time and contrast: why do you develop for the highlights while exposing for the shadows?
- What are the key variables in the darkroom (temperature, time, agitation, dilution) and how does changing each one affect the final negative?
- How do you determine your personal film speed and development time, and why is testing essential rather than relying on manufacturer recommendations?
- What is the difference between normal, soft, and contrasty development, and when would you choose each approach based on your scene and artistic intent?
- Describe the complete workflow from metering a scene to a finished negative: how do exposure, development, and post-processing decisions interconnect?
- Meter a high-contrast scene (bright sky, dark foreground) and use the Zone System to place key tones; expose and develop one roll, then compare the negative to your visualization.
- Conduct a personal film speed test: shoot a test roll at box speed and one stop over/under, develop normally, and examine the negatives to determine your optimal exposure index.
- Develop a test strip of the same film at different times (e.g., 6, 7, 8, 9 minutes) while keeping temperature and agitation constant; compare negatives to understand how development time affects contrast.
- Prepare and mix developer, stop bath, and fixer from scratch using 'The Darkroom Cookbook' recipes; document temperature, dilution, and timing for reproducibility.
- Shoot and develop a roll using altered agitation patterns (gentle vs. vigorous) and compare the results to understand how agitation affects grain and evenness.
- Create a personal reference set: photograph a gray card under consistent lighting, develop at your standard time, and print to establish a baseline for future comparisons.
- Shoot a scene with intentionally soft lighting and another with harsh lighting; develop both normally and compare how the Zone System helped you anticipate the results.
- Troubleshoot a deliberately 'problem' roll: underexpose one frame, overexpose another, and develop all together; analyze how exposure errors compound or are mitigated by development choices.
Next up: This stage transforms you from a passive observer of exposure and development into an active, intentional practitioner with a personal system—equipping you to move forward into advanced printing techniques, alternative processes, or specialized film stocks with the confidence that your negatives will reliably support your creative vision.
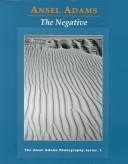
Adams's definitive treatment of the Zone System and exposure control; reading this after the beginner stage means the concepts land with full context and you can apply them immediately.
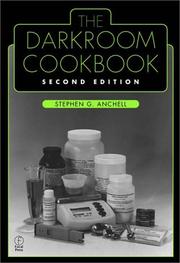
The most comprehensive and trusted reference for film developers, fixers, and chemistry — read alongside or just after Adams to understand exactly what happens to your negatives in the tank.
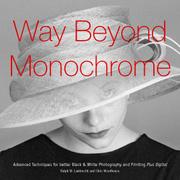
A thorough, science-grounded guide to black-and-white photography from capture through development; it bridges the gap between Zone System theory and real-world darkroom practice.
Mastery: Darkroom Printing & the Fine Print
ExpertProduce exhibition-quality darkroom prints, understand advanced printing controls, and develop a personal printing aesthetic rooted in the full analog tradition.
▸ Study plan for this stage
Pace: 8–10 weeks, ~25–30 pages/day with 2–3 darkroom printing sessions per week
- The Zone System as a precise tool for exposure and development control to achieve desired tonal separation and print contrast
- Paper grades, paper characteristics (fiber vs. RC), and how to select the right paper for your negative and aesthetic intent
- Dodging and burning techniques—selective exposure control to shape light and shadow in the final print
- Contrast control through developer choice, dilution, temperature, and agitation to refine the tonal range of your print
- Toning and archival finishing methods to add color, extend tonal range, and ensure permanence of your prints
- The relationship between negative density, paper exposure, and development time in achieving fine print quality
- Print evaluation and critique—understanding how to read a print, identify technical flaws, and refine your aesthetic vision
- How does the Zone System inform your exposure and development decisions when creating a negative intended for printing?
- What are the practical differences between fiber-based and RC papers, and how do these differences affect your choice for exhibition-quality work?
- Describe the dodging and burning workflow: how do you plan, execute, and evaluate selective exposure adjustments on a print?
- How can you use developer choice, dilution, temperature, and agitation time to control contrast and achieve a desired tonal range in your prints?
- What toning and archival finishing methods are appropriate for fine art prints, and how do they affect both aesthetics and longevity?
- How do you diagnose problems in a test print (muddy shadows, blown highlights, flat midtones) and adjust your technique to correct them?
- Read 'The Print' by Ansel Adams in full, taking detailed notes on the Zone System as it applies to printing; create a personal reference sheet mapping zones to paper tones
- Conduct a paper comparison test: print the same negative on at least three different paper grades and surfaces (e.g., Grade 2 glossy, Grade 3 matte, Grade 4 luster) and evaluate the aesthetic and technical differences
- Create a series of test prints from a single negative using different developers (e.g., D-72, Selectol-Soft, Dektol at different dilutions) to understand how developer choice affects contrast and tonality
- Execute a dodging and burning study: select a negative with challenging lighting, make a straight print, then create 2–3 refined versions using planned dodging and burning to improve tonal separation and visual hierarchy
- Produce a contact sheet proof from a full roll of negatives, then select and print 3–5 negatives at exhibition quality, applying all learned techniques (Zone System evaluation, paper selection, contrast control, selective exposure)
- Tone and finish a series of prints using at least two different toning methods (e.g., selenium toning, split toning, or gold toning); document the process and evaluate the aesthetic and archival impact
- Conduct a detailed critique session: print a challenging negative three times with different technical approaches, then compare the results against Adams' principles to identify which approach best serves your aesthetic intent
Next up: Mastery of darkroom printing and fine print production establishes you as a complete analog photographer capable of realizing your vision from capture through exhibition, positioning you to explore specialized techniques (alternative processes, large-format printing, or fine art series development) or to mentor others in the full analog workflow.
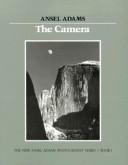
The natural sequel to The Negative — Adams walks through every aspect of darkroom printing, from paper grades to dodging and burning, cementing the complete analog workflow.
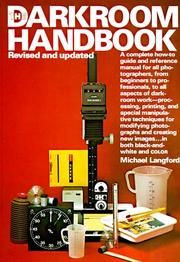
A practical, encyclopedic reference covering enlargers, printing papers, toning, and advanced techniques; ideal as the capstone reference you return to again and again as your printing evolves.
Discussion
Keep reading
Paths that share books, cover the same subject, or open a related topic.