Travel Photography: Best Books to Capture the World, in Order
This curriculum takes a beginner travel photographer from foundational camera craft and seeing light, through the art of composition and working with people, into the nuanced skills of landscape photography and visual storytelling — the exact arc the learner requested. Each stage builds the vocabulary and eye needed for the next, so no step feels like a leap in the dark.
Foundations: Light, Camera & the Photographer's Eye
BeginnerUnderstand how cameras work, how light shapes a photograph, and how to start seeing the world like a photographer before you ever board a plane.
▸ Study plan for this stage
Pace: 4–5 weeks, ~25–30 pages/day. Week 1–2: "Understanding Exposure" (focus on exposure triangle, metering, and practical application). Week 3–4: "The Photographer's Eye" (composition, visual design, seeing). Week 5: Review and integration exercises.
- The exposure triangle: aperture, shutter speed, and ISO—how each element controls light and image quality
- How light meters work and the difference between metering modes (spot, center-weighted, evaluative)
- Exposure compensation and how to override your camera's meter for creative intent
- Composition fundamentals: balance, framing, layering, and visual weight as taught in Freeman's framework
- How the photographer's eye differs from the camera's eye—selective attention and intentional seeing
- The relationship between technical control (exposure) and artistic vision (composition)
- How to read light in a scene: direction, quality, color temperature, and contrast
- Building a personal visual language through deliberate observation before pressing the shutter
- Explain the exposure triangle and how changing one element requires compensating with another to maintain proper exposure
- What are the three main metering modes, and when would you choose each one for different shooting scenarios?
- How does aperture affect both exposure and depth of field, and why might you choose a shallow depth of field over a deep one?
- Describe the difference between how your eye sees a scene and how your camera captures it—what does Freeman mean by 'the photographer's eye'?
- What are the key compositional principles Freeman discusses, and how do they guide where you place subjects within the frame?
- How can you use exposure compensation creatively to convey mood or intent, rather than just 'correct' exposure?
- Walk through your process for analyzing light in a real scene: direction, quality, and how it shapes form and mood
- Exposure triangle drills: photograph the same subject with 5 different aperture/shutter speed combinations while holding ISO constant; document how each changes depth of field and motion blur
- Metering mode comparison: shoot the same high-contrast scene using spot, center-weighted, and evaluative metering; compare results and explain why the meter 'chose' different exposures
- Exposure compensation practice: intentionally overexpose and underexpose the same scene by 1–2 stops; evaluate when and why you'd choose each for creative effect
- Composition study: photograph 10 everyday subjects using Freeman's principles (balance, framing, layering, visual weight); annotate each image explaining which principles you applied
- Light observation walks: spend 30 minutes in one location at different times of day (morning, midday, golden hour) sketching or photographing how light direction and quality change the scene's mood
- Photographer's eye training: choose a location and take 20 photos exploring different framings, focal lengths, and perspectives of the same subject; reflect on how your 'seeing' evolved across the series
- Technical-artistic integration: shoot a scene twice—once prioritizing technical perfection (correct exposure, sharp focus) and once prioritizing compositional impact; compare and discuss the trade-offs
- Create a visual journal: collect 15 photographs (yours or others') that exemplify strong composition; annotate each with Freeman's principles and explain what makes the image work
Next up: This stage equips you with the foundational knowledge of how your camera responds to light and how to intentionally frame what you see, preparing you to apply these skills to the specific challenges and opportunities of photographing real-world travel scenarios—from managing unfamiliar lighting conditions to composing compelling images of people, places, and cultures in motion.
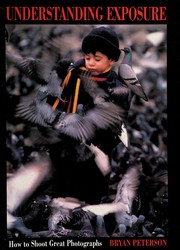
The single best beginner book for demystifying aperture, shutter speed, and ISO — the technical trio you must own before anything else. Peterson uses plain language and vivid examples that immediately connect to outdoor and travel situations.
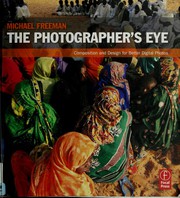
Bridges the gap between technical competence and visual thinking. Read this second so the design principles — frame, moment, balance — give structure to the instincts you are just starting to develop.
Composition & the Travel Frame
BeginnerApply deliberate compositional thinking to travel scenes — streets, markets, architecture — and learn to make intentional, not accidental, images.
▸ Study plan for this stage
Pace: 4–5 weeks, ~25–30 pages/day. Start with I'Anson's practical chapters on framing and composition (weeks 1–2), then move to Barnbaum's deeper exploration of visual design principles (weeks 3–4), with week 5 dedicated to integration and review.
- The rule of thirds and grid-based composition as a starting framework for organizing travel scenes
- Leading lines and how to use streets, paths, and architectural elements to guide the viewer's eye through an image
- Foreground, middle ground, and background layering to create depth and visual hierarchy in travel photography
- Framing within the frame—using architectural elements, doorways, and natural frames to isolate and emphasize subjects
- The relationship between subject placement and negative space in creating intentional, balanced compositions
- How light direction and quality shape compositional choices in street, market, and architectural photography
- Deliberate cropping and viewpoint selection as compositional decisions, not accidents of convenience
- Visual tension and balance—when to follow rules and when to break them for emotional impact
- How does the rule of thirds apply to travel photography, and when might you intentionally deviate from it?
- What are three ways you can use leading lines to guide a viewer through a travel photograph?
- Explain how foreground, middle ground, and background work together to create depth in a single travel image.
- What is 'framing within the frame,' and how can you use architectural elements to strengthen a composition?
- How should negative space inform your subject placement in a travel scene?
- Describe the relationship between light direction and compositional choices in street or architectural photography.
- Photograph the same street or market scene from five different angles and viewpoints; compare how each compositional choice changes the story and emphasis of the image.
- Create a series of 10 images using the rule of thirds as your primary compositional tool, then annotate where the subject intersects the grid lines.
- Find and photograph three examples of leading lines in your local environment (roads, paths, architectural edges); write a sentence on how each line directs the viewer's eye.
- Shoot a series of images of the same building or architectural subject, deliberately varying foreground, middle ground, and background elements; reflect on how depth changes with each composition.
- Practice 'framing within the frame' by finding natural frames (doorways, windows, archways) and photographing subjects through them; create a contact sheet of at least six examples.
- Photograph a busy market or street scene, then deliberately crop and re-crop the same image three different ways; explain how cropping changes the composition and narrative.
Next up: This stage establishes the intentional, rule-based foundation of composition that prepares you to explore how light, color, and moment interact with framing in the next stage—moving from static compositional structure to dynamic visual storytelling.
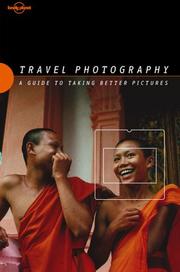
The most comprehensive and widely recommended single-volume guide written specifically for travel photographers. Covers gear choices, logistics, light in the field, and composition all in one place — a natural next step after the foundations stage.
Goes deeper into composition, vision, and creative intent than any quick-tip book. Reading it here sharpens your aesthetic judgment before you tackle the harder human and landscape subjects ahead.
Photographing People & Culture
IntermediateConfidently approach, connect with, and photograph strangers and communities in an ethical, respectful, and visually compelling way.
▸ Study plan for this stage
Pace: 4–5 weeks, ~40–50 pages/day, with 2–3 days per week dedicated to field practice and reflection
- Building genuine human connection before and during photography—the foundation of ethical portraiture
- Visual storytelling through color, light, and composition to reveal character and cultural context
- Navigating the ethics of photographing strangers: consent, dignity, and long-term relationships with subjects
- McCurry's signature style: saturated color, dramatic lighting, and intimate framing that honors subjects
- Approaching unfamiliar communities with humility, cultural sensitivity, and patience
- Using environmental portraiture to show people within their cultural and social context
- The technical mastery (exposure, focus, lens choice) that enables spontaneous human moments
- Editing and curation as ethical choices—how you present people's stories to the world
- How does Steve McCurry establish trust and connection with his subjects before photographing them, and why is this essential to ethical travel photography?
- What are McCurry's signature visual techniques (color, light, composition) and how do they serve the goal of revealing character and cultural authenticity?
- How do you balance the desire for a compelling image with the ethical responsibility to represent people and communities respectfully?
- What role does environmental context play in McCurry's portraits, and how does it deepen the viewer's understanding of a person's life and culture?
- How would you approach photographing in a community where you don't speak the language or share cultural background, based on McCurry's example?
- What technical decisions (lens choice, exposure, focus) does McCurry make to capture intimate moments while maintaining respectful distance?
- Study 10–15 iconic McCurry portraits in depth: analyze the color palette, light direction, framing, and what environmental or cultural details are included. Write one paragraph per image explaining how these choices reveal the subject's character or story.
- Photograph a stranger in your local community (with clear permission and conversation first): spend at least 15 minutes talking with them before shooting, then take 50+ frames. Review your contact sheet and select 3–5 images that best capture their character. Write about what you learned from the interaction.
- Create a 'connection protocol' for approaching strangers: document the phrases, gestures, and questions you'll use to build rapport before asking to photograph. Test it with at least three different people and refine based on what works.
- Shoot an environmental portrait series (5–8 images) of someone in their home, workplace, or meaningful location. Ensure the environment tells part of their story. Compare your results to McCurry's environmental portraits in the book.
- Analyze the ethical decisions in one McCurry photo essay: identify moments where consent, dignity, and representation are evident in the images. Write a short reflection on how McCurry balanced compelling storytelling with respect.
- Practice the technical fundamentals McCurry uses: shoot in varied light conditions (golden hour, overcast, backlit) and experiment with lens choices (35mm, 50mm, 85mm) to understand how each affects intimacy and context in portraiture.
Next up: This stage equips you with the ethical framework, visual language, and interpersonal skills to photograph people authentically; the next stage will likely deepen your ability to work within specific cultural contexts, develop longer-term projects, or master advanced narrative techniques that weave multiple subjects and stories together.

McCurry's body of work is the gold standard for humanist travel photography. Studying this collection after reading technique books trains your eye to see how masters use color, light, and moment to reveal character across cultures.
Landscapes & Natural Light on the Road
IntermediateMaster the craft of landscape and environmental photography — golden hour, long exposures, vast vistas — as encountered during travel.
▸ Study plan for this stage
Pace: 4–5 weeks, ~25–30 pages/day, with 2–3 days per week dedicated to field practice
- Visual composition as storytelling—using the frame to direct attention and convey narrative in landscapes
- The decisive moment in environmental photography—recognizing and capturing the interplay of light, subject, and context
- Intentional framing and cropping—how edges, layers, and negative space shape the viewer's emotional response
- Light as a design element—understanding how direction, quality, and color of light sculpt landscape scenes
- Depth and dimension in 2D images—creating visual hierarchy through foreground, middle ground, and background
- Editing as an extension of vision—post-processing decisions that honor the photographer's intent without betraying the scene
- Presence and observation—developing the mindset to see photographically and anticipate compositional opportunities while traveling
- How does DuChemin define the relationship between the camera's frame and storytelling in landscape photography?
- What is the 'decisive moment' in environmental photography, and how does it differ from simply capturing a beautiful landscape?
- Explain how foreground, middle ground, and background work together to create depth and guide the viewer's eye through an image.
- How should you use negative space and edges intentionally in landscape composition, and what emotional or narrative effect can they create?
- What role does light quality and direction play in landscape photography, and how do you position yourself to use it effectively?
- How does DuChemin approach post-processing, and what is the relationship between editing and your original photographic intent?
- Read and annotate the book's core chapters on composition and framing; create a visual glossary of DuChemin's key compositional principles with 3–4 example images per principle.
- Photograph the same landscape scene from 5–7 different vantage points and framings (varying foreground, depth, and edge placement); compare and analyze which composition best serves the story you want to tell.
- Spend 2–3 hours in one location during golden hour, shooting continuously and intentionally shifting your position and framing every 5–10 minutes; review the sequence to identify how subtle compositional changes alter the narrative.
- Create a 'light study' series: photograph the same subject or scene at different times of day (dawn, midday, golden hour, blue hour) and analyze how light quality and direction transform the emotional impact.
- Select 3–5 of your own landscape photographs and apply DuChemin's framework to critique them—identify the story you intended, evaluate whether the frame serves that story, and articulate what you would change.
- Practice intentional cropping: take 5 existing landscape images and create 2–3 alternative crops for each, experimenting with negative space, edge placement, and visual weight; reflect on how cropping changes the narrative.
Next up: This stage anchors your compositional and observational foundation in landscape work, preparing you to layer in technical mastery (exposure, focus, and long exposures) and specialized techniques for capturing dynamic environmental moments during travel in subsequent stages.
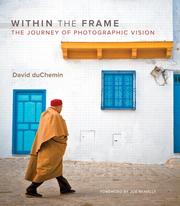
duChemin writes specifically about travel and world photography with a strong emphasis on intentionality in landscapes and environments. His philosophical approach perfectly complements Kelby's technical one.
Visual Storytelling: Making a Journey Mean Something
ExpertSequence and edit your travel images into coherent, emotionally resonant photo essays and stories that communicate the spirit of a place.
▸ Study plan for this stage
Pace: 4–5 weeks, ~40–50 pages/week (contact sheets studied intensively, not skimmed)
- Contact sheets as a window into editorial decision-making: how photographers select, sequence, and reject images to build narrative
- The relationship between individual frames and the larger story: how single images contribute to or detract from thematic coherence
- Editing as storytelling: the deliberate choices photographers make about what to include, exclude, and emphasize
- Emotional resonance through visual rhythm and pacing: how image order, repetition, and variation create meaning
- The photographer's eye in context: understanding intent, subject matter, and cultural perspective through the full body of work
- Technical and compositional patterns that signal a photographer's visual language and thematic priorities
- Sequencing strategies: juxtaposition, progression, and visual echoes that guide viewer interpretation
- How do the contact sheets in this book reveal the difference between what a photographer captured and what they ultimately chose to publish? What does this tell you about editorial vision?
- Pick one photographer's contact sheet and explain how the sequence of images—not just individual frames—creates emotional or narrative meaning. What would be lost if the images were reordered?
- What visual or thematic patterns do you notice within a single photographer's contact sheet? How do these patterns reflect their approach to documenting a place or subject?
- How would you use contact sheet methodology to edit your own travel photo series? What criteria would you use to select, sequence, and reject images?
- What role does repetition and variation play in the contact sheets you've studied? How do photographers use similar compositions or subjects to build coherence?
- How does understanding a photographer's full contact sheet (including rejected frames) change your interpretation of their final published work?
- Study one complete photographer's contact sheet in detail: annotate which images the photographer selected for publication, then write a 300-word analysis of why those specific frames tell a more complete story than any single image alone
- Create your own contact sheet mockup: select 15–20 travel images from your archive and arrange them in a grid, then experiment with 3 different sequences. Document how each sequence creates a different narrative or emotional arc
- Reverse-engineer a published photo essay: find the final published version of a story featured in the book, then compare it to the contact sheet. List every image that was excluded and hypothesize why
- Practice intentional rejection: from a single day's shoot (minimum 50 images), narrow down to 8–10 images that tell a coherent story. Write your editing rationale for each inclusion and exclusion
- Sequence exercise: arrange 12 of your travel images in three different orders (chronological, thematic, emotional) and photograph each layout. Reflect on how sequence changes the viewer's interpretation
- Study visual language: select two photographers from the book whose work contrasts stylistically, then identify 3–5 compositional or thematic signatures in each one's contact sheet that distinguish their approach
Next up: Mastering the editorial eye through contact sheets prepares you to move into the final stage of synthesizing multiple stories into a cohesive body of work and presenting your travel photography with professional intent and clarity.

Reveals how the world's greatest photojournalists — many of them travel photographers — think in sequences, edit ruthlessly, and build narrative across a shoot. Seeing the raw contact sheets alongside the chosen images is a masterclass in storytelling logic.
Discussion
Keep reading
Paths that share books, cover the same subject, or open a related topic.