Smartphone Photography: Best Books to Take Better Phone Photos
This curriculum takes a beginner from zero to pro-level smartphone photography across four progressive stages. It starts by building the universal visual language of composition and light, then moves into the unique strengths of mobile cameras, and finally masters editing workflows and advanced creative techniques — each stage unlocking the vocabulary needed for the next.
Seeing Like a Photographer
BeginnerDevelop a trained eye for composition, framing, and visual storytelling — the timeless skills that apply to any camera, including your phone.
▸ Study plan for this stage
Pace: 4–5 weeks, ~25–30 pages/day. Start with "Understanding Exposure" (2 weeks), then move to "The Photographer's Eye" (2–3 weeks). Allocate 2–3 days per week for hands-on practice between reading sessions.
- The exposure triangle (aperture, shutter speed, ISO) and how each element controls light and creative outcomes
- How exposure choices affect mood, depth of field, and motion blur in your visual storytelling
- The fundamental principles of composition: balance, leading lines, rule of thirds, and visual weight
- How to use framing and cropping to direct viewer attention and strengthen narrative
- The relationship between subject, background, and negative space in creating compelling images
- How light quality (hard vs. soft, direction, color temperature) shapes the emotional impact of a photograph
- Visual hierarchy and how to organize elements within the frame to guide the viewer's eye
- How do aperture, shutter speed, and ISO work together, and what creative trade-offs do you make when adjusting each?
- What is the difference between using exposure to preserve detail versus using it as a creative tool for mood?
- How do leading lines, rule of thirds, and visual balance work together to create a strong composition?
- What role does negative space play in composition, and how can you use it intentionally in your frames?
- How does the direction and quality of light affect the emotional tone of a photograph?
- How do you use framing and cropping to tell a story or emphasize a particular subject?
- Shoot 10 images of the same subject using different aperture settings (f/2.8, f/5.6, f/16), then compare how depth of field changes the story each photo tells.
- Create a series of 5 photos using the rule of thirds: place your main subject off-center in at least three different positions and evaluate which feels most compelling.
- Photograph the same scene in three different lighting conditions (golden hour, midday, overcast) and analyze how light quality changes mood and visual impact.
- Find and photograph 5 examples of leading lines in your environment (roads, fences, shadows, etc.) and explain how each guides the viewer's eye.
- Shoot a subject with intentional negative space around it; then crop the same image three different ways and compare how framing changes the emphasis.
- Take 8–10 photos exploring visual balance: include examples of symmetrical balance, asymmetrical balance, and intentional imbalance, then reflect on which compositions feel strongest and why.
Next up: Mastering exposure control and compositional fundamentals gives you the visual language to move into the next stage, where you'll apply these technical and artistic skills to specific genres and real-world scenarios.
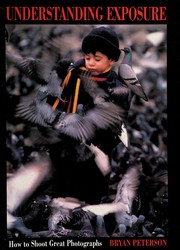
A classic, approachable introduction to how light, aperture, and shutter speed work together. Reading this first gives you the foundational vocabulary of light and exposure before you touch any app or technique.
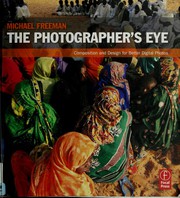
Teaches the grammar of composition — rule of thirds, balance, geometry, and visual weight. Reading it second cements the 'why' behind every framing decision you'll make on your phone.
Mobile-First Foundations
BeginnerUnderstand what makes smartphone cameras unique, learn to control them intentionally, and start shooting with purpose rather than luck.
▸ Study plan for this stage
Pace: 4–5 weeks, ~20–25 pages/day, with 2–3 days per week dedicated to hands-on shooting practice
- How smartphone cameras differ from traditional cameras in sensor size, lens design, and computational photography
- The exposure triangle (ISO, shutter speed, aperture) and how to manipulate it within iPhone's constraints
- Composition fundamentals: rule of thirds, leading lines, framing, and depth of field techniques specific to mobile
- Lighting principles and how to work with natural light, backlighting, and shadows on a smartphone
- iPhone camera app controls: exposure compensation, focus/lock, HDR, and manual modes available in iOS
- The role of post-processing and editing in mobile photography workflow
- How to develop intentional shooting habits and move beyond automatic mode
- What are the key hardware and software differences between an iPhone camera and a traditional DSLR, and how do these differences affect your shooting approach?
- How do you use exposure compensation and focus-lock on an iPhone to intentionally control exposure in tricky lighting situations?
- Explain the rule of thirds and at least two other composition techniques specific to smartphone photography, and why they matter
- What is computational photography, and how does the iPhone use it to improve image quality?
- How would you approach a backlit scene differently on an iPhone compared to shooting in ideal lighting, and what tools would you use?
- Describe a complete mobile photography workflow from capture to final edit, including which iPhone camera settings and post-processing steps you'd use
- Shoot 5 photos using only automatic mode, then re-shoot the same scenes using exposure compensation and focus-lock; compare and reflect on the differences
- Create a composition study: photograph the same subject using rule of thirds, leading lines, and framing techniques in separate shots
- Spend one full day shooting in a single lighting condition (golden hour, overcast, backlit, etc.) and document how the iPhone handles it
- Edit 3 photos using iPhone's native editing tools (exposure, contrast, saturation, shadows/highlights) and write a brief note on how each adjustment changed the image
- Photograph a challenging scene (high contrast, low light, or mixed lighting) and experiment with HDR on/off to understand when it helps
- Create a 10-photo series on a single theme (e.g., 'morning light in your home' or 'textures in your neighborhood') demonstrating intentional composition and exposure control
Next up: This stage equips you with the foundational knowledge of how iPhones capture images and the core techniques to control them deliberately, preparing you to explore advanced composition strategies, specialized shooting modes, and creative post-processing in the next stage.

A thorough, step-by-step guide to getting the most out of a smartphone camera's native controls and modes. Read after Carlson to reinforce hands-on habits and fill any gaps in camera-app fluency.
Light, Moment & Creative Vision
IntermediateLearn to read and chase great light, develop a personal style, and shoot consistently strong images across different subjects and conditions.
▸ Study plan for this stage
Pace: 4–5 weeks, ~20–25 pages/day with daily photography practice
- How to actively observe and analyze light quality, direction, and color temperature in real-world scenes
- The relationship between composition, light, and emotional impact—how they work together to convey meaning
- Developing a personal visual style by understanding your aesthetic preferences and shooting consistently
- The concept of 'seeing' as a learned skill: training your eye to notice what makes an image compelling before pressing the shutter
- How to identify and chase fleeting moments and optimal lighting conditions across different subjects and environments
- Using constraints (subject, time, light conditions) to strengthen creative decision-making and visual clarity
- The role of intention and storytelling in smartphone photography—moving beyond technical perfection to purposeful imagery
- What are the key differences between harsh, soft, and directional light, and how does each affect the mood and clarity of a smartphone photograph?
- How can you train yourself to 'see' photographically in everyday situations, and what specific visual elements should you look for before composing a shot?
- What is your personal visual style, and how do you identify it? What subjects, light conditions, or compositional choices consistently appear in your strongest images?
- How do you balance technical execution with creative intention when shooting smartphone photography? When should technical perfection take a backseat to capturing a meaningful moment?
- Describe a situation where you chased or waited for light to improve a scene. What did you observe, and how did the final image differ from your initial attempt?
- How does understanding light and moment help you shoot consistently strong images across different subjects and conditions, rather than relying on luck?
- Daily light observation walks (15–20 minutes): Spend time each day observing how light changes throughout the day in one familiar location. Note the quality, direction, and color of light at different times. Take photos only after you've spent 5 minutes observing without the camera.
- Single-subject deep dive: Choose one subject (a person, plant, architectural detail, or animal) and photograph it across at least 5 different lighting conditions and times of day. Analyze how light transforms the subject and your emotional response to each image.
- Moment-chasing project: Identify a recurring moment or activity in your daily life (morning light through a window, commute, meal preparation, etc.). Shoot this moment for 2 weeks, aiming to capture the best light and composition each time. Review the series to see how your 'seeing' improves.
- Personal style audit: Review your 50–100 best smartphone photos from the past year. Identify recurring patterns: preferred subjects, lighting conditions, colors, compositions, and emotional tones. Write a one-paragraph description of your visual style based on these patterns.
- Constraint-based shooting: Set a specific constraint (e.g., only shoot in golden hour, only shoot one subject, only use one compositional rule) for 3–5 days. Photograph within this constraint and reflect on how limitations clarified your creative choices.
- Light quality comparison: Photograph the same scene or subject in three distinctly different light conditions (e.g., overcast, golden hour, harsh midday sun). Write a brief analysis of how light quality affected composition, mood, and your creative decisions for each version.
Next up: Mastering the ability to read light and develop a consistent personal vision prepares you to apply these skills strategically across specific genres and advanced techniques, where you'll learn to deliberately manipulate composition, perspective, and post-processing to strengthen your storytelling within your established style.
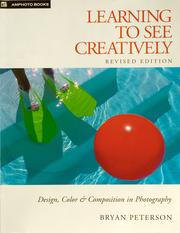
Pushes beyond rules into creative decision-making — color, contrast, depth, and storytelling. At this stage you have the basics; this book teaches you to break rules intentionally and develop a personal visual voice.
Editing Mastery & Pro Output
ExpertBuild a professional post-processing workflow using industry-standard mobile editing apps, and produce images indistinguishable from those shot on dedicated cameras.
▸ Study plan for this stage
Pace: 4–5 weeks, ~40–50 pages/day, with 2–3 dedicated editing lab sessions per week
- Exposure and tonal range correction: understanding histograms, curves, levels, and how to recover blown highlights and crushed shadows on mobile devices
- Color grading workflows: white balance correction, color temperature, saturation, vibrance, and HSL adjustments to achieve professional color palettes
- Selective editing techniques: using masks, brushes, and local adjustments to enhance specific image areas without affecting the entire frame
- Sharpening and clarity: applying smart sharpening, texture enhancement, and clarity adjustments that enhance detail without introducing artifacts
- Professional finishing: noise reduction, vignetting, grain addition, and export optimization for different platforms and print media
- Non-destructive editing principles: layer-based workflows and adjustment stacks that preserve original image data for iterative refinement
- Before-and-after comparison methods: critical evaluation techniques to ensure edits enhance rather than degrade image quality
- Mobile app ecosystem mastery: understanding the strengths and limitations of industry-standard apps like Lightroom Mobile, Snapseed, and Capture One
- How do you read and interpret a histogram to diagnose exposure problems, and what specific adjustments would you make to recover detail in overexposed and underexposed areas?
- Walk through a complete color grading workflow: starting from white balance correction through to final saturation and vibrance adjustments. What is the logical order and why?
- Explain the difference between global adjustments and selective/local edits. When would you use each, and how do you apply them non-destructively on mobile?
- You have a portrait with blown-out highlights in the sky and crushed shadows in the subject's face. Describe your step-by-step editing approach using curves, masks, and local adjustments.
- What are the key differences between sharpening, clarity, and texture adjustments? How do you apply each without creating halos or over-processing artifacts?
- How do you optimize and export an edited image for different outputs (social media, print, web portfolio) while maintaining quality?
- Complete 10 before-and-after edits using Kelby's exposure and tonal correction principles: take underexposed and overexposed test images and recover detail using curves and levels
- Color grade 8 images from different lighting conditions (golden hour, blue hour, overcast, mixed lighting) using white balance, temperature, and HSL adjustments to achieve cohesive, professional color palettes
- Practice selective editing: edit 6 portraits using masks and local brushes to enhance eyes, skin tone, and background separately without affecting the entire image
- Create a sharpening and clarity comparison study: edit the same landscape image 5 different ways (no sharpening, subtle, moderate, aggressive, over-processed) and evaluate which looks most professional
- Build a complete editing workflow from raw import to final export: take one challenging image (mixed lighting, color cast, exposure issues) and document each step following Kelby's methodology
- Produce a portfolio-ready series: shoot and edit 15–20 images across 3–4 different genres (landscape, portrait, street, product) using consistent, professional color grading and finishing techniques
Next up: Mastering these post-processing fundamentals on mobile devices establishes the technical foundation needed to develop a signature editing style and understand how to adapt these workflows to different genres and creative intentions in the next stage.

Kelby's no-fluff, recipe-style approach covers professional shooting and editing techniques that translate directly to mobile. Read last as a capstone: it ties together light, composition, and post-processing into a repeatable pro workflow.
Discussion
Keep reading
Paths that share books, cover the same subject, or open a related topic.