Best books to learn tatting and needle lace
This curriculum is designed for an intermediate learner who already has some crafting background and wants to deeply master tatting lace — both shuttle and needle techniques. The path moves from solidifying core tatting vocabulary and foundational patterns, through mastering rings, chains, and joins, and finally into advanced design, complex motifs, and original lacemaking. Each stage builds the technical and aesthetic fluency needed for the next.
Foundations & Core Techniques
BeginnerSolidify the essential vocabulary of tatting — the double stitch, rings, chains, picots, and joins — using both shuttle and needle, so all later patterns feel approachable.
▸ Study plan for this stage
Pace: 4–5 weeks, ~15–20 pages/day with frequent practice breaks. Allocate 2–3 weeks to "Learn To Tat" (foundational techniques) and 2 weeks to "Tatting with Visual Patterns" (pattern application). Expect 1–2 hours daily including reading and hands-on practice.
- The double stitch (DS) as the fundamental building block: how to execute it cleanly with both shuttle and needle techniques
- Rings and chains as the two primary structural elements, and how they combine to create lace patterns
- Picots: their purpose as decorative elements and their role in joining, plus how to control their size and placement
- Joins (both lock joins and picot joins) as the mechanism for connecting rings and chains to create cohesive lace
- Shuttle tatting vs. needle tatting: the practical differences, advantages, and when to use each method
- Reading and interpreting visual pattern diagrams from Konior's system, translating symbols into hand movements
- Tension control and consistency: how even tension produces uniform stitches and professional-looking finished work
- Thread management: winding shuttles, managing ball and shuttle thread, and preventing tangles during work
- Can you execute a clean double stitch with both shuttle and needle, maintaining consistent tension throughout?
- What is the structural difference between a ring and a chain, and why are both necessary in tatting patterns?
- How do picots function both as decorative elements and as join points, and how do you control their size?
- What are the key differences between shuttle tatting and needle tatting, and when would you choose one over the other?
- Can you read and interpret a visual pattern diagram from 'Tatting with Visual Patterns' and execute it without errors?
- How do you join rings to chains and rings to rings using both lock joins and picot joins?
- Practice the double stitch 50+ times with shuttle until it becomes automatic; repeat with needle tatting until both methods feel natural
- Create 5 simple rings of varying sizes (1/2 inch, 3/4 inch, 1 inch) with consistent tension, then compare them for uniformity
- Tat 3 simple chains of different lengths, focusing on maintaining even stitch spacing and thread tension throughout
- Create a practice swatch combining rings and chains in a simple alternating pattern (ring-chain-ring-chain) to internalize how they connect
- Make 10 picots of intentionally different sizes on a single piece, then practice controlling picot size on subsequent attempts
- Complete 2–3 beginner projects from 'Learn To Tat' (e.g., simple edging, bookmark, or small motif) using shuttle tatting
- Complete 2–3 beginner projects from 'Tatting with Visual Patterns' using the visual diagram system, focusing on accurate joins
- Practice both lock joins and picot joins in isolation 20+ times each until you can execute them smoothly without thinking
Next up: Mastery of these foundational techniques and vocabulary—especially the double stitch, rings, chains, and joins—provides the technical foundation needed to tackle more complex patterns, color work, and advanced lace structures in the next stage.
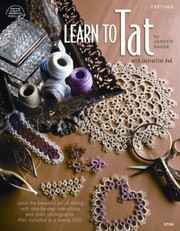
A clear, well-illustrated primer that covers shuttle tatting from the very first double stitch through rings and chains — ideal for cementing fundamentals before moving to more complex work.
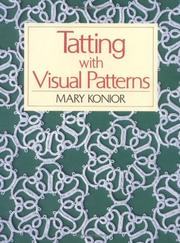
Konior's unique visual notation system builds strong pattern-reading intuition; reading this early trains the eye to see structure in lace diagrams used throughout the rest of the curriculum.
Needle Tatting & Comparative Technique
IntermediateMaster needle tatting as a parallel discipline, understand where it differs from shuttle tatting in tension and structure, and become fluent in switching between both tools.
▸ Study plan for this stage
Pace: 4–5 weeks, ~25–30 pages/day with daily practice sessions (30–45 minutes of hands-on tatting)
- Needle tatting mechanics: how the needle replaces the shuttle and how thread tension differs fundamentally from shuttle tatting
- Double stitches in needle tatting: formation, consistency, and the role of the needle's eye in creating loops
- Picots in needle tatting: how they are formed differently than in shuttle work and their aesthetic function
- Rings and chains in needle tatting: structure, joining techniques, and how they compare to shuttle-made equivalents
- Tension control with needle tatting: managing thread flow through the needle eye and maintaining even stitches across both techniques
- Switching between shuttle and needle: recognizing when each tool is optimal and developing muscle memory for both
- Pattern reading and adaptation: interpreting shuttle patterns for needle execution and vice versa
- Finishing techniques in needle tatting: securing thread ends and blocking completed pieces
- What are the key mechanical differences between how a shuttle and a needle form a double stitch, and how does this affect tension management?
- How do you form a picot in needle tatting, and why does the technique differ from shuttle tatting?
- Describe the process of joining in needle tatting and explain how it compares to shuttle joining methods.
- When would you choose needle tatting over shuttle tatting for a specific project, and what are the practical advantages?
- How do you maintain consistent tension when switching between shuttle and needle tatting, and what adjustments must you make?
- Can you take a shuttle tatting pattern and successfully adapt it for needle execution? What steps would you follow?
- Work through the foundational exercises in 'Needle Tatting with Style' to master basic double stitches with the needle, focusing on achieving the same tension you use in shuttle tatting
- Practice forming picots in needle tatting using both the Foster and Nicholls methods; compare the visual results and note which feels more natural to your hand
- Create a series of simple rings in needle tatting (progressively increasing in size) and compare them side-by-side with shuttle-made rings of identical dimensions
- Tat a basic chain pattern using the needle, then immediately tat the same pattern with a shuttle; document the differences in execution time, tension consistency, and final appearance
- Work through at least two complete projects from 'Needle Tatting with Style' that require joining techniques, paying close attention to thread management and securing
- Adapt a simple shuttle tatting pattern from 'Tatting' by Nicholls for needle execution; create a sample and reflect on which techniques required modification
- Practice switching between shuttle and needle tatting within a single session (e.g., 15 minutes shuttle, 15 minutes needle) to build fluency and muscle memory across both tools
Next up: This stage equips you with dual-tool proficiency and a deep understanding of how tatting structure remains constant across different execution methods, preparing you to tackle advanced patterns that exploit the unique strengths of each technique and to explore specialized variations like split-ring tatting or multi-shuttle work.

The most widely recommended dedicated needle tatting guide, covering the unique mechanics of needle technique, thread management, and how to adapt shuttle patterns for the needle.
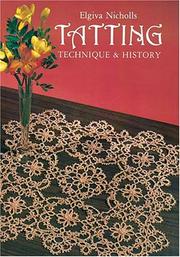
Places both shuttle and needle tatting in historical context, revealing the structural logic behind traditional lace construction and deepening understanding of why techniques work the way they do.
Advanced Patterns & Complex Motifs
ExpertExecute intricate, multi-element lace compositions — including split rings, Celtic motifs, 3D elements, and complex joins — with professional-level consistency and design awareness.
▸ Study plan for this stage
Pace: 8–10 weeks, ~15–20 pages/day with 2–3 hours of hands-on practice per session
- Split rings and their structural role in complex motifs
- Celtic knot patterns and their geometric construction principles
- Multi-element compositions and spatial planning on lace pieces
- 3D tatting techniques and dimensional shaping methods
- Advanced joining methods (including hidden joins and seamless transitions)
- Pattern reading and notation interpretation for intricate designs
- Design awareness: proportion, balance, and visual flow in complex pieces
- Tension control and consistency across extended, multi-part projects
- How do split rings function differently from standard rings, and when should you choose one over the other in a pattern?
- What are the key geometric principles underlying Celtic motif construction, and how do you adapt them for different scales?
- How do you plan and execute a multi-element lace composition to ensure all parts fit together seamlessly?
- What techniques create 3D effects in tatting, and how do you maintain structural integrity while adding dimensional elements?
- Describe the differences between visible and hidden joins, and explain when each is appropriate for professional-level work.
- How do you read and interpret complex pattern notation, and what do you do when a pattern seems ambiguous or incomplete?
- What design principles govern the visual balance and flow of an intricate lace piece, and how do you evaluate your own work against these standards?
- Work through at least 3 split-ring patterns from Konior's collection, documenting the differences in tension and join placement compared to standard rings
- Execute 2 complete Celtic motifs at different scales (small and large), analyzing how proportions shift and adjusting your technique accordingly
- Plan and execute a multi-element composition (minimum 4 separate components) that requires you to draft a layout, calculate thread lengths, and coordinate joins before tatting
- Create a 3D tatting piece (such as a dimensional flower or sculptural element) using techniques from Konior's patterns, experimenting with stiffening or shaping methods
- Tat a complex join sequence (at least 5 different join types) on a single practice piece, labeling each and reflecting on which feels most secure and invisible
- Reproduce one complete advanced pattern from Konior exactly as written, then create a written analysis of the pattern's structure, notation, and any ambiguities you encountered
- Design and execute your own original multi-element composition inspired by a Celtic or geometric theme, applying Konior's techniques and documenting your design decisions
Next up: This stage equips you with the technical mastery and design intuition needed to move into independent pattern creation and artistic innovation, where you'll develop your own original designs and adapt existing patterns to personal aesthetic goals.

Konior's most demanding collection, featuring interlocking and layered designs that require mastery of split rings and precise picot placement — a true advanced benchmark.
Design Fluency & Original Lacemaking
ExpertTransition from executing others' patterns to designing original tatted lace — understanding proportion, thread choice, motif planning, and how to draft and notate your own patterns.
▸ Study plan for this stage
Pace: 4–5 weeks, ~15–20 pages/day with pattern study and sketching
- Anne Orr's design philosophy: how she approached proportion, symmetry, and aesthetic balance in lace motifs
- Thread selection and its impact on final appearance: weight, fiber content, sheen, and how these choices affect pattern execution and visual effect
- Motif planning and composition: how to break down complex designs into repeatable units and understand negative space
- Pattern notation and drafting: reading Orr's original patterns, understanding her diagramming conventions, and translating visual designs into written instructions
- Scaling and adaptation: how to modify existing patterns for different thread weights, sizes, and contexts
- Design principles specific to tatting: understanding how joins, picots, and ring/chain sequences create visual rhythm and structure
- From replication to innovation: recognizing the underlying logic in Orr's designs so you can create variations and original work
- What are the key design principles Anne Orr used to create balanced, proportional lace motifs, and how do these principles apply across different pattern types?
- How does thread weight, fiber type, and finish affect the visual appearance and execution of a tatted design, and how would you choose thread for a specific design goal?
- How do you break down one of Orr's complex patterns into its component motifs and repeating units, and what role does negative space play in the overall design?
- What are the key elements of Orr's pattern notation system, and how would you translate one of her diagrams into step-by-step written instructions for someone unfamiliar with her work?
- How would you scale or adapt one of Orr's patterns to work with a different thread weight or to create a larger or smaller finished piece?
- What design variations could you create by modifying specific elements (picots, joins, ring sizes, or chain lengths) in one of Orr's original patterns while maintaining design coherence?
- Study 3–4 of Anne Orr's complete patterns in depth: map out each motif, identify repeating units, sketch the negative space, and annotate how joins and picots create visual rhythm
- Recreate one of Orr's patterns while documenting your own notation system in parallel—write out step-by-step instructions in your own words and compare your clarity to Orr's original
- Create a thread-choice study: tat the same small Orr motif in 3–4 different thread weights or fiber types (cotton, silk, metallic, etc.) and photograph/document how each choice changes the visual effect
- Draft a scaled version of one Orr pattern: enlarge or reduce it by 25–50% and work through the math of adjusting ring and chain lengths, then tat it to verify your calculations
- Design one original small motif (8–12 rings/chains) inspired by Orr's aesthetic principles: sketch it, notate it, tat it, and refine based on how it actually executes
- Analyze the proportional relationships in 2–3 of Orr's designs: measure and document the ratios of ring sizes, chain lengths, and picot spacing to understand her underlying design logic
Next up: This stage equips you with the analytical tools and hands-on experience to deconstruct master patterns and understand the design logic behind them, preparing you to move into independent pattern creation and the development of your own signature tatting style.

A classic collection of historically significant patterns that reveals the range of what tatted lace can achieve, providing rich inspiration and a deep well of design vocabulary for original work.
Discussion
Keep reading
Paths that share books, cover the same subject, or open a related topic.