The Best Books on Studio Lighting for Photographers
This curriculum takes an intermediate photographer from a solid understanding of exposure and natural light into the full command of studio flash, light modifiers, and professional portrait setups. Each stage builds on the last: first cementing the physics and vocabulary of artificial light, then mastering modifier choices and multi-light setups, and finally developing the artistic eye and business-level craft of a working studio pro.
Foundations of Artificial Light
IntermediateUnderstand how flash and continuous light behave, learn the core vocabulary (inverse square law, color temperature, guide numbers, sync speed), and develop an intuitive mental model before touching a modifier.
▸ Study plan for this stage
Pace: 4–5 weeks, ~40–50 pages/day. Start with "Light—Science and Magic" (Chapters 1–6, ~2.5 weeks), then move to "Speedliter's Handbook" (Chapters 1–5, ~2 weeks). Allocate 2–3 days per book section for review and note-taking.
- Inverse square law: how light intensity drops proportionally with distance squared, and why it matters for flash exposure
- Color temperature (Kelvin scale) and how different light sources (flash, tungsten, daylight) affect white balance and mood
- Guide numbers: what they are, how to calculate flash exposure manually, and their relationship to aperture and distance
- Flash sync speed: why it exists, how it limits shutter speed, and the practical difference between front-curtain and rear-curtain sync
- Continuous vs. flash light behavior: recycle time, modeling light, heat output, and when to choose each
- Light falloff and its creative use: how to predict and control where light reaches in a scene
- Beam angle and spread: how flash coverage changes with zoom head position and reflector design
- Exposure metering with flash: TTL vs. manual modes, and how to read your camera's feedback
- Explain the inverse square law in your own words and show how it affects flash exposure when you double the distance from subject to light.
- What is color temperature, and why would you need to gel a flash or adjust white balance when mixing daylight with tungsten continuous light?
- How do you calculate the correct aperture for a manual flash exposure using the guide number, and what happens if you ignore the guide number?
- What is flash sync speed, why does it exist, and what is the practical difference between front-curtain and rear-curtain sync in a real shoot?
- Compare continuous light and flash in terms of heat, recycle time, and modeling capability—when would you choose one over the other?
- Describe how light falloff works in a scene and give an example of how you would use it creatively to separate a subject from the background.
- Measure and record the inverse square law: place a light meter at 3 feet, 6 feet, and 12 feet from a flash or continuous light, note the readings, and verify the 1/4 intensity drop at double distance.
- Calculate guide numbers manually: fire your flash at a known distance with a test subject, note the aperture used, and work backward to derive the guide number; compare to the manufacturer spec.
- White balance test: photograph a gray card under daylight, tungsten, and flash (unmodified), then with CTO gel on the flash; observe the color shift and practice correcting in post.
- Sync speed exploration: shoot the same scene at your camera's sync speed and 1/2 the sync speed with flash; examine the difference in ambient light capture and flash exposure.
- Beam angle experiment: zoom your flash head from wide (24mm) to narrow (105mm), measure the light falloff at the edges, and note how coverage changes.
- Continuous vs. flash comparison: light a simple still life with continuous light, then with flash, and document differences in heat, flicker, and modeling capability.
Next up: This stage builds the mental model and vocabulary needed to understand how modifiers (softboxes, umbrellas, reflectors) shape and control light—you now know how light behaves in its raw form, so you're ready to learn how to bend it.
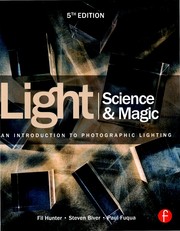
The definitive primer on how light physically interacts with surfaces, highlights, and shadows. Reading this first gives you the scientific vocabulary every later book assumes you already have.

Bridges the gap between on-camera flash and off-camera studio thinking. It demystifies TTL, manual power, and high-speed sync so you arrive at the studio stage with no gaps.
Studio Flash & Modifier Mastery
IntermediateLearn to control monolight and pack-and-head systems, choose and place modifiers (softboxes, umbrellas, beauty dishes, grids, reflectors), and read and recreate light from a photograph.
▸ Study plan for this stage
Pace: 4–5 weeks, ~25–30 pages/day with daily practice breaks
- Flash exposure fundamentals: guide numbers, inverse square law, and how to meter and control flash output in studio and on-location setups
- Monolight and pack-and-head systems: power settings, recycle times, and practical differences between flash types for studio control
- Modifier selection and placement: how softboxes, umbrellas, beauty dishes, and grids shape light quality, direction, and falloff for different subjects
- Reading light from reference photographs: identifying modifier type, distance, angle, and power by analyzing shadows, highlights, and catch lights
- McNally's practical workflow: scouting, test shots, exposure compensation, and real-world problem-solving on location and in studio
- Reflector placement and fill techniques: using bounce surfaces to control contrast and create dimension without additional light sources
- Balancing ambient and flash: exposure blending, high-speed sync, and when to use flash as key, fill, or accent light
- How do you calculate and adjust flash exposure using guide numbers, and why does distance matter more than power adjustments?
- What are the practical differences between monolight systems and pack-and-head systems, and when would you choose each for studio work?
- How do you identify which modifier was used in a photograph by analyzing the quality of light, shadow edges, and catch light shape?
- What is McNally's approach to metering and test shooting, and how does it help you nail exposure on the first or second frame?
- How do softboxes, umbrellas, and beauty dishes differ in their effect on light quality and subject appearance, and how do you position each for optimal results?
- How do you use reflectors and fill light to control contrast and create dimension, and what are the trade-offs of adding more light versus bouncing existing light?
- Photograph 3 different subjects (portrait, product, full-body) using only one monolight and one modifier type; write down your settings and analyze the light quality afterward
- Recreate 5 photographs from The Hot Shoe Diaries by identifying the likely modifier, distance, and angle, then shoot your own version and compare
- Set up a monolight with a softbox, umbrella, and beauty dish in sequence on the same subject; document how each modifier changes shadow quality, catch light, and skin tone
- Meter the same scene with flash at three different distances (8 ft, 12 ft, 16 ft) at constant power; record exposure and analyze the inverse square law in action
- Create a 'light reading journal': collect 10 photographs (from the book or online), sketch the likely setup (modifier type, position, fill strategy), and note your reasoning
- Shoot a series of fill-light experiments: key light only, key + reflector, key + fill flash at different ratios; compare contrast and dimension in each
Next up: This stage equips you with the technical foundation and visual literacy to control light in controlled environments; the next stage will build on this by teaching you how to adapt these modifier and flash techniques to uncontrolled, mixed-light environments and advanced creative scenarios.

McNally's visual storytelling approach teaches you to see and feel light rather than just measure it, building creative intuition on top of the technical base you now have.
Portrait Lighting Setups & Patterns
IntermediateRecognize and execute the classic portrait lighting patterns (Rembrandt, loop, split, butterfly, broad, short), understand how to sculpt faces with light placement, and work confidently with one- to three-light setups.
▸ Study plan for this stage
Pace: 4–5 weeks, ~25–30 pages/day, with 2–3 days per week dedicated to hands-on lighting practice
- The six classic portrait lighting patterns (Rembrandt, loop, split, butterfly, broad, and short) and their defining characteristics and use cases
- How light direction, distance, and quality (hard vs. soft) sculpt facial features and create dimension
- The role of the key light, fill light, and back light in a multi-light setup and how to position each for intentional effect
- Practical one-, two-, and three-light configurations and when to use each based on subject and desired mood
- How to assess and modify ambient light and use reflectors as a fill alternative to additional lights
- The relationship between light placement and shadow patterns on the face, and how shadows define the portrait's character
- Metering and exposure techniques specific to portrait lighting with multiple light sources
- What are the six classic portrait lighting patterns, and what is the defining characteristic of each (e.g., where the shadow falls, which side of the face is lit)?
- How do you position a key light, fill light, and back light in a three-light setup, and what is the purpose of each?
- What is the difference between hard and soft light in portrait work, and how does each affect the appearance of skin texture and facial contours?
- How would you adapt a lighting setup if you only had one light source instead of three, and what compromises or creative choices would you make?
- Describe the relationship between light direction and shadow placement: how does moving the key light change the mood and dimension of a portrait?
- When would you choose broad lighting over short lighting, and what does each reveal or conceal about the subject's face?
- Set up and photograph a subject using each of the six classic lighting patterns (Rembrandt, loop, split, butterfly, broad, short) in sequence, noting the position of each light and the resulting shadow patterns
- Create a one-light portrait using only a key light and reflector, then add a fill light and compare the results; repeat with a back light added
- Photograph the same subject with hard light (bare bulb or reflector) and soft light (softbox or umbrella) in identical positions, and analyze how the quality of light changes facial dimension and texture
- Practice metering and exposure with a multi-light setup: take meter readings at the subject's face for each light individually, then in combination, and adjust your camera settings accordingly
- Shoot a series of portraits moving the key light in 15-degree increments around the subject's face (keeping distance constant), and identify the point at which the lighting pattern shifts from loop to Rembrandt to short
- Recreate a portrait lighting setup from a reference image (from the books or external source), identifying the number of lights, their positions, and the resulting pattern, then photograph your own subject with that setup
Next up: This stage equips you with the foundational vocabulary and muscle memory of classic portrait lighting, preparing you to move into advanced topics such as high-key and low-key portraiture, environmental portraiture with mixed lighting, and creative departures from traditional patterns.

Systematically walks through every major portrait lighting pattern with diagrams and results, making it the ideal first dedicated portrait-lighting reference after you understand modifiers.

Focuses specifically on how the direction and quality of a light source shape a subject—essential reading before moving into complex multi-light and high-end commercial work.
Advanced Techniques & Shaping Light Like a Pro
ExpertExecute complex multi-light setups, master color gels, negative fill, hair and rim lights, and develop the ability to design and reverse-engineer any professional studio look.
▸ Study plan for this stage
Pace: 8–10 weeks, ~25–30 pages/day, with 2–3 dedicated practice days per week for hands-on lighting setups
- Multi-light positioning and ratios: mastering key, fill, rim, and hair lights to create depth, dimension, and separation in portraits
- Color gels and color temperature control: using gels strategically to create mood, separate subject from background, and achieve professional color grading in-camera
- Negative fill and light sculpting: using black flags, gobos, and negative space to shape light and create contrast without adding more light sources
- Reverse-engineering professional looks: analyzing existing images to deconstruct lighting setups and reproduce them with available gear
- Adaptive studio techniques: applying studio lighting principles in unconventional spaces and locations using portable, minimal gear (Studio Anywhere philosophy)
- Compositional intent and light: using light as a narrative tool to guide viewer attention and reinforce the emotional and compositional story of an image
- Practical problem-solving: troubleshooting common multi-light scenarios, managing light spill, and achieving consistency across setups
- How do you position and meter a four-light setup (key, fill, rim, hair) to achieve professional separation and dimension in a portrait, and what ratios would you use for different moods?
- Describe how you would use color gels on specific lights to create a cohesive color story in a portrait, and explain the difference between gelling the key light versus gelling the background or rim light
- What is negative fill, and how would you use black flags or gobos to sculpt light and create contrast in a setup without adding additional light sources?
- Walk through the process of reverse-engineering a professional studio portrait: how would you analyze the image to determine light positions, modifiers, and ratios?
- How do the principles of studio lighting adapt when you're working in a non-traditional space with limited gear, and what compromises or creative solutions would you employ?
- How does your choice of lighting setup (hard vs. soft, multi-light vs. minimal) directly support the compositional and emotional intent of the image?
- Execute a complete four-light portrait setup (key, fill, rim, hair) with a subject; meter each light, document the ratios, and compare the final image to a professional reference image with similar intent
- Gel experiment: shoot the same portrait setup three times using different gel combinations (e.g., warm key + cool rim, monochromatic, complementary colors); analyze how each choice affects mood and separation
- Negative fill challenge: light a portrait using only a key light and reflector, then add black flags and gobos to sculpt the light and create dimension without adding new light sources; compare before/after
- Reverse-engineer three professional studio portraits from books, magazines, or online portfolios: sketch the likely light positions, estimate modifiers and ratios, then attempt to recreate each setup with your own subject
- Adaptive location shoot: take a multi-light setup (at least 3 lights) to an unconventional space (warehouse, outdoor covered area, small room) and solve for space, power, and light spill constraints while maintaining professional results
- Lighting for narrative: shoot a series of portraits of the same subject using different multi-light setups, each designed to tell a different story or convey a different emotion; document your lighting choices and how they support intent
Next up: This stage equips you with the technical mastery and creative problem-solving skills to execute any professional studio look, setting the foundation for the next stage where you'll integrate these advanced techniques with post-production, business practices, and specialized genres (fashion, commercial, editorial) to become a complete professional photographer.

Pushes creative problem-solving with minimal gear in unconventional spaces, forcing you to internalize every principle learned so far and apply it under real-world constraints.
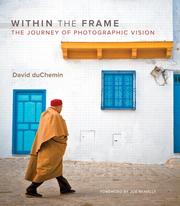
Closes the curriculum by elevating technical mastery into intentional visual storytelling—ensuring your studio lighting serves a human, artistic purpose rather than becoming an end in itself.
Discussion
Keep reading
Paths that share books, cover the same subject, or open a related topic.