Portrait photography: books to light and pose people well
This curriculum takes you from the absolute basics of photography and light all the way to the nuanced art of connecting with subjects and crafting expressive, flattering portraits. Each stage builds on the last — first you learn to see light and understand your camera, then you develop a deliberate approach to posing and composition, and finally you master the advanced craft of lighting design and the human element that separates good portraits from truly memorable ones.
Foundations: Seeing Light & Understanding Your Camera
BeginnerUnderstand how cameras work, how to expose an image correctly, and how to begin seeing light as a portrait photographer — regardless of what camera you own.
▸ Study plan for this stage
Pace: 4–5 weeks, ~25–30 pages/day. Start with "Understanding Exposure" (weeks 1–2, ~200 pages), then move to "Light: Science and Magic" (weeks 3–5, ~250+ pages). Allow 2–3 days between books for reflection and initial exercises.
- The exposure triangle (aperture, shutter speed, ISO) and how each element controls light and image properties
- How metering modes work and why correct exposure is subjective and intentional, not automatic
- The physics of light: how it behaves, reflects, and interacts with surfaces and materials
- The relationship between light quality (hard vs. soft), direction, and shape in creating dimension and mood in portraits
- How to read and interpret light in a scene before picking up your camera
- The technical foundations of your camera's sensor and how it captures light, regardless of camera model
- Practical strategies for controlling and modifying light to serve your creative intent
- How to move beyond exposure 'rules' and make intentional creative choices based on light behavior
- Explain the exposure triangle and describe how changing one element (e.g., increasing aperture) affects the others and the final image
- What is the difference between metering modes, and when would you choose spot metering over evaluative metering for a portrait?
- Describe the difference between hard light and soft light, and explain how each affects the appearance of texture and form in a portrait
- How does light direction (front, side, back) change the visual information revealed in a portrait, and what mood or effect does each create?
- Walk through the process of 'seeing light' in a scene: what do you observe before you raise your camera, and how does that inform your exposure decisions?
- Explain the inverse square law and why it matters when positioning a light source relative to your subject in portrait photography
- Shoot the same portrait subject in three different lighting conditions (window light, overcast, direct sun) and analyze how each affects exposure and mood; write notes on metering choices for each
- Using 'Understanding Exposure,' practice the 'sunny 16 rule' and manual exposure calculations outdoors, then compare your results to your camera's meter to build intuition
- Create a 'light observation journal': spend 15 minutes daily for one week observing light in different environments (indoors, outdoors, different times of day) and sketch or photograph how light behaves on faces and objects
- Photograph a portrait subject with a single light source (or window light) positioned at three different angles (45°, 90°, and backlit); compare the texture, dimension, and mood revealed in each
- Read the metering and exposure chapters in 'Understanding Exposure' and then shoot a high-contrast scene (e.g., subject in shadow with bright background) using spot metering, evaluative metering, and manual exposure; document your settings and results
- Study the diagrams and explanations in 'Light: Science and Magic' on reflection and diffusion, then set up a simple still-life portrait setup using household materials (white poster board, aluminum foil, fabric) to demonstrate hard light, soft light, and reflected light
Next up: This foundation in exposure mechanics and light behavior equips you to move into the next stage—where you'll apply these principles to develop a consistent portrait style, work with different camera equipment, and master the intentional use of light to communicate emotion and character.
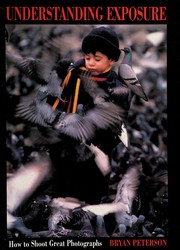
The single best starting point for any beginner — Peterson demystifies aperture, shutter speed, and ISO with clear, visual examples so you can take conscious control of your camera before worrying about anything else.
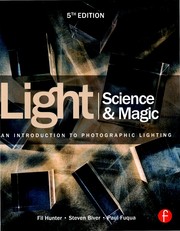
Teaches you to truly see and analyze light — how it reflects, diffuses, and wraps around subjects — giving you the foundational vocabulary every portrait lighting concept will build upon.
Portrait Essentials: Posing, Composition & Flattery
BeginnerLearn the core rules of posing and composing portraits so that every shot is flattering, intentional, and visually balanced — even in simple, available-light situations.
▸ Study plan for this stage
Pace: 8–10 weeks, ~25–30 pages/day (approximately 1–2 weeks per book, with overlap for practice)
- The foundational posing angles: how head tilt, shoulder angle, and body position create flattery and visual interest
- The rule of thirds and leading lines in portrait composition to create balance and draw the viewer's eye to the subject
- How to use negative space and background intentionally to isolate the subject and enhance the portrait's message
- Posing for different body types and face shapes: adapting poses to flatter individual features and proportions
- The relationship between camera angle, lens choice, and perceived flattery (e.g., shooting slightly above eye level, focal length distortion)
- Creating depth and dimension through layering, hand placement, and spatial relationships between subject and background
- How lighting direction and quality interact with pose and composition to enhance or diminish flattery
- Directing and communicating with subjects to achieve natural, intentional poses that feel comfortable and look authentic
- What are the three main posing angles (head, shoulders, body), and how does each contribute to a flattering portrait?
- How do you use the rule of thirds and leading lines to compose a portrait that guides the viewer's attention?
- What camera angles and focal lengths are most flattering for different face shapes, and why?
- How do you adapt a pose for different body types or proportions to ensure the subject looks their best?
- What role does negative space play in portrait composition, and how do you use it intentionally?
- How do you direct a subject to achieve a natural-looking pose that feels comfortable for them?
- Study 10 portraits from each book and annotate them: identify the head angle, shoulder angle, body position, and explain why each choice is flattering
- Shoot 5 portraits of the same subject using different head tilts and shoulder angles; compare the results and note which feels most flattering and why
- Practice framing 10 portraits using the rule of thirds: place the subject's eyes on the intersection points and evaluate the visual balance
- Photograph the same subject at three different camera angles (above eye level, at eye level, below eye level) and analyze how each affects perceived flattery
- Create a posing reference sheet for 3–4 different body types or face shapes, documenting which poses and angles work best for each
- Conduct a 30-minute portrait session with a friend, focusing on clear communication and direction; record your verbal cues and review how the subject responded
- Analyze 5 professional portraits: map out the negative space, background, and how the composition isolates the subject from distractions
Next up: Mastering these foundational posing and composition rules gives you the technical vocabulary and visual instincts to move into the next stage, where you'll learn how to adapt these principles to different portrait contexts—whether shooting couples, families, or in challenging environments—and how to develop your personal style within these frameworks.
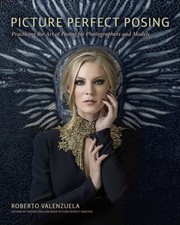
A systematic, rule-based approach to posing that removes guesswork — Valenzuela breaks down body angles, hand placement, and facial positioning so beginners can direct subjects with confidence.

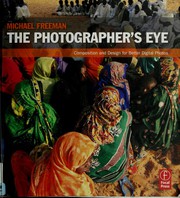
A practical, well-illustrated overview of portrait photography covering composition, lens choice, and simple lighting setups — ideal for consolidating beginner knowledge into a coherent workflow.
Lighting Craft: Natural & Artificial Light for Portraits
IntermediateMaster the deliberate use of both natural and studio light to sculpt faces, create mood, and produce consistently professional-quality portraits in any environment.
▸ Study plan for this stage
Pace: 4–5 weeks, ~25–30 pages/day, with 2–3 dedicated shooting days per week
- Direction of light (front, side, back, overhead, under) and how each sculpts facial features and creates dimension
- Quality of light (hard vs. soft) and how surface texture, distance, and modifiers control it
- The inverse square law and how distance from light source affects exposure and light spread
- Practical use of natural light sources (windows, open shade, golden hour) and their directional/quality characteristics
- Studio light positioning and modifier selection (softboxes, umbrellas, reflectors) to replicate or enhance natural light patterns
- Metering and exposure control when working with directional light to preserve detail in highlights and shadows
- Creating mood and narrative through deliberate light direction and quality choices
- Adapting lighting setups across different face shapes, skin tones, and environmental constraints
- How does the direction of light (front, side, back, overhead) change the perceived shape and dimension of a face, and when would you choose each for different portrait goals?
- What is the practical difference between hard and soft light, and how do distance, surface area, and modifiers control light quality?
- How does the inverse square law affect your lighting decisions when positioning a key light at different distances from your subject?
- How would you replicate a natural window-light setup using studio strobes, and what modifiers would you choose?
- What metering strategies ensure proper exposure when working with strong directional light and deep shadows?
- How do you adapt your lighting approach for different face shapes, skin tones, and environmental conditions while maintaining a cohesive style?
- Shoot a series of 5–6 portraits using only natural window light, positioning your subject at different angles (front, 45°, side, back) relative to the window; analyze how direction changes facial contour and shadow placement
- Create a 'light quality comparison' shoot: photograph the same subject in hard sunlight, open shade, and overcast conditions; document exposure, contrast, and skin texture in each scenario
- Set up a simple studio portrait with one key light and reflector; shoot the same pose with the light at 3 different distances (4 ft, 8 ft, 12 ft) and compare exposure falloff and light spread using the inverse square law
- Replicate a natural side-lit portrait using studio strobes and a softbox; compare the result to your original natural-light reference and adjust modifier size/distance to match
- Shoot a full session (8–10 portraits) using mixed natural and artificial light in a single location; document your metering approach and exposure decisions for each setup
- Create a mood board of 10–15 professional portraits; identify the direction and quality of light in each, then recreate 3 of them with your own subject using available resources
Next up: This stage builds your foundational literacy in light behavior and positioning, preparing you to layer in advanced techniques like multi-light setups, color temperature control, and creative ratios that define professional studio portraiture.

Van Niekerk focuses on the two most critical variables in portrait lighting — where light comes from and how soft or hard it is — with real-world examples that sharpen your on-location decision-making.
The Human Element: Connection, Expression & Style
ExpertDevelop the interpersonal skills, artistic vision, and psychological insight needed to draw out genuine emotion and expression from subjects — transforming technically correct portraits into powerful, personal images.
▸ Study plan for this stage
Pace: 4–5 weeks, ~25–30 pages/day, with 2–3 dedicated practice days per week for on-location shooting and subject interaction
- The psychology of posing: understanding how body language, positioning, and angles communicate emotion and reveal authentic character
- Building rapport and trust with subjects to create psychological safety that unlocks genuine expression
- The role of direction and communication: how clear, empathetic guidance elicits natural, unrehearsed moments rather than stiff poses
- Lighting as an emotional tool: using light quality, direction, and contrast to enhance mood and emphasize the subject's features intentionally
- Composition and framing choices that draw attention to the subject's eyes and emotional center while creating visual hierarchy
- Recognizing and capturing micro-expressions and fleeting moments that reveal authentic personality and vulnerability
- Developing a personal artistic vision and style through intentional creative choices rather than following rigid technical rules
- The relationship between technical mastery and artistic expression: knowing when to break rules to serve the emotional narrative
- How does understanding the psychology of posing help you direct subjects to reveal their authentic selves rather than creating artificial, stiff portraits?
- What specific communication techniques can you use during a session to build trust and psychological safety with a subject?
- How do you use lighting, composition, and framing strategically to emphasize emotion and guide the viewer's eye to the subject's emotional center?
- What is the difference between capturing a technically perfect pose and capturing a moment that reveals genuine expression and personality?
- How can you recognize and anticipate micro-expressions and fleeting moments, and what camera settings or shooting strategies help you catch them?
- How does your personal artistic vision and style influence your creative decisions during a portrait session, and how do you develop this vision intentionally?
- Study the posing sequences and principles in Picture Perfect Practice; photograph 3–5 subjects using Valenzuela's recommended poses and angles, then analyze how each pose communicates different emotions and character traits
- Conduct a 'rapport-building session' with a volunteer subject: spend 15–20 minutes in conversation before shooting, document how your communication and empathy affect the subject's comfort level and expression quality in the final images
- Create a lighting study: photograph the same subject under 5 different lighting setups (hard light, soft light, side light, backlighting, etc.) and analyze how each lighting choice affects mood, emotion, and the perceived personality in the portrait
- Practice direction and communication: shoot a series of portraits where you give increasingly specific, empathetic verbal guidance (e.g., 'think of a moment that made you laugh' vs. 'smile'), and compare the authenticity and emotional resonance of the resulting expressions
- Analyze 10–15 portraits from Picture Perfect Practice or other master photographers; identify the posing choices, lighting decisions, and compositional elements that make each image emotionally compelling, then recreate similar setups with your own subjects
- Shoot a 'micro-expression challenge': photograph a subject in rapid succession during natural conversation, then review the frames to identify fleeting moments of genuine emotion; practice anticipating and capturing these moments in subsequent sessions
Next up: Mastering the interpersonal and psychological dimensions of portrait photography—understanding how to draw out authentic emotion and build a personal artistic vision—prepares you to synthesize these skills with advanced technical refinement, specialized genres (fashion, commercial, editorial), and business practices that elevate your work into a professional, marketable practice.

Valenzuela's follow-up goes beyond posing rules into real-world execution — how to read locations, adapt under pressure, and build a repeatable creative process during live portrait sessions.
Discussion
Keep reading
Paths that share books, cover the same subject, or open a related topic.