The Best Books to Master Adobe Photoshop, in Order
This curriculum takes you from absolute Photoshop beginner to a confident, professional-level user across four carefully sequenced stages. Each stage builds on the last—first establishing core vocabulary and interface fluency, then deepening skills in retouching and color, then tackling advanced compositing and creative work, and finally refining a professional workflow for both designers and photographers.
Foundations: Interface, Tools & Core Concepts
BeginnerGet comfortable with the Photoshop interface, understand layers, masks, and selections, and complete basic photo editing tasks with confidence.
▸ Study plan for this stage
Pace: 4–5 weeks, ~40–50 pages/day (mix of reading and hands-on practice)
- Photoshop workspace layout: panels, toolbars, and customization for efficient workflow
- Layers as the fundamental building block: layer types, stacking order, and layer management
- Selections and selection tools: marquee, lasso, magic wand, and refining selection edges
- Masks and masking techniques: layer masks, clipping masks, and non-destructive editing
- Essential tools for photo editing: crop, healing brush, clone stamp, and adjustment layers
- Color and tonal adjustments: curves, levels, hue/saturation, and working with adjustment layers
- Basic retouching workflows: removing blemishes, straightening horizons, and exposure correction
- How do layers work in Photoshop, and why is layer organization critical for non-destructive editing?
- What are the differences between marquee, lasso, and magic wand selections, and when would you use each?
- How do layer masks differ from clipping masks, and what are the advantages of using masks instead of erasing?
- Walk through the steps to perform basic photo retouching: removing a blemish, adjusting exposure, and straightening a crooked horizon.
- What is the purpose of adjustment layers, and how do they enable non-destructive editing workflows?
- How would you combine selections, masks, and adjustment layers to selectively brighten only the sky in a landscape photo?
- Complete the introductory lessons in 'Adobe Photoshop Classroom in a Book' (Lessons 1–3) to familiarize yourself with the interface, workspace setup, and basic navigation.
- Create a new document and practice using all three selection tools (marquee, lasso, magic wand) on a sample image; refine edges using feathering and the Select and Mask workspace.
- Open a portrait photo and use the healing brush and clone stamp tools to remove blemishes, spots, or unwanted objects; practice on at least 3 different images.
- Create a multi-layer composition: import 2–3 images as layers, use layer masks to blend them together, and adjust opacity to create a seamless composite.
- Apply adjustment layers (curves, levels, hue/saturation) to a photo and use layer masks to apply adjustments selectively to different parts of the image.
- Complete a full retouching workflow: crop and straighten a landscape photo, adjust exposure and color using adjustment layers, and remove distracting elements using cloning tools.
Next up: Mastering these foundational skills—layers, selections, masks, and basic retouching—provides the essential toolkit needed to advance into more sophisticated techniques like advanced compositing, smart objects, and non-destructive workflows in the next stage.

The official Adobe-authored tutorial series is the gold-standard starting point—structured lessons walk you through every core tool and panel in a logical, hands-on order. Reading this first gives you the shared vocabulary every other book assumes you already have.

After the structured classroom approach, this book reinforces fundamentals with a strong emphasis on photographic thinking—exposure, tone, and color—bridging the gap between 'using software' and 'editing images with intention.'
Going Deeper: Retouching, Color & Tone
IntermediateMaster non-destructive retouching workflows, professional color correction, and tonal adjustments used by working photographers and retouchers.
▸ Study plan for this stage
Pace: 6–8 weeks, ~40–50 pages/day with daily practice sessions
- Non-destructive retouching workflows using adjustment layers, layer masks, and smart objects to preserve original image data
- Professional color correction techniques including white balance, color grading, HSL adjustments, and Curves for precise tonal control
- Frequency separation and advanced retouching methods for skin, texture, and detail work while maintaining natural appearance
- Tonal adjustments using Levels, Curves, and Shadows/Highlights to recover detail and create visual impact
- Selective editing with masks, selections, and targeted adjustments to isolate corrections to specific image areas
- Portrait retouching workflows including blemish removal, skin smoothing, eye enhancement, and facial feature refinement
- Layer organization, naming conventions, and smart object management for professional, reproducible workflows
- Output optimization and sharpening strategies appropriate for different media (print, web, screen display)
- How do you set up a non-destructive retouching workflow using adjustment layers and layer masks, and why is this preferable to direct pixel editing?
- What are the key steps in professional color correction, and how do you use Curves and HSL adjustments to achieve accurate color grading?
- Explain the frequency separation technique: what problem does it solve, and how do you implement it in Photoshop?
- How do you selectively apply retouching to specific areas of a portrait without affecting the entire image, and what tools enable this precision?
- What is the difference between destructive and non-destructive retouching, and what are the practical advantages of each approach in a professional workflow?
- How do you recover shadow and highlight detail using Curves, Levels, and Shadows/Highlights adjustments?
- Set up a non-destructive retouching template with organized layers, adjustment layers, and smart objects; apply it to 3 different portrait images
- Perform a complete color correction workflow on a flat or color-cast image: correct white balance, adjust Curves, apply HSL refinements, and compare before/after
- Practice frequency separation on a portrait: separate high and low frequencies, retouch skin texture on the high-frequency layer, and smooth on the low-frequency layer
- Retouch a portrait using selective masks: remove blemishes, enhance eyes, adjust skin tone in specific zones, and refine facial features without affecting the background
- Create a tonal adjustment workflow: use Levels and Curves to recover blown highlights and crushed shadows, then apply Shadows/Highlights adjustments to a challenging exposure
- Retouch 5 different portraits applying the complete workflow from the books: color correction → frequency separation → selective retouching → output sharpening
Next up: Mastering non-destructive retouching and color correction establishes the technical foundation for advanced compositing, special effects, and creative image manipulation covered in the next stage.

Kelby's straight-to-the-point, recipe-style approach is perfect at this stage—you now know the tools, and this book shows you exactly how professionals combine them for real-world photo editing and retouching results.

A deep dive into skin retouching, frequency separation, dodge-and-burn, and portrait-specific workflows—essential skills for anyone working with people, and a natural next step after mastering general photo editing.
Advanced: Compositing, Masking & Creative Techniques
ExpertBuild seamless photo composites, perform complex masking of hair and fine detail, and develop a creative visual language for high-end design and photo illustration.
▸ Study plan for this stage
Pace: 8–10 weeks, ~40–50 pages/day (mix of reading and hands-on practice). Weeks 1–5 focus on Photoshop Masking & Compositing; weeks 6–10 layer in The Hidden Power Of Blend Modes with concurrent composite projects.
- Layer masks, vector masks, and clipping masks as foundational tools for non-destructive editing and precision control
- Hair and fine-detail masking techniques including refine edge, select and mask workspace, and advanced brush strategies
- Seamless blending of multiple image layers through alignment, color correction, and edge refinement
- Blend modes as a core compositing tool—how each mode (multiply, screen, overlay, etc.) affects luminosity and color interaction
- Layer mask refinement workflows: feathering, density adjustment, and edge detection for photorealistic results
- Creative compositing theory: building depth, managing lighting consistency, and establishing visual hierarchy across composite elements
- Advanced selection techniques: color range, luminosity masks, and channel-based selections for complex subjects
- Blend mode stacking and layer organization strategies for complex multi-layer composites
- What are the key differences between layer masks, vector masks, and clipping masks, and when should you use each in a composite?
- Describe a step-by-step workflow for isolating hair or fine fur from a background using the select and mask workspace.
- How do you ensure seamless color and lighting consistency when blending multiple photographs into a single composite?
- Explain how blend modes alter pixel interaction and which modes are most useful for specific compositing scenarios (e.g., adding shadows, highlights, or texture).
- What techniques from Eismann's work allow you to refine mask edges for photorealistic results, and how do you avoid visible halos or artifacts?
- How can you use luminosity masks and channel-based selections to create complex masks without relying solely on color-based tools?
- Describe how to organize and stack blend modes across multiple layers to build a cohesive, high-end composite with proper depth and visual flow.
- Complete a three-layer composite: extract a subject from one image, place it into a new background, and refine the mask edge using feathering and density adjustments until the blend is seamless.
- Practice isolating hair from a complex background using the select and mask workspace; experiment with refine edge options and output settings to minimize halos.
- Create a luminosity mask from a channel and use it to selectively adjust shadows or highlights on a composite layer without affecting other tonal ranges.
- Build a multi-element composite (4+ layers) where you intentionally use different blend modes (multiply, screen, overlay, soft light) on each layer to achieve a specific mood or lighting effect.
- Extract a subject with fine details (fur, fabric texture, or foliage) and composite it into a new scene; document your masking choices and refinement steps.
- Experiment with blend mode combinations: create a single composite using only blend modes and layer masks (no additional adjustment layers) to solve a specific color or lighting problem.
- Recreate a professional photo illustration or composite from reference images, applying all masking, blending, and refinement techniques learned; critique your own work against the reference for seamlessness and visual impact.
Next up: Mastery of masking, blending, and seamless compositing establishes the technical foundation for advanced retouching, color grading, and specialized workflows—preparing you to tackle professional-level image manipulation and creative visual storytelling in subsequent stages.
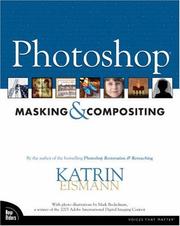
Widely considered the definitive book on compositing, Eismann covers every masking technique—channels, luminosity masks, hair extraction—in exhaustive, practical detail. This is the book professionals return to repeatedly.
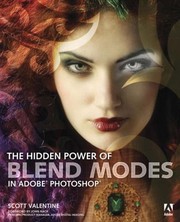
Blend modes are the secret engine behind advanced compositing and color work; this focused book demystifies every mode with real examples, unlocking creative possibilities that most intermediate users never discover.
Professional Mastery: Workflow, Design & Creative Vision
ExpertIntegrate everything into a fast, non-destructive professional workflow and develop the creative and technical judgment to tackle any project independently.
▸ Study plan for this stage
Pace: 4–5 weeks, ~40–50 pages/day with daily hands-on practice
- Non-destructive editing techniques (smart objects, adjustment layers, layer masks, and blend modes) as the foundation of professional workflows
- Glyn Dewis's systematic approach to organizing layers, naming conventions, and file structure for efficiency and collaboration
- Advanced selection and masking methods (refine edge, select and mask workspace) for precise control over complex edits
- Professional retouching workflows for portraits and commercial work, including frequency separation and dodge/burn techniques
- Color grading and tonal adjustments using curves, levels, and HSL for cohesive visual storytelling
- Compositing and blending multiple images seamlessly with proper layer management and masking
- Building repeatable, scalable processes that reduce repetitive work and increase creative output
- Developing critical eye for quality control, knowing when edits enhance versus distract from the subject
- How do you structure a Photoshop document with layers and groups to ensure it remains editable and shareable months later?
- What is the difference between destructive and non-destructive editing, and why does Glyn Dewis emphasize non-destructive techniques throughout his workflow?
- Walk through the steps of a professional portrait retouching workflow from raw import to final export, including which tools and techniques you'd use at each stage.
- How would you use adjustment layers and layer masks together to apply color grading that affects only specific parts of an image?
- Describe a compositing project: how would you combine multiple images non-destructively, and what masking techniques would ensure seamless blending?
- What naming and organizational conventions would you apply to a complex multi-layer document to make it easy for another designer to understand and modify your work?
- Complete at least 3 full portrait retouching projects from raw file to final export, applying frequency separation, dodge/burn, and skin tone correction using only non-destructive techniques
- Build a reusable Photoshop template for a recurring project type (e.g., product photography, social media graphics, or client portraits) with organized layer groups, smart objects, and adjustment layers
- Practice the select and mask workspace on 5 complex images with challenging edges (hair, fur, foliage) and export clean masks for compositing
- Create a before/after color grading comparison: take a flat image and apply a cohesive color grade using curves and HSL adjustments, documenting your layer structure
- Composite 3 multi-image projects (e.g., background replacement, group portraits, product placement) using layer masks and blend modes, keeping all layers editable
- Audit one of your past Photoshop projects: reorganize it with proper naming conventions, convert destructive edits to non-destructive equivalents, and document the workflow for a colleague
- Recreate 2–3 techniques directly from 'The Photoshop Workbook' exercises, then apply them to your own images to internalize the approach
- Record a 5–10 minute screen capture of your own workflow on a real project, then review it critically for inefficiencies and opportunities to streamline
Next up: This stage equips you with the professional systems, non-destructive mindset, and technical precision needed to move into specialized domains (advanced color science, 3D integration, or automation) or to mentor others in Photoshop best practices.
A comprehensive, reference-grade compendium that rewards readers who already have strong practical skills—use it to fill any remaining gaps, understand the 'why' behind features, and build a complete mental model of the entire application.

Dewis walks through complete, real-world creative projects from concept to final image, tying together retouching, compositing, and color grading into cohesive professional workflows—the ideal capstone for a designer or photographer ready to work at the highest level.
Discussion
Keep reading
Paths that share books, cover the same subject, or open a related topic.