The Best Wooden Boat Building Books, in Order
This curriculum takes an intermediate learner from a solid grounding in wooden boatbuilding theory and tools through the full arc of small-craft construction — lofting lines, choosing and working timber, planking a hull, and finishing with tight joinery. Each stage builds directly on the last: you must understand lines and wood before you can plank, and you must plank before fine joinery details matter. Roughly 9 books across 4 stages give you a focused, practical path to building a rowboat, canoe, or similar small craft from scratch.
Foundations & Language of the Craft
IntermediateInternalize the vocabulary, tools, and design logic of wooden boatbuilding so that every subsequent technical book makes immediate sense.
▸ Study plan for this stage
Pace: 6–8 weeks, ~25–35 pages/day (Chapelle first: 3–4 weeks; Gougeon second: 2–3 weeks; overlap review: 1 week)
- Hull geometry and lines: understanding sheer, camber, deadrise, and how lines plans translate to 3D form (Chapelle's core framework)
- Wood selection and properties: grain direction, strength along vs. across grain, moisture movement, and why specific woods suit specific structural roles
- Traditional joinery and fastening: lap joints, scarfs, mortise-and-tenon, and the logic of why wooden boats use these instead of nails alone
- Framing systems: the distinction between carvel planking, clinker (lapstrake), and frame-first vs. plank-first construction philosophies
- Modern epoxy and composite techniques: how the Gougeon method departs from traditional practice while respecting wood's properties
- Structural load paths: how forces flow through a hull from water pressure through frames, planking, and stringers to the keel
- Lofting fundamentals: scaling from lines plan to full-size molds and battens (Chapelle's detailed treatment)
- Design intent and trade-offs: why boatbuilders make specific choices about beam, draft, displacement, and construction method
- Explain the difference between a lines plan's sheer, camber, and deadrise, and describe what each tells you about how a hull will behave in water.
- Why do wooden boat builders use scarfs and lap joints instead of simply butting pieces end-to-end? What structural and practical advantages do these joints provide?
- Compare carvel and clinker planking: what are the material, tool, and performance trade-offs between them, and when would you choose each?
- Describe the load path from water pressure on the hull to the keel. What role do frames, stringers, planking, and fastenings each play?
- What is lofting, and why is it necessary even when you have a lines plan? How does Chapelle's approach differ from modern CAD?
- How does the Gougeon epoxy-and-wood-core method change the traditional rules about wood movement, joint design, and fastening? What problems does it solve, and what new constraints does it introduce?
- Hand-draw or trace a simple lines plan (from Chapelle's examples). Identify the sheer line, waterlines, buttock lines, and diagonals. Sketch what the hull looks like in profile and plan view.
- Visit a boatyard or maritime museum and examine actual wooden boats under construction or restoration. Identify the planking method (carvel vs. clinker), frame spacing, fastening patterns, and wood species. Sketch or photograph key joints.
- Build a scale model hull using Chapelle's lofting method: create a simple lines plan, loft it to 1:20 scale on plywood, cut molds, and build up planking (even if just 3–4 strakes) to feel how the geometry works in 3D.
- Create a material selection chart: list 8–10 wood species mentioned in both books, and for each note grain direction, strength properties, rot resistance, and typical uses (keel, frames, planking, trim). Cross-reference Chapelle's and Gougeon's recommendations.
- Disassemble or carefully examine a wooden boat joint (scarf, lap, mortise-and-tenon) in person or from high-resolution photos. Measure angles, overlap ratios, and fastening patterns. Sketch it and explain why it was designed that way.
- Compare two hull designs from Chapelle's examples: one carvel-planked, one clinker. For each, estimate the labor, material cost, and likely performance differences. Write a one-page brief recommending which method for a specific use case (e.g., fishing boat, cruiser, dinghy).
Next up: This stage equips you with the shared vocabulary, structural logic, and design reasoning that all subsequent technical books assume—so that when you move into specialized topics (advanced lofting, specific construction methods, or performance optimization), you'll immediately grasp *why* each technique matters and how it fits into the whole.
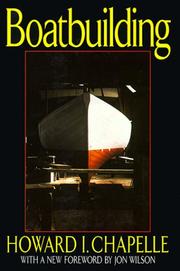
The canonical reference that defines the language of the craft — lines, offsets, scantlings, and construction methods. Reading this first gives you the shared vocabulary every other author assumes you already have.

Bridges traditional wood knowledge with modern epoxy/wood-composite methods widely used in small-craft building today; reading it second lets you evaluate which techniques suit your project before committing to a method.
Lofting — Reading and Drawing the Hull
IntermediateBe able to take lines from a table of offsets, lay them full-size on a lofting floor, fair the curves, and derive every mold, bevel, and pattern needed to build the hull.
▸ Study plan for this stage
Pace: 8–10 weeks, ~20–25 pages/day, with 2–3 days per week dedicated to hands-on lofting practice
- Reading and interpreting a table of offsets to extract hull dimensions at specific stations and waterlines
- Setting up and laying out a full-size lofting floor with proper grid systems and reference lines
- Fairing curves (sheer, buttock, waterline, and diagonal lines) to create a smooth, mathematically consistent hull shape
- Deriving molds (body plan cross-sections) from the lofted lines and understanding their role in hull construction
- Calculating and applying bevels to frames and planking to match the curved hull surface
- Creating patterns and templates from the lofted drawing for actual boat construction
- Understanding the relationship between the lines plan, body plan, and the three-dimensional hull form
- Applying Vaitses' systematic lofting methods to traditional designs like those in The Dory Book
- How do you extract and plot offsets from a table to establish the basic hull shape on a lofting floor?
- What is the purpose of fairing curves, and what visual and mathematical methods does Vaitses recommend to ensure fairness?
- How do you derive a mold (body plan section) from the lofted lines, and why is accuracy critical for hull construction?
- What is a bevel, how is it measured or calculated from the lofted drawing, and how does it guide frame and plank fitting?
- How do the sheer, buttock, waterline, and diagonal lines work together to define a three-dimensional hull form?
- What specific steps would you follow to loft a traditional dory design from The Dory Book using Vaitses' methods?
- Set up a full-size lofting floor (or scaled mockup) with grid lines, reference points, and baseline; practice laying out a simple hull section using a provided table of offsets
- Plot and fair the sheer line, buttock lines, and waterlines for a small hull design; identify and correct unfair curves using batten and eye
- Loft a complete body plan from a table of offsets; derive three to five molds at different stations and check their fairness and consistency
- Create a bevel board or bevel gauge from a lofted drawing; measure bevels at the stem, keel, and several frame stations for a dory or similar design
- Develop full-size patterns or templates for the stem, keel, and at least two frame molds using paper or thin plywood; compare them against the lofted drawing
- Work through a complete lofting exercise from The Dory Book: select one dory design, loft it full-size (or at a consistent scale), fair all curves, derive molds and bevels, and create a set of construction patterns
- Practice transferring lofted lines to a half-model or scale model to verify that the three-dimensional form matches the two-dimensional drawing
Next up: This stage equips you with the ability to translate a designer's lines into a full-size, fair hull shape and the molds and patterns needed for construction, preparing you to move into the next stage of actually building the hull frame and planking.

The clearest step-by-step lofting manual in print, written specifically for the amateur builder; it should be read before any planking book because accurate molds depend entirely on accurate lofting.

Gardner walks through the lines and construction of one of the simplest hard-chine hulls ever built, making lofting concepts concrete with a real, buildable design — ideal for cementing what Vaitses taught.
Planking, Framing & Hull Construction
IntermediateExecute the full structural sequence of a wooden hull — steam-bending frames, spiling and hanging planks, caulking seams — on a lapstrake, carvel, or strip-built small craft.
▸ Study plan for this stage
Pace: 8–10 weeks, ~25–30 pages/day, with 2–3 days per week dedicated to hands-on practice and mock-ups
- Steam-bending and frame preparation: selecting wood, moisture control, bending techniques, and securing frames to the keel and sheer
- Spiling and plank-hanging methods: reading hull shape, transferring measurements, and achieving fair planking in lapstrake, carvel, and strip-built construction
- Planking sequences and fairing: managing plank widths, maintaining proper overlap (lapstrake) or edge-joining (carvel), and using battens and spiling tools
- Caulking seams and hull finishing: cotton, oakum, and caulking irons; sealing carvel seams; and achieving watertight joints in different construction methods
- Wood selection and grain orientation: choosing appropriate timber for frames, planks, and structural components to maximize strength and durability
- Lofting and full-scale layout: translating design lines to the building frame, establishing reference points, and maintaining accuracy throughout construction
- Strip-building alternatives: advantages of stitch-and-glue and strip-planking over traditional frame-and-plank methods, and when each technique is appropriate
- Quality control and fair hull: recognizing and correcting planking defects, ensuring consistent gaps, and achieving smooth transitions between planks
- Describe the complete sequence for steam-bending frames: wood selection, moisture preparation, bending technique, and securing to the keel and sheer. What are the critical failure points?
- What is spiling, and how do you use it to transfer hull shape from the building frame to individual planks in both lapstrake and carvel construction?
- Explain the differences between lapstrake, carvel, and strip-built planking methods. When would you choose each, and what are the structural and aesthetic trade-offs?
- Walk through the caulking process for a carvel-built hull: tools, materials, technique, and how to recognize when a seam is properly caulked and sealed.
- How do you maintain a fair hull while hanging planks? What visual and tactile cues tell you when planking is going off-fair, and how do you correct it?
- Describe how to loft a small craft design and establish the building frame, including the role of reference lines, buttocks, and waterlines in ensuring accuracy.
- Build a scale model (1:10 or 1:8) using McIntosh's methods: steam-bend small frames, spile and hang planks, and caulk seams to understand each step in miniature before full-scale work.
- Practice spiling on a curved surface: create a template using the spiling technique described in McIntosh and Moores, then transfer it to actual wood and fit it to a test frame.
- Bend and secure at least three practice frames using steam or soaking, varying wood species and moisture levels to understand how each responds and where failures occur.
- Plank a small test hull (2–3 feet) using one of the three methods (lapstrake, carvel, or strip-built), focusing on fair lines, consistent gaps, and proper overlap or edge-joining.
- Caulk a section of carvel planking (at least 3–4 seams) using cotton and oakum, practicing the iron technique and learning to judge when a seam is properly set and sealed.
- Loft a simple small-craft design (dory, skiff, or canoe) full-scale on a building frame, establishing reference lines and buttocks, then build the strongback and building frame to specification.
Next up: This stage equips you with the core structural skills—framing, planking, and sealing—that form the foundation for the next stage, which will likely focus on finishing details, interior joinery, hardware installation, and launching a completed hull.
A thorough, practical guide to carvel and lapstrake construction that bridges lofting directly into framing and planking; its logical chapter order mirrors the actual build sequence.
Focuses the strip-planking method on canoes and small craft — the most accessible planking technique for a first build — and should follow McIntosh so you understand why strip-planking simplifies traditional spiling.
The definitive strip-canoe construction manual, richly illustrated; reading it after Hazen deepens your understanding of station molds, stripping sequences, and glassing — and results in a finished, paddleable boat.
Joinery, Finish & the Complete Builder
ExpertExecute refined interior joinery, hardware fitting, and finish work, and develop the judgment to design or adapt small-craft plans independently.
▸ Study plan for this stage
Pace: 4–5 weeks, ~25–30 pages/day, with 2–3 days per week dedicated to hands-on joinery and finishing practice
- Interior joinery techniques specific to small craft (lap joints, mortise-and-tenon, scarfs, and their marine applications)
- Hardware selection, fitting, and installation for functional and aesthetic integrity in small boats
- Surface preparation, wood finishing systems (varnish, paint, epoxy), and their durability in marine environments
- Design principles for small-craft interiors: proportions, ergonomics, and structural integration
- Adapting and modifying existing small-boat plans to suit individual needs and constraints
- The relationship between interior joinery quality and overall boat performance and longevity
- Tool mastery and precision work required for advanced joinery at small scales
- Judgment and decision-making in selecting materials, joinery methods, and finishes for specific applications
- What are the key differences between joinery techniques suitable for small boats versus larger vessels, and why does scale matter?
- How do you select and fit hardware (cleats, blocks, fittings) to ensure both functional reliability and aesthetic harmony in a small-craft interior?
- What are the advantages and limitations of different finish systems (varnish, paint, epoxy) for small-boat interiors, and how do environmental conditions affect your choice?
- How would you adapt an existing small-boat plan to accommodate a different interior layout or accommodate a specific use case?
- What is the relationship between joinery quality and the long-term durability and resale value of a small boat?
- What decision-making framework should you use when choosing between traditional joinery methods and modern alternatives (e.g., epoxy and fiberglass reinforcement)?
- Build a sample interior component (cabin sole, locker frame, or berth support) using at least two different joinery techniques from Rössel's methods, then evaluate their strength and finish-ability
- Select hardware for a specific small-boat project (from the book or your own design), justify each choice in writing, and practice fitting and installing at least three pieces
- Prepare and finish a wood sample using three different finish systems (varnish, paint, epoxy), then expose them to moisture and UV to compare durability over 2–3 weeks
- Take an existing small-boat plan and sketch a modified interior layout with detailed joinery drawings; document your design decisions and material choices
- Create a full-scale mock-up or prototype of a challenging interior joint (e.g., a cabin sole joint or a through-beam connection) and refine it based on fit and finish quality
- Document a complete interior finishing sequence for a small-boat project: joinery, hardware fitting, surface prep, and final finish, photographing each stage
Next up: Mastery of refined joinery, hardware integration, and finishing techniques—combined with the judgment to adapt plans independently—positions you to tackle custom design work, larger or more complex vessels, and to mentor others in small-craft construction.
Rössel synthesizes lofting, planking, and joinery into complete small-craft projects with a master craftsman's eye for detail — the ideal capstone that ties every earlier stage together into a coherent builder's mindset.
Discussion
Keep reading
Paths that share books, cover the same subject, or open a related topic.