Best books on restoring old and antique tools
This curriculum takes an intermediate woodworker or tool enthusiast from confident rust removal and basic restoration through advanced sharpening geometry, handle-making, and the nuanced craft of reviving vintage hand tools. Each stage builds on the last — starting with the physical science of metal and rust, moving into hands-on restoration workflows, then mastering the precision skills (sharpening, fitting) that separate a rescued tool from a truly working one.
Metal, Rust, and the Restorer's Mindset
IntermediateUnderstand why rust forms, how different metals behave, and develop a systematic approach to assessing and cleaning old tools before any restoration work begins.
▸ Study plan for this stage
Pace: 4–5 weeks, ~25–30 pages/day, with 2–3 days per week dedicated to hands-on assessment practice
- The electrochemical process of rust formation and how moisture, oxygen, and metal composition accelerate or inhibit it
- How different metals (iron, steel, cast iron, brass, copper) respond differently to oxidation and corrosion
- The distinction between surface rust, deep pitting, and structural damage—and what each tells you about a tool's history and salvageability
- Systematic assessment protocols: visual inspection, tactile evaluation, and simple tests to determine rust depth and metal integrity before cleaning
- The restorer's mindset: balancing preservation of patina and original character with functional restoration
- How tool condition assessment informs your choice of cleaning methods and restoration strategy
- Safety considerations when working with corroded metal and rust removal agents
- Documentation and record-keeping as part of the restoration workflow
- What are the three essential conditions for rust formation, and how does removing or limiting any one of them slow or stop the process?
- How would you distinguish between surface rust on a tool and pitting corrosion, and why does this distinction matter for your restoration approach?
- Describe the differences in how cast iron, mild steel, and brass oxidize, and explain why a restorer must treat each metal type differently
- What is the restorer's mindset, and how does it influence your decision to clean versus preserve the patina on an old tool?
- Walk through a systematic assessment of a corroded hand tool: what would you look for visually, what would you feel for, and what simple tests would you perform?
- Why is documentation important during the assessment phase, and what key information should you record before beginning any cleaning work?
- Collect 3–5 old, corroded hand tools (or images of them) and perform a detailed written assessment of each using a structured checklist: rust type, depth, affected areas, metal type, and salvageability rating
- Create a visual reference guide showing the differences between surface rust, pitting, and structural damage using photographs or sketches of real tools
- Conduct a simple electrochemical demonstration (e.g., salt water and nails) to observe rust formation in real time, then document your observations and relate them to Sims's explanations
- Interview an experienced tool restorer or blacksmith about their assessment process, then compare their approach to Sims's methodology and write a reflection on the differences
- Practice taking detailed before photographs and written notes on a corroded tool, then research and document the metal type, likely age, and original function
- Build a personal decision tree or flowchart for assessing tool condition that incorporates metal type, rust severity, and the restorer's mindset to determine your cleaning strategy
Next up: This stage equips you with the knowledge to diagnose what you're working with and why it corroded, setting the foundation for the next stage, where you'll learn the specific techniques and tools to safely remove rust and begin the actual restoration process.
Grounds the reader in how iron and steel are made, worked, and degraded — essential vocabulary for understanding what you are actually restoring before you pick up a wire brush.
Core Restoration: Cleaning, De-rusting, and Reviving
IntermediateExecute a full rust-removal and cleaning workflow on planes, saws, chisels, and other common hand tools using mechanical, chemical, and electrolytic methods.
▸ Study plan for this stage
Pace: 4–5 weeks, ~25–30 pages/day, with 2–3 days per week dedicated to hands-on practice
- Identifying rust types and damage severity on plane bodies and soles
- Mechanical de-rusting techniques: scraping, sanding, and wire-brushing without damaging tool geometry
- Chemical rust removal using vinegar, evaporust, and other safe solvents appropriate for cast iron and steel
- Restoring plane sole flatness and sole-to-body alignment after rust removal
- Cleaning and reviving chipbreakers, irons, and adjustment mechanisms
- Preventive maintenance and rust prevention strategies for long-term tool preservation
- Understanding how tool condition directly affects planing performance and workpiece quality
- What are the main types of rust found on vintage planes, and how do you assess whether a tool is salvageable?
- Describe the step-by-step process for mechanically de-rusting a plane sole without compromising its flatness.
- When would you choose chemical de-rusting over mechanical methods, and what are the safety considerations?
- How do you test and restore sole flatness after rust removal, and why is this critical to plane function?
- What is the proper procedure for cleaning and reviving a chipbreaker and iron assembly?
- How does rust and corrosion on a plane's adjustment mechanism affect usability, and how do you restore it?
- Acquire a moderately rusted vintage hand plane (or practice on a donated tool) and document its condition with photos before beginning restoration
- Perform mechanical de-rusting on the plane sole using scrapers and abrasives, taking care to preserve geometry and recording which tools/grits worked best
- Use chemical de-rusting (vinegar soak or commercial rust remover) on the chipbreaker and iron, following Hack's guidance on soaking times and safety
- Test sole flatness using a straightedge or precision ruler at multiple points before and after rust removal, and note any high spots or hollows
- Disassemble, clean, and reassemble the plane's adjustment mechanism (tote, knob, lever cap), documenting any stuck or corroded parts and how you freed them
- Apply a protective finish (oil, wax, or lacquer) to the restored plane and document the finish choice and application method
- Restore and sharpen the iron and chipbreaker, then test the plane on scrap wood to verify that cleaning and de-rusting restored full functionality
Next up: Understanding how to execute a complete restoration workflow on planes—from diagnosis through de-rusting, flatness verification, and reassembly—prepares you to apply these same mechanical, chemical, and preventive principles to other hand tools (saws, chisels, and specialty planes) in the next stage.

Covers disassembly, cleaning, lapping, and tuning of bench planes in depth; read after Walter so you can identify the plane before you restore it.
Sharpening: The Heart of a Working Tool
IntermediateAchieve a truly sharp edge on plane irons, chisels, saws, and carving tools using stones, strops, and files — understanding geometry, steel type, and abrasive progression.
▸ Study plan for this stage
Pace: 4–5 weeks, ~25–30 pages/day (approximately 600–700 pages total across both books)
- Edge geometry and bevel angles: why different tools require different angles (plane irons ~25–30°, chisels ~25°, saws ~15–20°, carving tools ~20–35°) and how to achieve them consistently
- Steel metallurgy fundamentals: hardness, brittleness, and how different steel types respond to sharpening and hold edges
- Abrasive progression and stone grits: understanding the sequence from coarse to fine stones, why each grit removes previous scratches, and how to avoid skipping grits
- Stropping and honing compound: the difference between sharpening (removing metal) and stropping (realigning the edge), and when each is appropriate
- Sharpening geometry for specific tools: plane irons, bench chisels, saws (including rip vs. cross-cut), and carving tools—each with unique requirements
- Flattening and maintaining sharpening stones: why a flat stone is essential, how to flatten waterstones and oilstones, and recognizing when stones need replacement
- Practical technique and muscle memory: holding consistent angles, applying proper pressure, and developing the tactile feedback to know when an edge is truly sharp
- What bevel angle should a plane iron have, and why does this differ from a bench chisel or carving tool?
- Explain the difference between sharpening and stropping. When would you use each, and what does stropping actually accomplish?
- Why is abrasive progression important, and what happens if you skip grits (e.g., jumping from 1000 to 8000 grit)?
- How do you flatten a whetstone, and why is a flat stone essential for achieving a sharp edge?
- Describe the steps to sharpen a saw blade, including how the geometry differs from plane irons or chisels.
- What are the key differences in sharpening technique for carving tools compared to bench chisels, and why do these differences matter?
- How do you recognize when an edge is truly sharp, and what are the practical tests (e.g., the paper test, thumbnail test)?
- What role does steel type and hardness play in sharpening, and how might you adjust your technique for high-carbon vs. stainless steel?
- Sharpen a plane iron to a consistent 28° bevel using Lee's method; test sharpness with the paper test and thumbnail test; repeat until you can achieve a hair-popping edge
- Flatten a whetstone (or oilstone) using a flattening stone or sandpaper on glass; measure flatness with a straightedge; practice the flattening motion until you develop consistent technique
- Sharpen three different chisels (1/4", 1/2", and 1") at the correct 25° angle; compare edge quality across sizes; identify any technique variations needed for different widths
- Sharpen a handsaw (rip saw) following Kingshott's geometry; practice the correct stroke and angle; compare the cut quality before and after sharpening
- Strop a plane iron on leather with honing compound; perform 10 strokes each direction; test edge sharpness before and after stropping to understand stropping's effect
- Sharpen a set of carving tools (gouge, V-tool, knife) at their appropriate angles; practice maintaining angle consistency on curved edges; test on actual carving wood
- Create a sharpening station with organized stones (coarse, medium, fine); practice the full progression on a dull chisel from coarse to fine grit without skipping; document the visual change in the edge at each stage
- Sharpen a tool made from different steel (e.g., stainless vs. high-carbon); compare how each steel responds to the same sharpening sequence; note differences in edge feel and durability
Next up: This stage equips you with the foundational skill of creating and maintaining razor-sharp edges—a prerequisite for all restoration work—so that the next stage can focus on applying these sharp tools effectively to actual restoration tasks like flattening sole plates, tuning joinery, and removing rust without damaging underlying metal.
The most thorough single-volume treatment of sharpening theory and practice; covers every tool type and abrasive medium, making it the essential reference to read first in this stage.
Complements Lee with a British hand-tool tradition perspective and strong coverage of saw filing and specialist edge tools often encountered in vintage tool collections.
Advanced: Vintage Tool Collecting and Deep Reviving
ExpertAssess, authenticate, and fully revive rare or complex vintage hand tools — saws, braces, combination planes, and pre-industrial edge tools — with collector-level knowledge and craftsman-level execution.
▸ Study plan for this stage
Pace: 8–10 weeks, ~25–30 pages/day, with 2–3 days per week dedicated to hands-on assessment and revival work on actual vintage tools
- Historical tool authentication: dating, maker marks, material composition, and regional variations in early American hand tools
- Morphological analysis: how tool design evolved to solve specific woodworking problems, and what those design choices reveal about authenticity
- Deep cleaning and stabilization of complex mechanisms: restoring saws, braces, planes, and combination tools without destroying patina or compromising collector value
- Metallurgical assessment: identifying steel quality, hardness, and condition in vintage blades and understanding how to safely sharpen or hone without over-grinding
- Functional revival: bringing dormant tools back to working condition while preserving historical integrity and maintaining resale or collection value
- Collector-level documentation: photographing, cataloging, and recording the provenance and condition of restored tools for authentication and valuation
- Pre-industrial edge tool techniques: understanding hand-forged tool characteristics and the differences between factory-made and artisan-made implements
- How do you authenticate a vintage hand tool using maker marks, material composition, and design features, and what red flags indicate a reproduction or heavily modified piece?
- What is the relationship between a tool's design (handle shape, blade angle, weight distribution) and the specific woodworking task it was engineered to perform?
- How do you safely disassemble, clean, and restore a complex vintage tool like a brace or combination plane without damaging irreplaceable components or losing collector value?
- What metallurgical and hardness differences exist between hand-forged, early factory-made, and mass-produced vintage tool steel, and how do these affect sharpening and restoration strategy?
- How do you document and catalog a restored vintage tool in a way that preserves its provenance, supports future authentication, and enables accurate valuation?
- What are the ethical and practical boundaries between restoration (returning a tool to function) and over-restoration (destroying historical character and value)?
- Authenticate and date 3–5 vintage hand tools (saws, planes, or braces) using Sloane's morphological framework and maker-mark research; document your findings with photographs and written analysis
- Perform a complete disassembly, cleaning, and functional assessment of a complex vintage tool (combination plane, brace, or multi-bit saw) without causing damage; photograph each step
- Sharpen or hone the blade of a vintage hand tool using period-appropriate techniques; test the tool on actual wood and document the results
- Create a detailed condition report and restoration plan for a neglected vintage tool, including before/after photographs, material analysis, and ethical boundaries for the work
- Research the maker, patent history, and regional production context of one vintage tool in your collection; cross-reference Sloane's examples and Tolpin's design principles
- Restore a vintage saw (hand saw, back saw, or specialty saw) by cleaning the plate, straightening teeth if necessary, and sharpening; test for accuracy and function
Next up: This stage equips you with the authentication, assessment, and deep-revival skills needed to move into specialized restoration work—whether that's tool conservation for museums, high-end collector commissions, or teaching others the craft of vintage tool restoration.
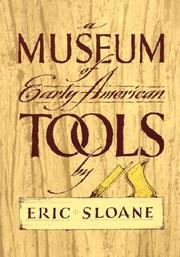
Sloane's illustrated survey of pre-industrial hand tools trains the eye to recognize original forms and functions, preventing misidentification and misrestoration of unusual vintage finds.
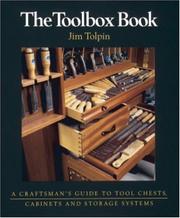
Brings together tool history, identification, and working use in one volume; read last as a capstone that connects restoration craft to the living tradition of hand-tool woodworking.
Discussion
Keep reading
Paths that share books, cover the same subject, or open a related topic.