The Best Books on Hand-Tool Woodworking
This curriculum is built for an intermediate woodworker ready to commit to hand tools as a primary practice. Starting from a solid conceptual and sharpening foundation, it moves through mastery of individual tools — planes, chisels, and saws — then into furniture-making methodology and joinery, and finally into advanced project-driven work that synthesizes everything. Each stage assumes the vocabulary and muscle memory built in the one before it.
Sharpening & Tool Mastery Foundations
IntermediateDevelop a reliable, repeatable sharpening system and build deep intuition for how edge tools work — the prerequisite skill that unlocks everything else in hand-tool woodworking.
▸ Study plan for this stage
Pace: 8–10 weeks, ~20–25 pages/day (alternating between both books; 2–3 weeks per book with overlap for integration)
- The geometry of edge angles and how they affect tool performance across different wood types and grain directions
- Abrasive progression and stone/strop selection: understanding grit sequences and when to use waterstones, oilstones, or synthetic alternatives
- The mechanics of sharpening strokes: pressure distribution, angle consistency, and how to recognize a properly sharpened edge by sight and feel
- How blade flatness, sole flatness, and chipbreaker geometry interact to determine plane performance and surface quality
- The relationship between tool setup (sole, chipbreaker, iron) and wood behavior: why sharpness alone is insufficient without proper tuning
- Developing muscle memory and sensory feedback: building the tactile and visual skills to diagnose dull edges and sharpen without jigs
- The role of stropping and maintenance in sustaining an edge between full sharpenings
- What edge angle should you use for different planes (e.g., jointer vs. smoother vs. jack plane) and why does grain direction sometimes require a different approach?
- Describe a complete sharpening progression from a dull tool to a razor edge using waterstones: which grits, in what order, and how do you know when to move to the next grit?
- How do you test whether a plane iron is truly sharp, and what visual or tactile signs indicate you need to return to the stones?
- Explain how the chipbreaker geometry and sole flatness affect tearout and surface quality, and how these factors interact with a sharp edge
- What is the difference between stropping and sharpening, and when should you strop versus when you need to return to the stones?
- How would you diagnose a plane that produces a rough surface despite having a sharp iron, and what adjustments would you make?
- Sharpen a plane iron or chisel using a full progression of waterstones (1000–8000 grit range), focusing on consistent angle and pressure; repeat until you can maintain a consistent bevel without a guide
- Practice the 'spine and toe' method on waterstones with multiple tools, developing the feel for when the entire bevel is in contact with the stone
- Set up a stropping routine with a leather strop and compound; strop a sharp tool daily for one week and compare edge retention to an unstropped tool
- Flatten a plane sole and chipbreaker using waterstones or a reference surface; document the process and measure flatness before and after
- Tune a jack plane, jointer plane, and smoother plane to identical sharpness, then test each on the same piece of wood; note how sole geometry and chipbreaker design affect surface quality
- Sharpen a plane iron to different edge angles (25°, 30°, 35°, 45°) and test each on difficult grain; document which angle works best for your wood and technique
Next up: Mastery of sharpening and tool geometry creates the foundation for the next stage—learning to execute specific joinery and surface techniques—because every subsequent skill depends on sharp, properly tuned tools and the ability to diagnose and correct edge performance in real time.
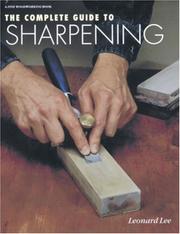
The definitive reference on sharpening every category of edge tool — planes, chisels, saws, and more. Reading this first ensures every tool you pick up afterward performs at its best.
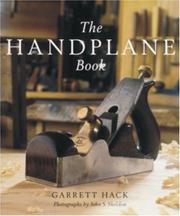
A comprehensive, beautifully organized guide to understanding, tuning, and using hand planes of all types. It builds the vocabulary and mechanical intuition needed before tackling plane-heavy project books.
Core Hand-Tool Skills & Technique
IntermediateMaster the fundamental techniques of working with chisels, saws, and planes by hand — accurate layout, controlled cutting, and efficient stock preparation without power tools.
▸ Study plan for this stage
Pace: 8–10 weeks, ~25–30 pages/day with 2–3 days/week for hands-on practice
- Tool selection, sharpening, and maintenance as the foundation for all hand-tool work—dull tools are dangerous and inefficient
- Proper body mechanics, grip, and stance for controlled cutting with chisels, saws, and planes to prevent fatigue and injury
- Accurate layout and marking techniques using traditional tools (marking gauge, square, knife) to ensure precision before any cutting begins
- Chisel technique: paring, chopping, mortising, and grain-aware cutting to achieve clean, controlled results
- Saw technique: crosscutting, ripping, and curved cuts with attention to kerf control and body positioning for straight, efficient cuts
- Plane technique: setup, sole flatness, blade sharpness, and grain direction to produce smooth surfaces and thin, consistent shavings
- Stock preparation workflow: sawing to rough dimension, planing to thickness, and edge preparation without relying on machines
- The relationship between tool design, material properties, and technique—understanding *why* a tool works the way it does
- What are the critical sharpening and maintenance steps for chisels, saws, and planes, and why does tool condition directly affect both safety and quality?
- How do you lay out and mark a mortise or dovetail joint accurately, and what tools and techniques does traditional layout require?
- Describe the proper body position, grip, and stroke for paring with a chisel versus chopping across grain—what is the key difference and why does it matter?
- What are the essential saw technique principles for crosscutting and ripping, and how do you maintain a straight kerf without binding?
- How do you set up a hand plane for optimal performance, and what role does grain direction play in achieving a smooth surface?
- Walk through a complete stock preparation workflow for a simple board: from rough sawn to finished thickness and edges, using only hand tools.
- Sharpen a set of chisels and saws using the methods described in *The Anarchist's Tool Chest*; practice until you can achieve a consistent, razor edge and maintain it over multiple sessions
- Layout and mark a mortise and tenon joint on scrap wood using a marking gauge, combination square, and knife; practice accuracy and consistency across multiple pieces
- Perform a series of paring cuts on grain in different directions using a sharp chisel; practice controlling depth, angle, and grain awareness to achieve clean surfaces without tear-out
- Practice crosscutting and ripping with a handsaw on softwood stock; aim for straight, square cuts with minimal binding and consistent kerf width
- Set up a hand plane (sole flatness, blade sharpness, depth of cut) and plane a board to consistent thickness; practice reading grain and adjusting technique to avoid tear-out
- Complete a full stock preparation project: take a rough-sawn board and prepare it to finished dimensions and surface quality using only hand tools (saw, plane, chisel, scraper)
Next up: This stage builds the core technical competency and muscle memory needed to execute joinery accurately; the next stage will apply these fundamental techniques to specific joint types (dovetails, mortise-and-tenon, etc.) and assembly strategies.

A passionate, opinionated manifesto and practical guide to building a complete hand-tool kit. It defines which tools matter and why, giving the learner a clear framework before diving into technique.
A focused, practical guide to ripping, crosscutting, and joinery sawing by hand. Reading it after the tool-chest book means you already understand context; now you build real saw skill.
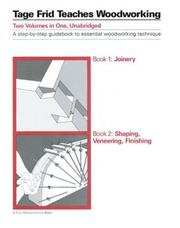
A classic three-volume work covering joinery, shaping, and finishing with a strong hand-tool emphasis. Frid's clear, step-by-step instruction bridges technique and furniture-making in a way few books match.
Joinery & Furniture Design by Hand
IntermediateUnderstand traditional furniture joinery — dovetails, mortise-and-tenon, and more — and learn how to design and plan furniture projects built entirely with hand tools.
▸ Study plan for this stage
Pace: 8–10 weeks, ~25–30 pages/day with 2–3 days per week dedicated to hands-on practice
- Traditional joinery fundamentals: dovetails, mortise-and-tenon, bridle joints, and lap joints as the backbone of hand-tool furniture
- Layout and marking techniques using hand tools (marking gauges, sliding bevels, squares) for precision without power tools
- Design principles from 'By Hand & Eye': proportional relationships, visual balance, and designing within the constraints of hand-tool woodworking
- The relationship between joinery choice and structural integrity in furniture design
- Hand-tool selection, sharpening, and maintenance as foundational skills for successful joinery work
- Planning and sequencing a complete furniture project from concept through assembly
- Understanding wood movement and grain direction as they affect joinery and long-term durability
- Developing the eye and hand coordination necessary for hand-tool work through repetitive practice
- What are the primary advantages of dovetail and mortise-and-tenon joints in hand-tool furniture, and when would you choose one over the other?
- How do you lay out and execute a through dovetail joint using only hand tools, and what common mistakes should you avoid?
- What does 'designing by hand and eye' mean, and how does it differ from designing furniture with power tools or CAD?
- Describe the complete process for planning a simple furniture project (e.g., a small table or box) using the principles from both books
- How do wood movement and grain direction influence your joinery choices and the long-term success of a hand-tool furniture piece?
- What are the essential hand tools for joinery work, and how do you maintain them to ensure precision?
- Cut at least three different dovetail joints (through, half-blind, and sliding) on scrap wood, focusing on layout accuracy and saw technique
- Practice mortise-and-tenon joints on increasingly complex pieces: start with simple rectangular mortises, progress to angled or multiple tenons
- Build a small box or drawer using hand-tool joinery (dovetails or mortise-and-tenon), documenting your design decisions and layout process
- Execute a complete furniture project (small table, stool, or shelf) from design sketch through final assembly, applying proportional design principles from 'By Hand & Eye'
- Create a series of practice joints on scrap wood to develop muscle memory and hand-eye coordination; aim for consistent, tight-fitting joints
- Analyze and sketch the joinery in existing hand-tool furniture pieces (antiques, museum pieces, or contemporary hand-tool makers' work) to understand design intent
Next up: This stage equips you with the technical mastery of traditional joinery and the design sensibility to plan furniture by hand, preparing you to tackle more complex projects—such as case furniture, chairs, or specialized techniques—with confidence in both execution and aesthetic judgment.
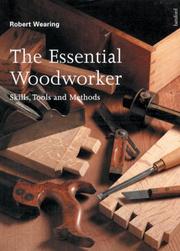
A concise, precise British classic that teaches hand-tool joinery and furniture construction with exceptional clarity. It is the ideal bridge between isolated skill-building and complete furniture projects.

Teaches the proportional, geometry-based design language used by pre-industrial furniture makers. Reading it here trains the eye to design furniture that looks right before a single cut is made.
Advanced Projects & Period Furniture
ExpertApply all accumulated skills to building complete, historically informed furniture pieces using hand tools alone, with an understanding of period styles and construction methods.
▸ Study plan for this stage
Pace: 8–10 weeks, ~40–50 pages/day with frequent project breaks; allow 1–2 weeks per major project study
- Understanding wood movement and grain direction as the foundational principle for all design and joinery decisions
- Period furniture styles (Shaker, Arts and Crafts, contemporary) and how their aesthetics reflect structural logic and hand-tool constraints
- Designing complete furniture pieces that balance historical authenticity with personal expression and available materials
- Advanced joinery selection and execution: choosing the right joint for the wood species, grain direction, and functional demands
- Finishing techniques that enhance wood character while protecting the piece without obscuring craftsmanship
- The relationship between tool mastery, material understanding, and design—how hand-tool limitations become creative advantages
- Building complete projects from concept through execution, including design iteration, material selection, and problem-solving in real time
- How does wood movement influence your choice of joinery and design for a specific furniture piece, and what design strategies does Becksvoort use to accommodate it?
- What are the defining characteristics of the furniture styles Becksvoort discusses, and how do their construction methods reflect hand-tool woodworking principles?
- How do you approach designing a piece of furniture that is both historically informed and personally meaningful, balancing authenticity with creative freedom?
- What is your decision-making process for selecting the appropriate joint (mortise and tenon, dovetail, frame-and-panel, etc.) for a given situation, and what trade-offs does each involve?
- How does Becksvoort's finishing philosophy enhance rather than hide the work of hand tools and the natural character of the wood?
- What are the common challenges Becksvoort identifies when building period furniture with hand tools, and what strategies does he recommend for solving them?
- Select one complete furniture project from *With the Grain* and create a detailed design plan: sketch the piece, identify all joinery, list wood species and grain direction considerations, and note potential wood movement issues
- Build a small practice piece (box, shelf, or stool) using at least two different joinery methods discussed in the book, paying deliberate attention to grain direction and wood movement accommodation
- Study one period style featured in the book (Shaker, Arts and Crafts, etc.) by examining photographs and drawings; document the structural logic behind its aesthetic choices and how hand tools shaped those decisions
- Execute a complete furniture project from *With the Grain* (or one inspired by it), from initial design through finishing, documenting your decision-making at each stage and any adaptations you make
- Practice the finishing techniques Becksvoort recommends on scrap wood samples, comparing results and understanding how different approaches affect the visual and tactile quality of the finished surface
- Conduct a wood movement study: build a simple frame-and-panel door or similar piece, then track and document how it changes seasonally over several months, relating your observations to Becksvoort's principles
Next up: Mastery of complete, historically grounded furniture design and execution with hand tools positions you to either specialize deeply in a particular period style, develop a personal design language that synthesizes multiple traditions, or explore advanced restoration and reproduction work.
Focuses on vernacular, stick-and-slab furniture forms that are achievable entirely by hand and deeply rooted in historical practice — a natural next project challenge after mastering joinery.

A master Shaker furniture maker shares a lifetime of hand-tool furniture-making knowledge. It synthesizes design, wood selection, joinery, and finishing into complete, refined projects — the capstone of this curriculum.
Discussion
Keep reading
Paths that share books, cover the same subject, or open a related topic.