Forge your first blade: beginning blacksmithing
This curriculum takes a complete beginner from zero blacksmithing knowledge to confidently setting up a forge, controlling a hammer, and completing real first projects in hot metal. Each stage builds on the last — starting with the craft's culture and safety mindset, moving through core technique, and finishing with structured project-based practice that cements everything learned.
Foundations: The Craft, the Shop, and the Fire
BeginnerUnderstand what blacksmithing is, how a forge shop is set up safely, what tools are needed, and how fire and metal behave — before touching a hammer.
▸ Study plan for this stage
Pace: 6–8 weeks total. Week 1–3: Read "The Backyard Blacksmith" by Lorelei Sims (~20–25 pages/day), focusing on shop setup, tool identification, and introductory fire management. Week 4–8: Read "The Art of Blacksmithing" by Alex W. Bealer (~15–20 pages/day), reading more slowly to absorb the historical co
- The blacksmith's shop ecosystem: the forge, anvil, vise, and quench tank work as an integrated system, not as isolated tools — Sims's layout diagrams make this tangible for a backyard setup.
- Fire management fundamentals: how a coal or propane forge reaches and sustains working heat, the role of the firepot and air supply (bellows/blower), and reading flame color and behavior — introduced practically in Sims and historically deepened in Bealer.
- The heat color spectrum of steel: from black through cherry red, orange, and yellow to white — understanding what each color signals about workability and risk of burning the metal, a theme both authors emphasize as the blacksmith's primary diagnostic tool.
- Metal behavior under the hammer: how steel moves (not compresses) when struck, the concept of working 'with the grain' of the metal, and why hammer angle and face shape produce different results — Bealer's historical narrative provides rich mechanical intuition here.
- Tool taxonomy and purpose: hardy tools, flatters, fullers, punches, and tongs — Sims catalogs the beginner's essential kit while Bealer traces the historical evolution that explains why each tool is shaped the way it is.
- Shop safety as a design discipline: fire hazards, ventilation requirements, burn protocols, and the spatial logic of a safe shop layout — Sims treats this as a first-order concern before any technique is introduced.
- The historical and cultural identity of blacksmithing: Bealer's sweeping history situates the craft within civilization, helping the reader understand why traditional methods and tool forms have persisted — building respect for the craft's logic.
- Carbon content and basic metallurgy: the difference between wrought iron, mild steel, and high-carbon steel, and why carbon content determines how a metal responds to heat and quenching — foundational to every future technique decision.
- After reading Sims, can you describe the minimum viable backyard shop layout — what equipment is non-negotiable, how it should be spatially arranged, and what safety provisions must be in place before the first fire is lit?
- What does a 'bright orange' heat color tell you about the steel you are working, and what does 'white heat' risk doing to the metal? Use the heat color guidance from either Sims or Bealer to answer precisely.
- Bealer traces blacksmithing from ancient civilizations through the industrial era — what does this history reveal about why hand-forging techniques and tool shapes have remained largely unchanged for centuries?
- What is the functional difference between a fuller and a flatter, and in what sequence would a smith typically use them on a single workpiece? Ground your answer in the tool descriptions found in Sims.
- How does carbon content distinguish wrought iron from mild steel from high-carbon steel, and why does that distinction matter when choosing stock for a beginner project?
- What are the three most critical ventilation and fire-safety rules Sims establishes for a home forge shop, and what is the physical or chemical reason each rule exists?
- Draw your own shop layout diagram from memory after finishing Sims's setup chapters — label every major tool station, mark the quench tank position, indicate airflow/ventilation paths, and note fire-hazard clearance zones. Compare it back to Sims's diagrams and annotate the differences.
- Build a 'heat color reference card': draw or print a steel bar divided into segments and label each color band (black, dark red, cherry red, bright orange, yellow, white) with its approximate temperature range, what it means for workability, and the risk at that stage — sourced from both Sims and Bealer.
- Create a tool glossary with sketches: for each tool named in Sims (hammer, tongs, hardy, fuller, flatter, punch, pritchel, etc.), draw its profile, write a one-sentence function description, and note one mistake a beginner might make using it incorrectly.
- Write a one-page 'shop safety checklist' formatted as an actual pre-session checklist (checkbox format) derived entirely from Sims's safety guidance — something you could laminate and hang in a real shop.
- After finishing Bealer, write a 300–400 word reflection answering: 'What did blacksmiths contribute to the development of civilization, and what does that history tell me about the discipline required to learn this craft?' Use at least three specific examples from Bealer's historical narrative.
- Visit a local forge, makerspace, or farrier (or watch 3–4 reputable forge demonstration videos if in-person is unavailable) and use your tool glossary and heat color card to identify what you observe in real time — annotate your glossary with anything Sims or Bealer described that you now see confirmed or nuanced by the real example.
Next up: ">Having internalized shop safety, tool purpose, fire behavior, and the heat color spectrum entirely through reading and observation, the reader is now ready to move from conceptual understanding to supervised hands-on practice — the next stage should introduce the first fundamental hammer techniques (drawing out, upsetting, and bending) on real stock at the forge.
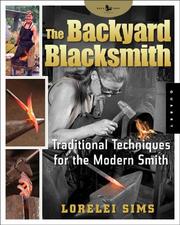
The ideal first book: written for absolute beginners, it covers forge types, anvil selection, basic tool kit, and safety in plain language, giving the reader a complete mental map of the shop before any work begins.
A classic historical and technical overview that explains WHY iron and steel behave as they do under heat and hammer — building the intuition and vocabulary every beginner needs before learning specific techniques.
Core Technique: Hammer, Anvil, and Heat
BeginnerLearn and practice the fundamental hammer strokes, heat management, and anvil positions that underpin every blacksmithing operation.
▸ Study plan for this stage
Pace: 5–6 weeks total: Weeks 1–3 cover "Practical Blacksmithing" by Richardson (~25–30 pages/day, focusing on the foundational technique chapters); Weeks 4–6 cover "The Blacksmith's Craft" by McRaven (~20–25 pages/day, reading more slowly to absorb McRaven's project-driven technique commentary). Allow one
- Hammer mechanics: grip, swing arc, and the three primary strokes (flat, cross-peen, and rounding) as demonstrated through the trade examples in Richardson's collected writings
- Heat colors and their meanings: Richardson's smiths consistently reference working color ranges (black heat through white heat) as the primary guide for when and how to strike
- Anvil geography: horn, face, hardy hole, pritchel hole, and heel — and how McRaven explains positioning work on each zone for drawing, bending, and cutting
- Drawing out and upsetting: the two opposing operations that change stock length, illustrated through Richardson's tool-making examples and McRaven's project sequences
- Fire management: building, maintaining, and reading a forge fire (coke vs. coal behavior) as described by Richardson's contributors and reinforced by McRaven's shop-practice notes
- Hammer control and 'feeling the heat': McRaven's emphasis on developing tactile and visual feedback so the smith knows when metal is moving efficiently versus when to reheat
- Work-holding and anvil position relative to the body: McRaven's guidance on standing position, anvil height, and tong selection to reduce fatigue and improve accuracy
- The reheat cycle: understanding that blacksmithing is iterative — heat, work a few blows, reheat — and why rushing this cycle produces poor results, a theme running through both books
- According to the smiths represented in Richardson's 'Practical Blacksmithing,' at what heat color should most general forging work be performed, and why is striking below a red heat considered damaging to the steel?
- How does McRaven describe the correct anvil height relative to the smith's body, and what problems does an anvil that is too high or too low create for hammer control?
- What is the mechanical difference between drawing out and upsetting as operations, and in which situations does Richardson's text show each being applied to tool or implement making?
- McRaven emphasizes 'reading the fire' as a core skill — what visual and behavioral signs does he identify that tell the smith the fire is ready, too hot, or oxidizing the work?
- Describe the purpose and technique of the cross-peen stroke as discussed in either book: when is it preferred over a flat-face blow, and what shape change does it produce in the stock?
- Both books treat the reheat cycle as fundamental discipline. Based on your reading, what are the consequences — described or implied — of continuing to hammer steel that has dropped below working temperature?
- Heat-color log: Before any forging session, heat a scrap piece of mild steel and hold it in a dim area; record the color at each stage from first glow to near-white. Compare your observations to the color descriptions in Richardson's text until you can reliably name the heat by sight.
- Hammer stroke isolation drill: Using a piece of soft mild steel (1/2" square stock), practice each stroke type — flat face, cross-peen, and rounding — in separate heats, making only that stroke. Sketch the resulting shape change after each session to build a visual vocabulary matching Richardson's examples.
- Draw-out progression: Following the sequence implied by Richardson's tool-making chapters, draw a 6-inch length of 1/2" square stock into a taper. Count your heats, note the color at each strike, and aim to complete the taper in the fewest reheats possible while maintaining clean, even reduction.
- Upsetting exercise: Take a 10-inch bar of 1/2" round stock and upset one end to form a shoulder or boss, using the anvil face and horn as McRaven describes. Focus on keeping the bar vertical and the heat localized to the end being upset.
- Anvil-zone mapping: Without metal in hand, stand at your anvil and physically point to — then use a marker on scrap wood — the horn, face, hardy hole, pritchel hole, and heel. Practice moving a cold bar to each zone and naming the operation you would perform there, referencing McRaven's descriptions.
- Reheat-cycle discipline: Forge a simple S-hook (a classic McRaven beginner project) with a strict rule: return the work to the fire the moment it drops below a bright orange. Log how many heats the project requires. Repeat it a second time and try to improve efficiency without sacrificing quality.
Next up: Mastering hammer strokes, heat reading, and anvil positions through Richardson and McRaven gives the student the physical vocabulary and shop discipline needed to tackle more complex forged forms — making the next stage, which introduces joinery, tooling, and decorative work, a natural extension of these now-internalized fundamentals.
A comprehensive 19th-century compendium of real shop techniques — drawing, upsetting, bending, punching — presented step by step; reading it after Bealer means the reader already understands the 'why' behind each operation.
A modern, hands-on guide that translates classic techniques into clear, illustrated exercises focused on hammer control and heat reading — the perfect bridge between theory and the anvil.
First Projects: Putting It All Together
BeginnerComplete structured beginner projects — hooks, leaves, scrolls, simple tools — that apply every skill learned so far in a logical, confidence-building sequence.
Organized entirely around achievable first projects (S-hooks, fire pokers, bottle openers), this book gives the beginner a clear project ladder where each piece reinforces hammer control and forge discipline learned in Stage 2.
Steps up the project complexity slightly — decorative ironwork, leaves, tenons — while introducing design thinking, making it the ideal capstone that shows how technique serves creative intent.
Going Deeper: Craft Mastery and Metalworking Science
IntermediateUnderstand the metallurgy of iron and steel, heat treatment, and more advanced forging operations so the learner can move beyond beginner projects with full technical understanding.
▸ Study plan for this stage
Pace: 10–13 weeks total. Weeks 1–5: "The Complete Modern Blacksmith" by Weygers (~20–25 pages/day, reading all three volumes in sequence — The Making of Tools, The Modern Blacksmith, and The Recycling, Use, and Repair of Tools). Weeks 6–13: "Steel Metallurgy for the Non-Metallurgist" by Verhoeven (~15–18
- Tool steel selection and sourcing: Weygers's philosophy of recycling high-carbon steel from everyday objects (files, springs, axles) and identifying unknown steels through spark testing and the quench-and-snap method
- Forging geometry and stock removal: Weygers's systematic approach to shaping bevels, tapers, shoulders, and eyes using hammer control and anvil positioning rather than grinding
- Heat treatment as a process sequence: the full Weygers workflow of normalizing → hardening → tempering, and why each step matters for tool performance and longevity
- The iron-carbon phase diagram (Verhoeven): understanding austenite, ferrite, cementite, and pearlite regions, and how carbon content and temperature together determine microstructure
- Martensite formation (Verhoeven): why rapid quenching traps carbon in a body-centered tetragonal lattice, producing hardness, and why this structure is brittle without tempering
- Critical temperature and the Ac1/Ac3 lines (Verhoeven): how to identify the correct austenitizing temperature for a given steel and why overshooting or undershooting causes failure
- Tempering and the hardness-toughness trade-off (Verhoeven): how time and temperature during tempering progressively relieve martensite stress and what color/Rockwell targets suit different tool applications
- Alloy steel effects (Verhoeven): how elements such as chromium, manganese, molybdenum, and vanadium shift the TTT/CCT curves, affect hardenability, and explain why tool steels like O1, W2, and 5160 behave differently in the forge and quench tank
- According to Weygers, how do you identify whether a piece of salvaged steel is high-carbon enough to harden into a usable tool, and what are at least two field tests he recommends?
- Walk through the complete heat-treatment sequence Weygers describes for making a cold chisel — what color is the steel at each stage, what quench medium is used, and how is the temper color read on the polished surface?
- Using Verhoeven's iron-carbon phase diagram, explain what is happening at the microstructural level when a 0.8% carbon steel is heated above the Ac3 line and then slowly cooled versus rapidly quenched.
- What is martensite, why is it hard, and why must it be tempered? Use Verhoeven's explanation of the crystal lattice and internal stress to support your answer.
- How does carbon content alone (comparing, say, 0.4% vs. 1.0% C steel) affect the maximum achievable hardness after quenching, and what does Verhoeven say about the practical ceiling of hardness regardless of carbon increase beyond ~0.6%?
- Verhoeven discusses hardenability and the Jominy end-quench test — how does the addition of alloying elements like chromium or manganese change a steel's hardenability, and why does this matter when choosing between W2 and 5160 for a large cross-section tool?
- Spark-test and quench-snap survey: Collect 6–8 pieces of salvaged steel (files, coil springs, leaf springs, old chisels, rebar). Spark-test each one against a grinder, photograph the spark patterns, and record your carbon-content estimate. Then normalize, harden, and snap each sample to examine the grain. Compare your spark-test predictions to the fracture grain size — reconcile any surprises with
- Make a Weygers-style cold chisel from a salvaged truck coil spring: forge the taper and head entirely by hammer (no angle grinder shaping), then execute the full normalize → harden → temper sequence. Polish the shank before tempering so you can watch the oxide colors travel. Log the exact heat colors, quench medium, and final temper color, then test the edge on mild steel.
- Phase-diagram annotation exercise: Print or hand-draw a large iron-carbon phase diagram (0–2% C, room temperature to 1600 °C). Using Verhoeven as your guide, label every phase field, both critical temperature lines, the eutectoid point, and the eutectic point. Then plot the thermal history of three steels (W2 at 1.0% C, 5160 at 0.6% C, mild steel at 0.2% C) through a normalize and a harden cycle a
- TTT curve comparison study: Using Verhoeven's TTT/CCT diagrams, create a side-by-side written comparison of W1/W2 (water-hardening) versus O1 (oil-hardening) steel. Explain in your own words why O1 can be quenched more slowly yet still achieve full hardness, and what that means for warping risk in thin cross-sections. Present this as a one-page 'steel selection guide' you would actually use at the
- Temper color strip test: Forge and harden four identical small blade blanks from the same bar of known high-carbon steel. Temper each one at a different temperature (375 °F, 425 °F, 475 °F, 525 °F) for one hour. File-test and flex-test each blank, record observations, and correlate results to Verhoeven's hardness-vs.-tempering-temperature curves. Write a short conclusion about which temper suits a
- Integrated tool project with written metallurgical rationale: Design and forge a tool of your choice (e.g., a drawknife, a center punch, or a pair of tongs). Before forging, write a one-page plan citing both Weygers (forging sequence and heat-treatment procedure) and Verhoeven (steel choice justification using carbon content and hardenability data). After completing the tool, write a one-page post
Next up: By internalizing both Weygers's hands-on heat-treatment craft and Verhoeven's microstructural science, the learner now has the technical vocabulary and practical intuition needed to tackle advanced topics such as pattern-welding, high-alloy tool steels, forge welding metallurgy, and professional blade or toolmaking — the territory of the next stage.
Weygers covers tool-making, heat treatment, and improvised smithing in extraordinary depth — a natural next step once basic projects are mastered, expanding the reader's capability to make and modify their own tools.
The most accessible rigorous treatment of how carbon steel behaves under heat — reading this after hands-on project experience makes the science click immediately and permanently elevates the smith's judgment at the forge.
Discussion
Keep reading
Paths that share books, cover the same subject, or open a related topic.