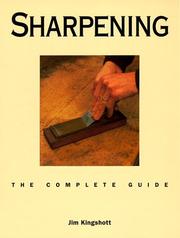
Sharpen kitchen knives properly
This curriculum takes a home cook from zero sharpening knowledge to confident mastery of whetstone technique, edge geometry, and long-term knife care. Each stage builds on the last: first you learn how knives work and why sharpening matters, then you develop hands-on whetstone skill, and finally you go deep on metallurgy, geometry, and professional-level refinement.
Foundations: Knives, Edges & the Cook's Mindset
BeginnerUnderstand how kitchen knives are designed, what a sharp edge actually is, and why proper care matters before touching a whetstone.
▸ Study plan for this stage
Pace: 2–3 weeks, ~20–25 pages/day (the book is ~230 pages of core content); read leisurely and re-read the introductory chapters on steel metallurgy and edge geometry twice before moving on
- Knife anatomy: spine, bevel, edge, heel, bolster, and tang — and how each part affects balance and use
- Steel types and their trade-offs: carbon steel vs. stainless vs. high-carbon stainless, hardness (Rockwell scale), and what those differences mean for edge retention and ease of sharpening
- Edge geometry: what a 'sharp' edge physically is at the microscopic level, bevel angles, and how geometry determines cutting performance
- The difference between sharpening (removing metal to create a new edge) and honing (realigning an existing edge) — and why confusing the two is the most common beginner mistake
- Knife selection principles: why an expensive knife is worthless without maintenance, and how to evaluate a knife's quality before buying
- The cook's mindset: treating the knife as a precision tool that requires ongoing stewardship, not a disposable commodity
- Basic knife care habits: proper storage (magnetic strip vs. block vs. sleeve), hand-washing, and cutting-surface selection to preserve the edge between sharpenings
- In your own words, what is happening at the microscopic level when a knife edge becomes dull — and what is the physical difference between a dull edge and a sharp one?
- What does the Rockwell hardness number tell you about a knife's steel, and why is a higher number not always better for a home cook?
- Why is honing NOT the same as sharpening, and in what situation would honing alone be insufficient to restore a knife's performance?
- Chad Ward argues that knife selection matters less than knife care — what evidence or reasoning does he offer to support this, and do you agree?
- What cutting-board material does Ward recommend and why, and how does surface choice directly affect edge longevity?
- What are the key factors to evaluate when assessing whether a knife is well-suited to a particular cook's hand and tasks?
- Handle audit: Pick up every knife in your kitchen, identify each part of its anatomy using Ward's terminology (spine, bevel, heel, bolster, tang), and note the steel type if marked on the blade — record your findings in a simple notebook.
- The paper test (observation only): Before any sharpening, slice a sheet of printer paper with each of your knives and record how each one performs — this establishes your personal 'before' baseline to revisit later in the curriculum.
- Storage assessment: Evaluate how your knives are currently stored; compare your setup against Ward's recommendations and make at least one concrete improvement (e.g., move knives off a cluttered drawer onto a magnetic strip or into blade guards).
- Steel research exercise: Look up the steel type of your primary chef's knife (check the manufacturer's website if not stamped on the blade), find its approximate Rockwell hardness rating, and write two or three sentences explaining what that number means for your sharpening expectations.
- Mindset journal entry: After finishing the book, write a short paragraph (5–8 sentences) articulating your personal 'knife care philosophy' — what habits will you commit to, and what misconceptions did you arrive with that Ward corrected?
- Cutting-surface inventory: Identify every surface you currently cut on (boards, plates, countertops), classify each as edge-friendly or edge-damaging using Ward's criteria, and commit to eliminating at least one harmful surface from your routine.
Next up: By internalizing how an edge is constructed and why it degrades, the reader is now ready to move from theory to tool — understanding what a whetstone actually does to steel and how to choose and use one effectively in the next stage.

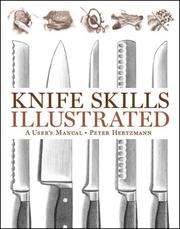
The single best beginner-to-intermediate guide written specifically for home cooks — covers knife anatomy, steel types, edge geometry, and sharpening methods in plain language. Read this first to build the vocabulary every later book assumes.
Core Skill: Whetstone Technique
BeginnerDevelop correct whetstone posture, angle control, pressure, and grit progression so you can reliably raise a burr and refine an edge on a Western or Japanese knife.
▸ Study plan for this stage
Pace: 4–5 weeks, ~20–25 pages/day (the book is ~240 pages); read actively with a whetstone and knife nearby to test concepts in real time
- Bevel geometry and the relationship between edge angle and blade performance — Lee's foundational chapters explain why angle choice differs between Western (~20° per side) and Japanese (~10–15° per side) knives
- Raising a burr (wire edge): understanding this tactile milestone as proof that you have reached the apex, as Lee describes in his sharpening mechanics sections
- Consistent angle holding: Lee's emphasis on muscle memory, the use of a sharpie marker trick, and finger-placement guides to maintain a repeatable bevel throughout the stroke
- Stroke mechanics and pressure control: Lee's distinction between edge-leading and edge-trailing strokes, applying heavy pressure on coarse grits to remove steel and progressively lighter pressure as you refine
- Grit progression logic: moving from coarse (120–220) to medium (400–800) to fine (1000–3000) stones as Lee outlines, understanding what each grit stage accomplishes and when to advance
- Stone maintenance — flattening, soaking vs. splash-and-go, and lapping — covered by Lee as prerequisites to consistent results
- Reading the edge: using the thumbnail catch test, the paper-slice test, and reflected light to diagnose sharpness and identify remaining flat spots or secondary bevels
- Differences in sharpening approach for Western (symmetrical, softer steel) vs. Japanese (asymmetrical or single-bevel, harder steel) knives as contextualized throughout Lee's examples
- According to Lee, what physical sign tells you that you have successfully raised a burr, and why does it matter before moving to a finer grit?
- What angle range does Lee recommend for a typical Western chef's knife versus a Japanese gyuto, and what steel and geometry factors drive that difference?
- How does Lee describe the correct way to flatten a whetstone, and what happens to your results if you skip this step?
- Explain Lee's logic for pressure management across a grit progression: how much pressure on a 220-grit stone versus a 2000-grit stone, and why?
- What is the sharpie-marker test, how do you perform it, and what does the wear pattern on the ink tell you about your angle consistency?
- After finishing on a fine stone, Lee describes several edge-testing methods — name at least two and explain what a passing result looks and feels like for each.
- Sharpie angle audit: coat the bevel of a dull knife with a black marker, make 10 strokes on a medium stone, then examine which part of the ink was removed. Repeat until the entire bevel is erased evenly, confirming consistent angle hold.
- Burr-raising drill: using a coarse stone (220-grit), sharpen one side of a knife exclusively until you can feel a continuous burr along the entire edge with your fingertip. Log how many strokes it took; repeat on three different knives to build feel.
- Full grit-progression run: take a deliberately dulled knife through a complete sequence — coarse → medium → fine — following Lee's pressure and stroke guidance at each stage. Document observations (burr formation, reflection under light, paper-slice result) at each grit transition.
- Stone-flattening session: use a lapping plate or diamond plate to flatten at least two whetstones before and after a sharpening session; observe the slurry color and the stone's surface to understand how much material was removed.
- Angle comparison test: sharpen one side of a knife at 15° and the other at 20° (use a protractor or angle guide to set up, then remove it and rely on feel). Compare sharpness and edge durability after light use to internalize why angle choice matters.
- Weekly paper-and-tomato test log: after every sharpening session, slice a sheet of printer paper and a ripe tomato, then record results in a notebook. Track improvement over the 4–5 weeks to build objective feedback habits.
Next up: Mastering burr formation and grit progression on a flat whetstone gives you the controlled, repeatable edge geometry you'll need to explore advanced refinement tools — strops, leather, and polishing compounds — and specialty geometries like single-bevel and convex edges in the next stage.
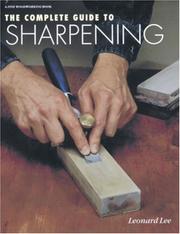
A thorough, methodical breakdown of sharpening mechanics — abrasives, angles, and stroke technique — that translates directly to whetstone practice. Read before more knife-specific texts to internalize the physics of cutting edges.
Intermediate Practice: Edge Geometry & Refinement
IntermediateUnderstand bevel angles, convex vs. flat grinds, single vs. double bevels, and how to match geometry to a knife's intended use — then apply that knowledge on the stone.
▸ Study plan for this stage
Pace: 3–4 weeks, ~20–25 pages/day; Donald's "Sharp" is dense with technique and photography, so allow extra time to pause, re-read diagrams, and practice at the stone between sessions rather than reading straight through
- Bevel angle fundamentals: how the angle between the blade face and the stone determines edge geometry, durability, and cutting performance
- Flat grinds vs. convex grinds: how the cross-sectional shape of the blade behind the edge affects food release, drag, and sharpening technique
- Single-bevel vs. double-bevel edges: the structural and functional differences, and which knife traditions (Japanese vs. Western) favor each
- Matching geometry to intended use: why a thin, acute angle suits a slicer or yanagiba while a more obtuse, robust angle suits a cleaver or workhorse chef's knife
- Consistent angle maintenance on the stone: body mechanics, finger placement, and visual/tactile feedback cues Donald emphasizes for holding a repeatable bevel
- Reading the edge: using a marker, fingernail, and reflected light to diagnose whether you are hitting the apex and shaping the bevel correctly
- Refinement vs. reprofiling: recognizing when a knife needs only a few strokes to refine an existing geometry versus a full reprofiling session to change the angle
- Stropping and finishing: how the final passes on a strop or high-grit stone align the apex and remove the wire edge without altering the geometry you have built
- According to Donald's framework in 'Sharp', what practical factors should guide your choice of bevel angle for a given knife, and how do you translate that angle into a physical position on the stone?
- How does Donald distinguish between a flat grind and a convex grind, and what does each geometry mean for how you must move the knife across the stone?
- What are the key sharpening technique differences Donald describes when working a single-bevel Japanese knife versus a symmetrically double-beveled Western knife?
- How does Donald recommend using a felt-tip marker to verify bevel contact, and what should you look for after the first few strokes on the stone?
- At what point in a sharpening session does Donald indicate you have successfully raised a burr, and why is detecting the burr the critical checkpoint before moving to a finer grit?
- How does Donald frame the relationship between edge geometry and a knife's intended cutting task — what examples does he use, and what is the underlying principle?
- Marker test on three different knives: coat the bevel of each with a felt-tip marker, take five strokes on your stone at your chosen angle, and photograph the wear pattern — repeat, adjusting your wrist angle until the marker is removed evenly across the full bevel width, as Donald instructs
- Angle audit: use an angle cube or a printed protractor guide to measure the existing bevel angle on at least two knives of different styles (e.g., a German chef's knife and a Japanese gyuto); record the angles, compare them to Donald's recommendations for each knife type, and note whether reprofiling is needed
- Single-bevel practice session: choose a single-bevel knife (or simulate one side of a chisel-ground blade) and sharpen it flat-side down on the stone following Donald's single-bevel protocol — focus on keeping the blade perfectly flat and raising a clean, even burr on the flat face
- Burr detection drill: sharpen a knife until you can feel a consistent burr along the entire edge with your thumb pad (moving perpendicular to the edge, safely); log how many strokes per inch of blade it took — repeat across two grit levels to internalize the feedback difference
- Geometry-to-task matching exercise: select four knives with different intended uses (e.g., bread knife, boning knife, cleaver, paring knife) and, using 'Sharp' as your reference, write a one-paragraph justification for the ideal bevel angle and grind type for each before touching a stone
- Refinement-only session: take a knife that is already reasonably sharp and practice a refinement-only pass — two or three light strokes per side on a fine stone, then strop — focusing on Donald's finishing mechanics; compare the edge before and after under a loupe or phone macro lens to see apex alignment
Next up: Mastering edge geometry and refinement in "Sharp" gives the reader a precise, geometry-aware eye and hand that is the essential prerequisite for tackling advanced topics such as freehand sharpening of specialty profiles, hollow grinds, and single-bevel knives at a professional level.

Written by the founder of Bernal Cutlery, this is a practical, beautifully illustrated guide to matching sharpening approach to specific knife styles — ideal at this stage when the reader is ready to move beyond one-size-fits-all technique.
Advanced Mastery: Metallurgy, Stropping & Long-Term Care
ExpertUnderstand how steel composition affects sharpening behavior, master stropping and finishing stones, and build a complete knife-care system for a home kitchen.
▸ Study plan for this stage
Pace: 6–8 weeks total: Weeks 1–3 cover "The Pattern-Welded Blade" by Hrisoulas (~20–25 pages/day, focusing on metallurgical chapters); Weeks 4–7 cover "The Razor Edge Book of Sharpening" by Juranitch (~15–20 pages/day with deliberate practice sessions alongside each reading session); Week 8 is a consolida
- Steel composition and carbon content: how varying carbon levels (low, medium, high carbon) directly govern hardness, edge retention, and sharpening difficulty, as explored through Hrisoulas's discussion of historical and pattern-welded steels
- The metallurgy of the heat-affected zone: how forge-welding, folding, and differential hardening in pattern-welded construction reveal why the steel's crystalline structure at the edge determines sharpening behavior
- Hardness vs. toughness trade-off: understanding why a harder steel (higher HRC) holds an edge longer but is more brittle and demands finer abrasives and lighter stropping pressure
- Juranitch's geometry-first philosophy: the argument that a consistent, correct bevel angle is more important than the abrasive used — and how to find and hold that angle freehand
- The Juranitch sharpening system: his specific progression from coarse stock removal through fine honing, emphasizing minimal strokes, consistent pressure, and testing for a burr (wire edge) at each stage
- Stropping theory and technique: the role of leather and stropping compounds in edge alignment and micro-burr removal, distinguishing stropping from honing and understanding when each is appropriate
- Edge geometry at the microscopic level: understanding the apex, the burr/wire edge, and the difference between a toothy 'working edge' and a polished 'razor edge' — and which is optimal for kitchen knives
- Building a complete knife-care system: integrating steel selection knowledge, a sharpening progression, a stropping routine, proper storage, and honing-steel use into a sustainable home-kitchen maintenance schedule
- According to Hrisoulas's treatment of pattern-welded steel, how does the layering and folding of high- and low-carbon steels affect the final edge's behavior under sharpening — and what does this tell you about why single-steel kitchen knives of known carbon content are more predictable to sharpen?
- Juranitch argues forcefully that angle consistency is the single most critical variable in sharpening. What is his reasoning, and how does his recommended method for establishing and maintaining a freehand angle differ from common hobbyist approaches?
- What is a wire edge (burr), how does Juranitch use its formation as a diagnostic checkpoint, and why must it be fully removed before a knife can be considered sharp?
- How do the metallurgical principles in Hrisoulas — specifically differential hardness across a blade — explain why some kitchen knives (e.g., san-mai or clad blades) require a different stropping pressure or finishing-stone grit than a mono-steel knife?
- What is the functional difference between stropping on bare leather, leather loaded with an abrasive compound, and using a fine finishing stone — and in what order and circumstance should each be used in a kitchen-knife maintenance routine?
- After completing both books, how would you design a complete care schedule for a home kitchen with three knives of different steel types (e.g., a high-carbon French chef's knife, a stainless utility knife, and a clad Japanese gyuto)?
- Metallurgy mapping exercise (Hrisoulas): After reading each chapter, sketch a simple diagram of the steel cross-section being described and annotate it with carbon content zones, hardness expectations, and predicted sharpening behavior. Compare your sketches across chapters to build intuition about how composition changes outcomes.
- Angle audit (Juranitch): Using a permanent marker, color the entire bevel of one of your kitchen knives, then make 5 freehand strokes on your stone. Examine which part of the marker was removed to diagnose your actual angle consistency. Repeat until the marker wears evenly across the full bevel — log your results each session.
- Burr-detection drill (Juranitch): Sharpen a knife deliberately to the point of raising a full, consistent burr on one side before switching sides. Use your thumb pad (carefully, rolling across — never along — the edge) and a loupe or phone macro lens to confirm the burr's presence. Practice removing it cleanly through alternating light strokes and stropping.
- Stropping progression test: Take a knife sharpened to 'working sharp' on a medium stone. Divide the blade into three sections with tape. Strop section one on bare leather, section two on leather loaded with green chromium-oxide compound, and leave section three as-is. Slice-test each section on copy paper and tomato skin; document the difference in feel and result.
- Steel-type comparison sharpening log: Sharpen two knives of noticeably different steel (e.g., a soft stainless vs. a hard high-carbon) using the exact same Juranitch stroke sequence. Record the number of strokes to raise a burr, the feel of the steel on the stone, and the final edge quality. Reflect on how Hrisoulas's metallurgical framework explains the differences you felt.
- Build your written knife-care SOP (Standard Operating Procedure): Draft a one-page care document for each knife you own, specifying: steel type (if known), target bevel angle, recommended stone progression, stropping routine, storage method, and a maintenance trigger (e.g., 'strop after every 3 uses; touch up on fine stone monthly'). Revise this document after the Week 8 consolidation review.
Next up: Mastering the metallurgical 'why' behind sharpening behavior and internalizing a complete care system gives the reader the expert foundation needed to critically evaluate specialty knives, exotic steel types, and professional sharpening equipment — the natural focus of any subsequent stage exploring high-performance or professional-grade tools.
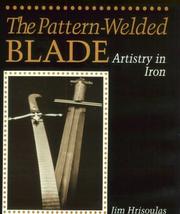
A deep dive into steel metallurgy and how carbon content, heat treatment, and grain structure determine how an edge behaves under sharpening — essential context for anyone who wants to sharpen intelligently rather than mechanically.
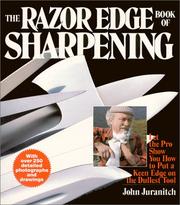
A cult classic among serious sharpeners that challenges conventional wisdom on angles and stropping, pushing the advanced reader to question assumptions and refine their technique to a true razor standard.
Discussion
Keep reading
Paths that share books, cover the same subject, or open a related topic.