Best Books to Master Soft Pastel Painting (in Order)
This curriculum takes a beginner from the absolute basics of soft pastel materials and mark-making through to advanced color layering, blending, and the nuanced capture of light in landscapes and portraits. Each stage builds directly on the last — you must understand pastel's unique surface and color logic before you can master its expressive blending, and you must command blending before you can convincingly render light across complex subjects like faces and skies.
Foundations: Materials, Mark-Making & First Strokes
BeginnerUnderstand soft pastel as a medium — how to choose and handle pastels, prepare surfaces, build basic marks, and think about color from the very start.
▸ Study plan for this stage
Pace: 2–3 weeks, ~20–25 pages/day, with 2–3 dedicated practice sessions per week
- Soft pastel composition and pigment quality: understanding binder ratios, lightfastness ratings, and how to identify professional-grade vs. student-grade pastels
- Surface preparation and tooth: how paper texture, weight, and coating affect pastel adhesion and layering potential
- Mark-making fundamentals: pressure control, directional strokes, blending techniques, and how hand position influences mark quality
- Color theory applied to pastels: hue, value, saturation, and how soft pastels' opacity and blending properties differ from other media
- Pastel handling and safety: proper grip, dust management, storage, and health considerations when working with pigments
- Building layers and opacity: how soft pastels interact with paper tooth and previous layers to create depth and visual interest
- Translating observation into marks: connecting what you see to deliberate pastel choices and application methods
- What distinguishes professional-grade soft pastels from student-grade pastels in terms of pigment content and lightfastness, and why does this matter for your work?
- How does paper tooth affect pastel adhesion and your ability to layer colors, and what types of surfaces does Creevy recommend for beginners?
- Describe three different mark-making techniques with soft pastels and explain how pressure, hand position, and stroke direction change the result
- What is the relationship between color value, saturation, and opacity in soft pastels, and how do you use this to create visual hierarchy in a composition?
- What are the key safety and health considerations when working with soft pastels, and how should you store and maintain your materials?
- How do you build layers with soft pastels without losing tooth, and what visual effects can you achieve through strategic layering?
- Create a pastel swatch chart: test 12–15 different soft pastels across at least three paper types (smooth, medium tooth, rough), labeling each swatch with pastel name, brand, and paper type to understand how surface affects color appearance
- Practice mark-making studies: fill 3–4 pages with varied strokes using different hand positions, pressures, and directions; label each section with the technique used (e.g., 'light pressure, side of stick', 'firm pressure, tip', 'blended with finger')
- Conduct a value study: using a limited palette of 3–5 soft pastels, create a simple still-life study (apple, cup, or similar) focusing on establishing light, mid, and dark values without worrying about detail
- Experiment with layering and tooth: on a single sheet of textured paper, apply 4–5 layers of color in one area, stopping when the paper no longer accepts pigment; document where tooth is lost and what visual effects emerge
- Blend and layer exploration: create three identical compositions side by side using different blending methods (finger blending, stump blending, no blending) to compare results and understand how blending affects final appearance
- Safety and setup practice: organize your workspace following Creevy's recommendations, set up dust management (spray fixative, ventilation), and practice proper pastel grip and hand positioning for 15–20 minutes until it feels natural
Next up: This stage equips you with material fluency and mark-making confidence, providing the technical foundation needed to move into the next stage where you'll apply these fundamentals to structured composition, color harmony, and representational subjects.

A thorough, beginner-friendly introduction to all pastel types with clear guidance on materials, surfaces, and foundational techniques — the ideal first read to demystify the medium.
Color Logic: Layering & Mixing on the Surface
BeginnerDevelop a confident understanding of color theory as it applies specifically to soft pastels — how colors layer, mix optically, and interact on textured paper.
▸ Study plan for this stage
Pace: 4–5 weeks, ~25–30 pages/day. Start with "Painting With Pastels" (weeks 1–2), then move to "Color and Light" (weeks 3–5), allowing time for practical application between reading sessions.
- How soft pastels layer and blend directly on textured paper surfaces, creating optical color mixing rather than true pigment mixing
- The role of paper texture and tooth in holding multiple pastel layers and affecting how colors appear
- Color temperature (warm/cool) and how adjacent pastel strokes influence perceived hue and vibrancy
- Underpainting and color blocking strategies specific to pastel—establishing dominant hues before adding detail
- Light and shadow relationships in pastel: how value contrast and color saturation work together to create depth and form
- Simultaneous contrast and color harmony principles applied to pastel compositions
- The difference between additive (light-based) and subtractive (pigment-based) color mixing, and how pastels operate in the subtractive space
- Atmospheric perspective using color temperature and saturation shifts to create spatial recession
- How does the tooth of pastel paper affect the way colors layer and mix, and why does this matter for your color choices?
- Explain the difference between optical mixing (layering pastels) and true pigment mixing, and give an example of how you'd use optical mixing in a pastel painting.
- What is color temperature, and how can you use warm and cool pastel strokes strategically to enhance a composition?
- How do value and color saturation work together in pastels to create the illusion of light, shadow, and depth?
- Describe a practical underpainting strategy from Price's work and explain how it sets up successful color layering.
- What is simultaneous contrast, and how would you apply it to make a focal area in a pastel painting stand out?
- Create a color temperature study: paint the same simple form (e.g., a sphere or cube) twice on pastel paper—once using warm dominants, once using cool dominants. Note how the same object reads differently.
- Practice optical mixing: layer three different pastel colors on textured paper in small swatches, varying the order and pressure. Observe how the visual result differs from mixing the same pigments on a palette.
- Conduct a paper-tooth experiment: apply the same pastel color sequence to three different paper textures (rough, medium, smooth). Document how the tooth affects color saturation and blending ease.
- Sketch an underpainting in a neutral or complementary hue, then layer local colors on top. Compare the result to a painting without underpainting to see how it affects color vibrancy and harmony.
- Create a value study using only two pastel colors (e.g., ultramarine and burnt sienna) to establish light, midtone, and shadow. Focus on how value contrast alone creates form before worrying about local color.
- Design a small composition (8×10 inches) that deliberately uses simultaneous contrast: place a muted color next to a vibrant one of the same hue family, and observe how the vibrant color appears even more intense.
Next up: Mastering color logic and layering on the surface gives you the foundation to move into representational subjects—you'll now understand *why* certain color and value choices work, allowing you to apply these principles confidently to landscapes, portraits, and still life in the next stage.
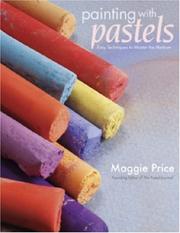
Maggie Price is one of the most trusted voices in pastel education; this book focuses squarely on color mixing and layering strategies that are unique to the pastel medium, making it the perfect bridge from basic mark-making to intentional color use.
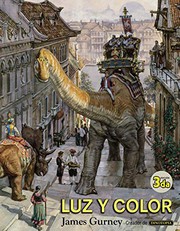
Though medium-agnostic, this canonical reference on how light behaves and how color is perceived is essential reading before tackling landscapes and portraits — it gives the conceptual framework that all later blending and light-capture work depends on.
Blending Mastery: Texture, Edges & Atmosphere
IntermediateMove beyond basic blending into deliberate control of edges, lost-and-found transitions, and atmospheric depth — the skills that separate competent pastel work from expressive art.
▸ Study plan for this stage
Pace: 4–5 weeks, ~20–25 pages/day with daily studio practice
- Hard vs. soft edges and their emotional/spatial impact in composition
- Lost-and-found technique: strategic edge dissolution to guide viewer attention
- Blending tools and methods (tortillon, stump, finger, brush) and when each serves different effects
- Atmospheric perspective through color temperature, value shift, and edge softness
- Layering and glazing strategies to build depth without overworking
- Preserving paper tooth and luminosity while achieving seamless transitions
- Gestural mark-making within controlled blending for expressive texture
- How do hard and soft edges function differently in directing the viewer's eye and creating spatial depth?
- What is the lost-and-found technique, and how does it differ from uniform blending across an entire form?
- Which blending tools does Eagle recommend for specific effects, and why would you choose one over another in a given passage?
- How can you use atmospheric perspective (color, value, edge quality) to push background elements back and pull foreground forward?
- What is the relationship between paper tooth, layering sequence, and the final luminosity of a pastel painting?
- How do you balance expressive texture and gestural marks with the need for atmospheric unity in a composition?
- Study and sketch 5 objects using only hard edges, then re-render the same objects with deliberately softened edges on half the form; compare emotional and spatial effects
- Create a small landscape study (8×10 or smaller) applying lost-and-found transitions: keep edges sharp on one focal area, dissolve edges elsewhere, and evaluate how it directs attention
- Practice blending with each tool (tortillon, stump, finger, soft brush) on identical pastel passages side-by-side; note texture, control, and finish quality of each method
- Paint a still life or portrait using atmospheric perspective: cool/muted colors and soft edges for background, warm/saturated colors and crisp edges for foreground; assess depth illusion
- Layer and glaze a small study (6×8) in 3–4 passes, stopping between layers to evaluate paper tooth and luminosity; document how many layers before the surface becomes muddy
- Render a complex form (fabric, face, or landscape) using a mix of gestural marks and blended passages; identify where texture enhances expression vs. where it distracts
- Analyze 3 finished paintings by Eagle (or reproductions in the book) using tracing paper to map hard/soft edges and lost-and-found areas; write a one-page reflection on how these choices create atmosphere
Next up: This stage equips you with deliberate edge control and atmospheric depth—the foundation for the next level, which will likely explore how to synthesize these techniques into cohesive, emotionally resonant compositions and develop a personal voice through consistent application of these principles.

Eagle's meticulous, studio-based method teaches how to build luminous, multi-layered pastel surfaces with refined blending — an essential intermediate step before tackling the complexity of portraits and light.
Capturing Light in Landscapes
IntermediateApply layering, blending, and color-light theory to landscape painting — skies, water, foliage, and atmospheric perspective — with pastel-specific compositional strategies.
▸ Study plan for this stage
Pace: 4–5 weeks, ~20–25 pages/day with daily practice sessions
- Pastel-specific layering techniques for building depth and luminosity in landscapes
- Color-light theory applied to skies, water, and atmospheric perspective
- Blending methods that preserve pastel texture while creating soft transitions
- Compositional strategies for landscape painting using pastel's unique properties
- Capturing foliage with layered color and gestural mark-making
- Creating atmospheric perspective through color temperature, value, and saturation shifts
- Paper selection and surface preparation for multi-layer pastel work
- Light direction and shadow modeling in natural landscape scenes
- How do you build luminosity in a sky using pastel layering without overworking the surface?
- What color relationships and temperature shifts create convincing atmospheric perspective in a landscape?
- How does Mowry recommend blending pastels while maintaining the medium's characteristic texture and vibrancy?
- What compositional principles specific to pastel painting help organize a complex landscape scene?
- How do you render water reflections and movement using pastel layering and directional mark-making?
- What role does paper tooth and surface preparation play in supporting multiple layers of pastel?
- Complete 3–4 small sky studies (6×8 inches) focusing on different times of day, practicing layering and blending techniques from Mowry's demonstrations
- Paint a water scene (lake, river, or ocean) emphasizing reflections and atmospheric perspective using the color-light principles covered
- Create a foliage study isolating trees or vegetation, experimenting with layered greens and warm/cool color shifts to suggest depth
- Execute a full landscape composition (11×14 inches) incorporating sky, middle ground, and foreground with intentional atmospheric perspective
- Photograph or sketch 5 landscapes in nature, then analyze the light direction, color temperature shifts, and compositional structure before translating one to pastel
- Practice blending exercises on different paper surfaces to understand how tooth and texture affect layering and color mixing
Next up: This stage builds the technical foundation and observational skills needed to move into more advanced topics such as capturing specific lighting conditions (golden hour, storms, dramatic skies) and refining individual landscape elements (trees, rocks, atmospheric effects) with greater subtlety and control.

Mowry is a master of the Tonalist landscape tradition in pastel; her book teaches how to observe and translate natural light and mood into layered pastel passages, directly applying everything learned so far.
Discussion
Keep reading
Paths that share books, cover the same subject, or open a related topic.