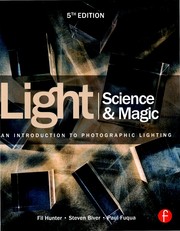
Macro photography: an ordered reading list for beginners
This curriculum takes a beginner from zero macro knowledge to advanced technical mastery, moving through four tightly sequenced stages: first building a solid photographic and gear foundation, then diving into macro-specific optics and lighting, then tackling the precision techniques of focus stacking and field craft, and finally refining artistic vision and composition for truly striking close-up images. Each stage assumes the vocabulary and intuition built in the one before it, so reading in order is essential.
Foundations of Photography
BeginnerUnderstand core camera controls — exposure, aperture, shutter speed, ISO, and depth of field — so that macro-specific concepts introduced later make immediate sense.
▸ Study plan for this stage
Pace: 4–5 weeks, ~25–30 pages/day (approximately 600–700 pages total across both books)
- The exposure triangle: how aperture, shutter speed, and ISO work together to control light and image quality
- Aperture (f-stops) and how it controls depth of field, light transmission, and lens performance
- Shutter speed and its dual role in controlling motion blur and light exposure
- ISO sensitivity and the trade-off between brightness and image noise
- Metering modes and how cameras measure light to determine correct exposure
- Exposure compensation and manual mode as tools for creative control
- Depth of field fundamentals: how focal length, aperture, and subject distance affect focus zones
- Practical workflow: from camera settings to post-processing adjustments for exposure correction
- How do aperture, shutter speed, and ISO interact to create proper exposure, and what creative trade-offs does each control offer?
- What is depth of field, why does it matter in photography, and how do you control it with your camera settings?
- When would you choose manual mode over aperture priority or shutter priority, and how do you meter light in different scenarios?
- How does focal length affect depth of field, and why is this relationship critical for macro photography?
- What is exposure compensation, when should you use it, and how does it differ from manual exposure adjustments?
- How do you diagnose and correct common exposure problems (underexposure, overexposure, blown highlights) in-camera and in post-processing?
- Shoot the same subject in aperture priority mode at f/2.8, f/5.6, and f/16, then compare the depth of field in each image to internalize how aperture affects focus zones
- Photograph a moving subject (person walking, pet, water) using shutter speeds of 1/15s, 1/125s, and 1/1000s to see how shutter speed controls motion blur
- Take identical exposures at ISO 100, 400, and 1600 in low light, then examine the noise trade-off at each sensitivity level
- Use your camera's metering modes (spot, center-weighted, evaluative) on a high-contrast scene (backlit subject, dark background) and note how each mode exposes differently
- Photograph the same scene in manual mode, adjusting the exposure triangle to achieve three different creative looks (shallow depth of field, motion blur, low noise) while maintaining proper exposure
- Create a visual reference guide: photograph a simple subject (white mug, book) at various apertures and shutter speeds, labeling each with settings, then review to build intuition for how settings affect the final image
Next up: Mastering the exposure triangle and depth of field in this stage provides the technical foundation needed to understand how macro-specific challenges—extreme magnification, shallow depth of field, and precise focus stacking—demand deliberate control of these same fundamental controls.
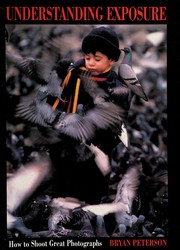
The single clearest introduction to the exposure triangle; mastering aperture and depth of field here is non-negotiable before tackling the razor-thin depth of field that defines macro work.
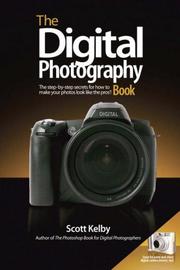
Bridges camera theory to practical shooting habits in plain language, giving the beginner a confident, hands-on workflow before specializing in macro.
Entering the Macro World — Gear & Light
BeginnerUnderstand macro-specific equipment (dedicated lenses, extension tubes, reversing rings, diffusers, ring flashes) and learn how light behaves at close distances.
▸ Study plan for this stage
Pace: 4–5 weeks, ~25–30 pages/day. Start with Komarechka's equipment chapters (weeks 1–2), then move to Arena's lighting fundamentals (weeks 2–3), then revisit both for integrated practice (week 4–5).
- Dedicated macro lenses vs. extension tubes, reversing rings, and teleconverters—when to use each and their optical trade-offs
- How magnification ratio, working distance, and depth of field interact at macro scales
- Light behavior at close distances: inverse-square law, diffusion, and the challenge of even illumination on tiny subjects
- Ring flash, twin flash, and continuous light setups for macro—advantages, limitations, and heat management
- Diffusers, reflectors, and light modifiers as essential tools for controlling harsh light in macro work
- Exposure metering and white balance challenges when working with specialized macro lighting
- The relationship between subject distance, lens focal length, and practical lighting placement constraints
- What are the key optical and practical differences between using a dedicated macro lens, extension tubes, and a reversing ring, and when would you choose each?
- How does depth of field change as you increase magnification, and what strategies can you use to manage it?
- Explain the inverse-square law and why it matters more in macro photography than in general photography.
- What are the advantages and disadvantages of ring flash, twin flash, and continuous light sources for macro subjects?
- How do diffusers and reflectors modify light behavior at close distances, and why are they critical for macro work?
- What metering and white balance challenges arise when using specialized macro lighting, and how do you overcome them?
- Photograph the same small subject (insect, flower, or coin) using three different macro setups (dedicated macro lens, extension tubes, and reversing ring if available); compare sharpness, working distance, and ease of use.
- Set up a simple macro subject indoors and photograph it with and without a diffuser, noting how light distribution, shadow quality, and exposure change.
- Build a DIY ring flash alternative using a continuous light source and white poster board; compare results to direct flash or available light.
- Meter the same macro subject under three different lighting conditions (ring flash, twin flash, continuous light) and document exposure compensation needed for each.
- Create a reflector setup using white foam board or aluminum foil to fill shadows on a macro subject; photograph before and after to see the effect.
- Photograph a macro subject at different working distances (1 inch, 2 inches, 4 inches) with the same lens, documenting how depth of field and light falloff change.
Next up: This stage equips you with the technical foundation—knowing your gear and how light behaves at close range—so you can move forward to composition, focus techniques, and subject-specific strategies in macro photography.

Written specifically for macro beginners, it demystifies gear choices and explains how light, magnification, and working distance interact — the perfect first macro-dedicated read.

Provides a thorough grounding in controlling and shaping light; understanding flash and diffusion here prepares you for the demanding lighting setups macro subjects require.
Precision Techniques — Focus, Stacking & Field Craft
IntermediateExecute manual focus, focus-rail shooting, and focus stacking workflows to achieve front-to-back sharpness; develop reliable field and studio habits for consistent results.
▸ Study plan for this stage
Pace: 4–5 weeks, ~25–30 pages/day with 2–3 dedicated shooting days per week
- Manual focus techniques: zone focusing, focus-by-wire, and live-view magnification for precise control in macro work
- Depth of field (DOF) limitations in macro and how aperture, focal length, and working distance interact to constrain sharpness
- Focus stacking methodology: capturing multiple exposures at different focus distances and blending them in post-production
- Focus rails and macro sliders: mechanical tools for repeatable, precise focus shifts without camera movement
- Field craft and studio setup: lighting placement, subject positioning, and environmental control to enable consistent sharp results
- Exposure and metering in macro: compensating for close working distances, reflective subjects, and non-standard lighting
- Workflow repeatability: establishing standardized procedures for focus, composition, and capture to reduce variables and improve consistency
- What are the practical trade-offs between using autofocus and manual focus in macro photography, and when should you choose each?
- How does focus stacking work, and what are the key steps from capture through post-production blending?
- Explain the relationship between aperture, focal length, and working distance in determining depth of field for a macro subject.
- What is a focus rail, how do you use it, and what advantages does it offer over hand-focusing?
- How should you position lighting and your subject to maximize sharpness and minimize focus-related failures in the field?
- What metering and exposure strategies do you need to employ when working at extreme magnifications with non-standard light sources?
- Practice manual focus on a stationary macro subject (e.g., a small object or insect specimen) using live-view magnification at 10× zoom; capture 10 frames and evaluate sharpness critically.
- Set up a focus-stacking sequence: photograph a small 3D object (e.g., a coin, flower, or insect) at 5–7 different focus distances using a focus rail or by hand-focusing in small increments; blend the stack in post-production and compare the final result to a single-frame macro shot.
- Build a simple macro lighting setup (diffused LED or ring light) and shoot the same subject under three different lighting angles; evaluate how each affects your ability to focus accurately and see fine detail.
- Conduct a depth-of-field test: photograph the same subject at f/4, f/8, f/16, and f/32 (or your lens's widest and smallest apertures) and measure the in-focus zone in each image; document how DOF changes.
- Shoot a 15–20 minute field session on a live subject (insect, plant detail, etc.) using only manual focus and a focus rail or slider; record your focus distances, apertures, and number of frames needed to achieve one sharp result.
- Create a personal macro workflow checklist covering focus method, metering, lighting, subject positioning, and exposure compensation; use it on three consecutive shooting sessions and refine based on results.
Next up: Mastering manual focus, focus stacking, and field discipline in this stage equips you to move into advanced composition, lighting design, and specialized macro subjects (such as insects, water droplets, or product photography) with the technical foundation to execute any creative vision reliably.
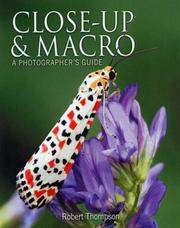
A comprehensive, technique-driven guide covering focusing methods, diffraction limits, and focus stacking step by step — the most thorough intermediate macro manual available.
Artistic Mastery — Composition, Vision & Specialization
ExpertDevelop a personal artistic voice in macro photography through advanced composition principles, subject specialization (insects, flora, abstracts), and the ability to create images that are not just sharp but genuinely striking.
▸ Study plan for this stage
Pace: 6–8 weeks, ~25–30 pages/day with 2–3 days per week dedicated to field practice and image review
- Visual hierarchy and compositional frameworks (rule of thirds, leading lines, depth layering) as taught in Freeman's systematic approach to seeing
- The relationship between technical sharpness and artistic intent—knowing when to break technical perfection for emotional impact
- Subject specialization through deep observation: understanding the unique compositional challenges and opportunities within flora, insects, and abstract macro forms
- Light quality, direction, and color harmony in macro work, particularly how Nichols uses backlighting and sidelighting to reveal texture and form
- Developing a personal visual language by identifying recurring compositional patterns, color palettes, and subject affinities that reflect your artistic voice
- The role of negative space, isolation, and context in macro composition—deciding what to include and exclude to strengthen visual impact
- Translating Freeman's theoretical frameworks into macro-specific applications where extreme magnification creates unique compositional constraints and opportunities
- How do Freeman's compositional frameworks (rule of thirds, leading lines, balance) apply differently to macro photography compared to landscape or portrait work?
- What is the relationship between technical sharpness and artistic vision in macro photography, and when should you intentionally sacrifice perfect sharpness for compositional or emotional effect?
- How does Nichols use light direction (backlighting, sidelighting, diffusion) to create depth and reveal texture in flower and plant photography, and how can you apply these principles to your chosen macro subjects?
- What defines your personal artistic voice in macro photography, and what recurring compositional patterns, subject choices, or color preferences emerge in your strongest images?
- How do you use negative space and subject isolation in macro composition to strengthen visual hierarchy and guide the viewer's eye?
- What are the unique compositional opportunities and constraints of your chosen specialization (insects, flora, or abstracts), and how do you leverage them to create striking images?
- Read Freeman's chapters on visual hierarchy and compositional frameworks, then analyze 10–15 of your own macro images using his vocabulary (balance, emphasis, movement, proportion). Identify which compositional principles are strongest and weakest in your work.
- Create a 'compositional study series' on a single macro subject (e.g., one flower, one insect species, or one abstract pattern) shot from 5–8 different angles and compositions. Compare the results to identify which framings feel most aligned with your artistic intent.
- Study Nichols' use of light in 5–6 of her flower photographs (from the book or online portfolio). Recreate or closely study the lighting setup (backlighting, diffusion, reflectors) and document how light direction changes the emotional impact and texture revelation.
- Conduct a 'negative space audit': shoot the same macro subject with varying amounts of negative space (tight crop, moderate space, generous space). Evaluate how negative space affects visual impact and hierarchy, then articulate your preference.
- Develop a specialization portfolio: choose one macro subject category (insects, flora, or abstracts) and create 15–20 images over 3–4 weeks that explore compositional variety within that niche. Document your decision-making process for each shot.
- Create a visual mood board of 20–30 macro images (your own and others') that resonate with your emerging artistic voice. Identify common threads: color palettes, compositional patterns, lighting preferences, subject matter. Write a 300–500 word artist statement based on these patterns.
Next up: This stage establishes your artistic foundation and personal voice in macro composition, positioning you to move into the next stage where you'll refine technical execution, master specialized equipment, and develop a cohesive body of work ready for exhibition or publication.
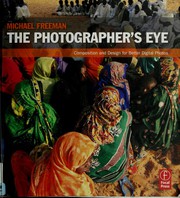
The definitive book on photographic composition and visual design; applying Freeman's framework to the intimate macro world transforms technically correct images into compelling art.

Focuses on flora and close-up natural subjects with a strong emphasis on light quality, color harmony, and moment — directly applicable to botanical and garden macro work at an advanced level.
Discussion
Keep reading
Paths that share books, cover the same subject, or open a related topic.