Best Books to Learn Portrait Painting (in Order)
This curriculum is designed for an intermediate painter who wants to master portrait painting in oils, moving from a solid anatomical and structural foundation through the subtleties of skin tone and light, and finally into the elusive art of capturing a true likeness. Each stage builds directly on the last: you cannot paint convincing skin without understanding the skull beneath it, and you cannot capture a likeness without first controlling your light and value structure.
The Architecture Beneath the Face
IntermediateUnderstand the bony landmarks and muscle groups of the head so that every portrait decision — placement of shadow, edge quality, proportion — is grounded in anatomical reality rather than guesswork.
▸ Study plan for this stage
Pace: 8–10 weeks, ~40–50 pages/day, with 2–3 dedicated anatomy drawing sessions per week
- The skull as the foundational structure: bone landmarks (frontal, temporal, zygomatic, mandible) that determine head shape and proportion
- The relationship between skull geometry and facial feature placement: how eye sockets, nasal cavity, and jaw position dictate where to place eyes, nose, and mouth
- Major muscle groups of the face and neck (frontalis, orbicularis oculi, zygomaticus, masseter, sternocleidomastoid) and how they create surface form and expression
- How light, shadow, and edge quality follow anatomical structure rather than arbitrary placement
- The neck as a structural column: how it connects the head to the torso and supports the skull's weight and movement
- Proportional systems grounded in anatomy: the relationship between cranial vault and facial skeleton, and how individual variation fits within anatomical rules
- How understanding muscle origin and insertion points explains the direction and quality of form changes across the face
- What are the major bony landmarks of the skull, and how do they determine the placement of facial features?
- How do the orbicularis oculi and frontalis muscles function, and what surface changes do they create when contracted?
- Why does the jaw (mandible) move the way it does, and how does this affect the appearance of the lower face and neck?
- How would you use your understanding of the sternocleidomastoid to correctly render the neck in different head positions and expressions?
- What is the relationship between the cranial vault and the facial skeleton, and how does this proportion system guide feature placement?
- How does understanding muscle origin and insertion points help you place shadow and edge quality more convincingly than guesswork?
- From Hamm's 'Drawing the Head and Figure': complete all skull construction exercises, drawing the skull from multiple angles (front, 3/4, profile) at least 5 times each until you can construct it from memory
- Using Gray's 'Anatomy of the Human Body': create a detailed labeled diagram of the skull showing all major bone landmarks (frontal, parietal, temporal, zygomatic, mandible, maxilla), then cross-reference these with Hamm's construction method
- Draw the major facial muscles (frontalis, orbicularis oculi, orbicularis oris, zygomaticus, masseter) on a blank skull outline, then draw the same muscles on a living face or photograph, noting how they create surface form
- From Loomis's 'Figure Drawing for All It's Worth': work through the head construction chapters, then overlay anatomical understanding—redraw the same heads, this time explicitly marking where bone and muscle create shadow and edge changes
- Create a series of 10 portrait studies where you first lightly sketch the underlying skull structure, then add muscle form, then refine with shadow and edge—keep all three layers visible to train your eye to see anatomy beneath surface
- Draw the neck in 8–10 different positions (tilted, turned, extended) using the sternocleidomastoid as your primary structural guide; compare your results to photographs to verify anatomical accuracy
Next up: This stage equips you with the anatomical foundation to make informed decisions about form, shadow, and proportion in the next stage, where you'll learn to translate this structural knowledge into expressive portraiture and character work.

A clear, diagram-rich primer on head proportions and planes that gives intermediate painters a fast, practical vocabulary for facial structure before moving to more demanding anatomical texts.
The definitive reference for skull and facial musculature; used selectively (head and neck chapters), it anchors your anatomical knowledge in authoritative detail that informs every shadow you paint.

Loomis's sphere-and-plane method for constructing the head in any angle is the single most-taught approach in classical portrait training and builds the spatial intuition needed for the stages ahead.
Value, Light, and the Planes of the Head
IntermediateLearn to see and paint the head as a three-dimensional form defined by light and shadow, establishing a reliable value structure before color is introduced.
▸ Study plan for this stage
Pace: 4–5 weeks, ~25–30 pages/day with daily practice sessions
- Understanding value as the primary tool for describing three-dimensional form on the head
- How light direction and quality determine shadow placement and edge quality on facial planes
- Identifying and painting the major planes of the head (front, side, top) and how they turn in space
- The relationship between anatomical structure and how light reveals or obscures it
- Building a consistent value structure from light source to shadow without relying on color
- How edge quality (hard vs. soft) communicates form and light interaction
- The role of reflected light and halftones in maintaining three-dimensionality while preserving value hierarchy
- How does understanding the planes of the head help you establish a believable value structure in portrait painting?
- What is the relationship between light direction and the visibility of facial planes, and how do you use this to guide your value choices?
- How do reflected light and halftones function within a value structure, and when should they be subordinate to your primary light-shadow relationship?
- What edge qualities should you use to describe different planes turning in space, and how does this relate to light and shadow?
- How does Schmid's alla prima approach to value differ from a more methodical underpainting approach, and when is each appropriate?
- How can you use the anatomical planes described in Faigin's work to inform your value structure and make the head read as three-dimensional?
- Paint 5–7 monochromatic head studies using only one light source, focusing on clearly separating light planes from shadow planes without worrying about likeness
- Create a value scale study for a single head, mapping out the lightest light, darkest dark, and halftone areas before applying paint
- Paint the same head from three different light directions (frontal, side, back-lit) to understand how light direction transforms the visibility of planes
- Do 10–15 quick 15-minute studies focusing only on edge quality: hard edges where planes meet in light, soft edges where planes turn into shadow
- Paint a head study using Schmid's alla prima method: establish value structure in one session without underpainting, working wet-into-wet
- Analyze 3–5 master portrait paintings (Rembrandt, Sargent, etc.) by tracing the major planes and value transitions, then paint your own interpretation
- Paint a head study where you deliberately exaggerate plane breaks and value shifts to clarify form, then do a second version with more subtle transitions
Next up: This stage establishes the structural and tonal foundation necessary to introduce color in the next phase—once you can reliably describe three-dimensional form through value and light alone, color becomes a tool to enhance rather than define that form.

Schmid's masterwork covers seeing, value, edges, and paint handling in oils with portrait-specific depth; reading it now trains the eye to read light on form before tackling the complexity of color.
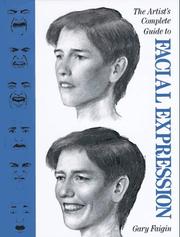
Bridges anatomy and expression by showing exactly how muscles shift planes and shadows across the face, giving you the observational tools to read any living model accurately.
Skin Tones and Color Mixing in Oils
IntermediateDevelop a reliable, flexible system for mixing and layering skin tones across a range of complexions, understanding warm/cool temperature shifts and the role of reflected light in living flesh.
▸ Study plan for this stage
Pace: 4–5 weeks, ~25–30 pages/day, with 2–3 dedicated painting sessions per week
- The limited palette approach for skin tones: using a core set of pigments (earth tones, ochres, alizarin, ultramarine) to achieve chromatic unity and control
- Temperature shifts in flesh: understanding how to push colors warm (toward yellow/red) in lit areas and cool (toward blue/violet) in shadows while maintaining skin's luminosity
- Layering and glazing techniques: building skin tones through transparent and opaque layers to create depth, translucency, and the illusion of living tissue
- The role of reflected light and ambient color: how surrounding colors and light bounce onto shadow areas, preventing muddy, dead-looking skin
- Undertone variation across complexions: recognizing that skin tones span a spectrum of undertones (olive, red, golden, ashy) and how to mix them systematically
- Optical color mixing on the canvas: using broken color and juxtaposition rather than over-blending to preserve vibrancy and luminosity in flesh
- Value structure as the foundation: establishing correct light-to-shadow relationships before refining color, ensuring skin reads as three-dimensional
- What is a limited palette approach to skin tone mixing, and why does it create chromatic harmony in portrait work?
- How do you use temperature shifts (warm lights, cool shadows) to model form in skin while keeping it believable and luminous?
- Describe the difference between opaque and transparent layers in oil painting, and when you would use each to build skin tones.
- What is reflected light, and how does it prevent shadow areas from becoming muddy or lifeless?
- How do you identify and mix the undertone of a specific complexion, and why does this matter more than matching a single 'skin tone' color?
- What is optical color mixing, and how does it differ from physically blending pigments on the palette?
- Complete Brooker's limited palette exercise: mix a set of 5–7 core skin tone colors from a restricted palette (e.g., yellow ochre, burnt sienna, alizarin crimson, ultramarine, white), then create a value scale showing light to shadow transitions.
- Paint a small study (6×8 inches) of a single facial feature (nose, cheek, or forehead) focusing on temperature shifts—deliberately warm the lit side and cool the shadow side, then add reflected light to the shadow.
- Conduct a glazing study: paint an underpainting in monochrome or earth tones, then apply 2–3 transparent color glazes over it to build luminosity and depth, following Brooker's layering approach.
- Mix skin tones for three different complexions (light, medium, deep) using the same limited palette, documenting the pigment ratios to build a personal reference system.
- Paint a small portrait study (8×10 inches) of a face with strong directional light, emphasizing the interplay of warm light, cool shadow, and reflected light in the cheek and jaw areas.
- Create a color temperature chart: paint swatches showing the same local color (e.g., a mid-tone flesh) rendered in warm, neutral, and cool versions, then identify where each appears in a lit face.
Next up: Mastering skin tone mixing and layering in oils establishes the technical foundation needed to move into full-face portraiture, where you'll apply these color and light principles across multiple features while maintaining overall harmony and likeness.

A structured, atelier-method guide focused entirely on oil portrait painting, with dedicated chapters on palette construction, flesh-tone mixing, and layering — the most direct resource for this stage.

Gurney's rigorous treatment of how light behaves on organic surfaces — including subsurface scattering in skin — gives the theoretical backbone that makes your color mixing decisions intentional rather than accidental.
Capturing a Likeness
ExpertMove beyond technically correct portraits to paintings that unmistakably resemble a specific individual — understanding the subtle relationships of proportion, asymmetry, and character that constitute a likeness.
▸ Study plan for this stage
Pace: 4–5 weeks, ~20–25 pages/day, with 2–3 dedicated painting sessions per week
- Proportional relationships and the geometric framework of the head — how deviations from 'ideal' proportions create individual character
- Asymmetry as the fingerprint of likeness — recognizing and deliberately painting the subtle imbalances that make a face unique
- The role of the eye placement, shape, and expression in establishing immediate recognition of a specific person
- Modeling form through value relationships rather than relying on outline — how light and shadow reveal the individual structure beneath
- Capturing the subtle planes of the face — cheekbones, jaw, forehead — that distinguish one person from another
- Color temperature and undertone shifts as tools for suggesting individual skin characteristics and age
- The mouth and its relationship to surrounding features as a signature element of likeness
- Refining and correcting proportions mid-painting — the iterative process of achieving resemblance
- How does understanding the underlying geometric structure of the head help you move beyond technical accuracy to capturing likeness?
- What role does asymmetry play in making a portrait unmistakably resemble a specific individual, and how do you identify which asymmetries matter most?
- How do the proportional relationships between the eyes, nose, and mouth differ from person to person, and what is the most efficient way to measure and establish these relationships?
- What is the relationship between value modeling and the perception of individual character in a portrait?
- How do you use color temperature and undertones to suggest a specific person's skin quality and age rather than painting generic flesh tones?
- Describe the process Sanden outlines for correcting proportions and refining likeness during the painting process — what are the key checkpoints?
- Complete 3–4 proportional studies (charcoal or graphite) of different faces from photographs, focusing on measuring and mapping the unique relationships between key landmarks (eye width, nose length, mouth width, chin projection) before any shading
- Paint 2 small oil studies (8×10 or similar) of the same model from different angles, deliberately noting how the proportional relationships shift and what remains constant in terms of likeness
- Create a detailed written or sketched analysis of a face you know well, identifying 4–5 specific asymmetries or deviations from 'ideal' proportions that make that person recognizable — then attempt a portrait emphasizing these features
- Paint a portrait focusing exclusively on value relationships and modeling, deliberately avoiding line work — practice seeing how form and character emerge from light and shadow alone
- Conduct a color temperature study: paint the same head twice, once with warm undertones and once with cool undertones, observing how this choice affects the perceived age, health, and individuality of the subject
- Complete a full portrait (head and shoulders, 16×20 or larger) from life or a high-quality photograph, incorporating Sanden's process of establishing proportions, blocking in values, and iteratively refining likeness through multiple sessions
Next up: This stage equips you with the diagnostic and technical tools to reliably capture likeness, preparing you to move into portraiture that captures not just resemblance but psychological presence, emotional state, and the narrative dimension of a specific individual.

Sanden, one of America's most prolific portrait painters, focuses specifically on the process of achieving likeness in oils, making this the ideal bridge between technical mastery and expressive portraiture.
Discussion
Keep reading
Paths that share books, cover the same subject, or open a related topic.