Learn oil painting: from first strokes to finished work
This curriculum takes a complete beginner from understanding oil paint as a material all the way to executing finished paintings using classical and contemporary techniques. Each stage builds directly on the last: you first learn what you're working with, then how to handle it, then how to see and mix color, and finally how the Old Masters structured their paintings — giving you a complete, historically grounded practice.
Foundations: Materials, Setup & First Strokes
BeginnerUnderstand oil paint as a medium — what to buy, how to set up a palette, how paint behaves, and how to make your first confident marks without being overwhelmed.
▸ Study plan for this stage
Pace: 8–10 weeks total. Week 1–4: Read "Oil Painting for the Absolute Beginner" by Willenbrink (~20–25 pages/day, including pausing to study diagrams and supply lists). Week 5–10: Read "The Oil Painting Course You've Always Wanted" by Staiger (~15–20 pages/day, slowing down to work through her structured
- The essential starter palette: understanding which pigments Willenbrink recommends for a limited but versatile beginner palette, and why fewer colors build stronger color-mixing intuition
- Mediums, solvents, and the 'fat over lean' rule: how linseed oil, odorless mineral spirits, and their ratios affect drying time, paint consistency, and long-term painting durability
- Brush types, canvas surfaces, and studio setup: how Willenbrink's practical supply guidance helps you avoid costly over-buying and set up a functional, safe workspace
- How oil paint behaves differently from watercolor or acrylic — its slow drying time as a creative advantage, blending capacity, and the concept of 'open time'
- Staiger's structured lesson approach: breaking a painting into logical stages (drawing/composition, value blocking, color layering) rather than working randomly across the canvas
- Value (light and dark) as the foundation of form: Staiger's emphasis on seeing and painting values before worrying about color
- Mixing color with intention: understanding temperature (warm vs. cool), saturation, and how to mix cleanly without muddying, as taught through Staiger's exercises
- Mark-making and brush control: varying pressure, stroke direction, and paint load to create texture, edges (hard vs. soft), and visual interest
- According to Willenbrink, what are the core supplies a true beginner needs to start oil painting, and what can safely be skipped or added later?
- What does 'fat over lean' mean, and what goes wrong in a painting if you ignore this rule?
- How does Staiger recommend you approach the first stage of a painting — what do you establish before you apply any color, and why?
- What is the difference between a hard edge and a soft edge, and how do you physically create each one with a brush?
- How do you mix a neutral gray or muted earth tone without the result turning muddy, based on the color-mixing principles in both books?
- Why is value considered more important than color in the early stages of a painting, and how do you check the values in your own work?
- Supply audit & palette setup (Willenbrink): Before painting anything, assemble exactly the starter supply list Willenbrink recommends. Mix every color on your palette with white, then with its complement, and fill a sheet of canvas paper with the results — building a personal color reference card.
- Fat-over-lean consistency drill: Mix three batches of the same color — one lean (solvent-heavy), one medium (balanced), one fat (oil-heavy). Paint three side-by-side strokes and label them. Observe how they look and handle differently as they dry over the following days.
- Value scale exercise (Staiger): Using only ivory black and titanium white, mix and paint a 9-step value scale from pure white to pure black on canvas paper. Then paint a simple object (an egg or apple) using only those two colors to internalize form through value alone.
- Brush stroke sampler: On a canvas panel, practice every major stroke type — flat drag, stipple, scumble, glaze, palette-knife mark — labeling each. Revisit Willenbrink's brush guidance to match each stroke to the brush type that produces it best.
- First complete study painting (Willenbrink's method): Follow Willenbrink's step-by-step demonstration to complete one small still-life painting (8×10" or smaller) from start to finish, focusing on process over result: sketch, block in darks, build lights, refine edges.
- Structured lesson painting (Staiger's method): Choose one of Staiger's guided projects and work through it strictly in her prescribed stages — composition/drawing, value block-in, color lay-in, refinement — pausing between sessions to re-read the relevant chapter before continuing.
Next up: Completing this stage gives you a working vocabulary of materials, a safe and organized studio habit, and at least two finished small paintings — the exact foundation needed to move confidently into the next stage, where the focus shifts from 'how do I use this medium?' to 'how do I see and interpret a subject?' through more advanced observation, composition, and color theory.

A genuinely entry-level, step-by-step guide that demystifies materials, palette setup, and basic mark-making — the perfect first contact with the medium before any other reading.

Builds directly on basic familiarity by introducing structured exercises in value, edges, and simple composition, bridging the gap between 'first strokes' and intentional painting.
Seeing & Mixing Color
BeginnerDevelop a reliable eye for color relationships, value, and temperature, and learn to mix any color you see using a limited, logical palette.
▸ Study plan for this stage
Pace: 8–10 weeks total. Weeks 1–4: "Blue and Yellow Don't Make Green" (~20–25 pages/day, including re-reading key mixing charts). Weeks 5–10: "Color and Light" (~15–20 pages/day, slower pace to absorb Gurney's visual diagrams and painted studies). Allow one buffer day per week for review and palette pract
- The myth of the 'pure' primary — why blue and yellow don't reliably make green, and how pigment bias determines mixing outcomes (Wilcox)
- Pigment bias and the color wheel split: every pigment leans warm or cool, and choosing the right bias is the key to clean vs. muddy mixes (Wilcox)
- The limited, logical palette: building a full color range from a small set of bias-paired primaries rather than buying every tube (Wilcox)
- Mud prevention: understanding why certain pigment combinations produce dull, neutralized results and how to avoid them intentionally or exploit them for neutrals (Wilcox)
- Value vs. hue: separating the lightness/darkness of a color from its identity — value does the heavy lifting in a painting (Gurney)
- Color temperature and simultaneous contrast: how warm and cool relationships between colors create the illusion of light, shadow, and atmosphere (Gurney)
- The gamut and color keys: how professional painters consciously limit their color range to create mood and harmony rather than painting every color they see (Gurney)
- Landscape and artificial light sources: how the color of light changes the local color of every object it touches, and how to observe and mix accordingly (Gurney)
- Given two blues (e.g., Ultramarine and Phthalo) and two yellows (e.g., Cadmium Yellow and Lemon Yellow), which pairing produces the cleanest green, and why does pigment bias explain the result?
- What is the difference between a color's hue, value, and chroma, and which of the three has the greatest impact on a convincing sense of form in an oil painting?
- How does the temperature of a light source affect the temperature of shadows, and what rule of thumb does Gurney offer for observing warm/cool relationships in nature?
- What is a 'gamut' in Gurney's terms, and how would you consciously restrict your palette to stay within a chosen gamut for a specific mood or time of day?
- Using Wilcox's bias-paired palette logic, how would you mix a clean, vivid orange versus a muted, earthy orange — and when would you choose each?
- Why does Gurney argue that painting what you 'know' a color to be (local color) is less accurate than painting what you actually see under a specific light condition?
- Pigment bias mapping: squeeze out every tube you own, mix each one with a true white, and place it on a hand-drawn warm/cool color wheel to physically locate its bias — use this as your personal reference chart (Wilcox foundation exercise)
- Clean vs. muddy mixing drill: using only two yellows and two blues, mix all four possible green combinations side by side on a palette paper; label which pairings are clean and which are muddy, and write one sentence explaining why for each (Wilcox Chapter application)
- Limited palette master study: choose a simple still-life photo and mix every color in it using only Wilcox's recommended bias-paired primaries plus white — no extra tubes allowed; note where the palette feels limiting and where it surprises you
- Value-only grayscale study: paint a small (5"×7") oil study of any subject using ONLY ivory black and titanium white; your sole goal is accurate value relationships — this isolates value from hue as Gurney emphasizes
- Temperature observation exercise: paint the same simple object (e.g., a white mug) twice — once under warm indoor light and once in cool daylight or open shade — and compare how the shadow temperatures shift, applying Gurney's warm-light/cool-shadow principle
- Gamut restriction painting: pick one of Gurney's gamut maps (e.g., a 'low chroma warm' gamut) and paint a small outdoor or window-light scene staying strictly within that gamut; evaluate afterward whether the mood matches the gamut's intent
Next up: Mastering pigment bias, value structure, and color temperature gives you the perceptual and technical vocabulary to make deliberate decisions on the canvas — the essential foundation for the next stage, which focuses on applying paint with intention through brushwork, edges, and compositional design.
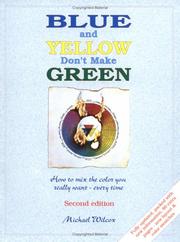
Corrects the most common color-mixing misconceptions from the start; understanding pigment behavior and color bias here prevents years of muddy, frustrating mixes.
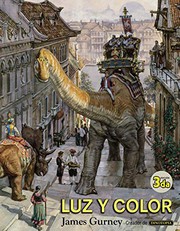
After Wilcox establishes pigment logic, Gurney teaches how light actually creates color in the real world — an essential bridge between mixing theory and observational painting.
Brushwork, Layering & Paint Handling
IntermediateMaster the physical craft of oil painting — alla prima direct painting, wet-into-wet blending, glazing, and building up surfaces with confidence and intention.
▸ Study plan for this stage
Pace: 8–10 weeks total. Weeks 1–4: The Painter's Handbook by Gottsegen (~20–25 pages/day, focusing on materials, mediums, and surface preparation chapters). Weeks 5–10: Alla Prima by Richard Schmid (~15–20 pages/day, reading slowly and revisiting demonstrations repeatedly alongside active painting session
- Fat-over-lean rule: understanding oil content in paint layers and why each successive layer must be more flexible (oilier) than the one beneath it, as grounded in Gottsegen's materials science chapters
- Paint chemistry and mediums: how solvents, oils, resins, and drying agents alter paint handling, open time, and film stability — drawn from Gottsegen's systematic breakdown of painting materials
- Ground and surface preparation: the role of absorbency, texture, and priming in how paint sits, moves, and adheres — a foundation Gottsegen treats with unusual rigor
- Alla prima (direct painting): completing a work in a single session, wet-into-wet, with confident, decisive brushwork — the central method Schmid teaches and demonstrates throughout his book
- Wet-into-wet blending: controlling edges (hard, soft, lost) by manipulating paint consistency, brush pressure, and timing, as Schmid demonstrates in his step-by-step figure and landscape passages
- Glazing and scumbling: applying transparent or semi-opaque layers over dry paint to modify color, value, and luminosity — covered in Gottsegen as technique and in Schmid as an expressive choice
- Intentional brushwork: treating each stroke as a finished statement rather than a sketch — Schmid's philosophy of 'painting what you see, not what you know' expressed through loaded, purposeful marks
- Building a painting with confidence and economy: Schmid's approach to value structure, color temperature, and edge hierarchy as the organizing logic behind every paint-handling decision
- According to Gottsegen, what does the fat-over-lean principle mean in practice, and what specific failures does violating it cause over time?
- What mediums does Gottsegen recommend for modifying paint consistency, and how does each one affect drying time, flexibility, and surface finish?
- How does Schmid define alla prima painting, and what mental and physical preparations does he describe as essential before the first stroke is placed?
- What is Schmid's approach to edges — how does he decide when an edge should be hard, soft, or lost, and how does he physically achieve each type wet-into-wet?
- How do glazing and direct (opaque) painting differ in their expressive and structural roles, and under what circumstances does each approach serve the painting better?
- What does Schmid mean by 'painting what you see rather than what you know,' and how does this philosophy change the way brushstrokes are mixed, loaded, and placed?
- Fat-over-lean layer test: On a single prepared panel, paint three overlapping layers of the same subject — each with progressively more linseed oil added to the medium. Label each layer and keep the panel as a reference for understanding paint film flexibility.
- Medium comparison swatches: Using Gottsegen's medium descriptions as a guide, mix four small batches of paint with different mediums (stand oil, alkyd, turpentine-only, and a resin varnish medium). Paint identical strokes with each and note handling differences, dry time, and surface sheen after one week.
- Alla prima still life sprint (Schmid method): Set up a simple 3-object still life and complete it in a single 2–3 hour session without any corrections the next day. Focus entirely on decisive, loaded strokes. Repeat this exercise weekly throughout the Schmid reading.
- Edge control study: Paint a sphere or simple head from life, deliberately practicing all three edge types — hard, soft, and lost — in their correct locations (form edges, shadow edges, background transitions). Use only wet-into-wet manipulation; no dry-brush blending after the fact.
- Glazing vs. direct painting comparison: Paint the same simple composition twice on identically prepared panels — once entirely alla prima (opaque, direct) and once using a lean underpainting followed by two transparent glaze layers. Compare the luminosity, depth, and color quality of both results.
- Schmid master-copy exercise: Select one of Schmid's own step-by-step demonstrations from Alla Prima and replicate it stroke-for-stroke on your own panel, pausing at each stage he describes. The goal is not a copy but internalizing his sequencing logic — value block-in first, color temperature second, edges last.
Next up: Mastering paint handling, layering logic, and direct painting gives the reader a confident physical vocabulary, which makes the next stage — focused on color theory, value structure, and compositional design — immediately actionable rather than purely theoretical.
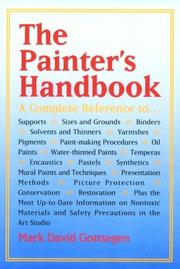
A thorough, authoritative reference on paint chemistry, mediums, grounds, and archival practice — reading this now ensures every technique you learn next is built on sound materials knowledge.

Widely considered the definitive modern text on direct oil painting; Schmid's detailed breakdown of observation, brushwork, and paint application is the core of this stage.
Classical Structure: Drawing, Value & Composition
IntermediateUnderstand how strong paintings are architecturally designed — using value structure, drawing, and compositional logic to create paintings that hold together as unified wholes.
▸ Study plan for this stage
Pace: 3–4 weeks, ~20–25 pages/day; read each chapter actively with sketchbook in hand, pausing to complete Dodson's built-in exercises before moving on
- Contour drawing as the foundation of observation — training the eye to follow edges slowly and honestly before worrying about rendering
- The 'artist's handwriting' concept: developing a personal, confident line quality rather than timid, scratchy marks
- Gesture and proportion: capturing the large movement and relative scale of a subject before committing to detail
- Value as structure — understanding that light and shadow, not line, are what give a painting its sense of form and three-dimensionality
- Simplifying values into a limited hierarchy (light, mid-tone, dark) to create readable, unified compositions
- Negative space as an active compositional tool: designing the shapes around the subject with as much intention as the subject itself
- Compositional logic: how the arrangement of major value masses guides the viewer's eye and creates a sense of balance or tension
- The habit of thumbnail sketching to test compositional ideas quickly before committing to a full painting
- Can you explain the difference between contour drawing and gesture drawing, and describe when each is the appropriate tool to use?
- How does Dodson define 'seeing' as distinct from merely looking, and why is this distinction central to drawing and painting well?
- How would you reduce a complex scene to three or four value zones, and why does this simplification strengthen a composition rather than weaken it?
- What role does negative space play in compositional design, and how can deliberately shaping negative areas improve the overall structure of a painting?
- How do proportion and placement of the major value masses determine where a viewer's eye travels across a picture plane?
- What is Dodson's recommended process for self-correcting a drawing, and how does that same process apply when evaluating a painting in progress?
- Daily 15-minute contour drawing sessions: choose one household object per day and draw it in pure contour (no peeking at the paper for the first pass), then compare the result to the object to train honest observation
- Value-strip exercise: create a 5-step grayscale strip from white to black using pencil or charcoal, then re-examine every drawing or photo reference by squinting and mapping it onto only 3 of those 5 steps
- Thumbnail composition studies: before any painting session, fill a page with 6–8 small (2"×3") thumbnail sketches of the same subject, varying the placement of the horizon, the main value mass, and the negative shapes — select the strongest before scaling up
- Negative-space reversal: choose a still-life or landscape reference, and draw ONLY the negative spaces (the background shapes) without drawing the objects themselves — then evaluate whether those shapes are interesting and varied
- Master study in value only: select one oil painting reproduction (from any classical painter you admire) and recreate it in pencil or charcoal, translating all color into a 3-value structure — this directly bridges Dodson's drawing principles to the painting context
- Weekly 'design audit': at the end of each week, lay out all drawings made that week and ask Dodson's self-correction questions — identify one recurring weakness (e.g., timid line, muddy values, centered compositions) and set a specific focus for the following week
Next up: Mastering Dodson's drawing fundamentals — confident line, simplified value structure, and intentional composition — gives you the architectural blueprint that oil paint must then be applied on top of, making the transition to color, medium, and paint handling feel purposeful rather than accidental.
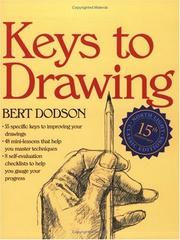
Solid drawing is the skeleton of classical oil painting; this practical, exercise-driven book builds the observational drawing skills that underpin every technique in the stages ahead.
Classical Techniques & Finished Paintings
ExpertUnderstand and apply the layered, indirect methods of the Old Masters — underpainting, glazing, and scumbling — to produce richly finished, technically sound paintings.
▸ Study plan for this stage
Pace: 8–10 weeks, ~20–25 pages/day, 5 days/week — Solomon's text is dense with technical instruction and period-specific terminology, so allow extra time to re-read passages before attempting each studio exercise. Dedicate at least one full weekend session per week to hands-on practice directly tied to th
- Indirect painting methodology: the principle of building a painting in distinct, purposeful layers rather than alla prima, as Solomon systematically outlines throughout the book
- Underpainting (dead colouring): establishing value structure, composition, and drawing accuracy in a monochrome or limited-palette first layer before any colour glazing begins
- Glazing: applying thin, transparent oil-rich colour layers over a dry underpainting to achieve luminous, optically mixed colour that cannot be produced by direct mixing alone
- Scumbling: dragging semi-opaque, lean paint over a dry layer to create atmospheric softness, reflected light, and textural variation — Solomon's counterpoint technique to glazing
- Fat-over-lean rule: the foundational technical discipline of ensuring each successive layer contains more oil than the last, preventing cracking and delamination over time
- The role of drawing as the structural armature of a finished painting — Solomon's associated drawing instruction is not supplementary but integral to his painting method
- Palette organisation and pigment selection for the Old Master approach: understanding which pigments are transparent (suitable for glazing) versus opaque (suitable for scumbling and lights)
- Finishing and surface unity: Solomon's guidance on resolving edges, unifying tone across layers, and knowing when a painting is truly complete rather than merely overworked
- According to Solomon, what is the precise purpose of the underpainting (dead colouring) stage, and what qualities — in terms of value, texture, and paint consistency — should it possess before glazing begins?
- How does Solomon distinguish between glazing and scumbling as techniques, and in what specific pictorial situations does he recommend each?
- What does Solomon say about the fat-over-lean principle in practical terms — how should a painter adjust medium ratios from the first layer through to final glazes?
- How does Solomon integrate drawing practice into the oil painting process, and why does he treat them as inseparable disciplines rather than sequential ones?
- Which pigments does Solomon identify as most suitable for transparent glazes, and what are his warnings about pigments that are chemically or optically unsuitable for this use?
- What criteria does Solomon offer for judging when a painting is finished, and what are the most common errors he identifies in overworking or prematurely resolving a canvas?
- Monochrome underpainting study: Choose a still-life or portrait reference and execute a complete underpainting in raw umber or ivory black, following Solomon's guidance on value structure. Do not proceed to colour until the layer is fully dry — use this waiting period to re-read the relevant glazing chapters.
- Glaze isolation test panel: On a small gessoed board, paint six identical grey value swatches, then apply a different transparent pigment glaze (e.g. alizarin crimson, viridian, burnt sienna, ultramarine, yellow ochre, transparent oxide red) over each. Label each swatch and keep the panel as a permanent reference for optical colour mixing.
- Scumbling vs. glazing comparison exercise: Take two identical underpainted panels and resolve one using only glazes and the other using only scumbles. Compare the resulting surface quality, luminosity, and edge character side by side, noting observations in a written studio journal.
- Fat-over-lean medium ladder: Mix five small jars of medium with progressively increasing oil content (e.g. 1:3 oil-to-solvent up to pure linseed oil). Execute a layered painting using each medium in sequence, labelling each layer in a notebook to internalise the principle as physical habit rather than theory.
- Drawing-as-structure exercise: Following Solomon's integration of drawing and painting, produce a detailed charcoal or pencil compositional drawing of your subject, then transfer or redraw it directly onto the canvas as the foundation for a full indirect painting — do not skip or abbreviate this stage.
- Full Old Master sequence painting: Execute one complete painting from start to finish using every stage Solomon describes — compositional drawing, toned ground, monochrome underpainting, colour lay-in, glazing, scumbling, and final resolution — keeping a written log of decisions made at each layer transition.
Next up: Mastering Solomon's layered, disciplined approach to indirect painting gives the reader the technical fluency and material understanding needed to engage critically with more specialised or contemporary advanced topics — such as portraiture, plein air, or conceptual approaches — without being undermined by foundational technical failures.
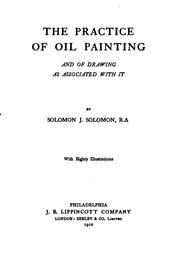
A classic, historically grounded text on the academic method — underpainting through final glazes — that ties together everything learned so far into a coherent classical workflow.
Discussion
Keep reading
Paths that share books, cover the same subject, or open a related topic.