Best Books to Master Still Life Painting (in Order)
This four-stage curriculum takes a beginner from the fundamental language of seeing and drawing, through the classical principles of composition and light, and finally into the specific techniques of oil and acrylic rendering for still life. Each stage builds the vocabulary and visual intuition required to get the most out of the next, so the books should be read in the order presented.
Foundations: Learning to See
BeginnerDevelop the core skill of observational drawing — training the eye to accurately perceive shape, proportion, and value before any paint is picked up.
▸ Study plan for this stage
Pace: 4–5 weeks, ~25–30 pages/day, with 3–4 dedicated drawing sessions per week (2–3 hours each)
- Shifting from L-mode (analytical) to R-mode (intuitive) thinking to bypass learned symbols and see what's actually there
- The five basic perceptual skills: contour drawing, negative space, proportion and perspective, light and shadow (value), and gestalt (whole-to-part relationships)
- How the left hemisphere defaults to symbolic representation while the right hemisphere perceives direct visual information
- Proportion and measurement techniques: using a pencil as a measuring tool, establishing relationships between objects, and checking angles
- Value as the foundation of form: understanding how light and shadow create dimension, volume, and visual hierarchy
- Contour and outline as tools for training edge perception and hand-eye coordination
- Negative space as an active compositional element that clarifies positive form
- What is the difference between L-mode and R-mode thinking, and how does understanding this difference improve observational drawing?
- Name and describe the five basic perceptual skills Edwards identifies, and explain why each is essential before painting
- How do you use a pencil as a measuring tool to establish accurate proportions in a still life setup?
- Why is negative space as important as positive space in observational drawing, and how do you use it to check accuracy?
- What is the relationship between value (light and shadow) and the illusion of three-dimensional form on a flat surface?
- Describe the contour drawing technique and explain how it trains the eye-hand connection differently than outline drawing
- Complete Edwards' 'upside-down drawing' exercise: copy a complex image (photograph or artwork) upside down to bypass symbolic thinking and train direct perception
- Practice 20-minute contour drawings of simple objects (apple, bottle, crumpled fabric) without looking at your paper, focusing on edge perception
- Set up a simple still life (3–4 objects) and execute a proportion study using a pencil as a measuring tool; establish unit relationships and verify angles
- Create 5–6 value studies of the same still life using only graphite, focusing on light source, shadow shapes, and reflected light—no outlines
- Negative space exercise: draw only the spaces between and around objects in a still life, not the objects themselves, to clarify form relationships
- Timed observational sketches (10–15 minutes each) of varied subjects (fruit, fabric, geometric forms) to build speed and confidence in perception
Next up: Mastering these foundational perceptual skills—accurate seeing, proportion, value, and spatial relationships—provides the visual literacy and hand-eye coordination necessary to move into color mixing, composition, and the technical execution of still life painting.

The essential first step: it rewires how you perceive objects by teaching you to draw what you actually see rather than what you think you see — a critical foundation for still life work.
Bridges pure observation into structured drawing practice with clear exercises on contour, shading, and form — building the hand-eye vocabulary needed before tackling paint.
Composition & Design: Arranging the Still Life
BeginnerUnderstand the principles of visual composition — how to arrange objects, create balance, guide the eye, and design a compelling picture plane before touching color or medium.
▸ Study plan for this stage
Pace: 2–3 weeks, ~20–25 pages/day, with daily sketching practice
- The rule of thirds and dynamic asymmetrical balance in arranging objects
- Creating visual pathways and focal points to guide the viewer's eye through the composition
- The relationship between positive (objects) and negative (empty) space in still life design
- How geometric shapes and value structure underpin compelling arrangements
- The importance of variety in size, shape, and placement to avoid monotony
- Using atmospheric perspective and overlapping to create depth on the picture plane
- How does Payne define compositional balance, and why is asymmetrical arrangement often more compelling than symmetrical?
- What role does the focal point play in guiding a viewer's eye, and how do you establish one in a still life arrangement?
- How should you use negative space to strengthen your composition rather than treat it as empty area?
- What geometric principles does Payne recommend for organizing objects before you begin painting?
- How can you create visual variety in a still life without making the arrangement feel chaotic?
- What is the relationship between value structure and compositional strength in Payne's approach?
- Arrange 5–7 simple objects (fruit, bottles, cloth) following the rule of thirds; sketch the arrangement from multiple viewpoints and identify the strongest composition
- Create 10 small thumbnail sketches (2×3 inches) of the same objects in different arrangements, focusing on how each changes the viewer's eye movement
- Draw a still life arrangement, then overlay a grid showing the rule of thirds and identify where your focal point falls—adjust and redraw if needed
- Set up a still life, photograph it, then sketch it with emphasis on negative space; use hatching or shading to make empty areas as intentional as the objects
- Arrange objects to create three different compositions: one with a clear geometric structure (pyramid, triangle, line), one with a circular flow, and one with a diagonal movement
- Study Payne's examples in the text; recreate one of his recommended arrangements with your own objects, then write a brief analysis of why the composition works
Next up: This stage establishes the compositional skeleton—the invisible architecture of balance, movement, and focal point—that will support all subsequent decisions about color, value, and medium in the next stage.
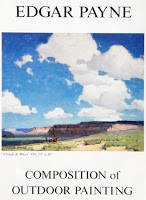
A canonical text on compositional structure and design patterns (notan, line, mass) that applies directly to still life; reading it here gives the learner a timeless design grammar.
Light, Shadow & Value: The Grammar of Form
IntermediateMaster how light behaves on three-dimensional objects — understanding planes, the value scale, cast shadows, reflected light, and edges — the core of rendering convincing form.
▸ Study plan for this stage
Pace: 8–10 weeks, ~40–50 pages/day, with 2–3 days per week dedicated to practical exercises and sketching
- The value scale and how to measure light-to-dark relationships accurately using a consistent tonal range
- How light behaves differently on curved vs. flat planes, and how to identify and render the five basic planes of form
- Cast shadows and reflected light: their properties, edges, and role in anchoring objects in space
- The relationship between light direction, shadow shape, and the illusion of three-dimensional form
- Hard vs. soft edges and how edge quality communicates form, material, and spatial depth
- Geometric underlying structure (proportion, perspective, and compositional geometry) as the foundation for accurate light rendering
- How atmospheric perspective and color temperature shifts interact with value to create convincing spatial recession
- How do you construct and use a value scale, and why is consistency in measuring tones essential to convincing still life painting?
- Explain the five basic planes of form and how light behaves differently on each; how would you identify these planes in a simple sphere or cube?
- What is the difference between cast shadow and reflected light, and how do you determine the edge quality of each?
- How does understanding the underlying geometric structure of an object improve your ability to render light and shadow convincingly?
- Describe the relationship between light direction, shadow shape, and the viewer's perception of three-dimensional form in a still life composition.
- How do edge quality (hard, soft, lost) and value transitions work together to create the illusion of form and spatial depth?
- Complete a series of value scales (at least 5) using graphite, charcoal, or paint, ensuring smooth, consistent transitions from light to dark without jumping steps
- Paint or draw 10–15 simple geometric forms (spheres, cubes, cylinders, cones) under a single, consistent light source, focusing on identifying and rendering the five planes and their value relationships
- Set up a still life with 3–4 simple objects under controlled lighting; make multiple studies (small, 30–45 min sketches) emphasizing cast shadows, reflected light, and edge quality
- Create a series of studies isolating one variable at a time: one focusing only on cast shadow shape and edge quality, another on reflected light, another on edge transitions
- Analyze 3–5 master still life paintings (photograph or study them alongside the books); identify the underlying geometric structure, value distribution, and how light direction creates form
- Paint a complete still life composition (8–12 hours total) applying all concepts: accurate value relationships, clear plane identification, convincing cast shadows and reflected light, and intentional edge control
Next up: This stage establishes the technical foundation—light, value, and form—that you'll now apply to more complex subjects (color harmony, atmospheric effects, and compositional dynamics) in the next stage of the curriculum.
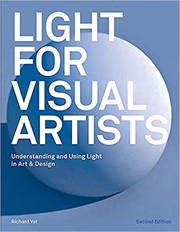
A clear, medium-agnostic breakdown of how light and shadow work on form; it introduces the full vocabulary (highlight, halftone, core shadow, reflected light) in an accessible, illustrated way.
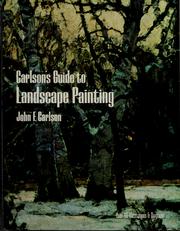
Though landscape-focused, Carlson's rigorous treatment of planes, angles, and value relationships is universally praised by still life painters for deepening understanding of how light defines form.

Deepens compositional and structural thinking by revealing the geometric armatures used by Old Masters — essential context before studying classical still life rendering techniques.
Rendering in Oils & Acrylics: Putting It All Together
ExpertApply all prior knowledge directly to still life painting in oils and acrylics — mastering paint handling, color mixing, edges, glazing, and the full process from block-in to finish.
▸ Study plan for this stage
Pace: 8–10 weeks, ~25–30 pages/day with daily painting practice sessions (1–2 hours)
- Oil and acrylic paint properties: drying times, transparency, viscosity, and how to manipulate them for different effects
- Underpainting and block-in techniques: establishing value structure and composition before detailed work
- Color mixing in oils and acrylics: achieving accurate hues, managing mud, and understanding pigment interactions
- Alla prima (wet-on-wet) painting: working directly and confidently in one session to capture immediacy and freshness
- Glazing and layering: building depth and luminosity through transparent layers in oils
- Edge control: creating soft, hard, and lost edges to direct viewer attention and create form
- Brushwork and paint handling: developing confident, expressive application appropriate to subject and medium
- Complete still life workflow: from initial setup and value study through block-in, underpainting, color lay-in, and final refinement
- What are the key differences between oil and acrylic paint properties, and how do these differences affect your painting approach and timing?
- How do you establish a strong value structure in the block-in stage, and why is this foundation critical before adding color?
- What strategies can you use to avoid muddy color mixing, and how do you correct it when it occurs?
- How does alla prima painting differ from layered/glazed approaches, and when is each method most appropriate for still life?
- What is the purpose of glazing in oil painting, and how do you apply transparent layers to build luminosity without losing form?
- How do you use edge control (hard, soft, and lost edges) to create depth, direct focus, and suggest form in a still life composition?
- Complete a monochromatic underpainting of a simple still life (3–4 objects) using only one color plus white, focusing on accurate value relationships and clean edges
- Paint the same still life setup twice: once using alla prima (wet-on-wet, one session) and once using a layered approach with underpainting and glazes; compare results and note handling differences
- Create a color-mixing study: mix 10 different greens, grays, and earth tones using oils or acrylics, labeling pigment combinations and noting which mixes stay clean vs. muddy
- Paint a small still life (8×10 inches) using only three pigments plus white, forcing deliberate color mixing and restraint
- Practice edge control: paint a simple object (apple, bottle, or cube) with intentional hard edges on one side, soft edges on another, and lost edges where appropriate; explain your choices
- Complete a full still life painting (12×16 inches or larger) from setup through finish, documenting each stage: composition sketch, value study, block-in, underpainting, color lay-in, and refinement
Next up: This stage equips you with the technical mastery and confident paint handling needed to move into personal expression and stylistic development, where you'll apply these foundational skills to explore your unique voice in still life painting.

A methodical, beginner-friendly but thorough introduction to oil technique — covering color mixing, value, and paint application in a structured way that directly supports still life work.

Widely considered the definitive modern masterwork on oil painting technique; Schmid's deep treatment of edges, color, and paint handling elevates still life rendering to a high level.
Discussion
Keep reading
Paths that share books, cover the same subject, or open a related topic.