Portrait drawing for beginners: the best books to capture a likeness
This curriculum takes a complete beginner from the very first pencil mark to confident, structured portrait drawing. Each stage builds directly on the last: you first develop an artist's eye and basic mark-making, then master facial proportion and individual features, then learn to model form with light and shadow, and finally study the underlying skull structure and likeness-capturing techniques used by professional portrait artists.
Foundations: Seeing & Mark-Making
BeginnerTrain the eye to see accurately, break the habit of drawing symbols instead of shapes, and build confident pencil control — the essential prerequisites before tackling the face.
▸ Study plan for this stage
Pace: 4–5 weeks, ~20–25 pages/day, with daily drawing practice (30–45 minutes). Week 1–2: Edwards' "Drawing on the Right Side of the Brain" (core perceptual exercises); Week 3: Dodson's "Keys to Drawing" (mark-making and line control); Week 4–5: Integration and refinement across both books' techniques.
- The difference between the symbolic (L-mode) and perceptual (R-mode) brain, and how to shift into R-mode drawing to see what is actually there, not what you think you see
- Contour drawing and blind contour drawing as tools to train direct eye-to-hand coordination and break reliance on symbols
- Negative space (the shapes around and between objects) as a primary subject, not the objects themselves
- Basic mark-making vocabulary: line weight, pressure, direction, and texture as fundamental building blocks of visual communication
- Proportion and measurement through sighting and comparative relationships rather than memorized rules
- The role of edges—hard, soft, and lost—in creating form and depth on a flat surface
- Overcoming the internal critic and perfectionism as prerequisites for honest observation and skill development
- What is the difference between L-mode (symbolic) and R-mode (perceptual) drawing, and how do you recognize when you've shifted into R-mode?
- How does contour drawing train your eye and hand, and why is blind contour drawing particularly valuable for breaking symbol habits?
- What is negative space, and why is learning to see and draw it as important as drawing the object itself?
- How do you use sighting and comparative measurement to determine proportions without relying on rules or formulas?
- What are the main types of marks you can make with a pencil, and how do line weight, direction, and pressure communicate form?
- How do hard, soft, and lost edges function in portrait drawing, and when would you use each?
- Complete Edwards' upside-down drawing exercise: copy a photograph or artwork upside down to bypass symbol recognition and train direct perception
- Practice blind contour drawing daily (10–15 minutes): draw your own hand, a crumpled cloth, or a simple object without looking at the paper, focusing entirely on the contour line
- Negative space studies: select 3–5 objects (cups, chairs, plants) and draw only the space around them, not the objects themselves, to train spatial awareness
- Sighting exercises: use a pencil held at arm's length to measure proportions on a reference image (head width vs. face length, eye spacing, etc.) and transfer those ratios to your drawing
- Mark-making exploration: fill 2–3 pages with varied pencil marks—different line weights, hatching patterns, stippling, scribbles—to build confidence and vocabulary
- Timed gesture and contour studies: draw the same subject (face, hand, or object) in 1-minute, 5-minute, and 15-minute versions to understand how observation deepens with time
Next up: With accurate perception, confident mark-making, and the ability to see shapes and relationships rather than symbols, you are now ready to apply these foundational skills to the specific anatomy and structure of the human face.

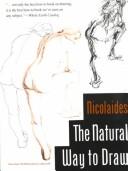
The single best starting point for any beginner: it rewires how you perceive what you see, replacing symbolic shortcuts with genuine observation — a skill portrait drawing demands above all else.
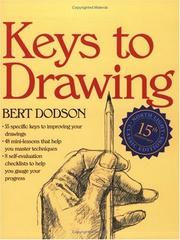
Follows Edwards by giving concrete, practical exercises in line, contour, and proportion that translate observational skill into controlled marks on paper, bridging seeing and doing.
Proportion & the Planes of the Face
BeginnerUnderstand the measurable proportions of the human head, correctly place all major features, and begin to think of the face as a three-dimensional form rather than a flat pattern.
▸ Study plan for this stage
Pace: 4–5 weeks, ~20–25 pages/day with frequent pauses for sketching and measurement practice
- The egg/ovoid as the foundational structure for the head in all views (front, three-quarter, profile)
- The rule of thirds and halves: dividing the head into proportional units to locate eyes, nose, mouth, and ears consistently
- The relationship between the cranium and jaw structure, and how this changes with head tilt and rotation
- The planes of the face (frontal, temporal, zygomatic, nasal, oral, and jaw planes) and how light reveals three-dimensionality
- Feature placement relative to the centerline and horizontal divisions, not as isolated shapes
- How proportions shift subtly with age, gender, and individual variation while maintaining underlying structural logic
- The importance of construction lines and blocking-in before rendering, establishing the head's orientation in space
- What is the basic geometric form Loomis recommends as a starting point for constructing the head, and why is it more useful than drawing the head as a circle?
- How do you divide the head to locate the eyes, and where does the nose sit relative to these divisions?
- Describe the major planes of the face and explain how understanding them helps you render a three-dimensional form rather than a flat pattern.
- How do the proportions of the head change when the head is tilted or turned, and what construction method helps you maintain accuracy in these rotations?
- What is the relationship between the cranium and the jaw, and how does this structure inform your approach to different head shapes?
- How would you explain the difference between drawing a head from a flat pattern of features versus constructing it as a solid three-dimensional form?
- Draw 10 heads in the frontal view using Loomis's egg construction method, focusing on dividing the form with centerlines and horizontal proportional divisions before adding features.
- Construct 8 heads in profile and three-quarter view, paying careful attention to how the egg rotates in space and how feature placement shifts with the head's orientation.
- Create a reference sheet mapping the five major facial planes (frontal, temporal, zygomatic, nasal, oral) on at least 4 different head angles, using light and shadow to emphasize dimensionality.
- Draw 6 heads with varying ages (child, young adult, middle-aged, elderly) using Loomis's proportional system, noting how the relationship between cranium and jaw shifts while the underlying structure remains consistent.
- Measure and annotate 5 photographs of real heads (front, profile, and three-quarter views) using Loomis's proportional divisions, then construct heads from these measurements without tracing.
- Complete a series of 12 quick construction sketches (5–10 minutes each) focusing solely on blocking in the egg, centerline, and feature placement lines—no rendering—to internalize the structural foundation.
Next up: Mastering proportional construction and understanding the head as a three-dimensional form of planes prepares you to add accurate facial anatomy, subtle surface variations, and expressive features in the next stage.
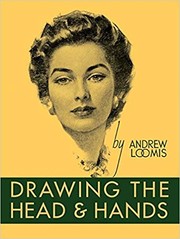
The canonical text on head construction: Loomis's sphere-and-plane method gives beginners a reliable, repeatable system for placing features in correct proportion from any angle.
Features in Depth: Eyes, Nose, Mouth & Ears
IntermediateDraw each individual facial feature convincingly on its own and understand how they integrate into a coherent, believable face.
▸ Study plan for this stage
Pace: 4–5 weeks, ~25–30 pages/day. Week 1–2: Hamm's feature fundamentals (eyes, nose, mouth, ears anatomy & construction). Week 3: Hamm's integration chapters + Faigin's feature-expression foundations. Week 4–5: Faigin's detailed feature analysis with daily drawing practice.
- Anatomical structure of each feature (eye socket, nasal bone, jaw mechanics, ear cartilage) as the foundation for convincing drawing
- Proportional relationships: how eyes, nose, mouth, and ears relate to each other and the head grid
- Light and shadow modeling on curved facial surfaces to create three-dimensional form
- How subtle variations in feature shape and placement convey age, emotion, and individual character
- The role of muscles and underlying structure in creating facial expressions through feature movement
- Integration principle: drawing features not in isolation but as interconnected parts of a unified face
- Common construction mistakes (symmetry traps, proportion errors, flat rendering) and how to avoid them
- Feature-specific techniques from Hamm (construction lines, geometric breakdown) and Faigin (expression mechanics)
- What are the key anatomical landmarks (bone and muscle) that determine the shape and position of each facial feature, and how do you use them as construction guides?
- How do the proportions of the eyes, nose, mouth, and ears relate to each other and to the overall head structure, and what happens when you alter these relationships?
- How do you use light, shadow, and form to make a single feature (e.g., an eye or mouth) appear three-dimensional and convincing on its own?
- What specific muscle movements and structural changes occur when a face expresses different emotions, and how does this affect the appearance of individual features?
- How do you integrate multiple features into a coherent face so they feel like they belong together rather than appearing as separate, disconnected elements?
- What are the most common mistakes beginners make when drawing individual features, and what specific techniques from Hamm and Faigin help you avoid them?
- From Hamm: Complete his step-by-step eye construction exercises (lids, iris, pupil, highlights) in at least 20 variations, focusing on different angles and expressions
- From Hamm: Draw the nose using his geometric breakdown method (wedge, planes, nostrils) at least 15 times from different angles (front, 3/4, profile)
- From Hamm: Practice mouth construction using his jaw and lip anatomy guides; draw 20+ mouths showing different expressions (smile, frown, neutral, open)
- From Hamm: Study and draw ears using his cartilage structure approach; complete 15 ears from multiple angles to internalize the complex curves
- From Faigin: Analyze the facial muscles responsible for 5–6 basic emotions (joy, anger, sadness, surprise, fear, disgust); sketch how each emotion subtly shifts the eyes, brows, mouth, and cheeks
- Integration exercise: Draw 10 complete faces where you deliberately vary one feature at a time (e.g., wide-set vs. close-set eyes) and observe how it changes the overall character and expression
- Timed feature studies: Spend 5–10 minutes drawing each feature (eye, nose, mouth, ear) from reference photos daily to build speed and accuracy
- Expression study: Using Faigin's framework, draw the same face showing 6 different emotions, paying close attention to how each feature contributes to the expression
Next up: Mastering individual features and their expressive mechanics prepares you to construct complete, emotionally convincing portraits where every element works in harmony to convey character and feeling.
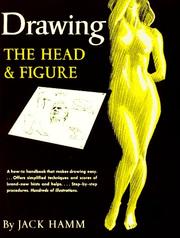
Hamm's encyclopedic breakdowns of every feature — with dozens of variations in age, angle, and expression — make this the ideal reference for drilling individual features after Loomis's structural overview.
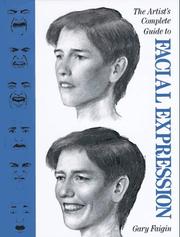
Goes beyond static features to explain the underlying muscles that create expression, giving portraits life and personality rather than a frozen, generic look.
Light, Shadow & Rendering
IntermediateApply tonal shading to model the face convincingly in three dimensions, understand how light behaves on curved surfaces, and produce a fully rendered portrait.
▸ Study plan for this stage
Pace: 4–5 weeks, ~25–30 pages/day with frequent practice breaks
- The five-value system (highlight, light, midtone, shadow, core shadow) and how to apply it to facial anatomy
- How light behaves differently on curved surfaces versus flat planes, and the importance of form shadows versus cast shadows
- Pencil techniques for smooth tonal transitions: blending, layering, and burnishing to create convincing three-dimensional form
- Establishing a consistent light source and maintaining directional logic throughout the portrait
- The relationship between value structure and anatomical form—how shadow placement reveals bone and muscle structure
- Rendering strategies for different facial features (eyes, nose, mouth, ears) with proper tonal modeling
- Creating atmospheric depth and visual hierarchy through value contrast and edge control
- How does Guptill's five-value system work, and why is understanding the core shadow distinct from other shadow values critical for dimensional rendering?
- Explain the difference between form shadow and cast shadow, and how recognizing this distinction improves the believability of a portrait.
- What pencil blending and layering techniques does Guptill recommend for achieving smooth tonal transitions on curved facial surfaces?
- How do you establish and maintain a consistent light source throughout a portrait, and what happens to your rendering if the light logic becomes inconsistent?
- Describe how shadow placement can reveal underlying anatomical structure (bone, muscle, cartilage) in the face.
- What strategies does Guptill present for rendering individual facial features (eyes, nose, mouth, ears) with proper three-dimensional form?
- Complete Guptill's five-value studies: create 5–10 small value scales and simple geometric forms (sphere, cylinder, cube) rendered with highlight, light, midtone, shadow, and core shadow to internalize the system before applying it to faces
- Render 3–4 simplified head studies (egg-shaped forms) under a single, consistent light source, focusing on clean form shadows and cast shadows without facial features
- Practice individual facial feature studies from Guptill's examples: render 5–6 eyes, 4–5 noses, and 4–5 mouths in isolation, experimenting with different light angles and tonal ranges
- Complete a full-face portrait study following Guptill's step-by-step rendering process: establish light source → block in basic anatomy → apply midtones → develop shadows → add highlights and refine edges
- Create 2–3 side-by-side comparison studies: render the same facial feature or simple head form under two different light sources (e.g., frontal vs. side lighting) to understand how light direction changes shadow placement and form readability
- Render a complete portrait from a photograph or reference, deliberately using Guptill's pencil techniques (blending, layering, burnishing) to achieve smooth transitions and convincing three-dimensional modeling
Next up: Mastering tonal rendering and light logic in this stage provides the technical foundation needed to move into more advanced portraiture—whether that involves color media, capturing likeness and character, or exploring expressive and stylized approaches to the face.
A classic technical reference on pencil rendering methods — hatching, blending, texture — that gives the learner a full toolkit for achieving polished, professional tonal portraits.
Structure, Likeness & the Professional Portrait
ExpertGround portrait drawing in anatomical skull structure, capture a true likeness of a specific individual, and develop a personal, expressive approach to the portrait as a finished artwork.
▸ Study plan for this stage
Pace: 8–10 weeks, ~40–50 pages/day with frequent breaks for drawing practice and skull studies
- Skull anatomy as the foundation for accurate portrait proportions and structure (cranium, jaw, eye sockets, nasal cavity, cheekbones)
- How surface anatomy (muscles, fat deposits, skin) drapes over the skull to create individual facial characteristics
- Measuring and comparing proportions to capture true likeness rather than relying on stylized conventions
- The relationship between anatomical understanding and expressive portraiture—using structure to serve artistic intent
- Three-dimensional form and spatial relationships in portrait sculpture as a complement to drawing
- Developing a personal, intentional approach to the portrait that balances anatomical accuracy with subjective interpretation
- The role of value, light, and surface texture in bringing anatomical structure to visual life
- How does understanding skull structure improve the accuracy and believability of your portrait drawings?
- What are the key anatomical landmarks on the skull, and how do they determine facial proportions?
- How do muscles and soft tissue modify the appearance of underlying bone structure, and why is this distinction important for capturing likeness?
- What methods can you use to measure and compare proportions when drawing a portrait from life or reference?
- How does working in three dimensions (clay) deepen your understanding of form in two-dimensional portrait drawing?
- How can you balance anatomical accuracy with personal expression and style in a finished portrait?
- Study and draw the skull from multiple angles using Simblet's anatomical illustrations; create at least 10 detailed skull studies from different viewpoints
- Overlay anatomical muscle and tissue diagrams on photographs of real faces to understand how surface anatomy modifies skull structure
- Measure facial proportions on 5–6 different faces (live models or high-quality photographs) using calipers or proportional dividers; compare findings across individuals
- Create a series of portrait drawings of the same person from different angles, focusing on how skull structure remains constant while surface appearance changes
- Follow Rubino's clay modeling exercises to sculpt a portrait head, paying close attention to anatomical planes and how form reads in three dimensions
- Draw the same portrait subject after and before studying their skull structure; compare the two drawings to identify improvements in accuracy and likeness
- Create a finished portrait (drawing or painting) of a specific individual, documenting your process of using anatomical knowledge to capture their unique likeness
- Analyze 3–4 master portraits (historical or contemporary) to identify how the artist used anatomical understanding to create both accuracy and personal expression
Next up: This stage equips you with the anatomical foundation and technical skill to create convincing, expressive portraits grounded in structure, preparing you to explore advanced topics such as color theory in portraiture, capturing emotion and psychology, or developing a distinctive personal style across a body of portrait work.
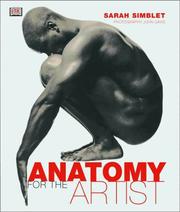
Introduces the underlying skeletal and muscular anatomy of the head with stunning photographic reference, giving the advanced student the structural knowledge that separates convincing likenesses from generic faces.
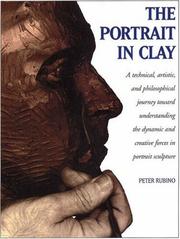
Though sculpture-focused, Rubino's rigorous analysis of planes, masses, and likeness-capturing strategies is widely used by portrait draughtsmen to sharpen their three-dimensional thinking and achieve true resemblance.
Discussion
Keep reading
Paths that share books, cover the same subject, or open a related topic.