Figure drawing and anatomy: the best books to draw the body, in order
This curriculum takes a complete beginner from their very first marks to a confident understanding of the human figure, moving through four carefully sequenced stages: building core drawing instincts, capturing gesture and life, understanding the skeleton and muscles beneath the skin, and finally synthesizing everything into a personal, structured practice. Each stage's books are ordered so that earlier titles unlock the vocabulary and confidence needed to get the most out of the ones that follow.
Foundations: Seeing & Mark-Making
BeginnerDevelop the fundamental ability to observe accurately, make confident marks, and understand basic proportion — the essential prerequisites before tackling the figure specifically.
▸ Study plan for this stage
Pace: 4–5 weeks, ~20–25 pages/day with daily practice sessions (30–45 minutes of drawing)
- The R-mode vs. L-mode brain: accessing the visual, intuitive right hemisphere to bypass analytical left-brain interference
- Contour drawing and edge perception: training the eye to follow outlines and edges with sustained attention
- Negative space recognition: understanding that empty space around objects is as important as the objects themselves
- Basic proportion and measurement: using sighting techniques and comparative relationships to establish accurate scale
- Mark-making confidence: developing a relaxed, responsive hand through gestural and exploratory mark-making
- Light, shadow, and value: observing how light defines form through tonal variation rather than line alone
- Observational accuracy over 'correctness': learning to draw what you see, not what you think you know
- What is the difference between L-mode and R-mode thinking, and how does R-mode drawing help you see more accurately?
- How does contour drawing train your perception, and why is it valuable before moving to figure drawing?
- What is negative space, and how does recognizing it improve your ability to draw proportions accurately?
- Describe at least two sighting or measurement techniques you can use to check proportions in a drawing.
- How does understanding light and shadow help you move beyond outline-based drawing?
- What mental shifts or exercises help you overcome the urge to draw from memory or symbolic knowledge rather than direct observation?
- Complete the 'upside-down drawing' exercise from *The New Drawing on the Right Side of the Brain*: copy a complex image inverted to bypass L-mode pattern recognition and train pure visual observation.
- Practice 20–30 minute contour drawings (blind or continuous line) of everyday objects, plants, or draped fabric; focus on following edges slowly without looking at the paper.
- Negative space studies: draw the spaces *between* objects (e.g., between chair legs, between fingers) rather than the objects themselves; complete at least 5 studies.
- Sighting exercises: use a pencil or ruler held at arm's length to measure proportions of a still life or reference image; record these measurements and apply them to a drawing.
- Gestural mark-making: spend 10–15 minutes making loose, confident marks in response to an object or reference without concern for accuracy; repeat daily to build hand confidence.
- Value studies: create 3–5 small studies (4×6 inches) focusing on light and shadow using only pencil, observing how tone defines form without relying on line.
Next up: By mastering accurate observation, confident mark-making, and basic proportion, you will have the perceptual and technical foundation necessary to apply these skills to the unique challenges of figure drawing—where understanding anatomy and structure depends first on seeing the body's actual proportions and forms, not preconceived ideas.

The ideal starting point for any beginner: it rewires how you see by teaching you to draw what is actually there rather than what your brain assumes. This perceptual shift is the single most important skill before studying the figure.
A gentle, systematic companion to Edwards that reinforces observation with clear exercises in contour, shading, and proportion — building the practical mark-making habits you will rely on throughout every later stage.
Gesture & the Living Figure
BeginnerLearn to capture the energy, flow, and essential action of the human body quickly and expressively before getting lost in detail.
▸ Study plan for this stage
Pace: 4–5 weeks, ~20–25 pages/day, with daily drawing practice (30–60 minutes)
- Gesture as the primary language of the body's action and intent, not anatomical accuracy
- Scribbling and continuous line drawing to capture movement before conscious thought interferes
- The concept of flow lines and directional force to understand how energy moves through the figure
- Contour drawing as a bridge between gesture and form, training the eye-hand connection
- Rhythm and balance in the figure—how the body organizes itself around a central line of action
- Seeing the figure as a unified whole animated by internal force, not as separate parts
- Speed and confidence in mark-making to overcome hesitation and over-correction
- What is the difference between gesture drawing and anatomical drawing, and why does Nicolaïdes argue gesture should come first?
- How does the concept of 'force' in Mattesi's work relate to capturing the energy and intention of a pose?
- What is the line of action, and how do you identify and emphasize it in a quick gesture sketch?
- How does scribbling or continuous line drawing help you see the figure more directly, and what does it train in your perception?
- What role does rhythm and balance play in making a figure feel alive rather than stiff or static?
- How do you transition from quick gesture sketches to more developed contour drawings while maintaining the energy of the pose?
- Daily 2-minute gesture sketches from live models or reference photos (aim for 10–15 per session) using loose, flowing lines
- Scribbling exercises: draw the same pose repeatedly without lifting your pencil, focusing on the overall movement rather than accuracy
- Line of action studies: identify and draw a single, confident line that captures the spine's curve and the figure's primary direction in 20–30 second sketches
- Contour drawing practice: trace the outline of the figure in one continuous line without looking at your paper, then compare to the original
- Force flow studies: overlay arrows or lines on reference images showing how energy moves through the torso, limbs, and head
- Timed drawing sessions: 5-minute, 10-minute, and 15-minute poses, progressively adding detail while maintaining the gesture foundation
- Copy studies: recreate gesture sketches from Nicolaïdes' book and Mattesi's demonstrations, then apply the same approach to your own reference material
Next up: This stage establishes the living, energetic foundation that all subsequent anatomical study and form refinement will build upon—you now see the figure as an animated whole driven by action, preparing you to understand anatomy not as static structure but as the engine that enables that gesture and movement.
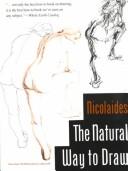
A classic structured course built around gesture, contour, and weight — read first in this stage because it trains the hand and eye to feel the figure's movement before any anatomy is introduced.

Builds directly on Nicolaïdes by giving gesture a clear mechanical language — the concept of 'force' — that makes dynamic, rhythmic figure drawing immediately accessible and actionable for beginners.
Structure & Artistic Anatomy
IntermediateUnderstand the skeleton, major muscle groups, and simplified forms that give the figure its three-dimensional structure, so drawings feel solid rather than flat.
▸ Study plan for this stage
Pace: 8–10 weeks, ~40–50 pages/day with daily drawing practice (1–2 hours)
- The skeleton as the foundation: major bones (spine, ribcage, pelvis, limbs) and how they articulate to enable movement and posture
- Simplified geometric forms (cylinders, boxes, spheres) that represent muscle groups and major body volumes
- The relationship between skeletal landmarks and surface anatomy: how bones and muscles create visible landmarks on the skin
- Major muscle groups (pectoralis, deltoid, latissimus, gluteus, quadriceps, hamstrings) and their directional flow across the body
- How the ribcage, spine, and pelvis form the core structural axis that anchors all limb movement
- Proportional relationships and construction methods: using the skeleton and forms to build convincing three-dimensional figures
- The difference between anatomical accuracy and artistic simplification: knowing what to emphasize for visual impact
- How does the skeleton determine the range of motion and posture of a figure, and how do you use skeletal landmarks to construct a believable pose?
- What are the major muscle groups discussed in Hampton and Hamm, and how do they flow across the body to create form and movement?
- How do you use simplified geometric forms (cylinders, boxes, spheres) to block in the figure before adding anatomical detail?
- What are the key anatomical landmarks (bony prominences, muscle attachments) that show through the skin, and why are they important for drawing?
- How does the ribcage-spine-pelvis axis function as the structural core, and how do the limbs articulate from it?
- When should you simplify anatomy for artistic effect versus when should you render anatomical detail, and how do you decide?
- Skeleton studies: Draw 10–15 full skeletons from Hampton's construction method, focusing on bone proportions, joint placement, and articulation in different poses
- Geometric blocking: Using Hampton's simplified forms, block in 20–30 figures using cylinders and boxes before adding muscle detail; practice both standing and dynamic poses
- Muscle group mapping: Draw the major muscle groups (chest, back, shoulders, arms, legs) in isolation on 5–6 anatomical charts, then overlay them on full-figure drawings to understand layering
- Landmark identification: On 10 photographs or reference images, identify and mark key bony landmarks and muscle attachments discussed in Hamm; then draw the figure emphasizing these landmarks
- Core axis studies: Draw 15–20 figures focusing solely on the ribcage-spine-pelvis relationship and how limbs attach; vary poses to show how the core rotates and tilts
- Comparative anatomy: Using Zarins' detailed illustrations, draw 5–6 figures at different scales and angles, comparing surface form to underlying structure to internalize the relationship
Next up: Mastering structural anatomy and simplified forms equips you to move into surface anatomy, proportional variation, and stylization—allowing you to confidently distort or exaggerate the figure while maintaining believability because you understand what lies beneath.

The perfect bridge from gesture into structure: Hampton teaches the figure as a system of interlocking forms and rhythms, making anatomy feel logical rather than overwhelming — read this before denser anatomy references.
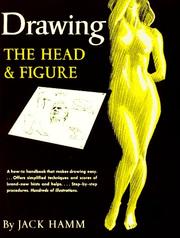
A clear, approachable reference that covers proportions, simplified anatomy, and common poses with step-by-step breakdowns — its straightforward style consolidates Hampton's ideas with plenty of practical examples.

Introduces the underlying skeleton and muscles through stunning photographic and 3-D references, making spatial anatomy intuitive — best read after Hampton so you already have a structural framework to hang the details on.
Mastery: Classical Anatomy & Synthesis
ExpertInternalize the full classical tradition of artistic anatomy and learn to synthesize gesture, structure, and surface form into expressive, authoritative figure drawings.
▸ Study plan for this stage
Pace: 8–10 weeks, ~40–50 pages/day with daily drawing practice (2–3 hours)
- Classical anatomical structure: skeletal framework, major muscle groups, and their origins/insertions as the foundation for all figure drawing
- Schider's systematic approach to proportions and the geometric relationships between body parts across different poses and body types
- Bridgman's dynamic gesture method: capturing movement and life through understanding the action line and flow of the figure
- Surface anatomy: how muscles, tendons, and bones manifest visually on the living form and how to render them convincingly
- Integration of structure and gesture: synthesizing anatomical knowledge with expressive, economical linework to create authoritative drawings
- Comparative anatomy across poses: how the same anatomical structures shift, compress, and elongate in different positions and angles
- The artist's selective emphasis: knowing which anatomical details to render and which to simplify based on pose, distance, and expressive intent
- How does understanding the skeletal framework and major muscle attachments allow you to draw the figure convincingly in any pose?
- What are the key proportional relationships Schider establishes, and how do they vary across different body types and poses?
- How does Bridgman's concept of the action line and gesture differ from a purely anatomical approach, and why is the synthesis of both essential?
- When drawing a foreshortened limb or torso, how would you apply both classical anatomy and dynamic gesture to maintain believability and expressiveness?
- How do you decide which anatomical details to emphasize or simplify in a given drawing, and what principles guide that decision?
- Can you identify the major muscle groups visible on a live model in a complex pose and explain how they relate to the underlying skeleton?
- Skeletal studies from Schider: Draw 10–15 complete skeletons in varied poses (standing, seated, twisted, foreshortened) to internalize proportions and joint mechanics
- Muscle layer progression: Using Schider's anatomical plates, draw the same pose three times—skeleton only, skeleton + major muscles, then fully rendered figure—to understand layering
- Bridgman gesture studies: Complete 50–100 quick gesture drawings (2–5 minutes each) from live models or reference, focusing on the action line and flow before adding anatomical detail
- Comparative anatomy studies: Select 5–6 complex poses and draw them twice—once emphasizing skeletal structure, once emphasizing surface musculature—to see how anatomy shifts
- Synthesis drawings: Create 20–30 finished figure drawings (20–45 minutes each) that integrate Schider's anatomical precision with Bridgman's dynamic gesture, varying pose complexity and foreshortening
- Anatomical annotation: Draw a live model or high-quality reference, then label the visible muscle groups, bony landmarks, and action lines to reinforce identification and understanding
- Foreshortening studies: Draw 10–15 figures in extreme foreshortened positions (lying down, reaching toward viewer, etc.), using both books to solve structural and gestural challenges
Next up: This stage equips you with the classical anatomical vocabulary and synthetic gesture skills needed to move into specialized applications—whether portraiture with anatomical subtlety, dynamic figure composition, or stylized character design—where you can confidently depart from realism with full understanding of what you're abstracting.
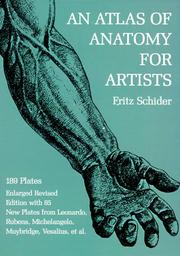
A canonical reference used in fine-art academies for over a century, presenting the skeleton and musculature with master-drawing examples — now that you have the structural vocabulary, this deepens and refines your anatomical knowledge.
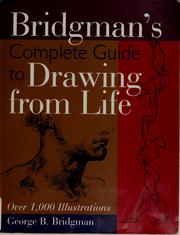
Bridgman's legendary system of massing and interlocking forms is the gold standard for synthesizing anatomy into expressive drawing — best saved for last so his dense, idiosyncratic style rewards rather than confuses.
Discussion
Keep reading
Paths that share books, cover the same subject, or open a related topic.