Learn to draw what you see
This four-stage curriculum takes a complete beginner from the very first mark on paper to a confident command of observational drawing — covering line quality, value, form, and perspective in a deliberate sequence. Each stage builds on the last: you must be able to see before you can shade, shade before you can construct form, and construct form before you can place it convincingly in space.
Seeing & First Marks
BeginnerRewire how you look at the world — learning to draw what you actually see rather than what your brain assumes is there — and develop confident, controlled line-making.
▸ Study plan for this stage
Pace: 8–10 weeks total: ~5 weeks on "The New Drawing on the Right Side of the Brain" (roughly 20–25 pages/day, including pausing to do every embedded exercise before moving on) + ~3–4 weeks on "Keys to Drawing" (~15–20 pages/day, again stopping to complete each exercise in the book before continuing). Pla
- L-mode vs. R-mode thinking (Edwards): the verbal, symbolic left brain vs. the visual, perceptual right brain — and how to consciously shift into the drawing mode
- Drawing what you see, not what you know: overcoming the brain's stored symbols (the 'lollipop tree', the 'smiley face') by trusting direct observation
- The five basic skills of drawing (Edwards): the perception of edges, spaces, relationships, lights & shadows, and the gestalt (the whole)
- Negative space: training the eye to see the shapes AROUND and BETWEEN objects as actively as the objects themselves
- Sighting and proportional relationships: using a pencil or constant reference unit to measure angles, relative sizes, and foreshortening accurately
- Contour and modified contour drawing (Dodson): slow, deliberate line-making that keeps the eye on the subject rather than the paper, building hand-eye coordination
- Line confidence and control (Dodson): varying pressure, speed, and direction to produce expressive, intentional marks rather than timid, scratchy ones
- Copying as a learning tool (Edwards): using upside-down drawing and master copies to bypass symbolic thinking and force pure shape/edge perception
- After completing Edwards's pre-instruction drawings and revisiting them at the end, can you articulate specifically what changed in your perception — not just your technique — and why Edwards attributes that change to a shift in brain mode?
- What are the five perceptual skills Edwards identifies as the foundation of drawing, and can you point to a passage or exercise in the book that trained each one?
- How does Dodson's concept of 'modified contour drawing' differ from pure contour drawing, and what practical problem does the modification solve for a beginner?
- Why does drawing a reference image upside down (Edwards) produce better results for most beginners than drawing it right-side up, and what does this reveal about how the brain processes familiar subjects?
- How would you use negative space to check the accuracy of a complex outline — for example, the silhouette of a chair or a hand?
- What specific strategies does Dodson offer for building line confidence, and how do they connect to Edwards's idea of silencing the symbolic, verbal mind?
- Pre/Post self-portrait (Edwards): Draw a self-portrait from a mirror on Day 1 before opening the book. Seal it in an envelope. Repeat the identical exercise after finishing both books and compare — this is the single most powerful feedback loop in the curriculum.
- Upside-down master copy (Edwards, Chapter 6): Choose one of Edwards's recommended line drawings (e.g., the Picasso or the Dürer hand), flip it upside down, and copy it without turning it right-side up until you are completely finished. Journal what felt different about the process.
- Pure contour hand drawing (Dodson + Edwards): Set a timer for 10 minutes. Place your non-drawing hand in an interesting position. Keep your eyes almost entirely on your hand — not the paper — and draw every edge and wrinkle you see as slowly as possible. Repeat 3×/week for the first four weeks.
- Negative-space chair drawing (Edwards, Chapter 7): Place a simple wooden or folding chair against a plain wall. Draw ONLY the negative spaces (the holes and gaps between the legs and rungs) as solid shapes. Do not draw the chair itself. Compare the resulting outline to a direct contour drawing of the same chair.
- Sighting & proportion grid (Edwards, Chapter 9): Set up a still life of 3–4 household objects. Using a pencil held at arm's length, measure the height-to-width ratio of each object and the angles of every edge. Record your measurements, then draw the still life using only those sighted relationships — no guessing.
- Line-quality sampler (Dodson): Fill three full sketchbook pages with nothing but lines — varying pressure from feather-light to heavy, varying speed (slow/deliberate vs. swift/gestural), varying direction and curvature. Label each row with the variable you changed. Return to this sampler whenever your lines feel timid or scratchy.
Next up: Mastering pure observation and controlled line-making gives you a reliable perceptual foundation, so the next stage can build confidently on top of it — introducing form, value, and three-dimensional structure without the beginner's habit of drawing symbols getting in the way.

The canonical starting point for any observational drawing student; it systematically dismantles symbol-drawing habits and teaches you to truly see edges, spaces, and relationships before touching any other technique.
Immediately after Edwards, Dodson gives you practical, exercise-driven tools for translating what you now see into clean, expressive lines — bridging perception to mark-making with clear, beginner-friendly language.
Value & Light
BeginnerUnderstand how light creates the illusion of three-dimensional form on a flat surface through the full range of tonal values, and build a reliable shading vocabulary.
▸ Study plan for this stage
Pace: 6–8 weeks total. Week 1–4: "Light for Visual Artists Second Edition" by Richard Yot — read ~15–20 pages per sitting, 4 sittings per week, pausing after each chapter to sketch the lighting concepts described. Week 5–8: "The Natural Way to Draw" by Kimon Nicolaïdes — work through the scheduled exercis
- The full tonal value scale — from pure white (highlight) through midtones and halftones to core shadow, reflected light, and cast shadow — and how each zone describes a specific relationship between a surface and a light source (Yot)
- The behavior of light types: direct, diffused, and ambient light, and how each produces hard, soft, or absent shadow edges (Yot)
- Form shadows vs. cast shadows: form shadows wrap around a volume and reveal its three-dimensional structure; cast shadows are projected onto surrounding surfaces and anchor objects in space (Yot)
- The concept of the 'terminator' — the boundary between the lit and shadow side of a form — and how its sharpness communicates surface curvature and light quality (Yot)
- Gesture drawing as a way of capturing the living, moving force of a subject before any tonal detail is added — Nicolaïdes's foundational idea that drawing is feeling, not copying (Nicolaïdes)
- Contour drawing as a slow, tactile tracing of edges that trains the eye to perceive subtle changes in surface direction, which directly informs where values shift (Nicolaïdes)
- Weight and pressure in line as a precursor to value: Nicolaïdes's exercises in which line thickness and darkness suggest mass and the pull of gravity, bridging pure line work to tonal thinking
- Integrating observation with mark-making: both authors converge on the principle that accurate value rendering depends entirely on sustained, disciplined looking before and during every mark
- Looking at any lit object, can you identify and name all seven value zones (highlight, light, halftone, core shadow, reflected light, cast shadow, and occlusion shadow) and explain what physical light interaction produces each one, as described by Yot?
- How does the distance and size of a light source affect the hardness of shadow edges, and why does this matter when you are deciding how to shade a form — per Yot's explanations of light behavior?
- What is the difference between a form shadow and a cast shadow, and how would you render each differently in a pencil sketch to make a sphere look convincingly three-dimensional?
- In Nicolaïdes's terms, what is the purpose of gesture drawing, and why does he insist it must come before any attempt at careful shading or detail?
- How do Nicolaïdes's contour exercises train the eye in a way that directly supports accurate value placement — what is the connection between sensing an edge and understanding a tonal shift?
- After completing both books, how would you combine Yot's analytical light framework with Nicolaïdes's observational discipline into a single drawing workflow, from first mark to finished tonal study?
- Value scale strip (Yot-based): Using pencil or charcoal, draw a 10-box horizontal strip and fill each box with an even, distinct tone from pure white to pure black. Repeat daily for one week until each step is clearly separated — this builds the muscle memory for tonal control that Yot's entire framework depends on.
- Single-source sphere study (Yot-based): Set up a white ball or orange under a single desk lamp. Identify and label all seven value zones on a reference photo or from life, then render the sphere in graphite, consciously painting each zone separately before blending. Repeat with the lamp at three different angles.
- Hard vs. soft edge comparison (Yot-based): Draw the same simple object (a mug, a book) twice — once lit by a bare bulb (hard shadows) and once by window light on an overcast day (soft shadows). Focus exclusively on edge quality along the terminator and cast shadow boundary.
- Blind contour drawing (Nicolaïdes-based): Spend 15 minutes per session drawing the contour of a hand, a shoe, or a crumpled cloth without looking at the paper, moving the pencil only as fast as your eye moves along the edge. Complete at least 10 sessions across the stage to internalize edge sensitivity.
- Gesture warm-up into tonal study (Nicolaïdes into Yot): Begin every drawing session with 5–10 gesture drawings of 30–60 seconds each (Nicolaïdes method), then select one pose and develop it into a full tonal study using Yot's value zones. This trains the habit of feeling form before rendering light.
- Cast shadow mapping exercise (Yot + observation): Arrange three simple objects (cylinder, cube, sphere) under one light source. Draw only the cast shadows and occlusion shadows as flat silhouettes, ignoring all other values. Then add form shadows. This two-pass method, grounded in Yot's shadow taxonomy, isolates each value zone for deliberate practice.
Next up: Mastering the tonal value scale and developing a disciplined eye through Yot's light theory and Nicolaïdes's observational exercises gives the reader a reliable shading vocabulary that is the essential prerequisite for the next stage, where those same principles are applied to specific subjects — such as the human figure, portraiture, or still life — with greater compositional and structural compl
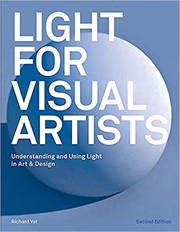
A visually rich, accessible guide to how light behaves — highlights, core shadow, reflected light, cast shadow — giving you the conceptual framework for all value work before you practice it intensively.
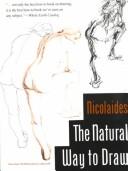
Nicolaïdes' structured daily exercises move you from gesture and contour into sustained tonal studies, training your hand and eye simultaneously to feel weight, mass, and value through disciplined practice.
Form & Construction
IntermediateLearn to think of every subject — figure, object, or landscape — as a collection of simple three-dimensional forms that can be constructed, rotated, and understood from any angle.
▸ Study plan for this stage
Pace: 6–8 weeks total: Weeks 1–4 on "Figure Drawing for All It's Worth" (~20–25 pages/day, focusing on Loomis's mannequin and massing chapters before moving to gesture and proportion); Weeks 5–8 on "Fun With a Pencil" (~15–20 pages/day, lighter reading but heavy on copying and construction drills alongsid
- The Loomis Figure Mannequin — breaking the human body into an egg-shaped head, cylindrical neck, ribcage block, pelvic block, and cylindrical limbs as the foundation for all figure construction in 'Figure Drawing for All It's Worth'
- The Line of Action & Balance — understanding how a single rhythmic line drives the pose and keeps the constructed figure from feeling stiff, as taught throughout 'Figure Drawing for All It's Worth'
- Proportion as a measuring system — Loomis's 8-head ideal and its variants give a reusable ruler for placing masses correctly in 3D space before any surface detail is added
- Foreshortening through overlapping forms — treating each body segment as a solid cylinder or sphere so that overlapping silhouettes, not distortion tricks, create convincing depth, a core lesson in 'Figure Drawing for All It's Worth'
- The sphere-based cartoon head construction in 'Fun With a Pencil' — dividing a sphere with a center line and brow line to place every facial feature at any angle, establishing the same 'forms first' logic in a more approachable context
- Rotating forms in the mind — both books train the reader to mentally orbit a subject and draw it from an unattempted angle by reasoning from the underlying geometry rather than copying a reference
- Light logic on simple forms — Loomis introduces how light, shadow, and cast shadow behave predictably on spheres, cylinders, and boxes, reinforcing that construction is also the key to rendering
- Economy of line and confident mark-making — 'Fun With a Pencil' emphasizes committing to structural lines rather than sketching timidly, building the habit of drawing through forms with single, purposeful strokes
- Given a standing figure in a reference photo, can you identify and label each Loomis mannequin block (head, ribcage, pelvis, limbs) before drawing a single contour line?
- How does Loomis use the 8-head proportion system to check whether a constructed figure's masses are correctly placed, and where do the key landmarks (chin, nipple line, navel, crotch, knees) fall?
- What is the line of action, and how does establishing it first in 'Figure Drawing for All It's Worth' prevent a figure from looking flat or stiff even when the mannequin is fully blocked in?
- Using the sphere-and-plane head construction from 'Fun With a Pencil', how would you position the center line and brow line to draw a head tilted 45° upward and turned 30° to the right?
- Why does Loomis argue that foreshortening is solved by overlapping solid forms rather than by stretching or squashing outlines, and how does this apply to a foreshortened arm reaching toward the viewer?
- How do the construction principles in 'Fun With a Pencil' (designed for cartoon characters) reinforce rather than contradict the realistic figure construction taught in 'Figure Drawing for All It's Worth'?
- Mannequin tracing & redraw: Photocopy or lightly trace 10 of Loomis's own mannequin diagrams from 'Figure Drawing for All It's Worth', then close the book and redraw each one from memory, checking your proportions against the 8-head scale.
- Turntable drill: Choose one Loomis mannequin pose and draw the same figure from the front, 3/4, side, and back using only geometric reasoning — no new reference. This forces you to truly own the 3D model rather than copy a 2D image.
- Sphere-head rotation sheet from 'Fun With a Pencil': Fill an A3 page with 20+ heads using the sphere-and-plane method at varied angles (up, down, left, right, combined tilts). Aim for consistent feature placement across all angles before adding any expression or detail.
- Foreshortening cylinder studies: Draw a simple cylinder (representing an arm or leg) pointing directly at the viewer, then at 30°, 60°, and 90° to the picture plane. Apply Loomis's overlapping-form logic and add a basic light source to each to confirm the form reads as solid.
- Photo-to-mannequin breakdown: Select 5 diverse figure photos (different genders, ages, poses). For each, draw ONLY the Loomis block mannequin — no skin, no clothing — then overlay your mannequin on a lightbox or tracing paper to check alignment with the actual figure.
- Integrated page study: Once per week, pick a single illustration from either Loomis book, write a 5-sentence analysis identifying every construction decision visible (line of action, block placement, foreshortening, light logic), then produce your own drawing of a similar pose applying those same decisions consciously.
Next up: Mastering Loomis's block-and-mannequin system gives you a reliable 3D scaffold for any subject, which makes the next stage — studying gesture, anatomy, or perspective in greater depth — a process of adding informed detail onto a structure you already understand, rather than copying surfaces you cannot yet explain.
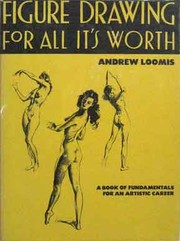
Loomis's block-and-sphere construction method is the gold standard for understanding three-dimensional form; even non-figure drawers benefit enormously from his systematic approach to mass and proportion.
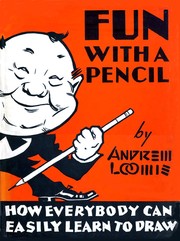
Read after the heavier Loomis volume, this lighter companion reinforces constructive form-building through approachable exercises that solidify the block-head and basic-solid vocabulary before moving to perspective.
Perspective & Spatial Depth
IntermediateMaster one-, two-, and three-point perspective, understand how to place constructed forms convincingly in space, and integrate all prior skills — line, value, form — into complete observational drawings.
▸ Study plan for this stage
Pace: 10–13 weeks total. Weeks 1–5: "Perspective Made Easy" (~20–25 pages/day, ~3–4 sessions/week) — read slowly and sketch every diagram as you go. Weeks 6–13: "How to Draw" by Scott Robertson (~15–20 pages/day, ~4 sessions/week) — this is a denser, more technical book; pause frequently to apply each met
- One-point perspective: the single vanishing point, horizon line placement, and how all receding lines converge — as introduced systematically in Norling's approachable, step-by-step framework
- Two-point perspective: using two vanishing points on the horizon to construct boxes, buildings, and any receding form seen at an angle, the backbone of Norling's middle chapters
- Three-point perspective: adding a vertical vanishing point to convey extreme height or depth, bridging Norling's foundations into Robertson's more advanced spatial constructions
- The picture plane, cone of vision, and station point: Robertson's rigorous technical vocabulary for understanding *why* perspective distortion occurs and how to control it
- Constructing complex forms from primitive volumes: Robertson's core methodology of building vehicles, furniture, and organic shapes by first establishing a bounding box in perspective, then subtracting and adding mass
- Ellipses in perspective: understanding that circles on any plane in perspective become ellipses, with Robertson providing precise methods for finding the correct ellipse angle and minor axis alignment
- Inclined planes and non-horizontal vanishing points: rooftops, ramps, stairs, and any surface that tilts away from the horizon — a key extension covered in both books
- Integrating line weight, value, and form into perspective drawings: using the skills from prior stages (confident line, value gradients, 3-D form) to make perspective constructions feel like finished, convincing observational drawings rather than dry diagrams
- After reading Norling, can you explain in plain language why all lines parallel in reality must converge to a single vanishing point in a perspective drawing — and where that vanishing point always lives?
- Can you set up a two-point perspective grid from scratch — placing the horizon line, choosing two vanishing points, and constructing a box — without referencing a guide?
- How does Robertson's concept of the 'cone of vision' explain why objects drawn near the edges of a composition look distorted, and how do you correct for it?
- What is the relationship between a circle and its perspective ellipse? How do you determine the correct minor-axis angle for an ellipse on a given plane in Robertson's system?
- How would you use a bounding box in perspective to construct a complex, irregular form (e.g., a car body or an architectural detail) step by step, as Robertson demonstrates?
- How do inclined-plane vanishing points differ from standard horizon-line vanishing points, and when must you use them?
- 'Norling Box-a-Day' (Weeks 1–5): Each study session, draw at least three boxes freehand — one in 1PP, one in 2PP, one in 3PP — varying the horizon line height and VP spacing each time to build intuitive muscle memory before opening Robertson.
- 'Room Dissection' (after Norling Ch. 1–4): Choose a real room. Photograph it, then overlay a horizon line and trace every receding edge to its vanishing point. Verify that all lines converge correctly; note any that don't and diagnose why.
- 'Robertson Bounding-Box Constructions' (Weeks 6–10): Pick 5 everyday objects of increasing complexity (book, shoe box, chair, bicycle, car). For each, establish a 2PP or 3PP grid, draw the bounding box first, then carve the final form out of it — exactly as Robertson's methodology prescribes.
- 'Ellipse Drill Sheet' (after Robertson's ellipse chapters): Draw a 3×3 grid of squares in perspective on three different planes (top, front, side). Inscribe an ellipse in each square, carefully aligning the minor axis perpendicular to the plane's axis. Compare against Robertson's diagrams and self-critique.
- 'Inclined Plane Study' (Weeks 9–11): Find or photograph a staircase, a sloped roof, and a ramp. Draw each from observation using the inclined-plane VP method from both Norling and Robertson. Label every VP — horizon VPs and inclined VPs — on your drawing.
- 'Integrated Final Drawing' (Week 12–13): Produce one large (A3 or larger) observational drawing of an urban exterior or interior space that deliberately showcases: a correct multi-point perspective grid, at least one inclined plane, ellipses (windows, wheels, arches, or dishes), varied line weight, and a full value range from light to shadow. This is the capstone that unites every skill from the s
Next up: Mastering constructed perspective and spatial depth gives the reader a reliable armature on which to hang any subject — figures, environments, or designs — making the next stage's focus on more complex subjects (such as figure drawing, urban sketching, or design ideation) feel grounded and spatially convincing rather than flat.

The clearest, most beginner-friendly perspective book ever written; its step-by-step diagrams make the rules of convergence and vanishing points feel intuitive rather than mechanical, and it is the ideal first perspective text.

The definitive advanced perspective and form-drawing reference; after Norling's foundations, Robertson's rigorous system for ellipses, curved surfaces, and complex forms in perspective brings your spatial drawing to a professional level.
Discussion
Keep reading
Paths that share books, cover the same subject, or open a related topic.