Perspective drawing: the best books to master depth and space, in order
This curriculum takes a complete beginner from the very first principles of seeing and mark-making all the way through mastering one-, two-, and three-point perspective with architectural and environmental confidence. Each stage builds directly on the last: you must understand how we perceive space before you can construct it, and you must construct it simply before you can render it with complexity and style.
Foundations: Seeing Like an Artist
BeginnerTrain your eye to observe the world accurately, understand basic drawing vocabulary (line, shape, proportion), and overcome the beginner's habit of drawing symbols instead of what you actually see — essential groundwork before any perspective system makes sense.
▸ Study plan for this stage
Pace: 4–5 weeks, ~25–30 pages/day. Start with "The New Drawing on the Right Side of the Brain" (weeks 1–2.5, ~200 pages), then move to "Keys to Drawing" (weeks 2.5–5, ~250 pages). Allocate 2–3 days per week for extended drawing practice sessions.
- The R-mode vs. L-mode brain: how the right hemisphere perceives shapes, relationships, and spatial information holistically, while the left hemisphere defaults to symbol-making and verbal labels
- Contour drawing and edge awareness: training your hand and eye to follow the actual outline and edges of objects rather than drawing remembered symbols
- Negative space: learning to see and draw the empty space around and between objects as a primary subject, not just background
- Proportion and measurement: understanding how to use basic tools (sighting, comparative measurement) to accurately gauge relationships between parts
- The five basic perceptual skills: sighting angles, perceiving edges, perceiving spaces (negative space), perceiving relationships, and perceiving lights and shadows
- Overcoming symbol substitution: recognizing when you're drawing what you think something looks like versus what it actually looks like from your viewpoint
- Line quality and observation: using line as a direct record of what your eye sees, not as a decorative or expressive tool at this stage
- What is the difference between R-mode and L-mode thinking, and why does the left brain's symbol-making habit interfere with accurate drawing?
- How does contour drawing train your perception, and what should you focus on when doing a blind or semi-blind contour drawing?
- Why is negative space important to observe and draw, and how does it improve the accuracy of your positive shapes?
- What are the five basic perceptual skills Dodson identifies, and how would you apply at least three of them to draw an unfamiliar object accurately?
- How do you use sighting and comparative measurement to check proportions in a still life, and why are these tools more reliable than your intuition?
- What does it mean to 'draw what you see' rather than 'draw what you know,' and how can you catch yourself falling into symbol-making?
- Complete 10–15 blind contour drawings (eyes on object, not on paper) from everyday objects: hands, shoes, crumpled fabric, plants. Focus on the continuous line, not accuracy.
- Do 5–7 modified contour drawings (occasional glances at paper allowed) of the same objects, comparing results to blind contours to see how looking at your paper changes the output.
- Create 3–4 negative space studies: draw only the empty space around a chair, tree, or person, leaving the object itself blank. Observe how the shape emerges.
- Perform 2–3 sighting exercises: hold a pencil at arm's length to measure angles and proportions in a still life setup; record these measurements and use them to construct an accurate drawing.
- Draw the same simple object (apple, mug, hand) 5 times over one week, deliberately trying to see more detail and accuracy each time. Note what you notice improving.
- Set up a still life with 3–5 objects and spend 30–45 minutes on a detailed observational drawing using all five perceptual skills; annotate where you used sighting, negative space, edge awareness, etc.
Next up: With your eye trained to observe accurately and your symbol-making habits interrupted, you're ready to learn how perspective systems codify these observations—understanding that one-point, two-point, and three-point perspective are simply formal rules for how your eye actually perceives spatial relationships and receding lines.

The definitive starting point for any beginner: it rewires how you perceive edges, spaces, and relationships — the perceptual skills that make perspective feel intuitive rather than mechanical.
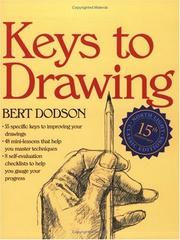
Bridges pure observation into structured drawing habits, introducing contour, proportion, and spatial relationships in a calm, step-by-step way that prepares you for formal perspective rules.
First Principles: One- and Two-Point Perspective
BeginnerUnderstand the geometry of the horizon line, vanishing points, and convergence; confidently draw boxes, rooms, streets, and simple buildings using one- and two-point perspective.
▸ Study plan for this stage
Pace: 4–5 weeks, ~20–25 pages/day from D'Amelio; 2–3 weeks, ~15–20 pages/day from Robertson. Allocate 3–4 days per week for drawing practice alongside reading.
- The horizon line as the viewer's eye level and its role in determining perspective relationships
- Vanishing points: definition, location, and how they control the convergence of parallel lines
- One-point perspective: when to use it, how to construct it, and its limitations for complex scenes
- Two-point perspective: setting up two vanishing points, drawing receding edges, and constructing believable 3D forms
- Convergence: how parallel lines in 3D space appear to meet at vanishing points in 2D drawings
- Constructing basic geometric forms (boxes, cubes, rectangular solids) as the foundation for more complex objects
- Applying perspective to practical subjects: rooms, streets, buildings, and interior spaces
- The relationship between eye level, horizon line placement, and viewer position in the composition
- What is the horizon line, and why does its placement on the page determine the viewer's eye level in a perspective drawing?
- Explain the difference between one-point and two-point perspective. When would you choose one over the other?
- What is a vanishing point, and how do you determine where it should be placed on the horizon line?
- How do you construct a cube in two-point perspective, and what role do the two vanishing points play?
- Draw a simple street receding into the distance using one-point perspective. How do the edges of the street converge?
- What happens to the horizon line and vanishing points when you change the viewer's eye level (looking up vs. looking down)?
- From D'Amelio: Work through the foundational exercises on drawing the horizon line and identifying vanishing points in photographs and existing artwork.
- Construct 10 boxes in one-point perspective with the vanishing point at different positions on the horizon line; observe how the box's appearance changes.
- Construct 10 boxes in two-point perspective, varying the position of the two vanishing points; practice placing them close together and far apart.
- Draw a simple interior room (4 walls, floor, ceiling) in one-point perspective using D'Amelio's step-by-step method.
- From Robertson: Complete the perspective construction exercises, focusing on his approach to setting up grids and measuring proportions in perspective.
- Draw a street or corridor receding into the distance using two-point perspective; include buildings, windows, and doors on either side.
- Sketch 5–10 simple buildings (houses, storefronts) using two-point perspective, varying the eye level to show different viewing angles.
- Create a composite drawing combining multiple geometric forms (boxes, cylinders, simple structures) in two-point perspective to build confidence with complex scenes.
Next up: Mastery of one- and two-point perspective provides the geometric foundation needed to tackle three-point perspective, atmospheric perspective, and the rendering of more complex architectural and environmental scenes with depth and spatial conviction.

The clearest, most concise introduction to perspective theory ever written — it explains WHY lines converge before showing HOW to draw them, building genuine understanding over rote copying.

After D'Amelio's theory, Robertson's rigorous visual method shows how to apply one- and two-point perspective to real objects and vehicles with precision, bridging pure geometry and creative drawing.
Going Deeper: Three-Point Perspective and Complex Forms
IntermediateMaster three-point perspective for dramatic worm's-eye and bird's-eye views, learn to draw cylinders, curves, and organic forms in perspective, and begin constructing believable environments from imagination.
▸ Study plan for this stage
Pace: 8–10 weeks, ~20–25 pages/day with daily drawing practice (1–2 hours)
- Three-point perspective construction: identifying and placing vanishing points for extreme angles (worm's-eye and bird's-eye views)
- Horizon line manipulation and its role in creating dramatic spatial depth and viewer positioning
- Cylindrical forms in perspective: constructing ellipses at different heights and angles to draw tubes, columns, and organic rounded shapes
- Curved surfaces and organic forms: applying perspective principles to non-rectilinear objects like barrels, vases, and character silhouettes
- Environmental construction from imagination: combining multiple perspective systems to build believable interior and exterior spaces
- Framing and composition: using perspective as a tool to guide viewer attention and create visual hierarchy
- Atmospheric and linear perspective integration: layering depth cues to enhance spatial believability in complex scenes
- How do you establish and use three vanishing points to create a convincing worm's-eye or bird's-eye view, and why does the placement of these points affect the drama and believability of the scene?
- Explain the process for constructing a cylinder in three-point perspective at various angles, including how to draw accurate ellipses at different heights.
- How can you apply perspective principles to organic, curved forms like fabric folds, character bodies, or natural landscapes?
- What is the relationship between horizon line placement and the viewer's psychological position in a scene, and how does this influence composition?
- Describe the workflow for constructing a complex environment (interior or exterior) from imagination using multiple perspective systems.
- How do you use framing, atmospheric perspective, and linear perspective together to create depth and guide the viewer's eye through a composition?
- Draw 10 simple boxes in three-point perspective from different extreme angles (high worm's-eye, low bird's-eye, tilted views); label all three vanishing points and horizon line for each.
- Construct 5 cylinders in three-point perspective at varying heights and angles; focus on drawing accurate ellipses and understanding how they change with perspective distortion.
- Create a series of 8–10 studies of organic forms (bottles, vases, barrels, draped fabric) in perspective, experimenting with how curves follow perspective rules.
- Design 3 complete interior environments from imagination (e.g., a bedroom, a warehouse, a spaceship cabin) using three-point perspective; include multiple objects and atmospheric depth.
- Draw 2 dramatic exterior scenes from imagination (e.g., a city street from a high vantage point, a landscape from ground level) that demonstrate strong three-point perspective and environmental believability.
- Create a 'perspective study sheet' for a character or creature in multiple poses and angles, ensuring all forms follow consistent three-point perspective logic.
Next up: Mastering three-point perspective and complex form construction equips you with the spatial reasoning and technical foundation needed to move into advanced topics like atmospheric effects, lighting integration, and stylized perspective for narrative and concept art.

Expands the perspective toolkit into three-point and cinematic space, with a strong emphasis on storytelling and environment — the ideal next step once basic vanishing-point mechanics are solid.

Tackles the hardest challenges — figures in perspective, vehicles, complex architecture — and should be read immediately after Vol. 1 while the spatial vocabulary is fresh.
Architectural Space and Urban Environments
IntermediateApply all three perspective systems to full architectural scenes, cityscapes, and interiors; develop a confident, expressive line quality for drawing built environments from observation and imagination.
▸ Study plan for this stage
Pace: 4–5 weeks, ~20–25 pages/day with daily sketching practice
- Translating three-point, two-point, and one-point perspective systems into rapid architectural sketches
- Developing confident, expressive linework through gesture and construction techniques for built environments
- Observational drawing strategies for complex urban scenes, interior spaces, and streetscapes
- Compositional principles for framing architectural subjects with visual hierarchy and depth
- Balancing speed and accuracy in sketch-based documentation of real and imagined spaces
- Material and texture rendering techniques specific to architectural elements (stone, glass, metal, wood)
- How do you quickly establish a perspective grid in a sketch without relying on rulers or precise measurement?
- What are the key differences in how you construct a one-point interior versus a two-point street scene, and when would you choose each?
- How can expressive linework (weight, rhythm, broken lines) enhance the sense of space and materiality in an architectural sketch?
- What observational strategies help you capture the essential character of a complex urban environment in a limited time frame?
- How do you handle atmospheric perspective and depth cues when drawing cityscapes or large interior spaces?
- What role does quick thumbnail composition play in planning a full architectural drawing?
- Sketch 5–10 interior spaces from observation (home, café, library, museum) using one-point perspective; focus on confident line weight and material differentiation
- Draw 3–5 street scenes or urban views using two-point perspective; practice rapid perspective construction without measuring tools
- Create 10 quick thumbnail compositions (2×3 inches) of architectural subjects to explore framing and compositional options before committing to full sketches
- Render a single architectural element (doorway, window, staircase) in three different perspective systems to understand their visual and emotional effects
- Sketch the same room or street corner at three different times of day or seasons to explore how light, shadow, and atmosphere change spatial perception
- Complete a 15–20 minute timed sketch of a complex public space (market, plaza, transit hub) emphasizing expressive linework over photorealism
- Study and copy 5–10 example sketches from the book, analyzing line weight, perspective construction, and compositional choices before attempting original work
Next up: This stage builds the foundational skill of translating three-dimensional architectural space onto paper with speed and confidence, preparing you to move into specialized applications such as design development, conceptual ideation, or narrative environmental storytelling in the next stage.
Teaches rapid, confident perspective sketching of three-dimensional objects and spaces — invaluable for learning to think in volume and depth quickly, not just carefully constructed diagrams.
Mastery: Imaginative Construction and Advanced Spatial Design
ExpertDraw fully realized environments, interiors, and structures entirely from imagination using internalized perspective principles; develop a personal visual language for depth, atmosphere, and spatial drama.
▸ Study plan for this stage
Pace: 8–10 weeks, ~40–50 pages/day with 2–3 days per week dedicated to extended drawing projects
- Imaginative construction: building convincing environments from memory, reference synthesis, and invented detail rather than direct observation
- Visual library development: systematically collecting and organizing visual references to fuel imaginative work
- Atmospheric perspective and depth cues: using color temperature, saturation, value, and edge quality to create spatial recession and mood
- Light as a narrative tool: understanding how light direction, quality, and color establish time of day, season, emotion, and visual hierarchy
- Color harmony in spatial design: applying color relationships (complementary, analogous, triadic) to unify environments and guide viewer attention
- Stylization and personal visual language: moving beyond photorealism to develop a distinctive approach to rendering form, light, and atmosphere
- Spatial drama through composition: orchestrating perspective, value contrast, and focal points to create compelling, emotionally resonant scenes
- How do you build a convincing imaginary environment when you don't have direct reference, and what role does a visual library play in this process?
- Explain how atmospheric perspective (color, saturation, and edge quality) creates the illusion of depth in a drawing, and how you would apply this to an invented interior.
- How does the quality and direction of light (warm/cool, hard/soft, direct/diffuse) communicate time of day, season, and emotional tone in a scene?
- What is the relationship between color temperature and spatial recession, and how would you use this principle to push and pull elements in an imaginative composition?
- How can you develop a personal visual language in perspective drawing that is neither photorealistic nor stylistically incoherent?
- Describe how you would use value contrast and focal point placement to create spatial drama and guide a viewer's eye through an invented environment.
- Build a personal visual reference library organized by environment type (interiors, exteriors, architectural details, lighting conditions, materials). Spend 1–2 weeks collecting and categorizing images from photography, film stills, and artwork.
- Draw 5–6 fully imagined interior spaces (bedroom, kitchen, workshop, fantasy chamber, etc.) using only your reference library and memory—no direct observation. Focus on believable spatial relationships and atmospheric depth.
- Create 3–4 large-scale exterior environments (landscape, cityscape, alien terrain, historical setting) entirely from imagination, emphasizing atmospheric perspective through color temperature shifts and edge softening.
- Execute 2–3 studies exploring a single environment under different lighting conditions (morning, noon, sunset, night, stormy, magical). Demonstrate how light transforms mood and spatial perception.
- Design and render a complex interior or architectural space with intentional color harmony (choose a dominant color scheme and justify how it serves the narrative and spatial design).
- Produce a series of 4–5 quick imaginative sketches (15–30 minutes each) of diverse environments, prioritizing spatial drama through strong value contrast and focal point hierarchy rather than detail.
Next up: This stage internalizes the technical and conceptual foundations of perspective and light, positioning you to apply these principles to narrative illustration, concept design for film/games, or personal artistic projects where spatial storytelling becomes the primary vehicle for visual communication.

Shows how master illustrators construct convincing, complex scenes from imagination — perspective, lighting, and form working together — pushing the learner from technical competence to creative vision.
Perspective alone creates structure; this book adds the atmosphere, shadow, and light that make a drawn space feel truly inhabitable — the final layer that transforms correct drawings into believable worlds.
Discussion
Keep reading
Paths that share books, cover the same subject, or open a related topic.