Pen-and-ink drawing: books to master line and crosshatching
This curriculum takes a beginner from the very first mark on paper all the way to expressive, confident black-and-white illustration using pen and ink. Each stage builds directly on the last: you first develop hand control and line confidence, then master the core tonal language of crosshatching and texture, and finally synthesize everything into personal, expressive finished work.
Foundations: Line, Tools & First Marks
BeginnerUnderstand the tools of pen-and-ink, develop hand control, and learn to think in line rather than tone — building the essential vocabulary every later technique depends on.
▸ Study plan for this stage
Pace: 4–5 weeks, ~20–25 pages/day with daily drawing practice (30–45 minutes)
- Shifting from left-brain (symbolic/verbal) to right-brain (visual/spatial) perception
- The importance of contour drawing and observing edges rather than naming objects
- How the brain's two modes process visual information differently and why artists must access the right-brain mode
- The relationship between hand-eye coordination and visual perception—they reinforce each other
- Breaking the symbol barrier: moving beyond childhood drawing symbols to see what is actually there
- The role of negative space in understanding form and composition
- Foundational mark-making as the bridge between perception and expression on the page
- What is the difference between left-brain and right-brain modes of perception, and why does Edwards argue that drawing requires accessing the right-brain mode?
- What is contour drawing, and how does it train your eye to see differently than you normally do?
- Why does Edwards emphasize negative space, and how does understanding it change the way you perceive objects?
- What is the 'symbol barrier,' and how can you overcome it in your own drawing practice?
- How does hand-eye coordination develop through drawing practice, and what role does perception play in that development?
- After reading this book, what is your personal strategy for accessing the right-brain mode when you sit down to draw?
- Complete the 'vase-faces' exercise and other perception-shift exercises from the book to experience left-brain vs. right-brain processing firsthand
- Practice blind contour drawing (drawing without looking at the paper) for 10–15 minutes daily to disconnect from symbol-making and focus on observation
- Draw the same object (e.g., a hand, a shoe, a plant) five times over one week, noting how your perception and hand control improve with repetition
- Create a negative-space study: draw only the empty space around an object (not the object itself) to train your eye to see form differently
- Spend 20 minutes observing and sketching a complex scene (e.g., a cluttered desk, a corner of a room) focusing on edges and relationships rather than naming what you see
- Keep a daily 'perception journal': after each drawing session, write 2–3 sentences about what you noticed about your own seeing and how it changed during the session
Next up: This stage establishes the perceptual foundation and hand-control basics that all pen-and-ink techniques depend on; the next stage will build on this right-brain access and line sensitivity to introduce specific mark-making systems, pen types, and the controlled vocabulary of hatching, stippling, and cross-hatching.

Before technique can stick, you must learn to truly see; Edwards retrains perception so that every subsequent pen exercise is grounded in accurate observation rather than symbol-drawing.
Core Techniques: Hatching, Crosshatching & Texture
BeginnerBuild a reliable repertoire of hatching, crosshatching, stippling, and texture strokes that can convincingly render light, shadow, and surface on any subject.
▸ Study plan for this stage
Pace: 4–5 weeks, ~15–20 pages/day with 30–45 minutes of daily practice drawing
- Hatching as directional parallel lines to establish value and form
- Crosshatching: layering hatching strokes at angles to build depth and shadow
- Stippling: using dots and marks to create tone and texture without line
- Texture rendering: matching stroke patterns to surface qualities (rough, smooth, organic, metallic)
- Pressure control and pen angle to vary line weight and visual impact
- Building value scales systematically from light to dark
- Stroke consistency and rhythm for convincing shading
- Combining multiple techniques strategically on a single subject
- What is the difference between hatching and crosshatching, and when would you use each?
- How do you create a convincing value scale using only hatching or crosshatching?
- What are the advantages and limitations of stippling compared to hatching for rendering shadow?
- How would you approach rendering the texture of different surfaces (wood, metal, fabric, skin) using pen and ink?
- What role does pen angle and pressure play in controlling the visual weight of your strokes?
- How can you combine hatching, crosshatching, and stippling on a single drawing to create visual interest and depth?
- Complete all value scale exercises in the workbook (light to dark using hatching, crosshatching, and stippling separately)
- Practice directional hatching: fill 10 rectangles with parallel hatching at different angles (0°, 45°, 90°, etc.) to internalize consistency
- Crosshatching study: layer two, three, and four directions of hatching on the same shape to observe how depth increases
- Texture studies: render 8–10 different surfaces (wood grain, metal, fabric, stone, water, skin, fur, glass) using appropriate stroke patterns
- Stippling exercise: create a small portrait or object using only dots, varying dot size and density for tone
- Full subject drawing: choose a simple still life or object and render it using all three techniques strategically—hatching for smooth areas, crosshatching for deep shadow, stippling for texture accent
- Speed drills: practice quick hatching and crosshatching fills (2–3 minutes per shape) to build muscle memory and consistency
- Pen angle exploration: draw the same subject twice—once with a fixed pen angle, once varying the angle—and compare results
Next up: This stage equips you with a flexible toolkit of fundamental marks and tones, preparing you to apply these techniques with confidence to complex subjects, varied compositions, and the specific demands of different drawing styles in the next stage.

A direct sequel to Dunn's guide, this workbook provides structured, progressive exercises specifically for hatching and texture — exactly the deliberate practice needed to move from knowing to doing.
Seeing in Black & White: Value, Composition & Contrast
IntermediateLearn to design strong compositions using only black, white, and grey — understanding how value structure, lost edges, and contrast guide the viewer's eye in monochrome work.
▸ Study plan for this stage
Pace: 6–8 weeks, ~25–30 pages/day, with 2–3 dedicated drawing sessions per week
- Value structure and the tonal hierarchy: how to organize blacks, whites, and greys to create visual order and guide viewer attention
- Lost and found edges: using edge quality (sharp vs. soft, defined vs. dissolved) to control focus and create depth in monochrome compositions
- Contrast as a compositional tool: strategic placement of high-contrast areas to establish focal points and create visual rhythm
- Pen-and-ink mark-making techniques: hatching, cross-hatching, stippling, and scumbling to achieve a full range of values with limited tools
- Composition principles specific to monochrome work: how the absence of color demands stronger value relationships and edge control
- Negative space and white paper as active design elements: using the page itself as a value in the composition
- Rendering form through value: translating three-dimensional structure into convincing depth using only tonal gradation
- How do you establish a clear value hierarchy in a pen-and-ink composition, and why is this essential when working without color?
- What is the difference between lost and found edges, and how do you use each strategically to direct the viewer's eye and create depth?
- How can you use contrast (the relationship between light and dark areas) as a compositional tool to establish a focal point?
- What pen-and-ink techniques allow you to achieve a full range of values from pure white to pure black, and when is each technique most effective?
- How does the white of the paper function as an active compositional element rather than simply empty space?
- How do you render convincing three-dimensional form using only value relationships in pen and ink?
- Value scale studies: Create 5–6 value scales using different pen-and-ink techniques (hatching, cross-hatching, stippling) to develop control over the full tonal range from white to black
- Composition thumbnails: Sketch 10–15 small thumbnail compositions (2×3 inches) exploring different arrangements of high-contrast, mid-tone, and light areas; identify the focal point in each
- Lost and found edge studies: Draw the same simple object (e.g., a sphere, cylinder, or draped fabric) three times, each emphasizing different edge treatments—sharp edges, soft transitions, and dissolved edges
- Monochrome landscape or still life: Complete a full-size drawing (8×10 inches or larger) using only black ink and white paper, focusing on establishing a clear value structure and using contrast to guide the viewer's eye
- Negative space composition: Create a drawing where the white paper is as important as the inked areas; experiment with how empty space can define form and create visual balance
- Rendering study: Draw a complex object with strong form (e.g., a face, hand, or folded fabric) using only pen and ink, practicing the translation of subtle value shifts into convincing three-dimensional structure
Next up: This stage establishes the foundational visual language of monochrome composition—value, contrast, and edge control—which will enable you to move into more specialized applications such as narrative illustration, architectural rendering, or expressive mark-making where these principles become tools for storytelling and personal style.
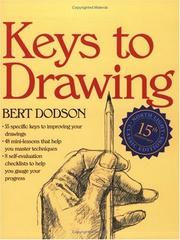
Dodson's practical, exercise-driven approach to seeing and simplifying value is medium-agnostic, making it ideal for translating what you observe into the limited tonal range of ink.
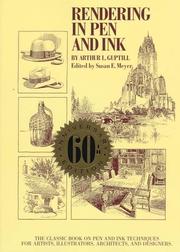
This classic, comprehensive reference — used in art schools for decades — covers composition, value planning, and advanced rendering strategies specifically for pen and ink, bridging technique and design thinking.
Subject Mastery: Nature, Architecture & Figures
IntermediateApply all learned techniques to specific, challenging subjects — organic textures, hard edges, foliage, stone, and the human figure — developing subject-specific mark-making fluency.
▸ Study plan for this stage
Pace: 6–8 weeks, ~25–30 pages/day with daily practice sessions (1–2 hours of drawing)
- Subject-specific mark-making: adapting pen strokes, hatching patterns, and line weight to convey different textures (bark, stone, fabric, skin)
- Organic form rendering: capturing the irregular, flowing nature of plants, trees, and foliage using layered marks and directional line work
- Architectural precision: applying clean edges, perspective, and geometric accuracy to buildings and structures while maintaining expressive linework
- Human figure fundamentals: proportions, anatomy, gesture, and facial features using pen techniques that balance structure with expressiveness
- Tonal depth through mark density: building value and dimension by varying mark spacing, layering, and cross-hatching rather than relying on tone alone
- Observation and translation: training the eye to see how light, shadow, and form translate into specific pen marks and techniques
- Combining techniques across subjects: integrating learned mark-making strategies to handle complex scenes with mixed elements (figures in landscapes, architecture with nature)
- How do you use different hatching patterns and mark types to distinguish between rough bark, smooth stone, and soft fabric in a single drawing?
- What strategies from Peter Gray's work help you render organic, irregular foliage convincingly without relying on detailed outlines?
- How do you maintain architectural precision and clean edges in pen-and-ink while keeping the drawing expressive and not mechanical?
- What are the key proportional relationships and anatomical landmarks you need to understand to draw the human figure convincingly with pen?
- How do you build tonal depth and dimension in pen-and-ink drawing when you cannot erase or use continuous tone?
- How would you approach a complex scene combining architecture, natural elements, and a human figure—which techniques would you prioritize and why?
- Texture studies: Create a series of 5–6 small studies (4×6 inches) focusing on one texture each—tree bark, stone wall, weathered wood, fabric folds, skin/hair—using only pen. Experiment with 3–4 different mark-making approaches per texture.
- Foliage rendering: Draw 3–4 trees or shrubs from observation or reference using techniques from Willenbrink's nature studies. Focus on suggesting leaf clusters and branch structure through mark direction and density rather than outlining individual leaves.
- Architectural detail studies: Select 3 architectural elements (a doorway, window, roofline, or corner detail) and render them with precise linework, clean edges, and appropriate perspective. Include one study with surrounding natural elements (ivy, weathering, shadows).
- Figure gesture and anatomy: Complete 10–15 quick gesture drawings (5–10 minutes each) of the human figure, then produce 2–3 more finished studies focusing on facial features, hand details, or drapery using pen techniques.
- Mixed-subject composition: Create 2 larger drawings (8×10 or larger) combining at least two of the following: architecture, landscape/foliage, and human figure. Apply appropriate mark-making strategies to each element.
- Value and depth study: Redraw one previous study focusing deliberately on building tonal depth through mark layering and cross-hatching. Compare the original to the revised version to assess improvement in dimension.
Next up: This stage equips you with subject-specific fluency and confidence to tackle complex, multi-element compositions and personal projects, preparing you to move into advanced work on composition, storytelling, and developing a distinctive personal style.

A thorough subject-by-subject breakdown that shows how line and texture strategies shift depending on what you are drawing, reinforcing adaptability across subjects.
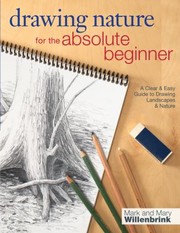
Willenbrink's focused treatment of natural textures — bark, foliage, water, rock — is invaluable for pen artists because organic subjects demand the most varied and expressive mark-making.
Expressive Voice: Style, Narrative & Personal Work
ExpertMove beyond technical correctness into expressive, personal illustration — developing a distinctive visual voice, understanding narrative composition, and producing finished, confident black-and-white artwork.
▸ Study plan for this stage
Pace: 4–5 weeks, ~20–25 pages/day, with 2–3 dedicated drawing sessions per week
- Sketching as a tool for developing personal visual language and expressive mark-making, not just preliminary studies
- The relationship between observation, interpretation, and stylistic distortion in building a distinctive drawing voice
- Narrative composition: how line weight, spatial relationships, and gestural choices convey mood, movement, and story
- Speed and spontaneity in sketching as catalysts for authenticity and breaking away from technical rigidity
- Building confidence through iterative sketching practice and embracing imperfection as part of artistic development
- Translating sketch-based exploration into finished, intentional pen-and-ink compositions
- The role of subject matter selection and thematic consistency in establishing a coherent personal practice
- How does Eissen distinguish between sketching as a preliminary step versus sketching as an end in itself, and what does this mean for developing expressive work?
- What techniques does Eissen present for using line quality, rhythm, and gestural mark-making to convey emotion and narrative without relying on photorealism?
- How can you use rapid sketching and iterative exploration to discover and refine your own visual voice?
- What role does subject matter and thematic focus play in building a cohesive body of personal illustration work?
- How do you translate the spontaneity and energy of sketches into finished, confident pen-and-ink pieces?
- What strategies does Eissen offer for moving beyond technical correctness toward expressive, intentional mark-making?
- Complete daily 15-minute gesture and observational sketching sessions focusing on capturing movement, mood, and character rather than accuracy; vary subjects (figures, architecture, nature, objects) to build versatility
- Create 3–4 thematic sketch series (10–15 sketches each) exploring a single subject or narrative idea; experiment with different line weights, mark-making styles, and compositional approaches within each series
- Produce 5 finished pen-and-ink pieces (8×10" or larger) developed directly from your most expressive sketches; focus on intentional line work, spatial clarity, and emotional impact rather than photorealistic detail
- Conduct a 'style study' exercise: select 3–5 artists whose expressive approach resonates with you, sketch in their manner for 20–30 minutes each, then synthesize observations into your own hybrid approach
- Create a narrative composition (single image or 3–4 panel sequence) that tells a story through visual choices alone—line weight, spatial relationships, figure placement, and mark-making should convey the narrative without text
- Build a personal sketch journal documenting 4–5 weeks of daily observational and imaginative sketching; review it weekly to identify emerging themes, recurring mark-making habits, and areas of growth in your visual voice
Next up: This stage establishes your personal visual vocabulary and narrative sensibility in black-and-white work, preparing you to apply these expressive principles to more complex, sustained projects—whether developing illustrated narratives, editorial work, or a cohesive body of personal illustration that demonstrates both technical mastery and distinctive artistic voice.
Though rooted in design sketching, Eissen's rigorous analysis of confident, expressive line quality and rapid tonal shorthand directly sharpens the kind of bold, decisive mark-making that defines mature pen-and-ink illustration.
Discussion
Keep reading
Paths that share books, cover the same subject, or open a related topic.