Learn tattooing: the craft behind the art
This curriculum takes a complete beginner from zero knowledge of tattooing through the full arc of professional craft: understanding the art form's history and culture, mastering equipment and technique, internalizing safety and hygiene, developing a personal artistic voice, and navigating the real-world path from apprentice to working artist. Each stage builds directly on the last — you must understand the culture before you touch a machine, master the machine before you refine your art, and refine your art before you build a career.
Foundations: History, Culture & Visual Language
BeginnerUnderstand where tattooing comes from, its major traditions and styles, and develop the visual literacy needed to study and copy great tattoo work — before ever picking up a machine.
▸ Study plan for this stage
Pace: 4–5 weeks, ~20–25 pages/day (the book is dense with primary sources and images, so slower, deliberate reading is more valuable than speed)
- The global, cross-cultural origins of tattooing — from Polynesia, Japan, and Indigenous Americas to ancient Egypt and Europe — establishing that tattooing is a universal human impulse, not a subculture
- Primary source literacy: Gilbert assembles journals, engravings, and firsthand accounts; learning to read these critically (who wrote them, from what bias, in what era) is as important as the content itself
- The role of Western 'discovery' voyages (Cook, Banks, etc.) in transplanting Polynesian tattooing into European and American sailor culture, and how that created the first wave of Western folk tattooing
- Traditional vs. decorative intent: understanding how tattoos functioned as rites of passage, social rank markers, spiritual protection, and identity documents across cultures — versus purely aesthetic motivations
- The evolution of tools and techniques across cultures: hand-tapping, hand-poking, and the eventual mechanization of the craft, and how each method produces a distinct visual quality
- Visual language fundamentals: how to read a tattoo's composition — line weight, negative space, symmetry, placement on the body, and how these choices carry cultural meaning
- The concept of 'style' as a cultural fingerprint: how geography, available pigments, spiritual beliefs, and social structures shaped distinct regional aesthetics (Māori tā moko, Japanese irezumi, American Traditional, etc.)
- Copying as study: the historical practice of tattooers learning by tracing and reproducing flash and existing designs, and why visual copying is a legitimate and essential foundation skill
- What were the primary social and spiritual functions of tattooing in at least three distinct cultures covered by Gilbert, and how did those functions shape the visual designs used?
- How did European contact with Polynesian tattooing — particularly through Cook's voyages — transform tattooing from an 'exotic' curiosity into a practice embedded in Western sailor and working-class culture?
- What does the evolution of tattooing tools (from bone combs and hand-tapping to the electric machine) reveal about the relationship between technology and aesthetic possibility in the craft?
- How do Gilbert's primary sources (journals, engravings, photographs) reflect the biases of their authors, and what does that mean for how we interpret early Western accounts of non-Western tattooing?
- Choose one regional tradition from the book. What are its defining visual characteristics — line quality, motif vocabulary, placement conventions — and what cultural logic underlies those choices?
- Why is developing 'visual literacy' — the ability to analyze and copy existing tattoo work — considered a prerequisite to technical practice, and how does Gilbert's historical survey support that argument?
- **Annotated Timeline:** As you read, build a hand-drawn or digital timeline of tattooing history. For each culture or era, note: the tool used, the social function, and one defining visual motif. Pin or sketch a representative image next to each entry. This forces active synthesis rather than passive reading.
- **Primary Source Analysis:** Select two firsthand accounts from Gilbert's collection written by Western observers of non-Western tattooing. Write a one-page comparison: What did the observer notice? What did they misunderstand or judge? What does their language reveal about their cultural assumptions? This builds critical reading habits essential for all future research.
- **Style Dissection Sketches:** Choose three culturally distinct tattoo traditions from the book (e.g., Māori, Japanese, American sailor-era). For each, fill one sketchbook page by copying representative motifs freehand — no tracing. Then annotate: line weight, use of negative space, symmetry, and what body placement was intended. Do not worry about quality; focus on observation.
- **'What Makes This Style?' One-Pager:** After completing the style sketches, write a short paragraph for each tradition answering: If someone showed me an unlabeled tattoo in this style, what visual clues would tell me where it came from? This trains the visual vocabulary you'll need to analyze any tattoo you encounter.
- **Personal Flash Sheet (Historical Homage):** Using motifs and compositional logic you've studied from at least two traditions in the book, design a single 8.5×11 'flash sheet' of 4–6 small, cohesive designs in pen or marker. The goal is not to invent — it is to internalize historical visual grammar by working within it.
- **Reflection Journal Entry:** At the end of the stage, write freely for 20–30 minutes on this prompt: 'Before reading Gilbert, I thought tattooing was ___. Now I understand it as ___. The tradition that surprised me most was ___, because ___.' This consolidates learning and surfaces the assumptions you're bringing into the next stage.
Next up: Having established that every tattoo style is a product of specific cultural logic, tools, and history, the reader is now equipped to approach the next stage — studying specific styles and technical execution in depth — with the analytical eye of someone who asks not just "how is this made?" but "why does it look this way, and where does it come from?"

A comprehensive, well-documented survey of tattooing across cultures and centuries. Reading this first gives you the cultural and historical context that every serious practitioner needs, and introduces the major style lineages you will later learn to execute.
Equipment, Hygiene & First Techniques
BeginnerLearn how tattoo machines, needles, inks, and power supplies actually work; internalize bloodborne-pathogen safety and cross-contamination prevention; and perform your first controlled lines and shading on practice skin.
▸ Study plan for this stage
Pace: 4–5 weeks, ~20–25 pages/day — Huck Spaulding's "Tattooing A to Z" is a dense, practical reference; read it in two passes: a fast first read (weeks 1–2) to map the landscape, then a slow second read (weeks 3–5) with hands-on practice running alongside each chapter.
- Tattoo machine anatomy and mechanics — how coil machines generate the up-and-down needle stroke, the role of the front/rear springs, contact screw, and capacitor, and how to tune voltage for lining vs. shading
- Needle configurations and their purposes — understanding round liners (RL), round shaders (RS), and flat shaders; how grouping and taper affect ink deposit and skin trauma
- Ink chemistry and viscosity — what pigment carriers do, why consistency matters for smooth color packing, and how to thin ink correctly without compromising saturation
- Power supply operation — reading voltage and duty cycle, setting the correct speed for a beginner stroke, and understanding why running a machine too hot or too slow damages skin
- Bloodborne-pathogen (BBP) safety and OSHA standards — the transmission routes of HIV, HBV, and HCV; the hierarchy of controls (elimination → PPE); and why single-use needles are non-negotiable
- Cross-contamination prevention and sterile field setup — proper gloving, surface barriers, single-use ink caps, sharps disposal, and the sequence of breaking down a station after a session
- Stencil application and skin preparation — using stencil fluid correctly, allowing proper dry time, and reading skin tone/texture to anticipate how a design will sit
- Controlled line work on practice skin — machine angle (45–60°), consistent hand speed, proper needle depth (just into the dermis), and the 'pull, don't push' stroke principle
- Trace the full electrical path in a coil tattoo machine from the power supply clip cord through the coils to the needle bar — what does each component contribute to the needle's motion?
- A client's linework is blowing out (ink spreading under the skin) — based on Spaulding's guidance, what are the three most likely machine or technique causes and how would you correct each?
- Walk through the complete station setup and teardown sequence Spaulding describes, identifying every moment where cross-contamination could occur and what barrier or procedure prevents it.
- What does Spaulding say about the relationship between needle taper length and the smoothness of ink flow — and why does this matter differently for lining versus shading?
- You are about to dispose of a used needle cartridge and break down your ink caps — describe the exact steps and materials required to do this safely according to BBP standards discussed in the book.
- How does Spaulding recommend adjusting machine voltage and hand speed when moving from thin linework on a bony area (e.g., wrist) to thicker lines on fleshier skin — and what is the underlying reason?
- Machine teardown and reassembly drill — disassemble a coil machine down to the frame, identify every part by the name Spaulding uses, then reassemble and tune it to a correct lining voltage (typically 7–9 V); repeat until you can do it in under 10 minutes without referencing notes
- Sterile station setup timed run — using Spaulding's sequence as a checklist, set up a full mock station (barriers, ink caps, stencil supplies, sharps container) and have someone else inspect it against the book's standards before you break it down using the correct contaminated-to-clean sequence
- Straight-line drills on practice skin — fill an entire sheet of synthetic practice skin with parallel horizontal lines using a 3RL needle, aiming for consistent weight, spacing, and depth; photograph each session and compare across days to track improvement in hand steadiness
- Circle and curve control exercise — draw concentric circles and S-curves on practice skin, focusing on maintaining a constant machine angle and pull speed around bends; Spaulding's linework principles apply equally to curves as to straights
- Shading gradient study — using a 7RS or 9RS, practice a smooth black-to-skin fade on practice skin by varying hand speed and needle depth as described in the shading sections; aim for no streaks or unworked patches
- BBP written self-quiz — after finishing the hygiene chapters, write out (from memory) the full post-session breakdown procedure and the exposure-incident response steps, then check every point against Spaulding's text and note any gaps to re-read
Next up: Mastering machine mechanics, sterile protocol, and basic line/shade control on practice skin gives you the safe, repeatable technical foundation needed to advance into design theory, stencil scaling, and working on live skin — the concerns of the next stage.

Written by a legendary industry veteran, this book goes deeper on equipment mechanics, sterilization procedures, and shop setup. Reading it after the Bible reinforces safety fundamentals with the authority of decades of professional experience.
Artistic Development: Drawing, Design & Style
IntermediateStrengthen the foundational drawing skills that separate competent technicians from true artists — understanding line weight, composition, color theory, and how to design work that translates beautifully onto skin.
▸ Study plan for this stage
Pace: 8–10 weeks total: Weeks 1–5 on "The New Drawing on the Right Side of the Brain" (~20–25 pages/day, including re-doing all exercises in the book); Weeks 6–10 on "Color and Light" (~15–20 pages/day, pausing frequently to sketch studies from Gurney's painted examples).
- R-mode vs. L-mode thinking (Edwards): learning to silence the symbol-drawing brain and truly see edges, spaces, relationships, and light — the perceptual shift that separates artists from technicians
- The Five Basic Skills of Drawing (Edwards): the perception of edges, spaces, relationships, lights-and-shadows, and the gestalt — all directly mappable to tattoo line work, negative space, and composition
- Contour and modified contour drawing (Edwards): training the hand-eye connection to record exactly what the eye sees, building the precise, confident line control essential for tattooing
- Negative space as a design element (Edwards): reading the shapes AROUND a subject, which is critical for designing tattoos that breathe and read well on the body's curves
- Sighting and proportional relationships (Edwards): measuring angles and relative sizes accurately — the foundation for scaling and placing a tattoo design correctly on a body part
- Color temperature and the behavior of light (Gurney): understanding warm light/cool shadow (and vice versa) so that shading and color choices in tattoos feel luminous rather than flat
- Gamut mapping and limited palettes (Gurney): how professional artists restrict their color range to achieve harmony — directly applicable to planning a cohesive tattoo color palette
- Form, planes, and how light wraps around 3-D surfaces (Gurney): understanding how light models volume, which translates to realistic shading, smooth gradients, and dimensional-looking tattoo work
- After completing Edwards, can you explain what 'R-mode' perception is and demonstrate it by drawing a complex reference upside-down with noticeably improved accuracy?
- Can you identify and name the five perceptual skills Edwards outlines, and give a specific example of how each one applies to designing or executing a tattoo?
- How does Edwards' concept of negative space change the way you would approach designing a tattoo that needs to wrap around a forearm or fill an irregular body panel?
- Using Gurney's framework, what happens to shadow color when the dominant light source is warm (e.g., golden sunlight), and how would you replicate that effect in a color realism tattoo?
- What is gamut mapping as described by Gurney, and how would you use it to plan a harmonious, limited color palette for a neo-traditional sleeve?
- How does understanding the planes of a form (Gurney) inform where you place highlights and core shadows when shading a portrait tattoo, versus simply copying a photograph?
- Pure contour drawing warm-up (Edwards): Spend 10–15 minutes every morning drawing your own non-dominant hand without looking at the paper. After two weeks, compare early drawings to recent ones and note the improvement in edge accuracy and line confidence — the same confidence needed for clean tattoo linework.
- Upside-down master copy (Edwards): Choose a classic tattoo flash sheet or a painting you admire, flip it upside-down, and copy it in graphite without turning it right-side-up until you are finished. This forces R-mode perception and breaks symbol-drawing habits.
- Negative-space body mapping (Edwards + tattoo application): Sketch a simple floral or animal design, then deliberately draw and shade ONLY its negative spaces on a body-part outline (forearm, upper arm, calf). Evaluate whether the design still reads clearly — if it does, your composition is strong enough for skin.
- Sighting and proportion transfer (Edwards): Find a photo of a person and, using only a pencil held at arm's length for sighting, transfer the proportions of their face or torso onto paper at a different scale. Practice until your transferred proportions are within 5% accuracy — this skill directly supports scaling tattoo stencils.
- Light-temperature studies (Gurney): Set up a simple still life (a mug, an apple, a bottle) and paint or render it three times: once under warm artificial light, once under cool daylight, and once under mixed lighting. For each study, consciously apply Gurney's warm-light/cool-shadow (or reverse) principle and compare results.
- Gamut-mapped tattoo palette design (Gurney): Choose a tattoo style (e.g., Japanese, watercolor, realism) and, using Gurney's gamut-mapping method, define a strict palette of 4–6 colors that will govern an entire imaginary sleeve design. Swatch the colors, note their temperature relationships, and do a small thumbnail rendering using only those colors to test harmony.
Next up: Mastering perceptual drawing and color theory through Edwards and Gurney gives you the visual language and critical eye needed to move into the next stage, where these skills are applied directly to tattoo-specific techniques, styles, and the unique constraints of working on living skin.

The single most recommended drawing primer across all visual arts. Tattooing is drawing on a curved, living surface — this book rewires how you see and reproduce form, which is the prerequisite skill for everything that follows.

Gurney's treatment of how light, shadow, and color interact is directly applicable to realistic and illustrative tattoo styles. Reading it here, after you can already draw, lets you immediately apply color theory to your flash and custom design work.
Advanced Technique & Specialization
ExpertStudy master-level execution across specific styles — black-and-grey realism, traditional, Japanese — and understand how to push technical limits with shading gradients, color packing, and large-scale composition.
▸ Study plan for this stage
Pace: 3–4 weeks, ~20–30 pages/day; treat each chapter as a focused workshop session — read once for comprehension, then re-read with needle and sketchbook in hand
- Machine mechanics and tuning — understanding how voltage, spring tension, contact gap, and needle depth interact to produce precise line work or smooth shading
- Needle configurations and their stylistic roles — liners vs. shaders, magnums (curved and straight), round shaders, and when to deploy each for realism, traditional, or Japanese work
- Black-and-grey realism technique — building luminosity through layered washes, controlling ink dilution ratios, and preserving highlights without overworking skin
- Traditional and bold-line execution — consistent line weight, saturated color packing, and the structural logic that makes traditional tattoos age well
- Japanese compositional principles — flow, negative space, the role of background elements (clouds, waves, wind bars), and how large-scale designs wrap the body
- Shading gradients and blending — feathering transitions, avoiding hard banding, and the motion mechanics (circular, whipping, pendulum) that produce seamless gradients
- Large-scale composition planning — mapping a design to body topography, accounting for muscle movement, and staging a multi-session piece
- Skin as a medium — understanding trauma response, ink settling, and how to read healed results to calibrate future technique
- How does adjusting machine voltage and spring tension change the feel of needle penetration, and what specific outcomes does each adjustment produce in lining versus shading?
- What needle grouping would you select for a smooth black-and-grey gradient on a large back piece, and why — and how would that choice change for tight detail work in a portrait?
- Describe the step-by-step layering process for building a realistic shadow in black-and-grey work: what dilution ratios are involved, and how do you avoid muddying the mid-tones?
- What structural and technical decisions make a traditional tattoo hold up over decades of aging, and how does Johnson's machine-tuning advice support those decisions?
- How do Japanese-style compositions use negative space and background elements to guide the viewer's eye across a large-scale piece, and what machine/needle adjustments support the bold outlines central to that style?
- What are the most common technical errors when packing color into a large area, and what machine settings or hand-speed corrections does Johnson recommend to fix them?
- Machine calibration drill: systematically adjust one variable at a time (voltage, contact gap, needle depth) on practice skin, documenting the visual result of each change in a dedicated log — build a personal reference chart
- Gradient ladder exercise: on a practice skin panel, produce 10 side-by-side black-and-grey gradient strips using different dilution ratios (undiluted → 10:1 water) and hand speeds; photograph healed results to calibrate your eye
- Style deconstruction study: select one classic example each of a black-and-grey realism piece, a traditional piece, and a Japanese piece; sketch the underlying compositional skeleton and annotate which machine/needle choices (as described by Johnson) would be required at each stage
- Bold-line consistency test: using a liner setup tuned per Johnson's guidance, tattoo (or draw on practice skin) a series of continuous curved lines of uniform weight at varying speeds — aim for zero wobble and consistent ink saturation across 6-inch runs
- Large-scale body-map project: design a quarter-sleeve or back-panel concept on a body-form template, annotating each zone with the needle configuration, machine setting, and shading motion you would use, referencing Johnson's technique recommendations
- Healed-result analysis: photograph 5–10 healed tattoos (your own work or reference images) and write a one-paragraph technical post-mortem for each — identifying what machine or technique factor likely caused any fading, blowouts, or uneven saturation
Next up: Mastering the machine-level precision and style-specific execution detailed in "Tattoo Machine" gives the reader the technical fluency needed to engage with business, client management, and professional artistry topics — the natural next frontier after craft is the sustainable career built around it.
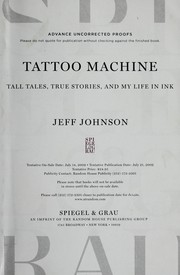
A memoir-style account from inside a working tattoo shop that captures the advanced realities of the craft — client relationships, artistic problem-solving, and the daily discipline required of a professional. It contextualizes technical mastery within the lived experience of the job.
Career: Apprenticeship, Portfolio & Professional Practice
ExpertNavigate the real-world path from student to working artist — how to find and succeed in an apprenticeship, build a portfolio that gets you hired, run a professional shop practice, and sustain a long creative career.
▸ Study plan for this stage
Pace: 3–4 weeks total. Week 1: Read "The War of Art" (~30–40 pages/day, ~3–4 sittings) — read slowly and reflectively, journaling after each section. Weeks 2–3: Read "Show Your Work!" (~20–25 pages/day, very fast read) — treat each short chapter as a standalone prompt and act on it immediately. Week 4: In
- Resistance (The War of Art): Pressfield's personification of the internal force — procrastination, self-doubt, fear, distraction — that blocks creative professionals from doing their work, and why it is strongest closest to the most important work.
- Turning Pro (The War of Art): The mindset shift from amateur to professional — showing up every day regardless of inspiration, treating creative work as a vocation with discipline, not waiting for permission or perfect conditions.
- The Hierarchical vs. Territorial Orientation (The War of Art): Working for external validation (hierarchical) vs. working because the work itself is the reward (territorial) — and why the territorial mindset is essential for a sustainable tattoo career.
- Invoking the Muse / Higher Calling (The War of Art): Pressfield's argument that serious creative work is almost spiritual — committing fully unlocks a force larger than yourself, reframing the apprenticeship grind as meaningful rather than merely transactional.
- Sharing Process, Not Just Product (Show Your Work!): Kleon's core argument that documenting and sharing your daily creative process — not just finished pieces — is the most authentic and effective way to build an audience and attract opportunities.
- Being a 'Scenius' Contributor (Show Your Work!): The idea that no artist works in isolation; great work emerges from a creative community (the 'scenius'), and actively contributing to that community — sharing influences, crediting others, engaging peers — accelerates a career.
- The 'Flow' of Sharing: Daily Dispatches (Show Your Work!): Building a consistent, low-stakes habit of sharing small updates, works-in-progress, reference sources, and behind-the-scenes moments to maintain visibility without waiting for a 'finished' portfolio.
- Sustainability & Longevity (both books): Combining Pressfield's anti-Resistance discipline with Kleon's open-sharing philosophy to build a career that is both internally driven and externally connected — the foundation of a decades-long professional practice.
- According to Pressfield, what is Resistance, and can you identify three specific forms it takes that are especially common during a tattoo apprenticeship (e.g., waiting for the 'right' mentor, avoiding practice because it won't be perfect)?
- What does 'Turning Pro' mean in the context of a tattoo apprenticeship — what concrete behavioral changes distinguish the professional apprentice from the amateur one, drawing on Pressfield's framework?
- Kleon argues you should 'share your work' before it is finished or polished. How does this principle apply to building a tattoo portfolio and social media presence, and what specific types of content does he suggest sharing?
- What is a 'scenius,' and how can a tattoo artist actively participate in one — both online and within a local shop community — using strategies from Show Your Work!?
- How do the two books complement each other: where does Pressfield's internal discipline framework end and Kleon's external sharing framework begin, and why does a working tattoo artist need both?
- Using both books, how would you design the first 90 days of a tattoo apprenticeship to address Resistance, build professional habits, and begin establishing a public creative presence?
- Resistance Audit Journal: Before starting your apprenticeship (or at its current stage), write a 1–2 page inventory of every excuse, fear, or avoidance behavior you notice in your first week of reading The War of Art. Label each one as a form of Resistance. Revisit and update this list at the end of the 4-week study period to measure self-awareness growth.
- Turn Pro Contract: Draft a one-page personal 'professional code' for your apprenticeship — specific, behavioral commitments (e.g., 'I will practice linework on fake skin for 1 hour every day before opening the shop,' 'I will not wait to be told what to practice'). Sign and date it. Pin it somewhere visible in your workspace.
- Process Documentation Sprint (Show Your Work! in action): For 7 consecutive days, post one piece of behind-the-scenes content per day to your chosen platform (Instagram, TikTok, a blog) — a sketch in progress, a reference image that inspired you, a short video of you practicing on fake skin, a caption explaining a technique you learned. Do not post finished tattoos only.
- Scenius Mapping Exercise: Create a visual map (on paper or digitally) of your creative community. List: 3 mentors or artists you admire and actively follow, 3 peers at your level you can exchange feedback with, and 3 online communities or hashtags where your work belongs. Then take one concrete action to contribute to each tier (comment thoughtfully, share someone else's work with credit, submit t
- Portfolio Narrative Statement: Using Kleon's principle of sharing 'who you are and what you do,' write a 150-word bio and a 3-sentence portfolio statement that explains your style, your influences, and where you are in your journey — honestly and without false polish. Post it publicly as your profile description or 'About' page.
- Anti-Resistance Morning Ritual Design: Using Pressfield's concept of the professional showing up daily, design a concrete 30-minute pre-practice ritual (e.g., review reference images → set one specific skill goal for the session → begin without checking social media first). Practice it every day for the remainder of the study stage and log whether it reduces procrastination.
Next up: By internalizing Pressfield's professional discipline and Kleon's open-sharing practice, the reader has built the psychological foundation and public presence needed to confidently pursue the next stage's deeper technical and business mastery — entering advanced study with the identity of a working artist, not a student.

Every tattoo artist faces the internal resistance of self-doubt, creative blocks, and the grind of building a clientele. This widely read book on creative discipline is the mindset foundation for sustaining a professional art career long-term.
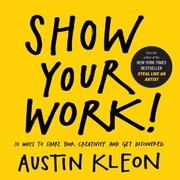
In the modern tattoo industry, an Instagram portfolio and consistent online presence are as important as in-person skill. This book provides a practical, artist-friendly framework for sharing your process, building an audience, and attracting the clients you want.
Discussion
Keep reading
Paths that share books, cover the same subject, or open a related topic.