Photo editing with Lightroom: the best books in learning order
This curriculum takes a beginner from zero Lightroom experience to a confident, professional editing workflow in four progressive stages. Each stage builds directly on the last — first establishing core concepts and navigation, then mastering tonal and color editing, then developing speed and style, and finally refining a repeatable professional workflow.
Foundations: Getting Oriented in Lightroom
BeginnerUnderstand Lightroom's interface, the Library module, and how to import, organize, and manage photos confidently before touching a single slider.
▸ Study plan for this stage
Pace: 4–5 weeks, ~25–30 pages/day from the Classroom in a Book, then 2 weeks on Lightroom Mobile Book (~20 pages/day)
- Lightroom's modular architecture: Library, Develop, Map, Book, Slideshow, and Print modules and when to use each
- The Library module workspace: Grid view, Loupe view, Compare view, Survey view, and Collections for organizing photos
- Import workflows: understanding source folders, destination folders, file handling options, and metadata templates
- Folder structure and collection strategies for managing large photo libraries without losing track of originals
- Rating, flagging, and color-coding systems as non-destructive ways to mark and organize photos
- Metadata and keywords: how to embed searchable information into photos for long-term discoverability
- Lightroom Mobile's sync capabilities and how desktop and mobile libraries communicate in real time
- Non-destructive editing philosophy: how Lightroom preserves original files while recording all adjustments separately
- What is the primary purpose of the Library module, and how does it differ from the Develop module?
- Walk through the steps to import 500 photos from a camera card into Lightroom, including folder organization and metadata decisions.
- Explain the difference between Collections and Folders, and when you would use each to organize your photo library.
- How do rating, flagging, and color-coding work together to create a photo management workflow?
- What is the relationship between Lightroom Classic on the desktop and Lightroom Mobile, and how does syncing work?
- Why is the non-destructive editing approach important, and what happens to your original files when you make adjustments in Lightroom?
- Import a real photo shoot (50–100 images) into Lightroom, creating a logical folder structure and applying a custom metadata template with your copyright and keywords.
- Create a Collections system for a hypothetical project (e.g., 'Best Shots,' 'To Edit,' 'Client Selects') and sort 100 sample photos using flags and star ratings.
- Practice all four Library view modes (Grid, Loupe, Compare, Survey) on the same photo set to understand when each view accelerates your workflow.
- Set up Lightroom Mobile on a smartphone or tablet, sync a folder of 20–30 photos, and practice flagging and rating on mobile, then verify the changes sync back to the desktop.
- Create a keyword hierarchy (e.g., Location > City > Landmark) and apply keywords to 50 photos, then search by keyword to confirm discoverability.
- Perform a full import-to-organization workflow: import photos, apply metadata, create collections, flag selects, and document your process to identify bottlenecks.
Next up: Mastering the Library module and import/organization workflows establishes the confident foundation needed to move into the Develop module, where you'll learn to adjust exposure, color, and tone on the photos you've now learned to manage and find effortlessly.

Adobe's official step-by-step training book is the most structured entry point for absolute beginners, covering import, the Library module, and basic organization with hands-on exercises.

Kelby's approachable, plain-English style demystifies Lightroom's ecosystem early on, helping beginners understand how the desktop and mobile versions connect before diving deeper.
Going Deeper: Color, Tone, and Creative Control
IntermediateDevelop a nuanced understanding of color science, advanced tone control, local adjustments (masks, brushes, gradients), and how to craft a deliberate visual style.
▸ Study plan for this stage
Pace: 8–10 weeks, ~25–30 pages/day, with 2–3 dedicated practice days per week
- Color spaces, profiles, and rendering intents: how RGB/CMYK conversions affect your edits across devices and outputs
- Tone curve mastery: reading and manipulating curves to control shadows, midtones, and highlights with surgical precision
- Local adjustment workflows: using masks, brushes, and graduated filters to apply selective color and tone corrections
- The digital negative philosophy: treating raw files as non-destructive masters that preserve maximum editing flexibility
- Calibration and profiling: monitor calibration, input profiles, and output simulation to ensure consistent color from capture to print
- Creative color grading: using HSL, color range masks, and split toning to develop a cohesive visual style
- Luminosity and saturation relationships: understanding how tone and color interact to avoid muddy or oversaturated results
- What is the difference between a working color space and an output color space, and why does this distinction matter in Lightroom?
- How do you read a tone curve, and what specific adjustments would you make to recover blown highlights versus lift crushed shadows?
- Describe the workflow for creating and applying a luminosity mask in Lightroom to selectively adjust a specific tonal range.
- What does 'digital negative' mean, and how does non-destructive editing in Lightroom embody this principle?
- How would you use the HSL panel and color range masks together to shift the color of a specific object (e.g., a blue sky) without affecting other colors?
- Why is monitor calibration essential before color grading, and what information does a color profile provide to Lightroom?
- Read 'Real World Color Management' Chapters 1–3 (color spaces and profiles), then create a test image with known color patches and soft-proof it in Lightroom using different output profiles to observe rendering intent differences.
- Study the tone curve chapter in 'The Digital Negative,' then take 3 underexposed and 3 overexposed raw files and use curves to recover detail without introducing banding or artifacts.
- Create a local adjustment study: pick a landscape image and use graduated filters, radial masks, and brush strokes to selectively warm shadows, cool highlights, and enhance midtone contrast.
- Build a 'digital negative' template: establish a baseline set of non-destructive adjustments (white balance, exposure, blacks, clarity) that you apply to 5 different raw files to see how they adapt.
- Perform a color grading exercise: take a portrait and use HSL sliders and color range masks to shift skin tones, eye color, and background color independently, then compare before/after.
- Calibrate your monitor using a colorimeter (or reference a calibration report), then re-edit a previously finished image and note how your color and tone decisions shift with accurate display.
Next up: Mastering color science, tone control, and local adjustments equips you to move into the next stage—applying these technical skills to genre-specific workflows (landscape, portrait, product) and developing a signature editing voice.
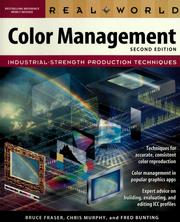
Provides the color-science vocabulary — color spaces, profiles, rendering intents — that makes advanced Lightroom color work meaningful rather than guesswork.

Schewe's deep dive into raw processing and local adjustment philosophy directly translates to Lightroom's Develop module, elevating editing decisions from mechanical to intentional.
Professional Workflow: Speed, Consistency, and Mastery
ExpertBuild a fast, repeatable, professional editing workflow using presets, batch editing, export pipelines, and catalog management strategies used by working photographers.
▸ Study plan for this stage
Pace: 4–5 weeks, ~25–30 pages/day, focusing on workflow chapters and appendices; allocate extra time for hands-on practice with your own photo library
- Catalog structure and management: organizing folders, collections, and smart collections for efficient batch operations
- Preset creation and customization: building personal presets for consistent style and rapid application across shoots
- Batch editing workflows: using the Library and Develop modules to apply adjustments to multiple images simultaneously
- Export pipelines and file naming: setting up automated export templates, metadata embedding, and naming conventions for client delivery
- Keyboard shortcuts and module navigation: mastering Lightroom's interface to minimize mouse movement and maximize editing speed
- Metadata and keywording strategies: tagging and organizing images for searchability and long-term catalog maintenance
- Performance optimization: managing catalog size, cache, and preview generation to maintain speed with large libraries
- How would you structure a Lightroom catalog and folder hierarchy to support batch editing of multiple photo shoots while maintaining fast performance?
- Walk through the steps to create a custom preset that enforces your signature editing style, and explain how you would apply it to 500 images in one workflow.
- What is the difference between a collection and a smart collection, and when would you use each in a professional workflow?
- Design a complete export pipeline for delivering edited photos to a client, including file naming, metadata, color space, and resolution decisions.
- How would you use Lightroom's Develop module to make global adjustments to a batch of images, and what are the limitations of batch editing?
- Describe a keyboard-driven workflow for culling, rating, and flagging images that minimizes reliance on the mouse.
- Audit your current Lightroom catalog (or create a new one): reorganize your folder structure following best practices from the book, then create 3–5 smart collections that reflect your typical sorting needs.
- Build 5–10 custom presets based on your editing style: create presets for different lighting conditions (daylight, tungsten, mixed), subject types (portraits, landscapes, events), or moods. Document the settings in each.
- Batch-edit a shoot of 50+ images: select a folder, apply a preset, then use the Develop module to make targeted adjustments to subsets (e.g., underexposed images, different white balance groups). Compare the time savings to editing one-by-one.
- Design and test an export template: set up an export preset with custom file naming, metadata embedding, color space conversion, and resolution. Export a test batch and verify the output meets your specifications.
- Create a keywording and metadata workflow: tag 100+ images with hierarchical keywords, add captions and copyright info, then use the Library filter to retrieve images by keyword. Measure the time to find specific images before and after.
- Optimize your catalog for speed: check catalog size, rebuild previews if needed, and benchmark editing speed before and after optimization. Document any performance improvements.
Next up: Mastering Lightroom's professional workflow establishes the foundation for advanced post-processing techniques, where you'll move into Photoshop for pixel-level retouching, compositing, and specialized effects that Lightroom cannot handle—using Lightroom as the first pass and Photoshop as the refinement layer.

The definitive reference for catalog management, troubleshooting, and workflow optimization — essential reading before locking in a long-term professional system.
Discussion
Keep reading
Paths that share books, cover the same subject, or open a related topic.