Woodworking joinery: an ordered reading list for strong joints
This curriculum takes a beginner from zero woodworking knowledge to confident mastery of hand-cut and machine-cut joinery, with a special focus on mortise-and-tenon, dovetails, and layout. Each stage builds on the last — starting with essential tool skills and shop vocabulary, moving through foundational joint-cutting techniques, then advancing into refined hand-tool mastery and furniture-grade precision, and finally reaching the level of a thoughtful craftsman who understands why joints work, not just how to cut them.
Foundations: Tools, Wood & Shop Vocabulary
BeginnerUnderstand how wood behaves, set up and tune essential hand tools, and develop the basic vocabulary and safety habits needed before cutting a single joint.
▸ Study plan for this stage
Pace: 4–5 weeks, ~25–30 pages/day. Start with "The Complete Manual of Woodworking" (weeks 1–2.5), then "The Anarchist's Tool Chest" (weeks 2.5–5). Allow overlap for tool setup and practice.
- Wood grain direction and how it affects tool behavior, tearout, and joint strength
- Moisture content, wood movement, and seasonal expansion/contraction in relation to joinery
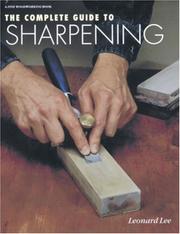
- Sharpening fundamentals: understanding edge geometry, stropping, and maintaining tool edges for clean cuts
- Proper hand tool setup and tuning: sole flatness, blade alignment, and iron geometry for planes, chisels, and saws
- Safe handling and stance for hand tools: grip, body position, and workholding to prevent injury and improve control
- Shop layout, workbench setup, and essential tool selection for a functional joinery workspace
- Vocabulary: grain direction, heartwood/sapwood, medullary rays, sole, iron, chipbreaker, and common joinery terms
- The philosophy of tool ownership and maintenance: why quality hand tools matter and how to care for them
- How does wood grain direction affect the direction you should plane or chisel, and what is tearout?
- Why does wood move seasonally, and how should this influence your approach to designing and cutting joints?
- What are the key steps to sharpen a chisel or plane iron, and how do you know when an edge is sharp enough?
- What does it mean to 'tune' a hand plane, and why is sole flatness critical for accurate joinery?
- Describe the correct grip, stance, and body position when using a hand saw or bench plane, and why safety matters
- What are the essential hand tools needed to begin learning joinery, and why would you choose quality tools over cheap ones?
- Select a piece of scrap wood, identify the grain direction by sight and feel, then plane with and against the grain to observe and document tearout
- Sharpen a chisel or plane iron using the methods described in the books, then test sharpness on end-grain wood and paper; repeat until you achieve a consistent edge
- Flatten and tune a hand plane sole using a straightedge and sandpaper or a jointer plane; document the before/after with photos or notes
- Set up your workbench and arrange your essential tools within arm's reach; practice safe handling and clamping techniques on scrap wood
- Practice proper stance and grip with a hand saw and bench plane on scrap; record yourself or have a peer observe and give feedback
- Create a simple tool maintenance log: sharpen, clean, and oil your hand tools weekly for 4 weeks, noting any changes in performance
Next up: This stage equips you with sharp, tuned tools, a safe and organized workspace, and a deep understanding of wood behavior—the essential prerequisites for confidently cutting your first joints with precision and control.

A comprehensive, illustrated reference that covers wood species, tool types, and basic techniques — gives the beginner a full map of the craft before diving into joinery specifically.

Teaches which hand tools truly matter and how to set them up correctly; reading this early prevents bad habits and ensures the learner's chisels and saws are ready for precise joinery work.
Core Joinery: Cutting Your First Joints
BeginnerSuccessfully lay out, cut, and fit the most fundamental woodworking joints — including basic mortise-and-tenon and dovetails — by hand and with machines.
▸ Study plan for this stage
Pace: 8–10 weeks, ~25–30 pages/day, with 2–3 days per week dedicated to hands-on practice and joint-cutting sessions
- Anatomy and function of fundamental joints: mortise-and-tenon, dovetails, box joints, and their load-bearing characteristics
- Layout techniques using marking gauges, chisels, and precision measuring tools to ensure accurate joint geometry
- Hand-tool methods for cutting mortises (chisels, mallets) and tenons (saws, chisels) with control and repeatability
- Router setup, bit selection, and jig-building for machine-assisted joint cutting (mortising, template routing, edge work)
- Handplane fundamentals: sole flatness, blade sharpness, grain direction, and using planes to fit and fine-tune joints
- Dry-fitting and troubleshooting: identifying gaps, binding, and misalignment, then correcting with chisels or planes
- Wood movement, grain orientation, and seasonal considerations when designing and cutting joints for durability
- What are the key differences between mortise-and-tenon and dovetail joints in terms of load direction, layout, and cutting sequence?
- How do you lay out a mortise-and-tenon joint accurately using hand tools, and what are the critical measurements?
- What router bits, jigs, and setup procedures are needed to cut mortises and tenons safely and consistently?
- How do you use a handplane to fit a tenon or adjust a joint after initial cutting, and why is sole flatness critical?
- What common mistakes occur when cutting dovetails by hand, and how do you correct binding or gaps in a dry fit?
- How does wood movement and grain direction affect joint longevity, and what layout decisions prevent failure?
- Cut 5–8 mortise-and-tenon joints by hand (chisels and saws) on scrap wood, progressively increasing accuracy and reducing gaps
- Build a simple router mortising jig and cut 3–4 mortises using the router; compare hand-cut and machine-cut results for speed and precision
- Cut a set of through-dovetails and half-dovetails by hand, focusing on layout accuracy and saw control; dry-fit and identify gaps
- Use a handplane to fit a tenon into a mortise, removing shavings incrementally until the joint seats without forcing; document the process
- Create a small box or frame using at least two different joint types (mortise-and-tenon and dovetails), gluing and clamping to completion
- Lay out and cut a box joint (finger joint) using both hand tools and a router table setup; compare the two methods for speed and repeatability
Next up: This stage equips you with the core hand and machine skills to cut fundamental joints accurately; the next stage will build on this foundation by introducing more complex joinery (angled joints, curved work, specialized jigs) and advanced fitting techniques for heirloom-quality furniture.
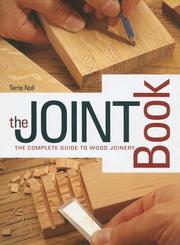
A clear, well-illustrated survey of every major joint type; reading it first in this stage gives the learner a mental library of joints before committing to cutting any one of them in depth.

Introduces machine-cut joinery through the router — one of the most accessible power tools for beginners — covering dadoes, rabbets, and template-based mortises that build confidence before tackling hand tools.

Mastering the hand plane is essential for fitting joints flush and true; this book, read after first attempts at cutting joints, teaches the learner to refine and correct their work at the bench.
Going Deeper: Dovetails & Mortise-and-Tenon Mastery
IntermediateCut tight, gap-free dovetails and mortise-and-tenon joints entirely by hand, understanding layout logic, grain orientation, and the proportions that make joints both strong and beautiful.
▸ Study plan for this stage
Pace: 8–10 weeks, ~25–30 pages/day, with 2–3 dedicated practice days per week for hand-cutting joints
- Dovetail layout proportions and geometry: pin-to-tail ratios, angle calculations, and how grain direction affects joint strength and appearance
- Mortise-and-tenon proportions and mechanics: shoulder placement, tenon thickness, depth ratios, and why these proportions create mechanical advantage
- Hand-tool technique for precision: saw control, chiseling accuracy, and how to read grain to avoid tearout and achieve tight fits
- Grain orientation strategy: selecting wood orientation for both strength and beauty, and understanding how grain direction influences joint layout
- Gap-free joint assembly: fitting logic, shaving techniques, and the relationship between layout precision and final fit
- Joint design for boxes and frame-and-panel construction: how joinery choices affect structural integrity and visual balance in finished work
- The relationship between proportion, strength, and aesthetics: why certain joint ratios are traditional and how they serve both function and form
- What are the standard proportions for dovetail pins and tails, and how do you calculate the angle of a dovetail based on the wood thickness and desired aesthetics?
- How do you lay out a mortise-and-tenon joint to ensure the tenon is the correct thickness and length relative to the mortise depth, and why do these proportions matter?
- What is the relationship between grain direction and joint strength in both dovetails and mortise-and-tenon joints, and how does this inform your wood selection and layout?
- Describe the step-by-step hand-tool process for cutting a dovetail by hand, including how to use a saw, chisel, and layout tools to achieve a gap-free fit.
- What are the key differences in layout and cutting technique between through dovetails, half-blind dovetails, and mortise-and-tenon joints, and when would you use each?
- How do you assess and correct a joint that is too tight or has gaps, and what shaving or fitting techniques allow you to achieve a snug, gap-free assembly?
- Cut 5–6 practice dovetails (through dovetails) on scrap wood, focusing on layout accuracy and saw control; measure gaps and refine technique with each attempt
- Cut 4–5 mortise-and-tenon joints on scrap, varying the proportions (1:3, 1:4, 1:5 tenon-to-mortise depth ratios) and evaluate how proportion affects fit and strength
- Layout and cut a half-blind dovetail joint (drawer front style) on a small practice piece, paying close attention to grain orientation and how it affects tearout
- Build a simple box using dovetails at all four corners, focusing on consistent proportions, grain direction, and achieving gap-free assembly on all joints
- Create a small frame using mortise-and-tenon joints at the corners, then assess fit, make shaving adjustments, and finish the piece to see how joinery quality affects the final appearance
- Study and sketch the joinery layouts from a finished box or frame project in Stowe's work; identify the proportions used and explain why those choices work for that design
Next up: This stage equips you with the precision hand-tool skills and design logic needed to tackle more complex joinery scenarios—such as angled joints, multiple mortises in a single piece, or frame-and-panel assemblies—where understanding proportion and grain becomes essential for both structural integrity and visual harmony.
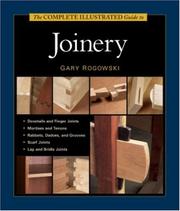
The most thorough single-volume treatment of joinery available, covering both hand and machine methods with detailed layout and cutting sequences — the essential intermediate reference for this stage.

Bridges technique and craft philosophy, helping the learner slow down, read the wood, and develop the focused attention that separates adequate joints from furniture-quality ones.
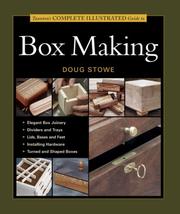
Boxes are the perfect practice project for dovetails and small mortise-and-tenon joints; this book provides structured, progressive projects that reinforce layout and cutting skills in a low-stakes format.
Advanced Hand-Tool Joinery & Layout Precision
ExpertAchieve furniture-maker-level precision in hand-cut joinery through mastery of layout tools, sawing technique, and the traditional methods used by period craftsmen.
▸ Study plan for this stage
Pace: 8–10 weeks, ~25–30 pages/day, with 2–3 days per week dedicated to hands-on practice and layout exercises
- Layout precision as the foundation of hand-cut joinery—how accurate marking directly determines joint quality
- Traditional hand-tool setup and maintenance for consistent, repeatable cuts (chisels, saws, planes, marking gauges)
- Grain direction analysis and how to read wood grain to optimize tool direction and minimize tearout
- Sawing technique fundamentals: body position, saw angle, stroke rhythm, and how to cut to the line consistently
- Mortise-and-tenon joinery as the core joint—layout, marking, mortising, and tenon-cutting methods used by period craftsmen
- Dovetail layout and hand-sawing technique for both through and half-blind dovetails
- The relationship between tool sharpness, technique, and precision—why dull tools force poor technique
- Developing the tactile feedback and muscle memory needed to execute repeatable, furniture-maker-quality joints
- How does grain direction influence your choice of tool direction and cutting sequence in hand joinery, and what does Becksvoort emphasize about reading the grain?
- What are the key steps in laying out a mortise-and-tenon joint by hand, and how does precision in marking affect the final fit?
- Describe the proper body position, saw angle, and stroke technique for hand-sawing dovetails and tenons, as taught in these texts.
- Why is tool sharpness non-negotiable for hand-tool joinery, and how does a dull tool compromise both technique and precision?
- What is the difference between through dovetails and half-blind dovetails, and when would you use each in furniture making?
- How do the traditional methods described in Wearing's work compare to modern power-tool approaches, and what advantages does hand-tool precision offer?
- Complete a full mortise-and-tenon joint (frame-and-panel style) by hand, focusing on layout accuracy and grain-aware sawing; repeat 3 times to build consistency
- Practice hand-sawing dovetails on scrap wood—cut at least 5 sets of through dovetails and 3 sets of half-blind dovetails, refining your saw angle and stroke
- Set up and sharpen a full complement of hand tools (chisels, saws, marking gauges, planes) following the maintenance principles in Wearing, then document the difference in cut quality
- Lay out a complex mortise-and-tenon joint without cutting—use only marking tools to achieve ±1/64" accuracy, then verify with calipers
- Saw a tenon freehand to the line on all four sides, aiming for a fit that requires only hand-plane cleanup; repeat until you achieve this 4 times in a row
- Build a small frame (4–6 mortise-and-tenon joints) using only hand tools, applying grain-reading and layout precision throughout; photograph and measure final gaps
Next up: Mastery of hand-tool precision and grain-aware technique in this stage provides the foundation for understanding how to adapt these principles to more complex joinery (such as frame-and-panel construction, curved joinery, or specialized joints) and to make informed decisions about when hand tools outperform machines in furniture making.

A Shaker furniture master's approach to joinery and design — teaches how joint selection, wood movement, and proportion interact, elevating the learner from technician to thoughtful furniture maker.
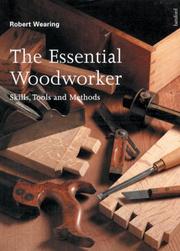
A concise, rigorous classic focused entirely on hand-tool accuracy and layout; its disciplined approach to marking gauges, squares, and sawing refines the precision needed for advanced mortise-and-tenon and dovetail work.
Discussion
Keep reading
Paths that share books, cover the same subject, or open a related topic.