The Best Books on Classic Car Restoration
This curriculum is built for an intermediate learner who already has basic mechanical familiarity and wants to master every discipline of a full classic car restoration — from stripping metal to rolling out a finished, road-worthy vehicle. The four stages move from a holistic project-management mindset, through the heavy metalwork and mechanical rebuild, into the precision crafts of paint and bodywork, and finally the finishing touches of upholstery and trim that separate a good restoration from a great one.
The Big Picture: Planning & Project Mastery
IntermediateUnderstand how a full restoration project is scoped, sequenced, and managed — including what to look for when buying a project car and how all the disciplines interconnect.
▸ Study plan for this stage
Pace: 6–8 weeks, ~40–50 pages/day (approximately 3–4 hours of focused reading and note-taking per day)
- Project scoping and assessment: evaluating a potential project car's condition, identifying rust, structural damage, and hidden problems before purchase
- Sequencing and phasing: understanding the logical order of restoration tasks (e.g., body work before paint, electrical before upholstery) and why dependencies matter
- Budgeting and resource planning: estimating costs for parts, labor, tools, and contingencies across a multi-year restoration timeline
- Discipline interconnection: how body repair, mechanical systems, electrical, interior, and finishing work must coordinate and communicate
- Auto body fundamentals: metal preparation, welding, panel alignment, gap management, and surface preparation as the foundation for professional results
- Documentation and project management: tracking progress, maintaining records, and organizing a restoration workflow to avoid costly rework
- Tool and workspace requirements: understanding what equipment, facilities, and safety measures are necessary for a credible restoration effort
- What are the five critical areas you should inspect when evaluating a potential project car, and what do signs of rust or structural damage tell you about the scope of work ahead?
- Why is body work typically sequenced before mechanical work and painting, and what happens if this order is reversed?
- How do you create a realistic budget for a full restoration, and what percentage contingency should you build in for unexpected discoveries?
- Describe how the auto body repair process (metal prep, welding, panel alignment, primer, paint) connects to and depends on other restoration disciplines.
- What documentation and tracking systems should you establish at the start of a restoration project, and why does this matter for managing scope creep?
- What minimum tools, workspace, and safety equipment are required to perform quality body work without compromising the final result?
- Find a specific classic car for sale online (local listing or auction site) and perform a written pre-purchase inspection assessment using Brownell's evaluation framework—document condition, estimated repair costs, and sequencing priorities.
- Create a detailed restoration timeline and phasing plan for a real or hypothetical project car, mapping out which disciplines must happen in which order and identifying critical dependencies.
- Build a line-item budget spreadsheet for a multi-year restoration, including parts, labor, tools, facility costs, and a 20–30% contingency reserve; justify your estimates using examples from the books.
- Visit a local body shop or restoration facility (in person or via video interview if possible) and observe or document the workflow—compare what you see to Parks' methodology and note any deviations.
- Perform a hands-on metal prep and small-scale welding or panel repair exercise (at a community college, vocational school, or shop) to understand the physical demands and precision required in body work.
- Create a project management template (spreadsheet, Gantt chart, or digital tool) for tracking a restoration, including task sequencing, resource allocation, and decision checkpoints based on Brownell's planning framework.
Next up: This stage equips you with the strategic and structural knowledge to oversee a complete restoration; the next stage will dive deep into the specialized technical skills and systems—mechanical, electrical, interior, and finishing—that execute the plan you've now learned to create.

A trusted, comprehensive overview of the entire restoration process that gives intermediate learners a mental map of every stage — bodywork, mechanicals, paint, and interior — before diving into any single discipline.

Bridges the gap between project planning and hands-on work by introducing the vocabulary of body repair, tools, and materials; reading this second ensures the later technical books land with full context.
Metalwork & Bodywork: Steel and Structure
IntermediateDevelop real competency in sheetmetal repair, rust removal, panel fabrication, and welding as applied to classic car bodies.
▸ Study plan for this stage
Pace: 8–10 weeks, ~25–30 pages/day with 2–3 days per week dedicated to hands-on metalwork practice
- Sheet metal fundamentals: gauge, hardness, annealing, and how material properties affect formability and repair
- Hand and power tool techniques for cutting, bending, stretching, and shrinking metal without compromising structural integrity
- Panel fabrication methods including English wheel work, planishing, and mock-up construction from Eddie Paul's techniques
- Welding processes (MIG, TIG, stick) applied specifically to automotive bodywork and joint preparation for classic cars
- Rust diagnosis, removal strategies (media blasting, chemical, mechanical), and prevention through proper surface preparation
- Panel alignment, gap management, and body line restoration to maintain classic car authenticity and fit
- Patch panel fabrication and installation for localized rust repair without full panel replacement
- Safety protocols for metalworking, welding, and chemical rust removal in a shop environment
- What is sheet metal gauge and how does it affect your choice of repair method for a classic car body panel?
- Describe the annealing process and explain when and why you would anneal metal during a fabrication project
- What are the key differences between English wheel work and planishing, and when would you use each technique?
- How do you diagnose the extent and type of rust (surface, scale, pitting, structural) and what removal method would you choose for each?
- Walk through the steps of creating and installing a patch panel for a rust hole in a classic car door or fender
- What are the critical safety considerations when welding on a classic car body, and how do you prevent heat damage to surrounding areas?
- Practice metal stretching and shrinking on scrap steel using hand tools and an English wheel; document how material behaves under different techniques
- Create a simple patch panel from flat stock using Eddie Paul's mock-up method, then fit and weld it to a practice panel
- Perform rust removal on a small rusted panel using at least two different methods (e.g., wire wheel, media blasting, chemical); compare results and document surface preparation quality
- Set up and execute MIG and TIG welds on automotive-gauge steel in butt, lap, and T-joint configurations; inspect for penetration and appearance
- Fabricate a small body panel (e.g., a patch for a fender) from flat sheet, including forming, fitting, and final welding to a donor panel
- Diagnose and repair a rust-affected section of a classic car body (real or practice piece) using the full workflow: assessment, removal, fabrication, welding, and finishing
Next up: Mastery of metalwork and bodywork techniques positions you to tackle full panel replacement, complex structural repairs, and the integration of new panels with original body lines—skills essential for the next stage of restoration work.
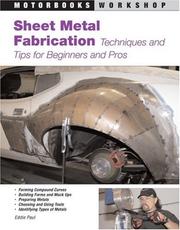
Covers the core hand-tool and power-tool techniques for shaping and forming sheetmetal — essential groundwork before tackling rust repair or panel replacement on a vintage body.
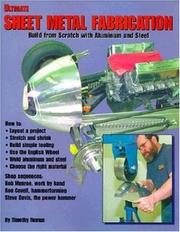
Steps up the complexity with more advanced panel-forming, English wheel work, and welding techniques; reading it after Eddie Paul's foundations prevents skill gaps when confronting complex body contours.

Focuses specifically on the rust and rot problems endemic to classic cars, with detailed guidance on cutting out rot, fabricating patches, and achieving structurally sound repairs — the practical capstone of this stage.
Engines & Mechanicals: Bringing the Drivetrain Back to Life
IntermediateRebuild and tune a classic car engine and drivetrain with confidence, understanding tolerances, parts sourcing, and period-correct specifications.
▸ Study plan for this stage
Pace: 8–10 weeks, ~25–30 pages/day, with 2–3 hands-on lab sessions per week
- Small-block Chevy engine architecture: block, heads, crankshaft, and internal component layout and relationships
- Disassembly procedures: safe engine removal, systematic teardown, and proper documentation of component orientation
- Inspection and measurement: using micrometers, calipers, and bore gauges to assess wear, measure tolerances, and determine which parts need replacement vs. reconditioning
- Cleaning and reconditioning: hot-tank cleaning, honing, and preparing surfaces for reassembly without damaging precision-finished areas
- Parts sourcing and selection: identifying original vs. performance alternatives, understanding casting numbers, and sourcing period-correct or upgraded components
- Reassembly sequencing: proper torque specifications, gasket selection, bearing clearances, and the critical order of assembly to avoid damage
- Break-in and tuning: initial startup procedures, proper running-in protocols, and basic carburetor and ignition tuning for reliable operation
- What are the key measurement points and tolerance ranges for small-block Chevy block, crankshaft, and piston assemblies, and how do you use micrometers to verify them?
- Walk through the complete disassembly sequence for a small-block Chevy engine—what comes off first, what documentation should you maintain, and why order matters
- How do you identify which internal components (bearings, rings, gaskets) must be replaced versus reconditioned, and what inspection criteria determine this?
- What are the critical torque specifications and assembly sequences for the block, crankshaft, connecting rods, and cylinder head, and why is order essential?
- How do you source period-correct or appropriate replacement parts, and what casting numbers or part numbers should you reference?
- What are the proper break-in procedures and initial tuning steps after reassembly to ensure reliable engine operation?
- Obtain a used or salvage small-block Chevy engine (or arrange access to one) and practice complete disassembly, documenting each step with photos and notes on component condition and orientation
- Measure critical dimensions (bore, stroke, crankshaft journals, rod length) using micrometers and calipers; compare results to Vizard's specifications and determine which parts are within tolerance
- Clean a set of engine blocks or heads using hot-tank or chemical methods; practice proper honing technique on a cylinder bore to achieve the correct surface finish
- Source a complete gasket set and bearing kit for your target engine; cross-reference part numbers with Vizard's specifications and verify authenticity of components
- Perform a full reassembly of the crankshaft, connecting rods, and pistons on a test block, following Vizard's torque sequence and checking bearing clearances with Plastigage
- Assemble and install the cylinder head, intake manifold, and valve cover, verifying gasket seating and torque specifications at each step
- Conduct a controlled first startup and break-in of a rebuilt engine (or observe one under expert supervision), monitoring oil pressure, temperature, and listening for abnormal sounds
Next up: Mastering engine rebuild mechanics and tolerances prepares you to move into fuel systems, ignition systems, and transmission integration—understanding how a properly balanced and tuned engine interfaces with supporting systems for complete drivetrain performance.
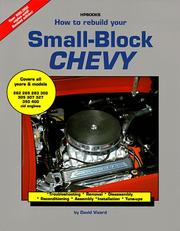
Uses the most common classic-era V8 as a teaching platform; the step-by-step teardown, inspection, and assembly process teaches universal engine-rebuild principles applicable to virtually any vintage powerplant.
Extends the mechanical rebuild knowledge from the engine into the drivetrain, covering the gearboxes most often found in classic performance cars and teaching the precision fitting skills needed for a reliable road car.
Paint, Finish & Interior: The Craft of Presentation
ExpertExecute a professional-quality paint job from bare metal to final buff, and restore or recreate period-correct upholstery, headliners, and trim.
▸ Study plan for this stage
Pace: 8–10 weeks, ~40–50 pages/day, with 2–3 days per week dedicated to hands-on practice and material testing
- Surface preparation fundamentals: sanding sequences, primer selection, and achieving a dust-free substrate for paint adhesion
- Paint chemistry and application: understanding basecoat/clearcoat systems, spray gun technique, temperature/humidity control, and wet-on-wet layering
- Finish troubleshooting: diagnosing and correcting common defects (orange peel, sags, runs, dust nibs, color matching) through Parks' and Pfanstiehl's diagnostic frameworks
- Buffing and compounding: machine and hand techniques to achieve show-quality gloss without burning through clearcoat
- Upholstery material selection and pattern layout: choosing period-correct fabrics, vinyl, and leather; reading and adapting original patterns from donor panels
- Interior restoration techniques: seaming, welting, padding installation, and securing trim without damage to underlying structures
- Headliner and trim restoration: panel removal, backing material selection, adhesive application, and reinstallation for factory-appearance results
- Walk through the complete surface preparation sequence from bare metal to primer application, explaining why each step prevents paint failure
- Explain the difference between basecoat and clearcoat systems, and describe how humidity and temperature affect spray application and cure time
- Identify and describe the causes of five common paint defects (orange peel, sags, runs, dust nibs, color mismatch) and the corrective measures for each
- Describe the proper technique for machine buffing a clearcoat finish, including pad selection, compound choice, and how to avoid burning through
- How do you determine the correct upholstery pattern and material for a restoration, and what are the key differences between hand-stitching and machine-stitching applications?
- Explain the process of removing, backing, and reinstalling a headliner panel to achieve a factory-correct appearance
- Practice sanding sequences on scrap metal panels: progress through 80, 120, 220, 320, and 400-grit in the correct order, then inspect for scratches and contamination under bright light
- Spray primer and basecoat on test panels under varying humidity and temperature conditions (Parks and Pfanstiehl), recording application notes and comparing cure times and finish quality
- Intentionally create common paint defects (orange peel, sags, runs) on test panels, then practice wet-sanding and buffing corrections using Pfanstiehl's diagnostic methods
- Set up and use a spray gun with proper air pressure, fluid delivery, and gun angle on at least three full-size body panels or equivalent test surfaces
- Disassemble and re-upholster a seat cushion or small interior panel using Caldwell's techniques: select fabric, cut pattern, stitch seams, install padding, and secure trim
- Remove, inspect, back, and reinstall a headliner panel or door panel following factory-correct adhesive and fastening methods from Caldwell
Next up: This stage equips you with the technical mastery to transform a bare shell into a show-ready exterior and interior, preparing you to integrate these finished systems with mechanical and electrical components in the final assembly and detailing stage.

The most widely recommended step-by-step guide to automotive refinishing — covering surface prep, primer, color coats, and clear — and the natural first read before tackling advanced finishing techniques.
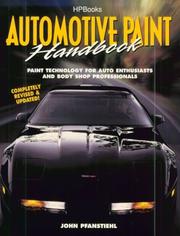
Goes deeper into paint chemistry, color matching, and troubleshooting defects; reading it after Parks's procedural guide turns practical knowledge into genuine expertise for achieving show-quality results.
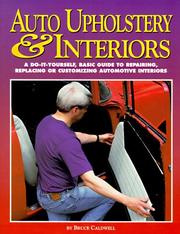
A thorough, illustrated guide to restoring seats, door panels, headliners, and carpets — the final discipline needed to complete a full, road-ready restoration and the logical capstone of the entire curriculum.
Discussion
Keep reading
Paths that share books, cover the same subject, or open a related topic.