Build your first workbench (and everything after)
This curriculum takes a complete beginner from zero woodworking knowledge to confidently building a solid workbench — the classic first "real" project. The stages move from understanding wood and hand tools, through essential joinery and shop skills, and finally into bench-specific design and construction, so every book builds directly on the vocabulary and intuition established before it.
Foundations: Wood, Tools & the Workshop
BeginnerUnderstand how wood behaves, learn to identify and safely use common hand and power tools, and develop the mental model of a functional beginner's shop.
▸ Study plan for this stage
Pace: 8–10 weeks total. Weeks 1–5: "The Complete Manual of Woodworking" (Jackson) — aim for ~20–25 pages/day, focusing on tool chapters and workshop setup sections. Weeks 6–10: "Understanding Wood" (Hoadley) — slow down to ~15–18 pages/day, taking notes on technical sections covering wood structure, movem
- Wood as a living material: how grain direction, growth rings, and cellular structure (from Hoadley) directly affect how wood is cut, shaped, and finished
- Moisture content and wood movement: shrinkage, swelling, and why wood moves across the grain far more than along it — the foundation of all sound joinery decisions (Hoadley)
- Distinguishing hardwoods from softwoods by species characteristics and practical working properties, not just hardness (Hoadley + Jackson)
- Hand tool identification, anatomy, and safe handling: saws, chisels, planes, marking tools — their purpose and correct grip/stance (Jackson)
- Power tool fundamentals: the table saw, band saw, drill press, and router as introduced in Jackson — understanding the cut each makes and the safety rules governing each
- Workshop layout and safety culture: dust management, tool storage, clear work paths, and the habit of thinking before cutting (Jackson)
- Reading and marking out wood: understanding face side/face edge conventions, using a marking gauge and try square accurately (Jackson)
- The mental model of 'wood wants to move' — designing and building with, not against, wood movement (Hoadley)
- After reading Hoadley, can you explain why a flat-sawn board cups the way it does when it dries, and which ring orientation resists this most?
- Using Jackson's tool chapters as reference, what is the correct way to hold and start a cut with a tenon saw, and why does blade angle matter at the start?
- What is equilibrium moisture content (EMC), and why does Hoadley argue it is more useful to a woodworker than a single moisture reading?
- Jackson describes several workshop layouts for small spaces — what are the three non-negotiable safety clearances he recommends around stationary power tools?
- How do the concepts of radial and tangential shrinkage from Hoadley change the way you would orient a board when designing a panel or a tabletop?
- What distinguishes a rip cut from a crosscut in terms of both the tool geometry required and the wood fiber behavior involved, drawing on both Jackson's tool descriptions and Hoadley's fiber structure chapters?
- Tool inventory walk: using Jackson's illustrated tool chapters as a checklist, physically handle or identify each hand tool, name its parts aloud, and note its intended cut or task — do this before and after reading each tool chapter
- Moisture experiment (Hoadley Chapter on wood-water relations): weigh a small scrap of wood, leave it outdoors for a week, weigh it again, then bring it inside for a week and weigh a third time — record the changes and calculate approximate moisture content shift
- End-grain study: cross-cut three species of scrap wood (e.g., pine, oak, poplar) and use a hand lens to sketch the growth rings, rays, and pores — match your sketches to Hoadley's photomicrographs and species descriptions
- Safe rip and crosscut practice: using Jackson's technique guidance, make 10 rip cuts and 10 crosscuts on scrap pine with a hand saw, focusing on starting the kerf, maintaining the line, and finishing without splitting — evaluate each cut against Jackson's quality benchmarks
- Workshop sketch: draw a top-down plan of your actual or intended workspace, placing tools according to Jackson's layout principles (clearance zones, lighting, dust extraction paths) — annotate each decision with a reason drawn from the book
- Wood movement simulation: glue up a small three-board flat-sawn panel without accounting for movement, then a second panel using Hoadley's recommended grain-orientation strategy — store both in a humid area for two weeks and compare cupping, gapping, or warping between the two
Next up: Mastering how wood behaves structurally (Hoadley) and how tools interact with it safely (Jackson) gives the reader the perceptual vocabulary and physical confidence needed to move into joinery and project-based work, where every design decision depends on predicting wood movement and choosing the right tool for a precise, repeatable cut.

A comprehensive, heavily illustrated reference that introduces wood species, grain, tools, and basic techniques all at once — ideal as a first orientation before anything else.

The definitive science of how wood moves, shrinks, and responds to moisture; reading this early prevents the most common beginner mistakes and informs every project decision going forward.
Hand-Tool Fluency
BeginnerDevelop confident, accurate use of hand tools — saws, chisels, hand planes, and marking tools — which are the core skills needed for bench joinery.
▸ Study plan for this stage
Pace: 8–10 weeks total: Weeks 1–5 cover "The Anarchist's Tool Chest" (~25–30 pages/day, reading in thematic chunks — tool philosophy, then each tool category); Weeks 6–10 cover "The Essential Woodworker" (~20–25 pages/day, pausing after each chapter to practice the technique described before moving on).
- Tool selection philosophy: Schwarz's argument for a curated, purposeful kit over accumulation — understanding *why* each hand tool earns its place in the chest
- Saw technique fundamentals: starting a kerf, maintaining a consistent angle, and the difference between rip and crosscut geometry as grounded in Schwarz's tool discussions
- Chisel control and edge geometry: how bevel angle, grip, and body mechanics combine to produce clean, controlled cuts — a thread running through both Schwarz and Wearing
- Hand plane setup and use: mouth adjustment, iron camber, grain direction awareness, and the feedback loop between shaving thickness and surface quality, as Wearing demonstrates through practical exercises
- Marking and measuring discipline: Wearing's insistence on knife lines over pencil lines, the role of the marking gauge and try square, and why layout accuracy is the foundation of all joinery
- Sharpening as a non-negotiable habit: both authors treat a sharp edge as the prerequisite for every other skill — understanding the full sharpening progression (flatten, grind if needed, hone, strop)
- Wood movement and grain reading: recognising long grain vs. end grain, reading the direction of figure to plane 'with the grain', and how this affects every tool interaction
- Work-holding basics: the role of the bench, the vise, bench dogs, and holdfasts in stabilising work so that tool energy goes into the cut, not into chasing the workpiece
- After reading Schwarz, can you explain — in your own words — the criteria he uses to decide whether a tool belongs in a serious hand-tool kit, and name at least five tools he considers essential and why?
- What is the mechanical difference between a rip-filed and a crosscut-filed saw, and in what situation would you reach for each?
- Wearing demonstrates a specific sequence for shooting an edge square with a hand plane. Can you describe that sequence, including how you check for square and what corrections you make if the edge drifts?
- Both authors address sharpening. What are the key steps in the sharpening progression each author describes, and where do their approaches agree or differ?
- What does Wearing mean by 'working to a knife line', and why does he argue it produces more accurate joinery than working to a pencil line?
- How does grain direction affect the way you present a hand plane to a board, and what visual or tactile cues tell you that you are planing against the grain?
- 'Tool audit' after finishing Schwarz: lay out every hand tool you own and apply his selection criteria — justify keeping each one or identify what is missing from your kit
- Sharpening drill (repeat weekly): take a chisel or plane iron through the full progression — flattening the back, honing the bevel, stropping — until you can shave arm hair cleanly; log how many minutes it takes each session and watch the time drop
- Saw a series of 10 crosscuts and 10 rip cuts in scrap pine, each to a knife line; use a try square and marking gauge to measure how far each cut deviates from the line, aiming to close the gap over repeated attempts
- Wearing's edge-shooting exercise: take a rough-sawn board and work one face flat, one edge square to that face, and one end square in both planes using only a bench plane and try square — the classic 'face, edge, end' sequence he teaches
- Chisel paring exercise: lay out a series of small recesses (e.g., 10 mm × 10 mm) on a piece of hardwood using a marking knife and gauge, then pare to the knife lines with a chisel — assess the walls with a square and a raking light
- Grain-reading log: before planing any new board, write down which direction you predict the grain runs and which way you will plane; after the session, note whether tearout confirmed or corrected your prediction — build intuition over 4–6 boards
Next up: Mastering individual hand tools in isolation — as this stage demands — directly enables the next stage, where those same tools are combined in precise sequence to cut the foundational bench joints (mortise-and-tenon, dovetail, housing) that define bench joinery.

Schwarz cuts through tool overwhelm by defining exactly which hand tools a beginner truly needs and why, building a purposeful, curated toolkit before the learner spends money or time on the wrong things.
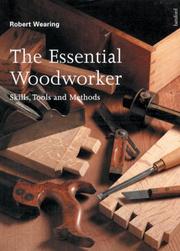
A concise, practical guide to using hand tools with precision; its step-by-step approach to sawing, planing, and chiseling directly prepares the reader for the joinery a bench requires.
Joinery: Connecting Wood Properly
IntermediateLearn the fundamental joints — mortise-and-tenon, dovetail, and housing joints — that appear in bench construction and understand when and why to use each.
▸ Study plan for this stage
Pace: 3–4 weeks, ~20–25 pages/day — "The Joint Book" by Terrie Noll is a highly visual, reference-style text best absorbed slowly; read each joint chapter twice: once for overview, once with tools in hand at the bench.
- Mortise-and-tenon joint anatomy — the proportions, orientation, and structural role of the mortise (socket) and tenon (tongue), including through, blind, and wedged variations
- Dovetail joint geometry — understanding the pin-to-tail ratio, the significance of the dovetail angle for different wood species (hardwood vs. softwood), and why the mechanical interlock resists tension
- Housing (dado) joints — how a full or stopped housing joint supports shelves and cross-members by bearing load across the full width of the housed piece
- Joint selection logic — matching the right joint to the mechanical demands of the connection (shear, tension, compression, racking) and the grain orientation of the mating pieces
- Layout and marking precision — using a marking gauge, mortise gauge, and sliding bevel to transfer joint geometry accurately before any cutting begins
- Grain direction and wood movement — understanding how seasonal wood movement affects joint fit and why long-grain-to-long-grain glue surfaces are far stronger than end-grain connections
- Fitting and testing — the iterative process of test-fitting, paring with a chisel, and achieving a 'hand-pressure' fit before final assembly
- Glue-up sequencing — dry-clamping, applying adhesive efficiently, and checking for square during the critical window before glue sets
- What are the standard proportional rules for sizing a tenon relative to the thickness and width of the workpiece, and why do those proportions matter structurally?
- In what bench-construction scenario would you choose a mortise-and-tenon over a dovetail, and what mechanical reason drives that choice?
- How does the dovetail angle differ between hardwoods and softwoods, and what happens if you use the wrong angle for your species?
- What is the difference between a through housing joint and a stopped housing joint, and when is the stopped version preferred for appearance or structural reasons?
- How does wood movement across the grain influence where you place joints and whether you glue the full length of a housing joint?
- What sequence of hand tools does Terrie Noll recommend for cutting a clean mortise, and what are the common errors at each step?
- Mortise-and-tenon sampler: Cut at least three mortise-and-tenon joints in scrap pine or poplar — one blind, one through, one wedged — focusing on achieving a hand-pressure fit without gaps at the shoulder line.
- Dovetail practice board: Lay out and cut a single through-dovetail (one pin, one tail) in two pieces of the same scrap wood, using only a marking gauge, sliding bevel, dovetail saw, and chisels — no router. Aim for a fit with no visible light gaps.
- Housing joint shelf mock-up: Build a small three-piece 'shelf unit' (two uprights + one shelf) using a stopped housing joint on each upright, then load the shelf with books to feel how the joint bears weight.
- Joint selection worksheet: Sketch a simple workbench leg-and-stretcher assembly; annotate each connection point with the joint type you would use and a one-sentence justification drawn from Noll's selection criteria.
- Grain-movement experiment: Glue up two test panels — one long-grain to long-grain, one end-grain to long-grain — let them cure 24 hours, then try to break them by hand or with a mallet. Record the difference in strength and relate it back to Noll's explanation.
- Dry-fit and glue-up drill: Take your mortise-and-tenon sampler pieces through a full dry-clamp, measure for square, then do a timed glue-up (set a 10-minute timer) to practice working within an adhesive's open time.
Next up: Mastering these foundational joints — and the layout, fitting, and glue-up discipline they demand — gives you the precise hand-tool control and structural vocabulary needed to tackle a full bench construction project, where every leg, stretcher, and vise connection will call on exactly these techniques at full scale.
A clear visual catalog of woodworking joints with instructions for cutting each one; reading this before tackling bench joinery gives the learner a map of all available options.
Building the Bench
IntermediateApply all prior knowledge directly to designing, planning, and building a sturdy, functional workbench — the capstone first project.
▸ Study plan for this stage
Pace: 4–5 weeks, ~20–25 pages/day — Landis's book is richly illustrated and detail-dense, so a slower, deliberate pace allows time to study the bench designs, cross-reference dimensions, and sketch alongside the reading.
- Workbench anatomy: understanding the key components — legs, stretchers, top, tail vise, face vise, and dog holes — and how each contributes to function and rigidity
- Design intent vs. personal workflow: how Landis shows that bench design is driven by the type of work done at it (hand-tool vs. power-tool, joinery vs. carving), and how to apply that to your own needs
- Material selection for bench building: choosing dense, stable hardwoods (beech, maple, fir) for the top vs. secondary woods for the base, and understanding wood movement at bench scale
- Joinery for structural strength: mortise-and-tenon joints, drawboring, and wedged joints as used in the benches profiled by Landis to resist racking and heavy lateral forces
- Vise mechanics and placement: the functional differences between face vises and tail vises, how to position them for handedness and task type, and how Landis's featured craftsmen integrate them
- Flattening and finishing the bench top: winding sticks, hand planes, and the iterative process of achieving a truly flat reference surface
- Planning and sequencing a build: reading Landis's builder profiles to extract a repeatable workflow — mill, joint, assemble base, build top, attach, flatten, fit hardware
- Benchmarks of a 'sturdy, functional' bench: understanding the standards Landis implies — no twist, no rack, adequate mass, reliable clamping — as a self-evaluation checklist
- After studying the bench profiles in The Workbench Book, what are the three most important design decisions you must make before cutting a single board, and how does your intended work style influence each one?
- Landis profiles benches from multiple woodworking traditions (European, Shaker, Japanese, etc.) — what are the key structural and functional differences between a classic Roubo-style bench and a Scandinavian-style bench as presented in the book?
- How do the craftsmen featured by Landis approach wood movement in a laminated bench top, and what construction techniques do they use to prevent cupping or twist over time?
- What is the mechanical purpose of drawboring a mortise-and-tenon joint in bench leg-to-stretcher connections, and why is this preferable to relying on glue alone for a workbench?
- Using the dimensions and proportions discussed in The Workbench Book, how would you determine the correct bench height, length, and top thickness for your own body and workspace?
- What does Landis identify as the most common mistakes first-time bench builders make, and what steps in the planning and milling stages prevent them?
- Sketch your own bench design on paper before, during, and after reading — revise the drawing each week as Landis's profiles reveal details you hadn't considered, and annotate each revision with your reasoning.
- Build a scaled cardboard or foam-core model (e.g., 1:10) of your planned bench using the dimensions you derive from The Workbench Book; test it for racking by applying lateral pressure and identify where bracing is needed.
- Mill and dry-fit a practice mortise-and-tenon joint using scrap lumber at the actual scale of a bench leg-to-stretcher connection, then drawbore it and compare the rigidity to a glue-only version.
- Laminate a small test slab (3–4 boards, ~18" long) to simulate bench-top construction: practice jointing edges, gluing up, and flattening with winding sticks and a hand plane until the surface is true.
- Write a one-page 'bench brief' — a design document listing your chosen dimensions, wood species, vise types and placement, joinery methods, and build sequence — citing specific pages or builder profiles from The Workbench Book as justification for each choice.
- Execute the full bench build using your brief as a guide; at each major milestone (base assembled, top laminated, top flattened, vises fitted), pause and compare your result against the standards and proportions Landis describes, noting any deviations and their causes.
Next up: Completing the workbench gives the reader a permanent, reliable foundation for all future projects — every technique, jig, and tool explored in subsequent stages will be practiced and refined at this very bench, making its quality and thoughtful design a direct investment in everything that comes next.
The canonical survey of workbench history, design, and construction; reading it first in this stage helps the learner choose the right bench style for their space and skill level before committing to a plan.
A free, opinionated, step-by-step guide to building one specific, proven bench design using the hand tools and joinery already studied — the perfect project book to close the curriculum.
Discussion
Keep reading
Paths that share books, cover the same subject, or open a related topic.