Timber framing for beginners: the best books to master heavy joinery
This curriculum takes a beginner from zero knowledge of timber framing all the way to designing and raising hand-cut post-and-beam structures. Each stage builds on the last: first you absorb the history, language, and visual grammar of timber frames; then you master the hand-tool skills and joinery that make them strong; and finally you tackle full structural design, layout, and the raising process itself.
Foundations — History, Vocabulary & Visual Grammar
BeginnerUnderstand what timber framing is, where it comes from, how frames are named and drawn, and what distinguishes a well-built frame — giving you the vocabulary to read every later book with confidence.
▸ Study plan for this stage
Pace: 4–5 weeks, ~25–30 pages/day, with 2–3 days per week reserved for review and exercises
- The historical evolution of timber framing from medieval Europe through North American vernacular traditions
- Core structural principles: how posts, beams, braces, and joinery work together to create a stable frame
- Naming conventions and nomenclature for frame members (posts, girts, plates, rafters, braces, etc.)
- How to read and interpret timber frame drawings, including plan views, elevations, and joinery details
- The role of joinery in timber framing: why traditional joints (mortise-and-tenon, scarf joints, etc.) are superior to modern fasteners
- Visual grammar of frame design: proportion, symmetry, and aesthetic principles that distinguish quality frames
- The relationship between frame geometry and load paths—how forces travel through the structure
- Regional and cultural variations in timber framing styles and their practical implications
- What are the key historical periods and geographic origins of timber framing, and how did these traditions develop?
- What are the primary structural members in a timber frame, and what role does each play in the overall system?
- How do you read a timber frame drawing, and what information do plan views, elevations, and joinery details convey?
- Why are traditional timber frame joints (mortise-and-tenon, scarf joints, etc.) considered superior to modern fastening methods, and how do they distribute loads?
- What visual and structural characteristics distinguish a well-designed, well-built timber frame from a poorly executed one?
- How do regional timber framing traditions differ, and what practical and aesthetic principles underlie these variations?
- Sketch the basic frame members (posts, girts, plates, rafters, braces) from memory, labeling each and describing its structural function
- Obtain a set of timber frame drawings (from the books or online resources) and annotate them with member names, load paths, and joinery locations
- Visit a timber-framed building or examine high-quality photographs and identify frame members, joinery, and design principles discussed in the readings
- Draw a simple timber frame elevation (e.g., a small house or barn section) showing posts, girts, braces, and basic joinery, using proper proportions and nomenclature
- Create a visual comparison chart of 3–4 regional timber framing styles (e.g., English, German, Japanese, or North American), noting structural and aesthetic differences
- Examine and sketch 5–6 different traditional joinery details from the books, noting how each joint distributes loads and why it was chosen for its location
Next up: This foundation in timber framing history, vocabulary, and visual literacy equips you to move into the next stage—understanding design principles and structural analysis—where you'll learn how to size members, calculate loads, and make informed decisions about frame geometry and joinery placement.
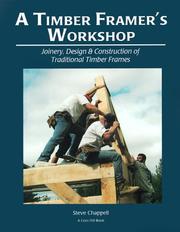
The single most accessible entry point to the craft: Chappell walks a complete beginner through the logic of post-and-beam construction, introduces essential terminology, and explains why joints are cut the way they are — perfect as book one.
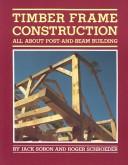
Sobon's illustrated guide reinforces the vocabulary from Chappell and adds clear drawings of common frame types and joinery, cementing the visual grammar you'll need before moving into hands-on technique.
Hand Tools & the Art of Wood
BeginnerDevelop fluency with the hand tools — chisels, mallets, saws, slicks, and layout instruments — that timber framers rely on, and learn how wood moves, dries, and behaves so your joints will last.
▸ Study plan for this stage
Pace: 8–10 weeks, ~25–30 pages/day. Allocate 4–5 weeks to "The Anarchist's Tool Chest" (approximately 280 pages), then 4–5 weeks to "Understanding Wood" (approximately 280 pages). Pair reading with hands-on tool practice and wood observation 3–4 times per week.
- Hand tool anatomy and proper setup: how chisels, mallets, saws, and slicks are constructed and why each component matters for performance and safety
- Tool sharpening and maintenance as foundational craft: understanding edge geometry, stropping, and the relationship between a sharp tool and wood behavior
- The sensory feedback loop: how to read wood grain, listen to tool sounds, and feel resistance to guide cuts and joint work
- Wood movement and dimensional change: how moisture content, grain direction, and seasonal cycles cause wood to expand, contract, and warp—and why this matters for joint longevity
- Grain structure and wood properties: the relationship between cellular structure, hardness, workability, and how different species behave under hand tools
- Joinery as applied wood science: how understanding wood movement informs the design and execution of mortise-and-tenon, dovetail, and other traditional joints
- The philosophy of hand tool work: why simplicity, directness, and mastery of fundamentals create better outcomes than complexity or force
- What are the key anatomical features of a well-designed chisel, and how does each part contribute to control and performance?
- Why is sharpening considered a core skill rather than maintenance, and what is the relationship between edge geometry and wood behavior?
- How does wood move in response to changes in moisture content, and why is this critical for designing joints that will remain tight over decades?
- What is the difference between radial and tangential shrinkage, and how do these directional movements affect the grain and stability of timber frame members?
- How do you assess wood grain direction and density by sight and feel, and why is this assessment essential before making your first cut?
- Why do traditional timber frame joints (mortise-and-tenon, etc.) work better than modern fasteners in accommodating wood movement over time?
- Acquire and set up a basic hand tool kit (chisel, mallet, handsaw, layout square) following Schwarz's guidance; document the setup process and your reasoning for each tool choice
- Practice sharpening a chisel to a mirror polish using stones or stropping; make 10+ practice cuts on scrap wood and observe how edge sharpness affects surface quality and control
- Fell, split, and hand-plane a piece of green (freshly cut) wood; observe and document how it moves, cracks, and changes shape over 2–4 weeks as it dries
- Examine wood grain direction in 5–6 different species using a magnifying glass; sketch the grain pattern and predict how each species will behave under hand tools
- Cut a simple mortise-and-tenon joint by hand; measure the joint before and after assembly, then revisit it after 1–2 weeks to observe how wood movement affects the fit
- Create a wood movement journal: photograph and measure a piece of timber weekly for 6–8 weeks, tracking dimensional changes and relating them to humidity and temperature data from Hoadley's principles
Next up: This stage builds the tactile mastery and wood science foundation needed to move into layout and joinery techniques, where you will apply these tool skills and wood knowledge to design and execute the full range of timber frame connections with precision and confidence.

Before cutting a single mortise, a framer must understand hand tools deeply; Schwarz's definitive guide covers tool selection, sharpening, and use in a way that directly transfers to timber-scale work.

Timber framing lives or dies by how well you understand wood movement, grain, and shrinkage — Hoadley's authoritative text is the essential science companion that prevents costly mistakes in large-timber joinery.
Mortise-and-Tenon Joinery — The Heart of the Frame
IntermediateMaster the layout, cutting, and fitting of mortise-and-tenon joints and the full range of timber joinery — from simple through-tenons to complex scarf and housed joints — by hand.
▸ Study plan for this stage
Pace: 6–8 weeks, ~20–25 pages/day with 2–3 days per week dedicated to hands-on practice and joint layout work
- Mortise-and-tenon joint anatomy: the relationship between mortise depth, tenon length, shoulder lines, and grain direction
- Layout and marking techniques: using traditional tools (marking gauge, square, bevel) to achieve precision before cutting
- Hand-cutting mortises: chiseling techniques, grain awareness, and methods for achieving clean walls and flat bottoms
- Hand-cutting tenons: saw technique, grain direction, and the importance of leaving proper shoulders and haunch details
- Fitting and assembly: test-fitting, shaving, and achieving tight joints without forcing or splitting wood
- Variation in joinery: understanding through-tenons, blind tenons, haunched tenons, scarf joints, and housed joints—when and why to use each
- Wood movement and seasonal expansion: how joinery design accounts for wood's behavior across the grain
- Traditional timber-frame proportions and design: how joint sizing relates to timber dimensions and structural logic
- What is the relationship between mortise depth and tenon length, and why does grain direction matter in this decision?
- Describe the step-by-step process for laying out a mortise-and-tenon joint using hand tools, including how to mark shoulder lines and mortise boundaries.
- What are the key differences between a through-tenon, a blind tenon, and a haunched tenon, and when would you use each in a timber frame?
- How do you hand-cut a mortise cleanly, and what are the common mistakes that lead to angled walls or uneven bottoms?
- Explain the proper technique for hand-sawing a tenon, including how to position your body, manage the saw angle, and leave appropriate shoulders.
- What does 'fitting' a joint mean, and what tools and techniques do you use to achieve a tight fit without forcing the wood?
- How do scarf joints and housed joints differ from mortise-and-tenon joints, and what structural or design situations call for them?
- Why is wood movement important in joinery design, and how does traditional timber-frame joinery account for seasonal expansion?
- Layout practice: Mark out 5–10 mortise-and-tenon joints on scrap wood using only a marking gauge, square, and pencil; do not cut yet—focus purely on accuracy and consistency of lines.
- Mortise-cutting progression: Cut three mortises of increasing difficulty (simple rectangular, then with a haunch, then blind) in softwood, focusing on clean vertical walls and a flat bottom; use a bench chisel and mallet.
- Tenon-cutting progression: Saw three tenons by hand, starting with a simple through-tenon, then a blind tenon, then a haunched tenon; pay attention to saw angle, shoulder quality, and grain tear-out.
- Fit and assembly: Create 3–4 complete mortise-and-tenon joints (layout through final fitting) in softwood; test-fit, adjust with a shoulder plane or chisel, and achieve a joint that seats fully without forcing.
- Joinery variation study: Cut one example each of a through-tenon, a blind tenon, a scarf joint, and a housed joint; compare their construction and discuss when each would be used in a frame.
- Full frame corner: Layout and cut a complete corner joint (two mortise-and-tenon connections meeting at 90°) as it would appear in a timber frame; this integrates layout, cutting, and fitting under realistic constraints.
Next up: This stage equips you with the hand-tool mastery and joint-design knowledge needed to move into full-frame layout and assembly, where you will apply these joinery skills to multi-member frames and learn how individual joints work together to create structural stability and resist racking.

This journal-format publication (widely treated as a canonical reference) dives deep into traditional joinery methods and hand-tool technique at the intermediate level, bridging tool skills and actual frame joinery.
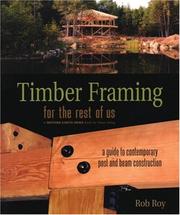
Roy demystifies the layout and cutting of timber joints for the self-builder, providing step-by-step sequences for the mortise-and-tenon connections that form the backbone of any post-and-beam structure.
Structural Design & Frame Engineering
IntermediateLearn how to design a structurally sound post-and-beam frame from scratch — sizing timbers, calculating loads, laying out bents, and understanding the engineering principles that keep a frame standing for centuries.
▸ Study plan for this stage
Pace: 4–5 weeks, ~25–30 pages/day, with 2–3 days per week dedicated to working through design calculations and frame layout exercises
- Load paths and how forces flow through a timber frame from roof to foundation
- Timber sizing principles: species selection, grade standards, and safety factors in structural design
- Post-and-beam frame geometry: bent layouts, spacing, and how to translate architectural plans into structural frames
- Joinery design for structural integrity: mortise-and-tenon sizing, bearing surfaces, and load transfer at connections
- Lateral bracing and wind/seismic resistance in timber frames
- Practical engineering calculations: live loads, dead loads, and deflection limits for residential timber frames
- Historic timber frame principles and why traditional proportions and details work structurally
- How do loads travel through a timber frame from the roof down to the foundation, and what role does each structural member play?
- What factors determine the size of a post or beam in a timber frame, and how do you calculate the required cross-section for a given load?
- How do you lay out bents and determine spacing between them based on architectural and structural requirements?
- What makes a mortise-and-tenon joint structurally sound, and how do you size the joint to handle the forces it will carry?
- What strategies can you use to brace a timber frame against lateral loads (wind and seismic forces)?
- Why do traditional timber frame proportions and details—such as post spacing and beam depth ratios—work, and how do they relate to modern engineering principles?
- Sketch the load path for a simple gable-roof timber frame, labeling each member and showing how forces flow from the roof to the foundation
- Calculate the required beam size for a simple span using live and dead load data from the book; compare your result to Benson's design examples
- Draw a full bent elevation (front view) and section (side view) for a small residential timber frame, including all major posts, beams, and braces
- Design a mortise-and-tenon joint for a specific load condition: determine the mortise depth, tenon length, and bearing surface area needed
- Create a simple frame layout plan (top-down view) showing bent spacing, post locations, and how the frame responds to the building's footprint
- Analyze a completed timber frame design from the book: identify all load-bearing members, trace the load paths, and explain why each member is sized as it is
Next up: Mastering structural design and frame engineering gives you the foundation to move into detailed joinery execution and construction sequencing—you'll now know *why* each joint is shaped the way it is and *how* to lay out a frame on site with confidence.
Benson's landmark book — the modern bible of timber framing — covers full frame design, bent layout, and structural logic in authoritative detail; it belongs here once you have joinery and tool skills in hand.
Raising — Layout, Assembly & the Complete Build
ExpertIntegrate everything into a complete build sequence: scribing and laying out timbers on the ground, pre-assembling bents, planning and executing a safe raising, and finishing the structure to a weather-tight shell.
▸ Study plan for this stage
Pace: 4–5 weeks, ~40–50 pages/day, with 2–3 days per week dedicated to hands-on layout and assembly practice
- Scribing and layout techniques: transferring design to timber, marking joinery, and establishing reference lines on the frame members
- Bent assembly sequencing: pre-assembling timber frames on the ground to test fit, verify joinery, and prepare for raising
- Raising logistics and safety: planning the sequence, calculating loads, positioning equipment, and coordinating crews for safe vertical assembly
- Structural bracing and temporary support: installing diagonal braces, shoring, and guy-lines to stabilize the frame during and immediately after raising
- Weather-tight shell completion: roof framing, sheathing, and envelope closure to protect the timber frame from the elements
- Benson's integrated approach: how layout, assembly, and raising decisions are interdependent and must be planned holistically before work begins
- What are the key steps in laying out and scribing a timber frame on the ground, and how do you establish accurate reference lines?
- How do you plan and execute a safe bent assembly sequence, and what checks must you perform before raising?
- What are the critical safety considerations and equipment needs for raising a timber frame, and how do you calculate safe load capacities?
- How do temporary bracing and guy-lines stabilize a frame during raising, and when can they be removed?
- What is the relationship between the raising sequence and the final weather-tight envelope, and how do roof framing decisions affect the raising plan?
- How does Benson's approach to layout and assembly differ from conventional framing, and why does pre-assembly on the ground reduce on-site risk?
- Create a full-scale layout drawing for a simple two-bent frame on paper or with chalk on a floor, marking all joinery, reference lines, and scribe marks as Benson describes
- Build a scale model (1:20 or 1:10) of a complete bent assembly, including all mortise-and-tenon joints, and practice dry-fitting and disassembly to understand sequencing
- Develop a detailed raising plan for a small timber frame: sketch the equipment placement, crew positions, load paths, and temporary bracing configuration
- Practice scribing and layout on actual timber offcuts (6×6 or 8×8 softwood): mark reference lines, transfer joinery marks, and test fit joints to understand Benson's precision standards
- Walk through a raising sequence using photographs or video from Benson's examples, annotating each step with the safety checks and bracing adjustments required
- Design and sketch the weather-tight envelope (roof, sheathing, details) for a frame you've laid out, showing how the raising sequence must accommodate final closure
Next up: This stage equips you with the complete skill set to execute a timber frame from layout through weather-tight completion; the next stage will likely focus on interior finishing, joinery refinement, or specialized applications (e.g., curved frames, large-span structures) that build on this foundational integrated process.
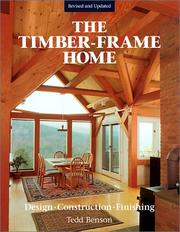
Benson's companion volume zooms out to the complete project lifecycle — site planning, enclosure systems, and raising logistics — giving the advanced learner the whole-project perspective needed to lead a build from scratch.
Discussion
Keep reading
Paths that share books, cover the same subject, or open a related topic.