Auto Body Repair: The Best Books on Bodywork and Refinishing
This curriculum is built for someone who already has basic mechanical familiarity and wants to master auto body repair and refinishing from panel work through a professional-quality paint job in a home garage. The three stages move from solidifying core metalwork and damage-repair skills, through surface preparation and primer systems, to advanced spray technique and finish quality — each stage's books building directly on the vocabulary and hands-on intuition developed in the last.
Core Bodywork: Dents, Rust & Metal Repair
IntermediateConfidently assess damage, remove dents with hand tools and a stud welder, cut out and patch rust, and weld in new metal panels — the essential foundation before any paint prep begins.

The industry-standard textbook used in vocational programs worldwide; it establishes the complete vocabulary of body repair, tools, and panel straightening that every later book assumes you know.
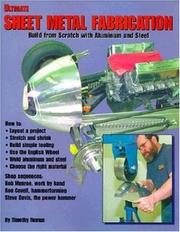
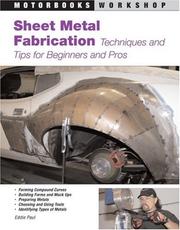
Bridges the gap between basic dent repair and real metalwork — cutting, shaping, and welding patch panels — giving you the fabrication skills needed to tackle serious rust repair.
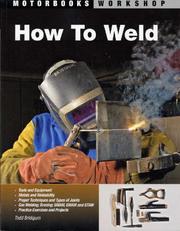
A focused, garage-friendly guide to MIG and TIG welding that directly supports patch-panel and rust-repair work; read it here so welding technique is solid before moving to surface prep.
Surface Preparation & Primer Systems
IntermediateMaster the full prep sequence — blocking, feathering, choosing and applying the right primers — so every surface is truly ready for color and no imperfections telegraph through the topcoat.
▸ Study plan for this stage
Pace: 4–5 weeks, ~25–30 pages/day, with 2–3 hands-on practice days per week
- The complete blocking and sanding sequence: grit progression, technique, and when to transition between grits to achieve a perfectly flat surface
- Feathering techniques: blending old paint edges into bare substrate so transitions are invisible to primer and topcoat
- Primer types and selection: surfacer primers vs. sealer primers vs. epoxy primers, and which to use for different substrates (bare metal, plastic, previously painted surfaces)
- Surface contamination identification and removal: dust, oils, silicones, and rust, and why each compromises adhesion and finish quality
- Primer application methods: spray technique, wet-on-wet layering, dry times, and achieving proper film thickness without runs or sags
- Substrate-specific prep: metal, fiberglass, plastic, and previously painted surfaces—unique challenges and solutions from both Taylor and Joseph
- Common prep defects and their causes: pinholes, cratering, adhesion loss, and how proper prep prevents them
- Quality inspection: how to evaluate a prepped surface before primer and before color, using tactile and visual standards
- Walk through the complete sanding grit sequence for a bare metal panel, explaining why each grit is necessary and what defects each one corrects.
- Describe the feathering technique in detail: what angle you hold the sander, how far you extend the feather, and how you verify the transition is smooth enough for primer.
- You have three substrates to prep: bare steel, plastic bumper, and an old single-stage paint. For each, identify the primer type Taylor or Joseph recommends and explain why that primer is the right choice.
- A panel shows signs of silicone contamination after sanding. What does silicone contamination look like, why is it dangerous, and what removal method does your reading material recommend?
- Explain the difference between a surfacer primer and a sealer primer, and give a real-world example from the books of when you would use each.
- You've applied primer and notice pinholes in the dry film. What caused them, and what prep step could have prevented this problem?
- Sand a test panel through a complete grit progression (80 → 120 → 180 → 220 or equivalent), documenting what each grit removes and inspecting the surface after each step.
- Practice feathering on a scrap panel with old paint: sand the edge at the correct angle, measure the feather width, and verify the transition is smooth by touch and sight.
- Prepare three different substrate samples (bare metal, plastic, previously painted) side by side; apply the appropriate primer to each and document drying times, appearance, and adhesion.
- Conduct a surface contamination test: deliberately contaminate a test panel with oil, dust, and silicone, then attempt to prime it; compare results with a properly cleaned panel to see the difference.
- Apply primer to a blocked and feathered panel, focusing on spray technique and wet-on-wet layering; inspect for runs, sags, and proper film thickness using the standards described in the books.
- Inspect and evaluate three prepped surfaces (one good, one with common defects) using the visual and tactile standards from Taylor and Joseph; identify defects and explain what prep step was missed.
Next up: Mastery of surface prep and primer systems ensures that the color and clear coat layers adhere perfectly and cure without defects, setting the stage for the next phase—color mixing, matching, and application—where you'll build on this flawless foundation.
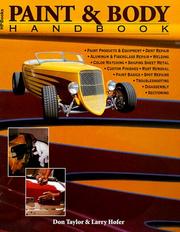
A practical, step-by-step guide that covers body filler application, blocking, and primer selection in plain language; it's the ideal bridge between metalwork and the spray booth.

Focuses specifically on the prep challenges that trip up home builders — feathering edges, sealing bare metal, and choosing the right primer for each substrate — filling gaps left by broader texts.
Spray Technique & Professional Finishing
ExpertSet up a safe home spray environment, dial in HVLP gun settings, lay down flawless base coat and clear coat, and correct defects through color sanding and polishing to a show-quality finish.

A highly regarded, garage-focused painting manual that walks through gun setup, spray patterns, and full refinishing sequences — the best single-volume bridge from prep to finished paint.
Goes deeper into the chemistry of modern basecoat/clearcoat systems, blending, and defect correction, giving you the technical understanding to troubleshoot runs, orange peel, and fisheyes.
Discussion
Keep reading
Paths that share books, cover the same subject, or open a related topic.