Detail your car at home
This curriculum takes a complete beginner from understanding basic car care principles all the way to professional-level paint correction, polishing, and interior detailing — all achievable in a home driveway setting. Each stage builds on the last: you first learn the "why" behind proper technique, then master the core wash and protection process, and finally tackle advanced paint correction and interior restoration like a pro.
Core Process: Wash, Decontaminate & Protect
BeginnerExecute a complete, safe wash-and-protect routine: two-bucket wash, clay bar decontamination, and applying a quality wax or sealant for lasting protection.
▸ Study plan for this stage
Pace: 2–3 weeks, ~20–25 pages/day — read actively with a highlighter, flagging any sections on washing, paint care, and protective products in "The Complete Idiot's Guide to Auto Repair" by Vyvyan Lynn
- The two-bucket wash method: one bucket for clean soapy water, one for rinsing the mitt, to prevent swirl marks and cross-contamination
- Proper wash sequence: top-to-bottom, panel-by-panel, to avoid dragging dirt across clean surfaces
- Understanding paint contamination: what bonded contaminants (industrial fallout, tar, tree sap) are and why they must be removed before protection
- Clay bar decontamination: how a clay bar works, lubrication requirements, and the 'baggie test' to check for surface smoothness
- Drying techniques: using a clean microfiber drying towel or forced air to eliminate water spots and mineral deposits
- Wax vs. paint sealant: the difference in chemistry, durability, and application method, and when to choose each
- Proper product application and removal: thin, even coats; working in the shade; and buffing off before the product hazes over
- Paint safety fundamentals: avoiding dish soap, abrasive sponges, and direct sunlight during the wash process
- What is the purpose of the two-bucket method, and what specific paint defects does it help prevent?
- In what order should you wash a vehicle's panels, and why does sequence matter for paint safety?
- How do you perform the 'baggie test,' and what does a rough or gritty feeling indicate about the paint surface?
- What is the correct way to use a clay bar — including lubrication, pressure, and what to do if you drop it?
- What are the key differences between a carnauba wax and a synthetic paint sealant in terms of durability and finish?
- Why must the car be fully decontaminated before applying a wax or sealant, and what happens if you skip this step?
- Two-bucket wash drill: Set up two clearly labeled buckets, wash your own vehicle (or a family member's) using the top-to-bottom panel sequence described in Lynn's guide, and note any areas where dirt transfer to the wash mitt occurs.
- Baggie test inspection: After washing and drying, slip a clean plastic sandwich bag over your hand and glide it across the hood, roof, and trunk. Document which panels feel rough or gritty versus smooth — these are your decontamination targets.
- Clay bar decontamination session: Using a clay bar kit with proper lubricant, work one panel at a time on the rough areas identified in the baggie test. Fold and knead the clay frequently; repeat the baggie test afterward to confirm smoothness.
- Wax vs. sealant comparison: Apply a carnauba wax to one half of the hood and a synthetic sealant to the other half (tape a dividing line). After curing, compare the visual finish and note which side beads water more aggressively after a week.
- Drying technique practice: Experiment with both a microfiber drying towel and the 'blot-don't-drag' method on separate panels. Check for water spots under direct light and adjust your technique until you achieve a spot-free result.
- Product label audit: Read the full label and instructions of every product you use (car shampoo, clay lubricant, wax/sealant) and cross-reference the guidance with Lynn's recommendations — note any conflicts or extra tips you discover.
Next up: Mastering a safe wash-and-protect routine gives you a clean, contamination-free surface — the essential foundation for the next stage, where you'll learn to correct paint defects (swirl marks, scratches, and oxidation) through machine or hand polishing techniques that only work effectively on properly prepared paint.
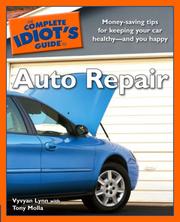
Grounds the detailer in how a car's exterior systems work together, so product choices and techniques are made with real understanding rather than guesswork.
Paint Correction: Polishing & Swirl Removal
IntermediateUnderstand paint defects (swirls, scratches, oxidation), choose the right compounds and polishes, and safely use a dual-action polisher to restore a mirror finish.
▸ Study plan for this stage
Pace: 3–4 weeks, ~20–25 pages/day; focus the first week on paint theory and defect identification chapters, the second week on product/abrasive selection, and the final week on machine polisher technique and finishing work
- Paint layer anatomy (primer, base coat, clear coat) and how each layer is affected by defects — as covered in Taylor's breakdown of automotive finishes
- Types of paint defects: swirl marks, buffer trails, fine scratches, oxidation, and water-spot etching, and how to distinguish them under proper lighting
- Abrasive science: understanding cut levels (heavy compound vs. finishing polish vs. all-in-one) and how grit/diminishing abrasives work on clear coat
- Pad selection and its relationship to compound aggressiveness — foam cutting pads, polishing pads, and finishing pads as detailed in the Paint & Body Handbook
- Dual-action (DA) polisher mechanics: orbit size, speed settings, pad priming, and safe working pressure to avoid burn-through
- Paint thickness awareness: using a paint depth gauge conceptually, recognizing thin spots, and knowing when correction is no longer safe
- The correction process sequence: wash → clay bar decontamination → compound → polish → LSP (last step protection), as outlined in Taylor's process chapters
- Inspection and quality control: using a detailing light or bright sunlight at multiple angles to verify swirl removal and surface uniformity
- According to Taylor's Paint & Body Handbook, what are the primary causes of swirl marks and how does clear-coat thickness determine the limit of how aggressively you can correct them?
- How do you match a compound's cut level and pad type to a specific defect severity — for example, light swirls versus deep random isolated scratches (RIDS)?
- What are the key operational differences between a dual-action random-orbital polisher and a rotary buffer, and why does Taylor recommend the DA for intermediate detailers working on clear-coat finishes?
- Describe the full paint correction sequence from decontamination to last step protection, explaining why skipping the clay bar stage can compromise your polishing results.
- How do you perform a test spot, and what criteria do you use to decide whether to move to a less aggressive or more aggressive combination of pad and product?
- What visual and tactile signs indicate that a panel's clear coat is dangerously thin, and what corrective action should you take at that point?
- Defect mapping exercise: Under a single bright work light in a dark garage, inspect one panel of a vehicle and photograph every visible swirl, scratch, and oxidized area before touching it — then categorize each defect by type and estimated depth using Taylor's defect classification framework.
- Test-spot drill: Section off a 2×2 ft area on a single panel with masking tape, apply a medium-cut compound on a cutting pad with your DA polisher at a moderate speed, then inspect under light and repeat with a finer polish on a finishing pad — document the before/after with photos to train your eye.
- Pad and product matrix chart: Create a hand-written reference card listing at least three defect levels (light, moderate, heavy) cross-referenced with the appropriate compound, pad type, DA speed setting, and number of passes — drawing directly from the product guidance in Paint & Body Handbook.
- Clay bar decontamination practice: Properly wash, dry, and clay-bar an entire vehicle hood, using the 'baggie test' before and after to feel the difference in surface smoothness, reinforcing why this step precedes any polishing.
- Full single-panel correction: Choose a moderately swirled door panel and execute the complete sequence — clay, compound with DA, refine with finishing polish, wipe down with an IPA (isopropyl alcohol) solution to remove oils, and inspect the true correction result before applying a sealant or wax as LSP.
- Lighting inspection drill: After completing a correction, inspect the same panel under three different light sources (shop light, direct sunlight, and a detailing LED torch at a raking angle) and note any remaining defects each source reveals — building the critical inspection habit Taylor emphasizes for professional-quality results.
Next up: Mastering paint correction and achieving a defect-free surface creates the ideal foundation for the next stage — paint protection (sealants, ceramic coatings, and paint protection film) — because a coating applied over an uncorrected surface permanently locks in defects, making the correction skills learned here a non-negotiable prerequisite.
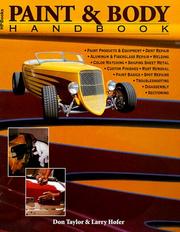
Provides deep technical knowledge of automotive paint systems, surface prep, and correction — essential vocabulary before picking up a machine polisher.
Interior Detailing: Fabrics, Leather & Hard Surfaces
IntermediateDeep-clean and restore every interior surface — carpets, upholstery, leather, plastics, and glass — to a professional showroom standard using the right tools and products.
▸ Study plan for this stage
Pace: 4–5 weeks, ~25–35 pages/day — Caldwell's book is hands-on and diagram-heavy, so budget extra time to study photos, material charts, and product tables rather than speed-reading. Aim to finish one major surface category (e.g., carpets, leather, plastics) per week, pausing to source materials and prac
- Surface identification & material compatibility — recognizing fabric types (woven, velour, vinyl-coated), leather grades, and hard-plastic compositions before selecting any product or tool
- Proper disassembly and access — removing door panels, seat bolts, trim clips, and carpet retainers safely so every surface can be reached and cleaned without damage
- Extraction vs. dry cleaning vs. steam — understanding when each method is appropriate for carpets and upholstery, and how dwell time and agitation affect soil removal
- Leather care cycle — cleaning, conditioning, and protecting leather in the correct sequence to prevent cracking, fading, and dye transfer
- Hard-surface restoration — cleaning, decontaminating, and dressing plastics, vinyl, rubber, and wood/metal trim to a uniform, non-greasy finish
- Interior glass clarity — removing haze, outgassing film, and streaks from windshields and windows using the correct applicators and techniques
- Odor elimination vs. masking — identifying odor sources (mold, smoke, pet) and applying enzymatic or ozone-based treatments rather than cover-up sprays
- Tool and product selection — matching brushes, extraction machines, microfiber types, and chemical pH levels to each specific surface to avoid damage
- According to Caldwell, what are the key differences in cleaning approach between woven fabric upholstery and vinyl/leather surfaces, and why does material misidentification lead to damage?
- What disassembly steps does Caldwell recommend before deep-cleaning carpets and door-panel upholstery, and what common mistakes cause trim clips or retainers to break?
- How does Caldwell describe the correct leather care sequence — what happens chemically if you condition before cleaning, or skip the protectant step entirely?
- What criteria does Caldwell use to decide between wet extraction, dry-compound cleaning, and steam for a heavily soiled fabric seat?
- How should hard plastics and vinyl trim be treated differently from soft-touch rubberized surfaces when applying dressings, according to the book?
- What does Caldwell identify as the root causes of persistent interior odors, and what treatment methods does he recommend for each source?
- Material identification drill — gather swatches or use your own vehicle's interior to identify every surface type (leather grade, fabric weave, plastic finish, rubber vs. vinyl) before touching any product, then cross-reference with Caldwell's material charts
- Full carpet extraction practice — vacuum, pre-treat with an appropriate spotter, agitate with a brush, and extract a carpet section using a wet-vac or extractor; compare results to Caldwell's before/after benchmarks and note dwell times that worked best
- Leather care sequence walkthrough — on a leather seat or panel, perform the full Caldwell cycle: pH-neutral clean → condition → protect, documenting product amounts, buffing technique, and final appearance at each step
- Hard-surface dressing test panel — apply an interior dressing to a plastic trim piece using three different applicator types (foam, microfiber, brush) and compare sheen, residue, and longevity after 48 hours to find the method Caldwell recommends
- Interior glass dehazing exercise — clean a fogged or filmed windshield in two passes (chemical cleaner + final polish wipe) using the cross-hatch technique described by Caldwell, then inspect with a flashlight at a low angle to verify zero streaking
- Odor-source audit — inspect a vehicle for odor origins (under seats, carpet backing, A/C vents, headliner), document findings, and apply the appropriate treatment (enzymatic cleaner, baking-soda absorption, or vent spray) as outlined in the book; re-evaluate after 24 hours
Next up: Mastering interior surfaces builds the chemical knowledge, tool handling, and surface-sensitivity needed to confidently move outward to exterior detailing — where paint correction, clay bar decontamination, and protective coatings demand the same disciplined product-matching and process-sequencing skills practiced here.
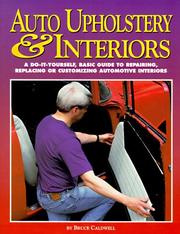
The definitive guide to understanding interior materials — fabric, vinyl, leather, and carpet — and how to clean, condition, and restore each one without causing damage.
Advanced Mastery: Coatings, Finishing & the Pro Mindset
ExpertApply ceramic coatings and long-term paint protection, develop a systematic detailing workflow, and think about quality control the way professional detailers do.
Focuses on the systematic, repeatable processes used by professional detailers, including ceramic coating prep and application, making it the ideal final read before tackling advanced protection work.
Discussion
Keep reading
Paths that share books, cover the same subject, or open a related topic.