Best Books to Illustrate Children's Books (in Order)
This curriculum takes a beginner from the foundational visual language of picture books all the way through professional publication. Each stage builds on the last: you first learn to see and analyze great picture books, then develop your character and visual storytelling craft, then master the structural and pacing demands of the picture book format, and finally navigate the publishing industry with confidence.
Foundations: Learning to See Picture Books
BeginnerDevelop the eye and vocabulary to analyze what makes a picture book work visually and narratively — before picking up a pencil professionally.
▸ Study plan for this stage
Pace: 4–5 weeks, ~25–30 pages/day (Shulevitz first: 2–3 weeks; Amidi second: 2 weeks)
- Visual storytelling through composition, color, and line—how pictures carry narrative weight independent of text
- The relationship between text and image: complementary, contradictory, and silent storytelling modes
- Emotional communication through character design, perspective, and visual rhythm in sequential images
- How constraint (limited palettes, simple forms, white space) creates impact and clarity in picture books
- Pacing and timing in visual narrative—how the reader's eye moves through a page and across spreads
- The role of the illustrator as interpreter: making authorial intent visible through visual choices
- What is the difference between illustration that merely decorates text versus illustration that tells its own story?
- How do color choice, composition, and perspective work together to convey mood and meaning in a single image?
- What does Shulevitz mean by 'writing with pictures,' and how does this concept apply to the Pixar shorts you've studied?
- How do constraints (like a limited color palette or simple line style) actually strengthen visual communication rather than weaken it?
- Describe the relationship between text and image in one picture book from Shulevitz's examples—where do they support each other, and where do they create tension?
- How does the illustrator guide the reader's eye through a spread, and why does pacing matter in a wordless or nearly-wordless sequence?
- Close-read 3–4 picture books from Shulevitz's examples: sketch the composition grid, note the color palette, and write one paragraph on how the visuals carry emotional weight
- Create a 'visual vocabulary sheet' documenting 10 techniques from Shulevitz (e.g., use of white space, perspective shifts, color temperature) with annotated examples from the text
- Watch one Pixar short film (referenced in Amidi's book) twice: first for story, second for visual technique only—document how composition, color, and timing create meaning without dialogue
- Remake a single spread from a Shulevitz-discussed picture book in a different color palette or perspective, then write a paragraph on how your changes alter the emotional impact
- Collect 5 picture books outside this curriculum and analyze each using Shulevitz's framework: identify the 'visual story' separate from the text, and note one compositional choice that surprised you
- Create a 2–3 page visual essay (sketches + notes) comparing how a Pixar short and a traditional picture book solve the same narrative problem (e.g., showing loneliness, joy, or discovery) using different visual languages
Next up: This stage trains your eye to *read* pictures fluently and builds a shared vocabulary for visual analysis—essential before the next stage, where you'll learn to *make* intentional visual choices and develop your own illustrative voice.
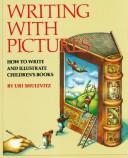
A legendary picture book illustrator breaks down exactly how images tell stories, covering composition, sequence, and the relationship between words and pictures. The essential first text for any aspiring illustrator.
Trains your eye to study character design, color, and visual storytelling at a professional level — building the visual intuition you'll apply directly to picture book work.
Character Design: Building Believable Characters
BeginnerLearn to design expressive, consistent, and emotionally resonant characters that can carry a picture book across 32 pages.
▸ Study plan for this stage
Pace: 4–5 weeks, ~20–25 pages/day, with 2–3 days per week dedicated to sketching exercises
- Silhouette clarity and visual distinctiveness as the foundation for character recognition in picture books
- Proportional systems and how they communicate age, personality, and role (head-to-body ratios, limb length, posture)
- Facial expression and feature placement to convey emotion and emotional range across 32 pages
- Consistency techniques: model sheets, construction methods, and line-weight systems to maintain character integrity
- Gesture and body language as primary storytelling tools before dialogue or narration
- Design choices that support narrative function—how a character's visual design should reflect their role in the story
- How do you use silhouette and negative space to make a character instantly recognizable and distinct from other characters in the same book?
- What proportional relationships define different character archetypes (child, parent, mentor, antagonist), and how do you adjust them for a specific story?
- How can you design a character's face and features to express a full emotional range—joy, fear, confusion, determination—while maintaining visual consistency?
- What is a model sheet, and what essential information should it contain to ensure consistent character rendering across 32 pages?
- How does gesture and body language communicate character personality and emotional state without relying on facial expression alone?
- How should a character's visual design (color palette, shape language, costume) support their narrative function and the story's themes?
- Create 5 character silhouettes (solid black shapes only) for different archetypes (child, elder, villain, sidekick, mentor), then test their distinctiveness by showing them to others without context
- Design a single character in 3 different proportional systems (realistic child, stylized/cartoony, and exaggerated), and write a paragraph explaining how each proportion choice affects the character's role and tone
- Draw your main character's face in 8–12 different expressions (happy, sad, angry, surprised, confused, determined, scared, thoughtful) using the same construction method, then create a facial expression guide sheet
- Build a complete model sheet for one character including: front/side/back views, 4–6 key expressions, hand variations, costume details, and a brief character description; use this sheet to redraw the character 10 times to test consistency
- Sketch 20 quick gesture drawings of your character in different poses and activities (sitting, running, reaching, thinking, celebrating), focusing on how body language alone communicates mood and personality
- Redesign a character from a published picture book you admire, explaining in writing how their visual design supports their narrative role and emotional arc
Next up: This stage equips you with the skills to design characters with visual clarity, emotional depth, and consistency—the foundation needed to move into the next stage, where you'll learn to integrate these characters into dynamic compositions, environments, and page layouts that maximize their storytelling impact across a full 32-page narrative.

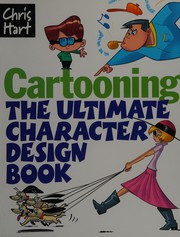
A practitioner-focused resource covering the principles of appealing, readable character design — expression, silhouette, and personality — directly applicable to children's book characters.

Disney animator Walt Stanchfield's collected lectures on gesture, expression, and life drawing form the backbone of expressive character work; read this to make your characters feel alive and emotionally clear.
Visual Storytelling & Page Pacing
IntermediateMaster the craft of telling a story purely through sequential images — controlling pacing, page turns, composition, and the interplay of text and art across a 32-page spread.
▸ Study plan for this stage
Pace: 4–5 weeks, ~25–30 pages/day. Start with "Understanding Comics" (3 weeks), then "Illustrating Children's Books" (2 weeks), allowing time for sequential practice between books.
- The grammar of sequential art: panels, gutters, transitions, and how readers' eyes move across a page
- Pacing through panel size, shape, and arrangement—controlling reader speed and emotional rhythm
- The closure principle: how readers mentally complete action between panels and fill narrative gaps
- Composition and staging within each frame to guide attention and establish spatial relationships
- The interplay of text and image: when to let pictures carry the story, when text anchors meaning, and how they work in tension
- Page-turn strategy: designing spreads so the turn itself becomes a narrative tool (surprise, revelation, pause)
- Visual continuity and character consistency across 32 pages while maintaining visual interest
- The illustrator's role in controlling mood, pacing, and reader engagement through color, line weight, and visual hierarchy
- How do panel transitions (moment-to-moment, action-to-action, subject-to-subject, scene-to-scene, aspect-to-aspect, non-sequitur) shape the reader's experience of time and pacing?
- What is closure, and how do gutters and negative space force readers to participate in completing the story?
- How can you use composition, focal points, and visual weight to direct a reader's eye through a page without relying on text?
- How do page turns function as narrative moments, and what happens when you place key information before or after a turn?
- When should text dominate, when should image dominate, and what does it mean for them to work in counterpoint?
- How do you maintain visual consistency and character recognition across a 32-page book while avoiding monotony?
- Analyze 5 published children's books (not in this curriculum) by mapping panel transitions on each page—label each transition type and note how it affects pacing and emotional tone.
- Create a 4-page wordless sequence (no text) that tells a complete micro-story using only composition, staging, and visual transitions; focus on controlling the reader's eye path and emotional rhythm.
- Redesign a 2-page spread from a children's book by changing only the panel layout and gutter placement—compare how the same images read differently with altered pacing.
- Storyboard a 32-page picture book outline (text + rough thumbnails) with deliberate page-turn moments; identify at least 3 spreads where the turn itself carries narrative weight.
- Create a character model sheet showing your protagonist in 6–8 different poses, expressions, and angles to ensure consistency across a full book dummy.
- Produce a 6-page dummy (rough illustrations with placeholder text) where text and image deliberately work in counterpoint—text says one thing, images suggest another or add layers of meaning.
Next up: This stage equips you to orchestrate narrative across an entire book using visual and sequential logic; the next stage will deepen your ability to integrate specific illustration techniques (color, medium, style) and emotional resonance to bring that paced, composed story to life.

The definitive text on how sequential images create meaning, time, and emotion — the principles here translate directly to picture book pacing and panel-to-panel (page-to-page) storytelling.

A comprehensive, beautifully illustrated survey of professional picture book illustration techniques, styles, and the visual grammar of the genre — bridges craft and industry context.
The Picture Book as a Whole: Craft & Structure
IntermediateUnderstand the full architecture of a picture book — how 32 pages are structured, how text and image divide labor, and how to develop a complete, publishable dummy.
▸ Study plan for this stage
Pace: 4–5 weeks, ~20–25 pages/day, with 2–3 days per week dedicated to hands-on dummy work
- The 32-page picture book format as a standardized container with front matter, story pages, and back matter
- How text and illustrations divide narrative labor—what words must do vs. what images must do
- The dummy as a working blueprint: how to plan and test a complete picture book before final art
- Pacing and page turns as structural tools that control reader experience and emotional timing
- The relationship between manuscript length, illustration spread design, and the physical 32-page constraint
- How cover, endpapers, and title page establish tone and prepare readers for the story
- Revision cycles: how to identify structural problems in a dummy and fix them before committing to final art
- What are the typical components of a 32-page picture book, and why does this format matter for both creators and publishers?
- How do text and images work together to tell a story—what can text do that images cannot, and vice versa?
- What is a dummy, and what specific problems can you solve by creating and testing one before final illustration?
- How do page turns function as a narrative and emotional tool in picture books?
- What decisions about manuscript length, pacing, and spread design must you make to fit your story into 32 pages effectively?
- How do front matter elements (cover, endpapers, title page) contribute to the overall architecture and reader experience of a picture book?
- Analyze the 32-page structure of 3–4 published picture books by mapping out front matter, story pages, and back matter; note where major plot turns occur and why the author/illustrator placed them there
- Create a detailed dummy (rough layout with thumbnail sketches and manuscript text) for a 500–750 word picture book manuscript, testing how it divides across 28–30 story pages
- Conduct a page-turn analysis: read a picture book and note what information is revealed on each page turn; rewrite one section to change the emotional impact through strategic page placement
- Design three different cover and endpaper concepts for the same picture book story, explaining how each sets a different tone and prepares the reader differently
- Revise your dummy based on pacing feedback: identify any pages that feel slow or rushed, and restructure text/image distribution to improve flow
- Create a side-by-side comparison of a manuscript and its corresponding dummy, annotating how you solved the problem of fitting text and image into the 32-page format
Next up: This stage equips you with the structural blueprint and dummy-testing skills needed to move into the next stage, where you'll focus on the visual language and design principles that bring that architecture to life on the page.
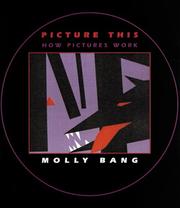
A short, brilliant analysis of how shape, color, and composition create emotion and narrative — essential for understanding why every visual choice in a picture book layout matters.
Getting Published: The Professional Path
ExpertUnderstand the children's book publishing industry — how to build a portfolio, submit work, work with art directors, and launch a professional illustration career.
▸ Study plan for this stage
Pace: 4–5 weeks, ~40–50 pages/day. "Show Me a Story!" (approximately 200 pages) over 4–5 days, then "The Business of Illustration" (approximately 250 pages) over 5–6 days, followed by 2–3 weeks for exercises, portfolio development, and reflection.
- The editorial and creative process behind successful children's books, including how illustrators collaborate with authors, editors, and art directors
- Portfolio construction: what professional children's book illustrators include, how to organize work by style/genre, and what publishers actually look for
- The submission process: query letters, agent representation, direct publisher submissions, and understanding rejection and revision cycles
- Business fundamentals for illustrators: pricing, contracts, rights management, royalties vs. flat fees, and protecting your intellectual property
- The role of art directors in shaping illustration work and how to interpret briefs, accept feedback, and maintain your artistic voice within commercial constraints
- Building a sustainable illustration career: networking, self-promotion, maintaining a website/portfolio, and diversifying income streams beyond book advances
- What are the key stages of collaboration between an illustrator and an art director in children's book publishing, and how do you navigate creative feedback?
- What should a professional children's book illustration portfolio contain, and how should it be organized to appeal to publishers and agents?
- What are the main differences between agent representation and direct publisher submission, and what are the pros and cons of each path?
- How do contracts, royalties, and rights work in children's book publishing, and what terms should you understand before signing?
- What strategies can you use to build visibility and credibility as a children's book illustrator in a competitive market?
- How do you balance commercial demands and client expectations with maintaining your unique artistic voice and creative integrity?
- Create a professional portfolio document (digital or print-ready) with 8–12 of your strongest children's book illustration pieces, organized by style, age group, or genre. Include a one-page artist statement explaining your approach.
- Write three sample query letters or submission packages: one to a literary agent, one to a mid-size publisher, and one to an independent press. Tailor each to the specific submission guidelines.
- Analyze 3–5 published children's books by illustrators you admire. Document the art direction choices, illustration style, medium, page layout, and how the visuals serve the narrative. Write a one-page reflection on what you learned.
- Draft a contract checklist and negotiation guide for yourself, identifying 5–7 key terms you need to understand (advance, royalty rate, rights, reversion clauses, etc.). Research real examples from Heller's book.
- Conduct informational interviews with 2–3 working children's book illustrators or art directors. Ask about their submission experiences, biggest career challenges, and advice for newcomers. Summarize key takeaways.
- Create a 12-month self-promotion and networking plan: identify 10 target publishers/agents, plan social media content strategy, list 5 industry events or communities to join, and set monthly visibility goals.
Next up: This stage equips you with the professional knowledge and market-ready portfolio needed to confidently navigate the publishing industry; the next stage will likely focus on sustained career growth, adapting to market trends, and exploring adjacent opportunities (such as licensing, educational publishing, or international markets) to build long-term resilience and income diversity.

In-depth interviews with 40 top picture book illustrators about their creative processes and careers — invaluable for understanding what publishers look for and how professionals actually work.
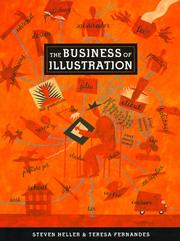
A frank, practical guide to the professional side of illustration — contracts, portfolios, self-promotion, and working with clients — giving you the industry knowledge to pursue publication confidently.
Discussion
Keep reading
Paths that share books, cover the same subject, or open a related topic.