Best Books on Backcountry Skiing, in Order
This curriculum is built for an intermediate skier who already has resort skills and wants to transition confidently into the backcountry. It moves from foundational touring knowledge and snowpack awareness, through terrain judgment and avalanche decision-making, and finally into advanced route-finding and expedition-level thinking — each stage building the vocabulary and mental models needed for the next.
Foundations: Gear, Movement & the Backcountry Mindset
IntermediateUnderstand touring equipment, skinning technique, basic travel protocols, and the culture of backcountry skiing before venturing into serious terrain.
▸ Study plan for this stage
Pace: 4–5 weeks, ~25–30 pages/day, with 2–3 days per week dedicated to hands-on practice and gear familiarization
- Ski touring equipment anatomy: skis, bindings, boots, skins, and how they differ from alpine gear
- Skinning technique: rhythm, cadence, weight distribution, and efficient uphill movement
- Descending safely: speed control, line selection, and adapting technique to variable snow
- Avalanche awareness fundamentals: terrain reading, snowpack basics, and decision-making protocols
- Navigation and route-finding: map reading, GPS use, and assessing objective hazards
- The backcountry mindset: self-reliance, risk assessment, group dynamics, and knowing your limits
- Weather interpretation and snow conditions: how to read forecasts and assess stability in the field
- Leave-no-trace ethics and environmental stewardship in backcountry skiing culture
- What are the key differences between touring bindings and alpine bindings, and why does each design matter for backcountry skiing?
- Describe the proper skinning technique: how should your weight be distributed, and what role does rhythm play in efficiency?
- How do you assess whether a slope is safe to ski, and what terrain features should trigger caution or avoidance?
- What is the relationship between snowpack structure and avalanche risk, and how do you gather basic stability information in the field?
- How do you plan a backcountry route using a map and compass, and what objective hazards should you identify before departing?
- What does 'backcountry mindset' mean, and how does it influence decision-making when conditions are uncertain?
- Assemble and disassemble your touring setup 3–4 times, naming each component and explaining its function; practice switching between climb and descent modes until it becomes automatic
- Skin uphill for 30–45 minutes on a gentle slope (15–20°), focusing on maintaining a steady rhythm and relaxed upper body; record how your technique feels at different paces
- Descend the same slope 5–6 times, practicing speed control with linked turns and experimenting with different line choices; note how snow conditions affect your control
- Study a topographic map of a local ski area, identify 3–4 potential tour routes, and mark terrain traps, aspect, and elevation gain; compare your route choices with experienced skiers
- Conduct a basic snowpack assessment: dig a pit, observe layer structure, and perform a compression test; document your findings and compare with avalanche forecast data
- Plan a half-day tour with a partner or mentor, including route selection, hazard assessment, weather check, and contingency plans; debrief afterward on decision points
Next up: This stage equips you with the foundational knowledge and muscle memory needed to move into terrain-specific skills—learning how to ski steeper slopes, manage complex avalanche terrain, and execute advanced techniques in challenging conditions.

A comprehensive, AMGA-guide-authored primer covering gear selection, skinning, boot-packing, and descending — the single best all-in-one starting point for the intermediate skier entering the backcountry.
Complements Volken by focusing on multi-day touring logistics, route planning basics, and self-sufficiency — essential context before moving into hazard assessment.
Snowpack & Avalanche Fundamentals
IntermediateBuild a working understanding of how snow forms, layers, and fails, and learn the foundational framework for recognizing and avoiding avalanche hazard.
▸ Study plan for this stage
Pace: 8–10 weeks, ~25–30 pages/day. Start with Tremper's accessible narrative (weeks 1–4), then move to McClung's technical depth (weeks 5–10). Allocate 1–2 days per week for review and hands-on exercises.
- Snow metamorphosis and crystal formation: how temperature, wind, and time transform fallen snow into distinct layers with different mechanical properties
- Snowpack stratigraphy and layer identification: recognizing weak layers, slab layers, and bonding interfaces in the field and understanding their role in failure
- Shear and tensile failure mechanics: how stress accumulates in snowpack and the conditions under which layers separate or collapse
- Avalanche classification and terrain factors: understanding slab avalanches, loose-snow avalanches, and how slope angle, aspect, and elevation influence hazard
- Stability evaluation frameworks: using Tremper's decision-making tools and McClung's quantitative approach to assess avalanche danger in real terrain
- Human factors and bias in avalanche decision-making: recognizing cognitive traps and how to apply systematic hazard assessment despite time pressure and uncertainty
- Weak layer persistence and seasonal patterns: understanding depth hoar, surface hoar, and wind slab formation across different snow climates
- Field observations and data interpretation: reading weather, snowpack tests, and terrain clues to inform your hazard assessment
- Explain the process of temperature-gradient metamorphosis and why it creates weak layers like depth hoar. How does this differ from wind-slab formation?
- Describe the shear and tensile failure mechanisms in a slab avalanche. What role does the weak layer play, and why does slab thickness matter?
- Walk through Tremper's decision-making framework (or McClung's stability evaluation approach): given a specific slope, weather history, and snowpack observation, how would you assess whether to ski it?
- What are the key differences between a persistent weak layer (e.g., depth hoar) and a temporary one (e.g., surface hoar)? Why does persistence affect your hazard assessment?
- How do slope angle, aspect, and elevation interact to create avalanche terrain? Why is a 35° north-facing slope in spring different from a 35° south-facing slope?
- Identify three cognitive biases that lead backcountry skiers to underestimate avalanche risk, and describe how systematic observation and testing can counter them.
- Snowpack profile practice: After reading Tremper's chapters on layer identification, sketch 3–5 detailed snowpack profiles from photos or field observations (real or from case studies in the books). Label crystal types, layer bonding, and potential weak layers.
- Stability test interpretation: Work through McClung's explanations of rutschblock, compression, and extended column tests. For each, write a one-paragraph interpretation of what the result tells you about slab stability and weak-layer strength.
- Decision-making case studies: Select 3 avalanche incidents from Tremper's book (or referenced in McClung). For each, reconstruct the snowpack conditions, identify the weak layer, and explain what observation or test would have revealed the hazard.
- Terrain assessment walk-through: Choose 5 different slopes in your local area (or from photos). For each, estimate slope angle, aspect, elevation, and terrain traps. Then predict which are most likely to slide and why, based on typical seasonal snowpack patterns.
- Weather-to-snowpack translation: Track a week of weather (temperature, wind, precipitation). Using Tremper's and McClung's frameworks, predict how each event will modify the snowpack (new slab formation, weak-layer strengthening, bonding changes). Compare your prediction to actual observations.
- Weak-layer identification challenge: Collect 5–10 snowpack photos or field observations. For each, identify the likely weak layer(s), estimate their persistence, and explain why they pose a hazard. Reference specific crystal types and bonding patterns from the books.
Next up: Mastering snowpack mechanics and hazard assessment frameworks here equips you to move into the next stage—applying these concepts to real-time decision-making, route planning, and advanced mitigation strategies in live terrain.
The most widely read and accessible avalanche book in North America — Tremper's clear explanations of snowpack, terrain traps, and human factors make it the essential first read on avalanche safety.

Goes deeper into the science of snow metamorphism and avalanche mechanics; read after Tremper to solidify the physical intuition behind the patterns you learned to recognize.
Terrain Judgment & Route Selection
IntermediateDevelop the ability to read terrain, select safe lines, interpret avalanche forecasts, and apply structured decision-making frameworks in the field.
▸ Study plan for this stage
Pace: 4–5 weeks, ~25–30 pages/day. Start with "Snow Sense" (weeks 1–2, ~120 pages), then "Allen & Mike's Really Cool Backcountry Ski Book" (weeks 3–5, ~150–180 pages). Allocate 2–3 days per week for field observation and decision-making practice.
- Snowpack structure and stability assessment: recognizing weak layers, temperature gradients, and crystal metamorphosis as indicators of avalanche risk
- Terrain reading and slope angle evaluation: identifying slope aspect, elevation, convexity, and terrain traps that influence avalanche terrain hazard
- Avalanche forecasts and advisory interpretation: understanding danger ratings, problem types, and how to apply forecasts to specific terrain decisions
- Route selection frameworks: applying systematic decision-making (e.g., terrain-based routing, aspect/elevation matching) to choose safe lines through complex terrain
- Exposure assessment and consequence management: evaluating run-out zones, escape routes, and the consequences of a slide before committing to terrain
- Field observations and pattern recognition: using visible clues (recent activity, wind loading, surface conditions) to refine real-time risk assessment
- Decision-making under uncertainty: balancing incomplete information with structured heuristics to make defensible choices in the backcountry
- What are the primary weak-layer types described in 'Snow Sense,' and how do you identify them in the field using basic observations (hand tests, pit profiles)?
- How do you interpret an avalanche forecast's danger rating and problem type, and what specific terrain adjustments does this require according to 'Allen & Mike's'?
- Describe the relationship between slope angle, aspect, and elevation in route selection—why do certain aspects become safer or riskier at different times of season?
- What is the difference between terrain hazard and avalanche hazard, and how does this distinction change your approach to line selection?
- Walk through a complete terrain-based decision-making process: given a specific slope, how would you assess stability, exposure, and consequences before dropping in?
- How do recent observations (wind-loaded slopes, recent slides, temperature changes) override or reinforce what the avalanche forecast predicts?
- Conduct 3–4 snowpit observations during the reading period, documenting layer structure, crystal types, and hand-test results; compare findings to 'Snow Sense' weak-layer descriptions.
- Analyze 5 consecutive days of avalanche forecasts for your region, mapping danger ratings and problem types to specific terrain features you can identify on a map or in photos.
- Select 3 different ski routes in your area and perform a written terrain analysis for each: slope angle, aspect, elevation, run-out zones, and exposure—then justify why each route is suitable (or not) given current conditions.
- Practice slope-angle measurement using a clinometer or smartphone app on 5+ slopes; correlate angles to stability observations and forecast danger levels.
- Conduct a 'route comparison' exercise: given two possible lines to the same objective, document the terrain hazards, avalanche hazards, and consequences of each; explain your preferred choice.
- Perform a field decision-making simulation: before each ski day, write down your terrain selection criteria based on the forecast, then document what you actually observed and whether your pre-trip analysis held up.
Next up: Mastery of terrain judgment and route selection provides the foundation for the next stage—applying these skills in real-time decision-making under stress, integrating group management, and developing the judgment to recognize when to turn back or avoid terrain entirely.
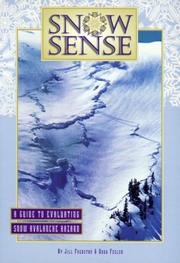
A concise, field-tested guide to on-the-ground avalanche decision-making; its practical checklists and terrain-reading heuristics bridge the gap between book knowledge and real decisions.

Uses illustrated, scenario-based storytelling to make route selection, group management, and terrain choices intuitive and memorable — a perfect complement to the more technical texts.
Advanced Skills & Mountain Judgment
ExpertIntegrate all prior knowledge into high-level mountain travel: ski mountaineering objectives, complex snowpack reading, crevasse terrain, and expedition planning.
▸ Study plan for this stage
Pace: 6–8 weeks, ~40–50 pages/day with weekly field application
- Crevasse rescue systems and self-rescue techniques in alpine terrain
- Advanced rope management, belaying, and protection on mixed terrain (rock, ice, snow)
- Expedition planning: logistics, permits, acclimatization schedules, and risk assessment
- Reading complex snowpack conditions and recognizing instability indicators in alpine environments
- Navigation in whiteout conditions using map, compass, and altimeter on glaciated terrain
- Altitude physiology and managing acute mountain sickness (AMS) on high peaks
- Objective hazards: avalanche terrain, rockfall, cornices, and exposure management
- Leadership decision-making: turnaround times, weather assessment, and go/no-go calls
- Describe a complete crevasse rescue sequence including anchor setup, hauling systems, and self-rescue options when a partner falls through a hidden crevasse
- How would you assess snowpack stability on a glacier approach to a 4,000m peak, and what specific signs would trigger a route change or retreat?
- Explain the logistics and timeline for planning a two-week ski mountaineering expedition to a remote range, including acclimatization, weather windows, and contingency margins
- What are the critical differences in rope team management between ski mountaineering and rock climbing, and why does ski terrain demand different protection strategies?
- You encounter deteriorating weather at 3,500m with two climbers showing early AMS symptoms and 4 hours to descent. Walk through your decision-making process
- How do you navigate a glacier in a whiteout using only map, compass, and altimeter, and what techniques prevent crevasse falls in zero visibility?
- Complete a full crevasse rescue drill on a glacier with a partner: practice anchor placement, hauling systems, and self-rescue from a crevasse using actual rope and gear
- Conduct a snowpack assessment on a ski-accessible glacier or slope: dig a pit, perform shear tests and compression tests, and document findings in a field notebook
- Plan a 3–5 day ski mountaineering trip to a real objective (e.g., a 3,000–4,000m peak): create a detailed itinerary with acclimatization schedule, weather contingencies, and permit/logistics checklist
- Practice glacier navigation in poor visibility: set up a course with map/compass checkpoints and navigate it in fog or at night using only altimeter and bearing confirmation
- Lead a rope team on a mixed snow/rock scramble: practice dynamic belay placement, anchor building in snow, and transitioning between ski and climbing modes
- Simulate an expedition decision scenario: given weather forecasts, AMS symptoms, fuel/food constraints, and time pressure, make and justify a turnaround or push-forward decision with a mentor
Next up: This stage synthesizes all prior technical skills into integrated expedition judgment, preparing you to execute complex ski mountaineering objectives independently and to understand how to adapt these principles to specialized terrain (extreme altitude, remote ranges, or technical mixed climbing) in advanced specialization stages.

The canonical mountaineering reference — at this stage, backcountry skiers tackling glaciated or high-alpine routes need its navigation, rope work, and hazard chapters to operate safely.
Discussion
Keep reading
Paths that share books, cover the same subject, or open a related topic.