The Best Books on Wilderness Navigation
This curriculum takes a beginner from zero navigation experience to confident, multi-tool backcountry travel across four progressive stages. Each stage builds on the last — first establishing core map-and-compass literacy, then layering in GPS and technology, then developing real-world route-finding judgment, and finally sharpening expedition-level and survival-oriented skills for remote, high-stakes terrain.
Foundations: Map & Compass Basics
BeginnerUnderstand topographic maps, compass mechanics, and the fundamental relationship between the two — enough to orient a map, take a bearing, and follow a simple route.
▸ Study plan for this stage
Pace: 4–5 weeks, ~25–30 pages/day (approximately 150–170 pages total across both books)
- Topographic map symbols, contour lines, and how they represent terrain elevation and steepness
- Map grid systems (latitude/longitude, UTM) and how to locate positions on a map
- Compass anatomy: baseplate, orienting lines, magnetic needle, and bezel ring
- Magnetic declination and how to adjust for the difference between magnetic and true north
- Taking a bearing from a map and following it on the ground using a compass
- Orienting a map to the landscape using terrain association and compass alignment
- Triangulation and resection: locating your position by identifying landmarks
- Pacing, distance estimation, and basic dead reckoning to track progress along a route
- What do contour lines represent on a topographic map, and how do you interpret their spacing to determine terrain steepness?
- How do you account for magnetic declination when taking a bearing from a map, and why is this adjustment critical?
- Describe the step-by-step process for taking a bearing from a map and then following that bearing on the ground.
- What is the difference between orienting a map by terrain association versus using a compass, and when would you use each method?
- How do you use triangulation to determine your location on a map using visible landmarks?
- What is dead reckoning, and how do pacing and distance estimation help you track your position during navigation?
- Study the legend and contour lines on a local topographic map; identify three terrain features (ridge, valley, steep slope, gentle slope) and explain what the contour patterns tell you.
- Practice taking a bearing from a map using Kjellström's method: place compass on map, rotate bezel to align orienting lines with map grid, read the bearing at the index line.
- Adjust a bearing for magnetic declination in your region; practice both adding and subtracting declination depending on whether you're converting from map to compass or vice versa.
- Conduct an indoor or outdoor compass orientation exercise: orient a map to match the landscape around you using both terrain association and compass alignment; verify they match.
- Walk a measured 100-meter course while counting paces; calculate your average pace length, then use it to estimate distances on future navigation practice.
- Perform a triangulation exercise: identify three visible landmarks on a map, take bearings to each from your position, and plot back-bearings to find your location on the map.
Next up: Mastering map orientation, bearing-taking, and position-finding with compass and map creates the foundation for the next stage, where you'll apply these skills to plan and execute multi-leg routes, navigate in poor visibility, and handle real-world complications like terrain obstacles and navigation errors.
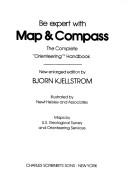
The classic introductory text on orienteering and land navigation, written by a compass pioneer. Its step-by-step exercises build map-reading and compass skills from absolute scratch, making it the ideal first book.
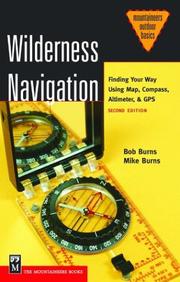
A clean, modern, beginner-friendly guide that covers topo maps, compass, and basic GPS in plain language. Read after Kjellström to reinforce concepts with backcountry-specific scenarios and clearer diagrams.
Going Deeper: Topography & Route-Finding Judgment
IntermediateRead terrain fluently from a map, anticipate what the land will look like before you see it, and make sound route-finding decisions in varied backcountry conditions.
▸ Study plan for this stage
Pace: 6–8 weeks, ~25–30 pages/day, with 2–3 days per week dedicated to field practice and map study
- Reading contour lines to visualize terrain in three dimensions and anticipate slope, aspect, and elevation changes
- Interpreting map symbols, colors, and scale to extract practical route-finding information
- Correlating map features with actual landscape features through terrain association and landmark recognition
- Assessing terrain difficulty, exposure, and hazards before committing to a route
- Using natural navigation cues (sun, stars, wind, vegetation, water flow) to verify map-based decisions and navigate when maps are unavailable
- Making sound route-finding judgments by balancing efficiency, safety, and energy expenditure in varied conditions
- Developing spatial reasoning to predict what terrain will look and feel like before encountering it
- How do you read contour lines to determine slope steepness, ridge lines, and valley formations, and what visual cues on a map indicate terrain you should avoid?
- What natural navigation techniques from Gatty's work can you use to verify your map-based route and navigate effectively if your map becomes unusable?
- Given a topographic map of unfamiliar terrain, how would you predict what the landscape will look and feel like, and what route would you choose based on safety, efficiency, and your skill level?
- How do you use terrain association—matching map features to visible landmarks—to confirm your location and adjust your route in real time?
- What factors should you weigh when making route-finding decisions in varied conditions (e.g., weather, daylight, group fitness, terrain hazards)?
- How do map symbols, colors, and scale inform your assessment of terrain difficulty and help you identify potential hazards before you encounter them?
- Contour line drills: Study 5–10 different topographic maps and sketch the 3D terrain profile for each ridge, valley, and slope; compare your sketches to photos of the actual terrain
- Terrain association field practice: On a local hike with a map, stop every 15–20 minutes to identify 3–5 visible landmarks on your map and confirm your location without GPS
- Route-finding decision scenarios: Analyze 8–10 real topographic maps with different terrain types and write a detailed route plan for each, explaining your choices and hazard assessment
- Natural navigation verification: On 3–4 field outings, use Gatty's techniques (sun position, shadow stick, wind patterns, vegetation) to verify your map-based location and route
- Blind map reading: Study a topographic map for 10 minutes, then close it and describe aloud what the terrain will look and feel like for the next mile of travel; compare your prediction to the actual terrain
- Cross-map comparison: Obtain maps of the same area at different scales and practice extracting route-finding information from each; note what details are lost or gained at different scales
Next up: This stage equips you with the fluency to read terrain and make confident route-finding decisions in familiar and unfamiliar backcountry, preparing you to apply these skills under challenging conditions—poor visibility, navigation errors, and emergency decision-making—in the next stage.
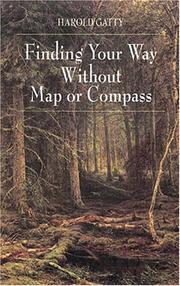
Gatty teaches natural navigation — sun, stars, wind, vegetation, and animal behavior — building deep terrain intuition that complements technical tools and works when they fail.
Bridges beginner compass skills and real-world route-finding, with strong coverage of declination, triangulation, and field decision-making. Randall's practical focus prepares readers for the next level of field application.
Modern Tools: GPS & Digital Navigation
IntermediateIntegrate GPS devices and digital mapping apps into a navigation system, understand their limitations, and use them confidently alongside traditional map-and-compass skills.
▸ Study plan for this stage
Pace: 4–5 weeks, ~25–30 pages/day. Start with "GPS Made Easy" (2–3 weeks), then "Staying Found" (2 weeks). Allocate 2–3 days per week for hands-on field practice.
- GPS fundamentals: how satellites, receivers, and signals work to determine position and accuracy
- Coordinate systems and datums: understanding latitude/longitude, UTM, and why datum selection matters for accuracy
- GPS receiver operation: waypoint creation, route planning, track recording, and interpreting receiver displays
- Integrating GPS with traditional maps: overlaying digital data on paper maps and cross-checking positions
- Digital mapping apps and software: using tools like mapping applications to plan routes and transfer data to GPS devices
- GPS limitations and failure modes: signal loss, accuracy degradation, battery dependency, and when to rely on map-and-compass
- Navigation workflows: combining GPS, maps, and compass in real-world scenarios to maintain situational awareness
- Staying found: continuous position verification, route confirmation, and recognizing when you've drifted off course
- How do GPS satellites and receivers calculate position, and what factors affect accuracy?
- What are the main coordinate systems (latitude/longitude, UTM) and why is datum selection critical when switching between GPS and paper maps?
- How do you create waypoints, plan a route, and record a track on a GPS receiver, and what do these functions tell you?
- What are the key limitations of GPS (signal loss, accuracy, battery life), and how do you mitigate them in the field?
- How do you integrate GPS data with paper maps and compass navigation to verify your position and stay on course?
- What is the difference between using GPS as a primary tool versus using it as a verification tool alongside traditional navigation?
- Set up a GPS receiver: configure datum, coordinate system, and map datum to match your paper maps; create and save 5–10 waypoints at known locations
- Plan a route digitally: use mapping software to plot a route, export waypoints, and load them into your GPS receiver; compare the digital route to a paper map
- Field exercise—waypoint navigation: navigate to 5 waypoints using only GPS, recording your track; then compare your actual path to the planned route
- Cross-check with map and compass: navigate a route using GPS, then verify each waypoint position on a paper map and with a compass bearing
- Simulate GPS failure: navigate a familiar route using GPS, then intentionally disable it and navigate the remaining distance using only map and compass
- Track analysis: record a walk or hike with GPS, download the track, overlay it on a digital map, and identify where you deviated from your intended route
Next up: This stage equips you with confidence in digital tools and their proper role in navigation, setting the foundation for the next stage—advanced wilderness navigation—where you'll learn to synthesize GPS, maps, compass, terrain reading, and environmental cues into seamless real-world decision-making in complex or remote environments.

The most widely recommended beginner-to-intermediate GPS guide, covering how GPS works, waypoints, tracks, and routes with hands-on clarity. Establishes the vocabulary needed for any digital navigation tool.
Uniquely bridges traditional and modern navigation, emphasizing the mindset of continuous situational awareness. It reinforces why no single tool — GPS or compass — should be relied upon alone.
Mastery: Expedition Navigation & High-Stakes Terrain
ExpertNavigate confidently in remote, off-trail, and technically demanding terrain — including alpine, desert, and whiteout conditions — and develop the judgment to lead others safely.
▸ Study plan for this stage
Pace: 8–10 weeks, ~40–50 pages/day (with 2–3 days/week for field practice and reflection)
- Terrain assessment and route-finding in alpine, off-trail, and technically complex environments using contour maps, terrain features, and visual landmarks
- Advanced map and compass navigation combined with GPS technology, including triangulation, declination adjustment, and cross-checking methods in high-consequence situations
- Weather prediction, avalanche terrain recognition, and hazard mitigation strategies specific to mountainous and remote regions
- Leadership decision-making under uncertainty: risk assessment, team management, and judgment calls in whiteout conditions and emergency scenarios
- Navigation in extreme conditions: altitude effects on cognition, navigation in low visibility, and maintaining orientation when landmarks disappear
- Expedition logistics: planning multi-day routes, managing water and resupply points, and adapting navigation to changing conditions over extended trips
- Technical terrain navigation: scrambling, snow travel, glacier crossing, and using natural anchors and terrain features for safe passage
- Personal accountability and continuous skill refinement through deliberate practice and post-expedition analysis
- How do you identify and assess terrain hazards (avalanche slopes, exposed ridges, scree fields) from a map before entering alpine terrain, and how does this inform your route choice?
- Describe a complete navigation workflow for leading a team through a whiteout condition on a high alpine pass: how would you maintain orientation, verify position, and make go/no-go decisions?
- What are the key differences between navigating in alpine terrain versus desert terrain, and how would your map-reading and hazard-assessment strategies differ?
- How do you balance speed, safety, and team morale when leading an off-trail expedition through technically demanding terrain, and what decision-making framework would you use?
- Explain how to use terrain association, handrail features, and backstop landmarks to navigate confidently without GPS in remote areas—and when would you rely on GPS as a check?
- What is your personal decision-making protocol for turning back or changing route in the field, and how do you communicate this to your team?
- Complete a full expedition plan for a 3–5 day off-trail alpine route: include detailed route-finding notes, hazard identification, contingency routes, resupply strategy, and weather contingencies using only map and compass
- Conduct a navigation simulation in whiteout conditions (use a blindfold or fog, or practice in poor visibility): navigate a 2–3 mile route using only compass bearing, terrain association, and pacing—then verify your position and reflect on decision points
- Lead a small group (2–3 people) on a technical off-trail route in alpine or mountainous terrain; document your route-finding decisions, hazard assessments, and team communication in real time
- Practice advanced map-reading in the field: identify 10+ terrain features from a contour map, then locate them on the ground; practice triangulation from multiple peaks to verify position in unfamiliar terrain
- Plan and execute a multi-day expedition (3–5 days) in remote terrain with minimal resupply; navigate entirely by map and compass for at least one full day, then reflect on your judgment calls and decision-making
- Conduct a post-expedition debrief: analyze a completed expedition (yours or a case study from the book) and identify 3–5 navigation decisions that worked well and 2–3 that could improve; document lessons learned
Next up: This stage transforms you from a competent navigator into a judgment-driven leader capable of safe expedition decision-making in extreme terrain; the next stage will likely focus on specialized environments (polar, tropical, maritime) or on teaching and mentoring others through complex navigation challenges.

The definitive mountaineering reference includes authoritative chapters on alpine navigation, route-finding on glaciers and technical terrain, and navigation in poor visibility — essential reading for high-stakes backcountry travel.
Discussion
Keep reading
Paths that share books, cover the same subject, or open a related topic.