The Best Books on Spoon Carving and Green Woodworking, in Order
This curriculum takes a complete beginner from their first axe swing to confident, nuanced spoon carving from fresh-cut wood. Each stage builds on the last: you first develop an eye for wood and safe tool habits, then master the core three-tool workflow (axe, sloyd knife, hook knife), and finally deepen your craft through design sensibility and broader green-woodworking context that will keep you growing for years.
Foundations — First Tools, First Chips
BeginnerUnderstand what green woodworking is, develop safe axe and knife habits, and carve your first simple spoons with confidence.
▸ Study plan for this stage
Pace: 4–5 weeks, ~20–30 pages/day with daily carving practice
- What green woodworking is and why it differs from dried wood (moisture content, workability, grain behavior)
- Safe axe handling: grip, stance, body positioning, and common hazards to avoid
- Safe knife handling: blade control, hand placement, cutting directions, and preventing slips
- How to select and prepare green wood for spoon carving (species, size, grain orientation)
- Basic spoon anatomy: handle, bowl, transition zones, and how wood movement affects design
- Fundamental carving techniques: roughing out, shaping the bowl, refining the handle, and finishing
- Tool maintenance: keeping axes and knives sharp, safe storage, and care between sessions
- What is green woodworking and what are the key advantages of carving green wood versus dried wood?
- Describe the safe grip, stance, and body positioning for axe work, and explain why each element matters for injury prevention
- What are the critical hand placement and cutting direction rules when using a carving knife, and how do you recover if you feel a slip coming?
- How do you select appropriate green wood for spoon carving, and what grain and moisture characteristics should you look for?
- Walk through the basic steps of carving a simple spoon from roughing out to finishing, and explain what happens at each stage
- Why is tool sharpness important for both safety and quality, and how do you maintain your axes and knives?
- Carve at least 3–5 complete simple spoons (small eating spoons or spreaders) from green wood, focusing on consistent technique each time
- Practice axe safety drills: 10 minutes daily of controlled chops on a log, focusing on stance, grip, and stopping distance before each swing
- Practice knife safety drills: 10 minutes daily of controlled cuts on scrap green wood, emphasizing hand placement and cutting away from your body and fingers
- Sharpen your axe and carving knife using the methods described in the book, then document the difference in how they feel and cut
- Collect and prepare 5–10 pieces of green wood suitable for spoon carving; note the species, grain direction, and moisture feel of each
- Carve one spoon deliberately slowly, pausing after each major step (roughing, bowl shaping, handle refinement) to inspect and adjust your technique
- Create a personal safety checklist and tool maintenance log; use it before and after every carving session for 4 weeks
Next up: This stage equips you with foundational safety habits, tool control, and the confidence to complete a simple spoon—preparing you to tackle more complex spoon designs, specialized techniques (like hook knives or chip carving), and deeper wood selection strategies in the next stage.

The single best entry point for spoon carving: Barn Carder (Barn the Spoon) walks through axe, sloyd knife, and hook knife in a clear, encouraging sequence built entirely around fresh wood. Read this first to get the full workflow in your head before anything else.
Core Skills — Axe, Knife & Hook Knife in Depth
BeginnerBuild real fluency with each of the three primary tools, understand grain and wood movement in green timber, and produce spoons with clean, controlled cuts.
▸ Study plan for this stage
Pace: 4–5 weeks, ~20–25 pages/day with 2–3 carving sessions per week
- Axe anatomy and balance: head weight, handle length, and how these affect control and power delivery
- Grip techniques and stance: how to position your body and hands for safety, precision, and efficiency across different cuts
- Wood grain direction and reading the grain: how to identify grain run and adjust your cutting angle to work with (not against) the wood
- Green wood properties: why freshly felled timber is easier to carve, how moisture affects tool performance and wood movement
- Fundamental axe cuts: the push cut, pull cut, and stop cut, and when to use each for spoon blanks and roughing
- Sharpening and tool maintenance: keeping your axe properly honed and understanding the relationship between edge geometry and cutting performance
- Safety principles: controlling the axe's trajectory, understanding kickback risks, and establishing safe working habits from the start
- What are the key differences between axe head designs (weight, balance point, blade geometry) and how do these affect the type of work each is suited for?
- How do you read wood grain direction in a log or blank, and why is cutting with the grain (rather than against it) essential for clean spoon carving?
- Describe the three fundamental axe cuts covered in the book and explain when you would use each one in roughing out a spoon blank.
- Why is green wood preferable to seasoned wood for spoon carving, and what specific properties of freshly felled timber make it easier to work?
- What are the critical safety principles for axe work, and how do you prevent common accidents like kickback or loss of control?
- How do you maintain a sharp axe, and what is the relationship between edge angle and cutting performance?
- Spend 30 minutes examining 3–4 different axe heads (or photos/diagrams from the book): measure and compare weight, balance point, and blade geometry; note which you'd choose for different tasks.
- Practice identifying grain direction on 5–6 pieces of green wood or logs by sight and touch; mark the grain run with chalk or pencil, then verify by making test cuts.
- Perform 10 repetitions each of the push cut, pull cut, and stop cut on a practice log or large blank, focusing on form and control rather than speed; video yourself to review technique.
- Rough out 2–3 spoon blanks using only axe work, deliberately practicing grain-aware cutting and adjusting your angle as the grain direction changes around the blank.
- Sharpen your axe using the methods described in the book; test the edge on paper and wood; repeat the process until you can consistently achieve a sharp, controllable edge.
- Carve one complete spoon from green wood blank to finish, applying all three fundamental cuts and making deliberate decisions about grain direction at each stage; document the process with photos or notes.
Next up: Understanding axe technique and grain awareness in green wood prepares you to transition to the knife and hook knife, where the same grain-reading and directional-cutting principles apply at a finer, more controlled scale.

A slim but authoritative guide to axe selection, sharpening, and technique from the legendary Swedish axe maker. Reading it here cements safe, effective axe work that underpins everything in green woodworking.
Broader Green Woodworking — Splitting, Shaping & the Living Tradition
IntermediateSituate spoon carving within the wider world of green woodworking: riving, shaving, steam-bending, and working with locally sourced timber.
▸ Study plan for this stage
Pace: 4–5 weeks, ~40–50 pages/day, with 2–3 days per week dedicated to hands-on practice and observation
- Green woodworking as a unified craft tradition: understanding how riving, shaving, steam-bending, and carving share common principles of working with living wood
- The role of the woodwright's shop as a functional workspace: tool arrangement, workflow, and the relationship between hand tools and timber preparation
- Riving and splitting as primary methods for converting round timber into usable blanks, and how this differs from sawing
- The properties of green (freshly felled) wood: moisture content, movement, seasoning, and how these affect tool selection and technique
- Hand tool mastery in green woodworking: understanding edge geometry, tool maintenance, and the tactile feedback that guides shaping decisions
- Regional and historical variations in green woodworking traditions, and how local timber species influence tool design and technique
- The integration of multiple techniques within a single project: how splitting, shaping, and finishing work together in traditional practice
- What are the key differences between riving and sawing timber, and why would a green woodworker choose one method over the other?
- How does working with green wood change your approach to tool sharpness, stroke direction, and wood movement compared to working with dry wood?
- Describe the layout and function of a traditional woodwright's shop. What does the physical organization tell you about workflow and priorities?
- What role does understanding local timber species play in green woodworking, and how might this knowledge influence your tool choices and techniques?
- How are spoon carving, riving, shaving, and steam-bending related as expressions of the same underlying craft tradition?
- What does Underhill emphasize about the relationship between hand tools and the material, and how does this philosophy differ from modern power-tool approaches?
- Visit a local timber source (sawmill, arborist, or woodlot) and observe freshly felled logs. Identify grain direction, check patterns, and radial versus tangential surfaces. Photograph or sketch examples.
- Practice riving a short length of green wood (4–6 inches diameter) using a froe or splitting wedge. Feel how the wood splits along the grain, and compare the resulting surface to a sawn surface.
- Set up a simplified 'woodwright's shop' in your workspace: arrange your carving tools, shaving tools, and a work surface to match Underhill's principles. Document the layout and reflect on how it affects your workflow.
- Carve or shape a small object (spoon blank, shaving, or simple utensil) from green wood, paying close attention to tool angle, grain direction, and the tactile feedback as you work. Note how the wood's moisture affects your technique.
- Research and document a local or regional green woodworking tradition (chair-making, coopering, tool-making, etc.). Identify which techniques overlap with spoon carving and how local timber species shaped the tradition.
- Sharpen and maintain one hand tool (carving knife, drawknife, or froe) using Underhill's principles. Practice stropping and honing until you can feel the difference in edge quality, then use it on green wood to experience the improvement.
Next up: This stage grounds you in the broader ecosystem of green woodworking—the tools, timber properties, and workshop practices—so that you can now return to spoon carving with a deeper understanding of how it fits into a living tradition and can apply advanced techniques like steam-bending and specialized shaping to create more sophisticated forms.

Underhill's classic introduces the full ecosystem of hand-tool, pre-industrial woodworking — including riving and shaving — giving spoon carvers essential context for sourcing and preparing their own green wood.
Mastery — Sharpening, Refinement & Lifelong Practice
ExpertAchieve razor-sharp tools (the single biggest lever on carving quality), develop a personal style, and understand how to keep improving independently.
▸ Study plan for this stage
Pace: 4–5 weeks, ~20–25 pages/day, with 2–3 dedicated sharpening practice sessions per week
- The geometry of sharp edges: bevel angles, edge geometry, and how they affect carving performance across different wood types
- Abrasive materials and grit progression: understanding stones, strops, and compound grits to achieve and maintain razor-sharp edges
- Sharpening methods and techniques: freehand stropping, guided systems, and honing strategies specific to carving tools (gouges, knives, chisels)
- Tool-specific sharpening: how to sharpen curved and hollow-ground edges without destroying tool geometry
- Maintaining sharpness in the field: stropping routines, touch-ups, and recognizing when a tool needs full re-sharpening versus maintenance
- The relationship between sharpness and carving quality: how razor-sharp tools reduce effort, improve control, and enable personal style development
- Building a personal sharpening system: selecting stones and equipment that fit your workflow and budget
- What bevel angle should you use for different carving tools, and how does angle affect both sharpness and durability?
- How do you sharpen a gouge or curved carving tool without rounding the edge or destroying its hollow grind?
- What is the difference between stropping and honing, and when should you use each in your maintenance routine?
- How do you recognize when a tool is truly sharp versus merely dull, and what does 'razor-sharp' mean in practical carving terms?
- What is a realistic sharpening maintenance schedule for active carving, and how do you keep tools sharp between full sharpenings?
- How does achieving razor-sharp tools directly improve your carving quality and enable you to develop a personal style?
- Set up a sharpening station with at least three different abrasive grits (coarse, medium, fine) and practice the progression on a dull carving knife until you achieve a consistent, razor-sharp edge
- Sharpen 3–5 of your carving gouges using Lee's techniques, paying attention to maintaining the hollow grind and testing sharpness with the paper-cutting test after each tool
- Establish a daily stropping routine: strop 2–3 tools each morning before carving for one week, and document how long the edge lasts before needing re-honing
- Create a personal sharpening reference chart: record the bevel angles, stone sequence, and stropping compound you use for each tool type in your kit
- Carve the same simple design (e.g., a basic spoon or relief) with a dull tool, then re-sharpen it to razor-sharp and carve the same design again—compare effort, control, and surface quality
- Practice freehand stropping on a leather strop for 15 minutes daily for one week until you develop muscle memory and consistency
Next up: Mastering sharpening removes the technical barrier to carving excellence, freeing you to focus entirely on design, technique, and developing the personal aesthetic that defines advanced work.
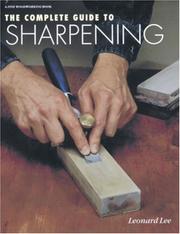
Sharp tools are the foundation of clean, safe carving, and Lee's guide is the most thorough and practical sharpening reference available — covering stones, strops, and geometry for axes, knives, and hook knives alike.
Discussion
Keep reading
Paths that share books, cover the same subject, or open a related topic.