The Best Books on Block Printing and Linocut, in Order
This curriculum takes a complete beginner from their very first cut to producing bold, professional-quality prints on both paper and fabric. Each stage builds on the last — starting with core tools and safety, moving through design thinking and advanced carving, and finishing with specialty techniques like fabric printing and reduction printing that demand full command of the craft.
Foundations: Tools, Safety & First Cuts
BeginnerUnderstand the essential tools, materials, and safety practices; make your first successful linocut print on paper with confidence.
▸ Study plan for this stage
Pace: 2–3 weeks, ~20–25 pages/day, with 2–3 dedicated practice sessions per week
- Essential linocut tools: cutting blocks, knives, gouges, and their specific uses
- Material selection: choosing appropriate linoleum, paper, and ink for different projects
- Safety protocols: proper handling, storage, and injury prevention in the studio
- Carving techniques: understanding pressure, angle, and depth control for clean cuts
- Printing fundamentals: inking, registration, and transferring designs to paper
- Design preparation: translating ideas into linocut-ready artwork with proper reversal considerations
- What are the main types of cutting tools used in linocut, and what is each one designed to accomplish?
- How do you safely handle and maintain cutting tools to prevent injury and ensure longevity?
- What factors should you consider when selecting linoleum and paper for a specific project?
- How does the pressure and angle of your knife affect the quality and character of your cuts?
- What are the essential steps in preparing a design before transferring it to a lino block?
- How do you ink and print a block to achieve consistent, high-quality impressions?
- Set up a safe, organized workspace following the safety guidelines in Morley's book; identify and label all your tools
- Practice basic carving strokes on scrap linoleum: straight lines, curves, and cross-hatching to develop muscle memory and control
- Carve a simple geometric design (circles, squares, triangles) on a small lino block to master depth and pressure
- Create a 2–3 color design sketch on paper, then reverse it and transfer it onto a lino block using carbon paper or tracing
- Ink and print your first simple design on paper, experimenting with different ink amounts and pressure to achieve clean impressions
- Document your process with photos and notes; compare your prints and identify what worked well and what needs adjustment
Next up: This stage equips you with the technical foundation and hands-on confidence to move forward into more complex design work, multi-block printing, and artistic refinement in subsequent stages.

The single best starting point for beginners — it covers tool selection, cutting technique, inking, and registration in a clear, visual, step-by-step format that builds real confidence fast.
Design Thinking for Block Printing
BeginnerLearn how to translate ideas and sketches into strong, print-ready designs — understanding negative space, line weight, and composition as they apply specifically to relief printing.
Provides a broader printmaking context — including woodblock and relief printing — giving the learner a design vocabulary and conceptual framework that purely technique-focused books skip.
Going Deeper: Woodblock & Multi-Block Printing
IntermediateMaster traditional woodblock carving, multi-block color registration, and more demanding inking methods to produce layered, multi-color prints.
▸ Study plan for this stage
Pace: 4–5 weeks, ~25–30 pages/day with 2–3 carving/printing sessions per week
- Wood selection and preparation for relief printing (grain direction, surface finishing, wood types)
- Advanced carving techniques: V-tools, burins, and specialty gouges for fine detail and expressive marks
- Multi-block registration systems and alignment methods for accurate color layering
- Ink consistency, viscosity, and application methods for relief printing (rolling, dabbing, wiping)
- Color theory and separation planning for multi-block prints (one block per color or reduction methods)
- Pressure control and printing techniques to achieve consistent, high-quality impressions
- Troubleshooting common printing defects (uneven inking, slippage, over-inking, ghosting)
- What are the key differences between hardwoods and softwoods for relief printing, and how does grain direction affect your carving and final print?
- How do you plan and execute a multi-block color print, including registration methods and color separation?
- What is the relationship between ink viscosity and the quality of impression, and how do you adjust it for different effects?
- Describe the step-by-step process of inking and printing a woodblock to achieve even coverage without over-inking.
- What are three common printing defects and how would you diagnose and correct each one?
- How do reduction and traditional multi-block methods differ, and when would you choose one approach over the other?
- Carve a 4×6 inch practice block using a variety of V-tools and gouges, focusing on controlled depth and clean line work.
- Create a two-color woodblock print using separate blocks with a simple registration system (corner tabs or alignment marks); document the registration process.
- Experiment with ink viscosity by rolling out the same image on three separate blocks with thin, medium, and thick ink; compare results and note differences in impression quality.
- Design and execute a three-color reduction print or multi-block print with intentional color separation planning; keep a visual record of each block and the final layered result.
- Print the same block using three different pressure levels (light, medium, firm) and analyze how pressure affects ink transfer and detail visibility.
- Troubleshoot a deliberately over-inked or under-inked print by adjusting ink application and re-printing; document what you changed and the outcome.
Next up: Mastery of multi-block registration and advanced inking techniques prepares you to explore contemporary relief printing innovations, mixed-media approaches, and how to scale your practice toward exhibition-quality work and personal artistic voice.
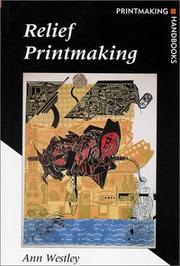
Focuses on multi-block and color relief printing with expert guidance on registration and layering — the critical intermediate skills needed to produce bold, complex designs.
Printing on Fabric
IntermediateSuccessfully transfer block and linocut printing skills to fabric, understanding textile inks, fabric preparation, repeat patterns, and heat-setting for durable results.
▸ Study plan for this stage
Pace: 4–5 weeks, ~20–25 pages/day, with 2–3 dedicated printing practice days per week
- Textile ink formulations and how they differ from paper inks in viscosity, pigment load, and cure requirements
- Fabric preparation techniques (washing, drying, sizing) to ensure optimal ink adhesion and print quality
- Designing and executing repeat patterns on fabric using block and linocut stamps with registration methods
- Heat-setting processes (steam, iron, oven) and their role in making prints durable and wash-fast
- Troubleshooting common fabric printing issues (bleeding, uneven coverage, ink transfer problems)
- Scaling designs appropriately for fabric applications and understanding how fabric weave affects print results
- Layering and color mixing techniques specific to fabric printing to achieve depth and complexity
- What are the key differences between textile inks and paper-based inks, and why does this matter for fabric printing?
- What pre-printing preparation steps are essential for fabric, and how do they affect the final print quality?
- How do you create and execute a successful repeat pattern on fabric using hand-carved blocks or linocuts?
- What heat-setting method is most appropriate for different fabric types, and why is this step critical for durability?
- How do you diagnose and fix common problems like ink bleeding, poor adhesion, or uneven color in fabric printing?
- What design considerations change when moving from paper printing to fabric printing?
- Print a series of test swatches on different fabric types (cotton, linen, silk blend) using the same block to observe how fabric weave and fiber content affect ink absorption and print clarity
- Design and carve a small linocut motif, then execute a 4-repeat pattern on a 12×12 inch fabric square using registration marks and measuring techniques from Corwin's guidance
- Prepare three fabric samples using different pre-treatment methods (unwashed, washed, sized), print identical designs on each, and compare adhesion and finish quality
- Create a color-layering print on fabric by stamping two or more blocks in sequence, experimenting with ink transparency and overlap techniques
- Heat-set printed fabric samples using three different methods (steam, household iron, oven) and then wash-test them to evaluate durability and color-fastness
- Document a complete fabric printing project from design through heat-setting, photographing each stage and noting any problems encountered and solutions applied
Next up: This stage establishes the technical and material foundations for translating carved stamps into finished textile products, preparing you to explore advanced applications such as garment printing, commercial production scaling, or integrating block printing into larger fiber arts projects.

A beautifully practical book covering stamps, blocks, and screens on fabric, with strong guidance on repeat design and finishing — it rounds out the fabric-printing stage with real-world projects.
Mastery: Reduction Printing & Personal Voice
ExpertExecute the demanding reduction linocut process, develop a personal artistic style, and produce edition-quality prints that demonstrate full command of the craft.
▸ Study plan for this stage
Pace: 4–5 weeks, ~40–50 pages/day with extended studio practice sessions (2–3 hours minimum per session, 4–5 days/week)
- Reduction linocut as an irreversible, high-stakes process requiring meticulous planning and execution
- Color separation and registration techniques for multi-block and multi-pass reduction printing
- Managing risk through proofing protocols, documentation, and strategic carving sequences
- Developing personal artistic voice through intentional mark-making, composition choices, and conceptual depth
- Edition management: consistency, numbering, signing conventions, and quality control across multiple impressions
- Advanced tool mastery and pressure control to achieve refined, expressive line work and tonal variation
- Translating artistic vision into technical execution while maintaining spontaneity and emotional resonance
- What makes reduction linocut fundamentally different from other printmaking methods, and why does this irreversibility demand a different mindset and preparation process?
- How do you plan and execute a multi-color reduction print, and what are the critical decision points where errors become permanent?
- What strategies can you use to develop and refine your personal artistic style within the technical constraints of reduction linocut?
- How do you maintain consistent quality and integrity across an entire edition, and what documentation and proofing practices support this?
- What role does experimentation and mark-making play in balancing technical precision with artistic spontaneity in advanced reduction work?
- How do you troubleshoot common problems in reduction printing (registration failure, inconsistent pressure, unintended color mixing) and prevent them in future editions?
- Execute a complete reduction linocut from concept to finished edition (minimum 10–15 prints), documenting every stage: sketches, color separations, carving sequence, proofs, and final numbered edition
- Create a series of 3–4 reduction prints exploring a single theme or subject, deliberately varying composition, color palette, and mark-making approach to develop recognizable personal style
- Produce a multi-color reduction print (3+ colors) with intentional registration and color interaction; proof after each reduction stage and analyze how each carving decision affects the final image
- Conduct a technical study: carve test blocks exploring different tool angles, pressure variations, and mark types to expand your expressive vocabulary and document findings in a reference journal
- Design and execute an edition with rigorous quality control: maintain consistent inking, pressure, and paper handling across all prints; number and sign the edition professionally; create an artist's statement explaining conceptual intent
- Analyze and critique 5–10 published reduction linocut prints (from The Printmaking Bible or other professional sources), identifying the artist's technical choices, stylistic signatures, and how they solved specific compositional or color problems
- Experiment with unconventional materials or substrates (colored paper, textured surfaces, mixed media integration) in a small reduction series to push beyond traditional approaches while maintaining technical control
Next up: This stage equips you with the technical mastery, conceptual depth, and documented body of work necessary to move into professional practice—whether exhibiting, selling, teaching, or pursuing specialized advanced techniques like chine-collé, multi-block registration systems, or experimental hybrid processes.

A comprehensive, studio-level reference covering every relief and printmaking technique in depth — the ideal capstone reference for a learner ready to push into professional, edition-quality work.
Discussion
Keep reading
Paths that share books, cover the same subject, or open a related topic.