The Best Books on Needlepoint, in Order
This curriculum takes a beginner from their very first stitch all the way through advanced canvas work, thread artistry, and original design. Each stage builds directly on the last — starting with essential vocabulary and basic stitches, moving through canvas and thread mastery, and culminating in the design thinking and artistic vision needed to create truly beautiful, original needlepoint pieces.
Foundations: First Stitches & Core Vocabulary
BeginnerUnderstand what needlepoint is, set up a proper workspace, learn to read a canvas, and execute the fundamental tent stitches (continental, basketweave, half cross) with confidence.
▸ Study plan for this stage
Pace: 4–5 weeks, ~20–25 pages/day, with 2–3 days per week dedicated to hands-on practice
- What needlepoint is: its history, materials, and place among fiber arts
- Workspace setup: proper lighting, seating, needle organization, and canvas preparation
- Canvas anatomy: mesh count, thread count, weave types, and how to read a chart or pattern
- The continental tent stitch: technique, tension, and when to use it
- The basketweave tent stitch: directional stitching, advantages, and preventing canvas distortion
- The half cross stitch: efficiency, limitations, and appropriate applications
- Needle and thread selection: sizing, fiber types, and matching to canvas weight
- Foundational tension and consistency: how uneven stitching affects the final piece
- What are the key differences between continental, basketweave, and half cross stitches, and when would you choose each?
- How do you read a needlepoint canvas and a stitch chart, and what does mesh count tell you?
- What does a properly set up needlepoint workspace include, and why is each element important?
- How do you prepare canvas and thread before beginning a project, and what common mistakes should you avoid?
- What is the relationship between tension, stitch consistency, and the finished appearance of your work?
- Why does basketweave tent stitch prevent canvas distortion better than continental stitch?
- Set up a dedicated needlepoint workspace with proper lighting and seating; photograph or sketch it to confirm all elements are in place
- Practice the continental tent stitch on a small practice canvas (at least 4×4 inches) until you can maintain even tension and consistent stitch size for 20+ consecutive stitches
- Practice the basketweave tent stitch on a separate practice canvas, paying attention to the diagonal direction changes and comparing the feel to continental stitch
- Practice the half cross stitch on a third practice canvas and note the differences in thread consumption, speed, and canvas pull compared to the other two stitches
- Complete a small sampler (6×6 to 8×8 inches) that includes all three stitches in distinct sections, labeling each section; this becomes a reference piece
- Stitch a simple 2-color geometric pattern (provided or from Picken or Christensen) using your strongest stitch, focusing on even tension and clean edges
Next up: This stage equips you with the mechanical skills and vocabulary to execute needlepoint confidently, preparing you to tackle more complex stitches, color theory, and design principles in the next stage.

A classic, approachable primer that introduces the complete beginner to materials, tools, and the most essential stitches — the perfect starting vocabulary before anything else.
The single most comprehensive reference for beginners and beyond; its encyclopedic coverage of stitches, canvas types, and thread choices makes it the essential companion to build on throughout the entire curriculum.
Building the Stitch Library
BeginnerExpand beyond tent stitches into a broad repertoire of decorative, textural, and specialty stitches, and learn how to choose the right stitch for a given area of a canvas.
▸ Study plan for this stage
Pace: 4–5 weeks, ~20–25 pages/day, with 2–3 practice sessions per week
- The anatomy and mechanics of basic decorative stitches (cross, long, Gobelin, Bargello, and their variations)
- How stitch direction, tension, and canvas count affect the visual appearance and texture of finished work
- Stitch selection criteria: matching stitch type to design intent (shading, texture, directional emphasis, background fill)
- The relationship between stitch size, canvas mesh, and overall design proportion and balance
- Specialty stitches and their functional and aesthetic purposes (beading, metallic thread applications, raised effects)
- Color and stitch interaction: how different stitches showcase or modify thread color and shading
- Practical problem-solving: adapting stitches for curved areas, corners, and irregular shapes on canvas
- What are the key differences between tent stitches and the major decorative stitch families (cross, long, Gobelin, Bargello), and when would you choose each?
- How do stitch direction and canvas count influence the final appearance of a needlepoint piece, and what adjustments might you make to achieve a desired effect?
- Given a specific area of a canvas design (e.g., a curved border, a large background, a focal point), how would you select and justify an appropriate stitch?
- What role does thread tension play in stitch definition and texture, and how can poor tension compromise a design?
- How do specialty stitches (beading, metallic, raised) differ in execution and application from standard stitches, and what design challenges do they solve?
- What is the relationship between stitch size, canvas mesh count, and overall design scale, and how do you maintain visual harmony across a piece?
- Create a stitch sampler on 10-mesh canvas featuring at least 8–10 different stitches from Rome's repertoire (tent, cross, long, Gobelin, Bargello, and variations), labeling each and noting the thread count and canvas interaction
- Work a small practice piece (4×4 inches) using a single decorative stitch throughout to understand how that stitch behaves at different scales and with different thread weights
- Analyze 3–4 finished needlepoint pieces (from Rome's examples or your own reference collection) and document which stitches were used, where, and why those choices likely enhanced the design
- Stitch the same small design area (e.g., a 2×2 inch square) using three different stitches and compare the visual and textural results; write a brief reflection on which stitch best serves the design intent
- Practice tension exercises: deliberately work rows of the same stitch with loose, medium, and tight tension to observe how tension affects stitch definition, coverage, and final appearance
- Design and execute a small canvas (6×6 inches or larger) that deliberately combines 3–4 different stitches in distinct areas, justifying each stitch choice based on design function (background, focal point, border, etc.)
Next up: Mastering a broad stitch library and the decision-making process for stitch selection prepares you to tackle more complex, multi-stitch designs and to develop your own design sense—moving from following patterns to confidently adapting and creating your own needlepoint compositions.

Bridges basic stitches and decorative canvas work by showing how combining stitch families creates texture and dimension — exactly the intuition needed before tackling thread and design.
Thread & Canvas Mastery
IntermediateDevelop a deep understanding of thread types (wool, silk, metallic, overdyed), canvas gauges, and how fiber choice fundamentally changes the look, texture, and durability of finished work.
▸ Study plan for this stage
Pace: 4–5 weeks, ~20–25 pages/day with weekly material review and fiber sampling
- Thread fiber composition and properties (wool, silk, metallic, overdyed) and how each affects stitch appearance and durability
- Canvas gauges (mono, penelope, interlock) and their relationship to thread weight and final texture
- Fiber-to-canvas matching: selecting appropriate thread types for specific canvas counts and desired visual effects
- How thread twist, ply, and construction influence stitch definition and color blending
- Texture and sheen variations created by different fiber types and their impact on design interpretation
- Durability and wear characteristics of various threads in high-traffic versus decorative pieces
- Overdyed threads: color variation, tonal effects, and how to work with unpredictable color shifts
- What are the key differences between wool, silk, metallic, and overdyed threads in terms of appearance, handling, and durability?
- How do canvas gauges (mono, penelope, interlock) affect your choice of thread type and weight?
- Why is matching fiber choice to canvas count critical, and what happens when they are mismatched?
- How do thread ply, twist, and construction influence the final look of a stitch?
- What visual and textural effects can you achieve by deliberately choosing specific fiber types for a design?
- How do you assess whether a thread is suitable for a high-wear area versus a purely decorative piece?
- What strategies does Jennifer Gray recommend for working successfully with overdyed threads?
- Create a fiber sample card: stitch identical motifs using wool, silk, metallic, and overdyed threads on the same canvas gauge; compare texture, sheen, and stitch definition side by side
- Canvas gauge comparison: work the same small design on mono, penelope, and interlock canvases using appropriately weighted threads; document how each combination affects the final appearance
- Thread weight matching exercise: select 3–4 different canvas gauges and identify the correct thread weights for each; justify your choices based on Gray's guidelines
- Overdyed thread study: work with 2–3 overdyed threads on a small sampler, noting color variation patterns and how to plan designs around unpredictable color shifts
- Durability test: research and document the wear characteristics of wool, silk, and metallic threads; identify which fibers Gray recommends for cushions, footstools, and wall pieces
- Fiber selection decision tree: for 3 different project briefs (e.g., a decorative wall hanging, a high-traffic cushion, a jewelry box lid), select and justify your thread fiber choices using Gray's framework
- Hands-on stitch comparison: work the same stitch (e.g., tent stitch, long stitch) in wool and silk on identical canvas; photograph and analyze how fiber choice changes the stitch's visual impact
Next up: This stage equips you with the technical knowledge to make intentional fiber and canvas decisions, preparing you to apply these skills in the next stage by designing and executing complete projects that leverage specific thread and canvas combinations for desired aesthetic and functional outcomes.
Focuses specifically on the relationship between canvas structure and stitch execution, giving the intermediate stitcher a technical foundation for making informed material decisions.
Design Thinking & Color
IntermediateLearn the principles of color theory, composition, and pattern as they apply specifically to needlepoint, and begin adapting or creating original designs rather than working only from printed canvases.
▸ Study plan for this stage
Pace: 4–5 weeks, approximately 25–30 pages per day, with 2–3 days per week reserved for design sketching and color exercises
- Color harmony and contrast in needlepoint (complementary, analogous, triadic schemes)
- Composition principles: balance, focal point, proportion, and rhythm applied to canvas design
- Pattern creation and repetition as structural elements in needlepoint
- Translating color theory from fiber and dye perspectives into stitch planning
- Design adaptation: modifying existing patterns and creating original designs from source material
- The relationship between yarn color, stitch texture, and visual impact on canvas
- Grid-based design thinking specific to canvas work constraints
- Color psychology and emotional resonance in needlepoint composition
- What are the three primary color harmony schemes (complementary, analogous, triadic), and how would you apply each to a needlepoint design?
- How do balance, focal point, and proportion function together in a successful needlepoint composition?
- What is the difference between adapting an existing printed design and creating an original design from scratch, and what additional planning steps does original design require?
- How does yarn color interact with stitch texture to create visual depth and emphasis in needlepoint?
- What role does pattern repetition play in creating unity and rhythm in a canvas work design?
- How can you use color psychology to evoke a specific mood or emotional response in a needlepoint piece?
- Create 3–4 small color swatches (4×4 inch canvas) exploring different color harmony schemes (one complementary, one analogous, one triadic) using actual needlepoint yarn
- Sketch 5 original design compositions on graph paper, each emphasizing a different principle (balance, focal point, rhythm, proportion, contrast)
- Adapt a simple printed needlepoint design by modifying its color palette using color theory principles; document your color choices and reasoning
- Collect 3–5 source images (photographs, textiles, artwork) and create a design grid-based sketch translating one into a needlepoint pattern
- Analyze 2–3 finished needlepoint pieces (from books, museums, or online) identifying their color scheme, compositional structure, and pattern logic in a written critique
- Design a small original needlepoint project (8×10 inches or smaller) incorporating at least two color harmony principles and a clear focal point, with a full color chart and stitch plan
Next up: This stage equips you with the conceptual and practical tools to design with intention, preparing you to move into technical execution—learning specific stitch techniques, yarn selection, and finishing methods that will bring your designed compositions to life on canvas.
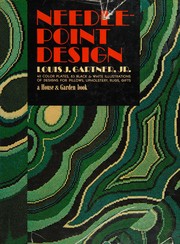
One of the most respected books on translating visual ideas into needlepoint canvases — it teaches the reader to think like a designer, covering proportion, motif, and layout.
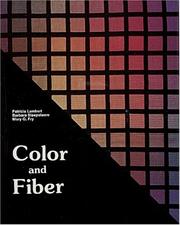
A rigorous, practical guide to color theory written specifically for fiber artists; reading it here gives the stitcher the language and tools to make intentional, beautiful color decisions in their own designs.
Discussion
Keep reading
Paths that share books, cover the same subject, or open a related topic.