The Best Amigurumi Books, in Order
This curriculum takes a complete beginner from their very first crochet stitch all the way to mastering advanced amigurumi shaping, expressive character design, and professional finishing. Each stage builds directly on the last — starting with crochet fundamentals, moving into classic amigurumi construction, then refining artistry and tackling complex plush forms.
Crochet Foundations
BeginnerLearn essential crochet stitches, tension control, working in the round, and reading patterns — the non-negotiable groundwork before any amigurumi project.
▸ Study plan for this stage
Pace: 4–5 weeks, ~20–30 pages/day with frequent hands-on practice breaks
- Holding the hook and yarn correctly for consistent tension and control
- Master basic stitches: chain, single crochet, half double crochet, double crochet, and slip stitch
- Understanding stitch abbreviations and reading crochet pattern symbols and charts
- Working in the round using magic rings or chain rings to create circular foundations
- Tension control and how it affects finished piece dimensions and appearance
- Increasing and decreasing stitches to shape amigurumi pieces
- Following written patterns step-by-step and troubleshooting common mistakes
- What are the correct hand positions for holding the hook and managing yarn tension, and why does this matter for consistent stitches?
- Can you identify and execute the five fundamental crochet stitches (chain, single crochet, half double crochet, double crochet, slip stitch) with even tension?
- How do you read and interpret crochet pattern abbreviations, symbols, and charts from 'Teach Yourself Visually Crocheting'?
- What is the difference between working in rows versus working in the round, and when would you use each method?
- How do increases and decreases work, and how do they shape a piece?
- What does 'tension' mean in crochet, and how do you adjust your tension if your stitches are too loose or too tight?
- Practice holding the hook and yarn with both pencil and knife grips until one feels natural; crochet 10 practice chains focusing on even tension
- Create a tension swatch (4×4 inches) in single crochet, measure it, and note your stitch count per inch for future reference
- Crochet a small swatch (6×6 inches) practicing each of the five basic stitches in separate rows; label each row
- Work a simple granny square or dishcloth pattern from the book to practice reading written instructions and abbreviations
- Practice the magic ring or chain ring method by creating 5 circular foundations of different sizes
- Crochet a simple tube or cylinder working in the round for 20–30 rows to build consistency and comfort with circular work
- Complete a small practice project (e.g., a simple hat or small drawstring bag) that combines stitches, tension control, and pattern reading
Next up: This stage equips you with the precise stitch execution, pattern literacy, and circular-working skills that are the absolute prerequisites for amigurumi—allowing you to move into shaping techniques, stuffing, and assembling three-dimensional plush toys with confidence.
A highly visual, step-by-step introduction to every foundational crochet stitch and technique. Starting here ensures you can confidently hold a hook, read a pattern, and work in the round before touching an amigurumi project.
Classic Amigurumi — First Figures
BeginnerUnderstand the core amigurumi construction method: magic ring, increases/decreases for spheres and ovals, safety eyes, wire armatures, and basic assembly.
▸ Study plan for this stage
Pace: 4–5 weeks, ~20–25 pages/day with pattern practice breaks. Allocate 2–3 weeks for "Amigurumi World" (foundational techniques), then 1.5–2 weeks for "Amigurumi two!" (refinement and assembly). Build in 2–3 practice days per week for hands-on work.
- Magic ring technique and its advantages over traditional chain-based foundations
- Increasing and decreasing stitches to create spheres, ovals, and dimensional shapes
- Proper tension and stitch consistency for seamless amigurumi construction
- Safety eye insertion, placement, and securing methods for secure attachment
- Wire armature selection, insertion, and positioning for poseable limbs and bodies
- Stuffing techniques and density control for proper shape and structure
- Basic assembly methods: seaming, ladder stitch, and connecting body parts
- Reading and interpreting amigurumi patterns from both books
- What is the magic ring, why is it preferred in amigurumi, and how do you execute it correctly?
- How do you increase and decrease stitches to shape a sphere, and what is the difference between shaping an oval versus a round ball?
- What are the steps for safely inserting and securing safety eyes, and where should they be positioned on a face?
- When and how do you insert wire armatures, and what types of wire are suitable for different amigurumi projects?
- What is the ladder stitch, and how is it used to close seams and assemble body parts invisibly?
- How do you maintain consistent tension and stitch quality throughout a project, and why does this matter for the final appearance?
- Practice the magic ring 10–15 times until you can execute it smoothly and consistently without unraveling
- Crochet a simple sphere using the increase/decrease patterns from 'Amigurumi World', focusing on even shaping and proper tension
- Create an oval or egg shape using the techniques in the books, practicing how increases and decreases differ from sphere construction
- Make a small practice head (2–3 inches), insert safety eyes at the correct depth and angle, and practice securing them firmly
- Crochet a simple limb or appendage, insert a wire armature, and practice bending and posing it to test stability
- Complete one full small project from 'Amigurumi World' (e.g., a basic ball, simple animal head, or beginner figure) using all techniques learned
- Assemble a multi-part amigurumi using the ladder stitch and seaming methods from both books, ensuring invisible joins
- Crochet a second small figure from 'Amigurumi two!' to practice refinement and apply assembly skills to a slightly more complex design
Next up: Mastery of these foundational techniques—magic ring, shaping, safety features, and assembly—provides the technical foundation needed to tackle more complex amigurumi designs with multiple body parts, varied textures, and advanced embellishment methods in the next stage.
The most widely recommended entry point into amigurumi specifically — Rimoli's patterns are simple, charming, and methodically teach the magic ring, shaping rounds, and limb attachment. A true beginner's first amigurumi book.

A direct sequel that introduces slightly more varied body shapes and color-change techniques while keeping patterns approachable. Reading it immediately after the first book builds fluency before moving to other authors.
Hoshi's Japanese-style patterns introduce a different aesthetic and more precise shaping logic, expanding your pattern-reading vocabulary and exposing you to the kawaii design tradition that defines much of the genre.
Shaping, Color & Character
IntermediateMove beyond basic spheres to sculpted bodies, expressive faces, colorwork, and the design decisions that give amigurumi distinct personality and polish.
▸ Study plan for this stage
Pace: 4–5 weeks, ~25–30 pages/day with pattern practice interspersed
- Sculpting amigurumi bodies through strategic increases, decreases, and stitch placement to create distinct proportions and silhouettes
- Creating expressive faces using embroidery techniques, bead placement, and strategic color choices to convey emotion and personality
- Colorwork methods (stripes, color changes, variegation) to enhance visual interest and character definition in plush toys
- Design principles for 'creepy cute' aesthetic: balancing unsettling and endearing elements through shape, expression, and color
- Modular construction and assembly techniques to combine shaped pieces into cohesive characters
- Yarn selection and texture variation to enhance character personality and tactile appeal
- Pattern reading and modification skills to adapt existing designs for custom proportions and features
- How do you use increases and decreases strategically to create non-spherical body shapes (e.g., pear-shaped bodies, elongated limbs, exaggerated heads)?
- What embroidery and bead-placement techniques does Haden use to create expressive, character-defining faces, and how do these choices affect perceived emotion?
- How can colorwork (stripes, color blocking, variegation) be used to enhance a character's personality and visual hierarchy?
- What defines the 'creepy cute' aesthetic, and how do shape, facial expression, and color work together to achieve it?
- How do you plan and execute the assembly of multiple shaped pieces to create a balanced, proportional finished character?
- What role does yarn texture and fiber choice play in communicating character personality?
- Work through 2–3 complete character patterns from 'Creepy Cute Crochet,' paying close attention to how body shaping differs from basic sphere patterns
- Create a custom face for one of Haden's characters using only embroidery (no beads), experimenting with stitch type, thread color, and placement to convey different emotions
- Design and crochet a simple character (head + body) using at least two different yarn colors or a colorwork technique; document how the color choices affect the character's perceived personality
- Modify one existing pattern from the book by changing proportions (e.g., making the head larger, limbs longer) and note how these changes affect the character's overall expression and appeal
- Practice the specific assembly and finishing techniques shown in Haden's patterns, including seaming, stuffing strategies, and securing embellishments
- Create a mood board or sketch showing how you would adapt one of Haden's character designs using a different color palette, and then execute the crochet version
Next up: This stage equips you with the sculpting, expression, and design vocabulary to move into advanced character development—whether that's creating original character designs, tackling complex multi-piece constructions, or exploring specialized techniques like amigurumi clothing and accessories.
Haden's patterns push shaping into non-spherical, asymmetrical forms and introduce more complex color placement and embroidery for facial expression — a pivotal step toward character-driven design.
Focuses on realistic animal anatomy translated into crochet, teaching how to plan proportions, add surface texture, and use color strategically to suggest fur, feathers, and markings.
Advanced Amigurumi & Plush Mastery
ExpertDesign original characters from scratch, master complex multi-part assembly, professional finishing, and understand the underlying geometry of amigurumi shaping well enough to create your own patterns.
▸ Study plan for this stage
Pace: 6–8 weeks, ~25–30 pages/day with project work interspersed. Allocate 3 weeks for "Amigurumi Knits," 2–3 weeks for "The Complete Idiot's Guide to Amigurumi," and 1–2 weeks for original design projects and refinement.
- Geometric principles underlying amigurumi shaping: how increases, decreases, and stitch placement control 3D form and proportion
- Multi-part assembly techniques: joining limbs, heads, and bodies seamlessly with invisible seams and structural integrity
- Pattern deconstruction and reverse-engineering: reading complex patterns to understand designer intent and adapt them for original work
- Professional finishing methods: blocking, seaming, stuffing density control, and embellishment placement for polished results
- Character design fundamentals: proportion, balance, and personality expression through shape, color, and feature placement
- Advanced shaping techniques from both books: working with different yarn weights, tension control, and specialty stitches for texture and dimension
- Creating original patterns: translating sketches and design concepts into written instructions with clear abbreviations and stitch counts
- Troubleshooting complex projects: identifying and correcting assembly errors, tension issues, and structural problems in multi-part pieces
- How do strategic increases and decreases in specific rows create the illusion of facial features or body contours in amigurumi?
- What are the key differences between joining methods (ladder stitch, mattress stitch, whip stitch) and when is each most appropriate for different amigurumi components?
- How can you reverse-engineer an existing amigurumi pattern to understand the designer's geometric choices and adapt it for your own original character?
- What role does yarn weight, tension, and stitch choice play in achieving professional-looking finished pieces, and how do you adjust patterns accordingly?
- How do you translate a character sketch or concept into proportional amigurumi dimensions and stitch counts for a cohesive original design?
- What are the common assembly and structural problems in complex multi-part amigurumi, and how do you prevent or fix them?
- Work through at least 2–3 complete projects from 'Amigurumi Knits,' paying close attention to how increases/decreases shape each piece; document the geometric logic in a design journal.
- Deconstruct one finished amigurumi from 'Amigurumi Knits' by carefully unraveling or analyzing its structure; sketch the component pieces and reverse-engineer a written pattern.
- Practice all major joining techniques (ladder stitch, mattress stitch, whip stitch) on scrap yarn samples; test each on different yarn weights and document which produces the cleanest seams.
- Create a character design from scratch: sketch a simple character, calculate proportions, write out a full original pattern for one component (e.g., head or body), and knit it to test accuracy.
- Complete at least one complex multi-part project from 'The Complete Idiot's Guide to Amigurumi' with deliberate attention to assembly order, stuffing density, and seam placement; photograph and critique your work.
- Design and execute an original amigurumi character (head, body, limbs, accessories) using techniques from both books; document your pattern, process notes, and final piece for a portfolio.
Next up: Mastery of original pattern creation and geometric understanding positions you to teach amigurumi, develop commercial patterns, or explore advanced specializations like miniature amigurumi, anatomically complex creatures, or hybrid fiber art techniques.
Though knit-focused, Singh's deep treatment of 3-D toy geometry, armature, and pattern drafting logic is directly transferable to crochet and is widely cited by advanced amigurumi designers as a key reference for understanding structure.
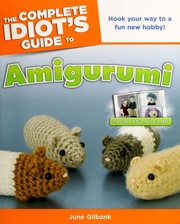
Gilbank — founder of PlanetJune — is one of the foremost authorities on realistic amigurumi design. This book consolidates her expertise on custom shaping, color theory for toys, and the full workflow for designing original patterns, making it the ideal capstone.
Discussion
Keep reading
Paths that share books, cover the same subject, or open a related topic.