Best Books on House Framing, in Reading Order
This curriculum takes an intermediate learner from confident planning and layout through the full technical mastery of wood-frame construction — walls, floors, roofs, rafters, trusses, and the building codes that govern every cut and connection. Each stage builds directly on the last: you must be able to read a plan and think in lumber before you can frame a wall, and you must understand wall and floor systems before roof geometry and engineered assemblies make sense.
Plans, Layout & The Framer's Mindset
IntermediateRead and interpret residential construction drawings, understand dimensional lumber, layout conventions, and how a framing sequence is organized before a single board is cut.
▸ Study plan for this stage
Pace: 4–5 weeks, ~40–50 pages/day, focusing on chapters covering drawing interpretation, lumber grading, layout tools, and framing sequence
- Reading and interpreting residential construction drawings (blueprints, elevations, sections, details)
- Dimensional lumber sizing, grading, and species selection for framing applications
- Layout conventions: story poles, chalk lines, measuring systems, and reference points
- Framing sequence: the logical order of operations from foundation to roof
- The framer's mindset: how to plan work before cutting, anticipate problems, and work efficiently
- Common framing symbols and notations on construction documents
- Relationship between design intent (drawings) and physical execution (framing)
- How do you read and extract framing information from a set of residential construction drawings?
- What are the key differences between lumber grades and species, and how do these affect framing decisions?
- What is a story pole, and how is it used to establish layout and ensure accuracy across a framing project?
- Describe the typical sequence of framing operations from foundation to roof—why does order matter?
- What information should you gather and plan before making your first cut on a framing project?
- How do standard framing symbols and notations on drawings translate into actual construction decisions?
- Obtain a set of residential construction drawings (or use an example from Vogt's book) and create a written summary of all framing-related information: wall heights, lumber sizes, spacing, connections, and special details
- Build a story pole for a sample wall section using a straight 1×2 or 1×4, marking all key heights (floor, top plate, window sills, headers, roof line) and verify it against the drawings
- Visit a lumber yard or review lumber grading charts; select appropriate lumber species and grades for three different framing scenarios (load-bearing wall, non-load-bearing partition, roof rafter)
- Sketch a simple framing sequence diagram for a single-story house: number and label each major step from foundation layout through roof sheathing, explaining why each step must precede the next
- Measure and layout a small wall section (4–6 feet) on the floor or on a bench using chalk lines and a tape measure, practicing the conventions and precision standards described in Vogt
- Create a one-page 'pre-framing checklist' based on Vogt's guidance: what must you know, verify, and prepare before cutting studs and raising the first wall?
Next up: This stage equips you with the mental framework and technical literacy to understand *what* needs to be built and *why*; the next stage will teach you *how* to execute specific framing techniques (wall assembly, window and door openings, roof framing) with precision and efficiency.
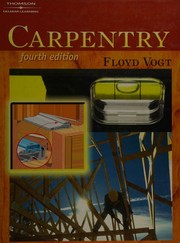
A widely adopted trade-school text that covers lumber grading, layout tools, measurement, and the overall sequence of residential construction. Provides the foundational framing vocabulary needed for the more specialized books ahead.
Walls & Floors — Platform Framing in Practice
IntermediateUnderstand and execute platform-frame wall and floor systems: sill plates, headers, jack and king studs, floor joists, subfloor layout, and load-path logic.
▸ Study plan for this stage
Pace: 4–5 weeks, ~25–30 pages/day, with 2–3 days per week dedicated to hands-on practice and site observation
- Platform framing as a modular, floor-by-floor construction method and its advantages over balloon framing
- Sill plates: installation, leveling, fastening to foundation, and moisture barriers
- Floor joists: sizing, spacing, bearing, rim joists, and blocking for lateral stability
- Subfloor systems: material selection, fastening patterns, and role in shear diaphragm strength
- Wall framing anatomy: top plates, bottom plates, studs, headers, king studs, and jack studs in load paths
- Header sizing and selection based on span and load, and proper support with king and jack studs
- Load paths: how forces transfer from roof through walls to foundation, and why each component matters
- Practical sequencing: the order and logic of assembling floors, walls, and connections on site
- What is platform framing, and what are its key structural and practical advantages over balloon framing?
- How do you properly install and fasten a sill plate, and what role does it play in the load path?
- What factors determine floor joist size and spacing, and how do rim joists and blocking contribute to floor stiffness?
- How does subfloor fastening pattern affect the floor's ability to act as a shear diaphragm?
- What is the function of headers, king studs, and jack studs in a wall frame, and how do you size a header for a given opening?
- How does a load path work in a platform-framed house, and how would you trace a load from the roof to the foundation?
- What are the critical connection points in platform framing, and why is fastening detail important at each?
- In what order would you build a platform-framed floor and wall system on site, and why does sequence matter?
- Study the sill plate section and inspect a real foundation and sill plate installation on a house under construction or renovation; photograph and annotate the moisture barrier, fastening, and leveling details
- Calculate floor joist size and spacing for a 16-foot span with 40 psf live load using span tables from the book; then verify your answer against a second source or ask a framing contractor to review
- Lay out and cut a sample header (using scrap lumber) for a 4-foot window opening in a 2×6 wall; identify the king studs and jack studs, and practice the assembly sequence
- Sketch a complete load path from a roof rafter, through the top plate, down a stud, through the sill plate, and into the foundation; label every component and connection
- Observe or assist with floor framing on an active job site: watch how joists are set, rim joists installed, and subfloor fastened; take notes on sequencing and fastening details
- Create a detailed framing plan (to scale) for a simple rectangular room (12×16 feet) showing sill plates, floor joists, rim joists, wall bottom plates, studs, a window opening with header, and all critical fastening points
- Build a small-scale (1:12 or 1:10) physical model of a platform-framed wall section (2–3 feet tall) with a window opening, using actual lumber or wood strips, to understand assembly sequence and load transfer
- Interview a framing contractor or carpenter about their process for checking floor level, installing headers, and ensuring walls are plumb; ask specifically about common mistakes and how they avoid them
Next up: This stage equips you with the structural logic and practical skills to build a complete floor and wall system; the next stage will build on this foundation by introducing roof framing, which sits atop these walls and transfers its loads through the same load paths you've now mastered.

A curated collection of field-tested Fine Homebuilding articles covering platform framing from the slab up. Read first in this stage because it gives real-job context and problem-solving intuition before the denser technical texts.
Roof Framing — Geometry, Rafters & Trusses
IntermediateCalculate and cut common, hip, valley, and jack rafters; lay out a roof from a plan; understand engineered roof trusses and when each system is appropriate.
▸ Study plan for this stage
Pace: 6–8 weeks, ~25–30 pages/day, with 2–3 days per week dedicated to hands-on layout and cutting practice
- Roof pitch, slope ratios, and rise-over-run calculations as the foundation for all rafter geometry
- Common rafter layout, cutting, and installation—the baseline system from which all other rafter types derive
- Hip and valley rafter geometry: longer spans, different angles, and how to calculate their lengths and angles using the Pythagorean theorem and rafter tables
- Jack rafters: how they fit between common, hip, and valley rafters, and their proportional length calculations
- Engineered roof trusses: design principles, load paths, and when to use trusses versus site-built framing
- Reading and interpreting roof plans: understanding roof lines, valleys, hips, and translating 2D drawings into 3D framing
- Practical layout techniques: using speed squares, rafter tables, and geometric methods to mark cut angles accurately
- Material selection and spacing: rafter sizing, spacing standards, and structural requirements for different roof systems
- How do you calculate the length of a common rafter given the roof pitch and the horizontal run, and what tools or tables can you use?
- What is the relationship between hip/valley rafter length and common rafter length, and how does the Pythagorean theorem apply?
- How do jack rafters differ in length and angle from common rafters, and how do you proportion their lengths?
- When is it appropriate to use engineered trusses versus site-built rafter systems, and what are the structural and economic trade-offs?
- How do you read a roof plan to identify all roof lines, valleys, hips, and ridges, and what does this tell you about the framing layout?
- What are the key angles and cuts you need to mark on a rafter (bird's mouth, ridge cut, tail cut), and how do you lay them out accurately?
- Work through 5–10 rafter length calculations using both rafter tables and the Pythagorean theorem for common rafters at different pitches (4:12, 6:12, 8:12, 10:12, 12:12)
- Lay out and cut a common rafter from a plan, marking the ridge cut, bird's mouth, and tail cut using a speed square; install it on a test frame or full-scale model
- Calculate hip and valley rafter lengths for a simple gable-with-hip roof; compare your results to rafter tables and verify using geometry
- Lay out and cut a hip rafter and at least two jack rafters for a hip roof section; fit them together to verify angles and spacing
- Study and annotate 3–4 roof plans from the books or real projects, identifying all common, hip, valley, and jack rafters; sketch the 3D framing layout
- Build a small-scale (1:4 or 1:8) roof model showing common, hip, valley, and jack rafters to reinforce spatial relationships and angles
Next up: This stage equips you with the geometric reasoning and practical layout skills needed to frame any roof configuration by hand, setting the stage for the next level where you'll tackle advanced topics like roof sheathing, ventilation, and integration with wall and floor systems.
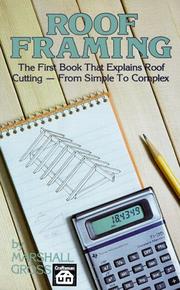
The most widely recommended single-subject roof-framing book in the trade. Starts with rafter theory and the rafter square, then builds systematically through hip, valley, and irregular roofs — read it before the more advanced geometry texts.
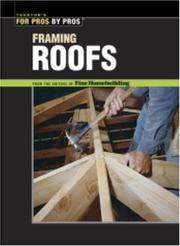
Bridges theory and field practice with illustrated case studies of complex roof intersections, dormers, and truss installations — best read after the two rafter-math books to see the concepts applied on actual jobs.
Code, Engineering & Structural Principles
ExpertUnderstand the IRC structural provisions that govern wood-frame construction: span tables, header sizing, shear walls, hold-downs, and load calculations — so every framing decision is both correct and code-compliant.
▸ Study plan for this stage
Pace: 12–14 weeks, ~40–50 pages/day (including code tables and worked examples). Allocate 4 weeks to IRC Chapters 3–6, 6 weeks to Wood Frame Construction Manual (Volumes 1–2), and 2–3 weeks to Holden's structural design applications and integration.
- IRC load classifications and design loads (dead, live, snow, wind) and how they drive member sizing decisions
- Span tables from the IRC and Wood Frame Manual: reading, interpolating, and applying them to floor joists, ceiling joists, and rafters
- Header sizing principles: tributary load calculation, beam theory, and IRC Table R502.5 and equivalent provisions in the Wood Frame Manual
- Shear wall design: identifying shear walls, calculating shear forces, and applying IRC provisions for bracing and hold-down requirements
- Hold-down and anchor bolt specifications: understanding tension and compression forces, selecting hardware, and IRC Table R602.3(1) requirements
- Load paths: tracing gravity and lateral loads from roof through foundation, ensuring continuity and proper transfer at each connection
- Wood properties and grade stamps: species, grade, moisture content, and how they affect allowable stresses and design values
- Deflection and serviceability limits: L/240, L/180 criteria and when they govern design over strength
- How do you determine the required live load and snow load for a specific residential project, and how do these loads affect joist and rafter sizing?
- Walk through the process of selecting a floor joist size and spacing using IRC span tables: what inputs do you need, and how do you read the table correctly?
- Calculate the tributary load on a header supporting a 16-foot-wide opening in a two-story house, and size the header using the Wood Frame Manual design process.
- Identify shear walls in a simple floor plan, calculate the total shear force at the base, and specify hold-downs and anchor bolts per IRC requirements.
- Explain the complete load path for a roof rafter in a house with a cathedral ceiling: from the rafter tie to the foundation.
- What is the difference between allowable stress design (ASD) and load and resistance factor design (LRFD), and which method does the IRC primarily use for residential wood framing?
- Using the IRC span tables, size floor joists for a 16-foot span with 40 psf live load and 10 psf dead load; compare results for 2×8, 2×10, and 2×12 lumber at 16-inch and 24-inch spacing.
- Calculate the tributary load on a header for a 12-foot-wide opening in a single-story house with a roof load of 25 psf (dead + snow); then size the header using the Wood Frame Manual and verify it meets deflection limits.
- Create a simple floor plan (sketch or CAD), identify all shear walls, calculate the base shear force assuming a seismic coefficient, and specify hold-downs and anchor bolts at each corner.
- Trace the load path for a roof rafter from the ridge to the foundation in a two-story house with a second-floor ceiling; identify each connection and verify it can carry the load.
- Compare two header designs (e.g., 2×12 solid vs. built-up beam) using the Wood Frame Manual; calculate cost, deflection, and ease of installation for each.
- Review a set of framing plans from a real residential project (or provided case study); identify code violations or design errors related to span, header sizing, or shear wall bracing, and propose corrections.
Next up: This stage equips you with the code-based structural knowledge and calculation methods needed to move into the next stage, where you will apply these principles to real-world design scenarios, coordinate with other trades, and optimize framing for cost, constructability, and performance.

The primary legal and technical reference for residential framing in the United States. Read it at this stage — after you understand what you are framing — so the span tables, wall-bracing sections, and connection requirements are immediately meaningful.

The engineering companion to the IRC, published by the American Wood Council. Provides the structural design methodology, load-path diagrams, and connection details that explain why the code says what it says.

Introduces structural load concepts — dead load, live load, lateral forces — in an accessible way that demystifies the engineering logic behind code requirements, making the IRC and AWC manual far easier to apply correctly.
Discussion
Keep reading
Paths that share books, cover the same subject, or open a related topic.