Flooring installation guide: top books to lay floors like a pro
This curriculum takes a complete beginner from zero flooring knowledge to confident DIY installer across all major floor types. The three stages build deliberately: first establishing tool literacy and home repair fundamentals, then diving into subfloor prep and type-specific installation techniques, and finally tackling finishing, troubleshooting, and professional-level refinement so the learner can handle real-world challenges on any floor surface.
Foundations: Tools, Materials & the DIY Mindset
BeginnerUnderstand basic hand and power tools, read a room layout, interpret product specs, and build the safety and planning habits every flooring project demands before a single plank is touched.
▸ Study plan for this stage
Pace: 4–5 weeks, ~20–25 pages/day, focusing on tool identification, safety protocols, and materials sections before moving to room assessment chapters
- Hand tool selection and proper grip/stance for flooring work (hammers, chisels, pry bars, measuring tools)
- Power tool safety, operation, and maintenance (circular saws, nail guns, sanders, drills)
- Reading and interpreting product specification sheets (thickness, moisture content, expansion rates, wear ratings)
- Room measurement, layout sketching, and subfloor assessment techniques
- Personal protective equipment (PPE) requirements and when to use each type
- Material properties and how environmental factors (humidity, temperature) affect flooring installation
- Pre-installation planning: site preparation, material acclimation, and contingency budgeting
- Safety-first mindset: hazard identification and risk mitigation before starting any project
- What are the three most critical safety rules when using power tools, and why does each matter for flooring work?
- How do you measure a room accurately for flooring, and what common mistakes should you avoid?
- What information should you extract from a flooring product specification sheet, and how does it affect your installation plan?
- Describe the proper technique for using a hand tool (hammer, pry bar, or chisel) safely and effectively.
- What environmental conditions must you check before beginning a flooring project, and why do they matter?
- How should you prepare a room and subfloor before installation, and what signs indicate a problem that needs fixing first?
- Create a personal tool kit checklist based on the book's recommendations; photograph or list each tool with its primary flooring use
- Practice measuring a room (bedroom, kitchen, or living space) using the book's techniques; sketch the layout to scale on graph paper
- Collect 3–4 real flooring product spec sheets (online or from a store); annotate each with key installation requirements and environmental limits
- Perform a mock subfloor inspection of a room in your home using the book's assessment criteria; document findings and note any red flags
- Set up a safe work station in your space; arrange tools, PPE, and materials following the book's safety layout principles
- Read and summarize one complete tool or materials chapter; create a one-page reference guide for quick on-site consultation
Next up: This foundation in tools, materials literacy, and safety planning equips you to confidently move into the next stage—actually selecting and preparing specific flooring types—because you'll recognize what each tool does, understand product requirements, and have internalized the planning habits that prevent costly mistakes.

A broad, heavily illustrated primer that introduces the vocabulary of home improvement — measuring, leveling, fastening, and material types — giving beginners the shared language every later flooring book assumes.
Core Skills: Subfloor Prep & Layout
BeginnerAssess and repair a subfloor, establish a square and level working surface, plan room layout and expansion gaps, and understand moisture barriers — the critical groundwork before any finish floor goes down.
▸ Study plan for this stage
Pace: 4–5 weeks, ~25–30 pages/day (alternating between both books; prioritize Litchfield's renovation fundamentals first, then Black & Decker's detailed technical guidance)
- Subfloor assessment: identifying damage, rot, squeaks, and structural integrity issues using visual inspection and simple testing methods
- Subfloor repair techniques: sistering joists, replacing damaged sections, securing loose boards, and when to call a structural engineer
- Establishing square and level: using chalk lines, laser levels, and straightedges to create a true working surface and detect high/low spots
- Moisture barriers and vapor retarders: understanding when and where to install them, material types, and how they prevent cupping and mold
- Room layout and expansion planning: measuring, marking reference lines, calculating expansion gaps for different flooring types, and accounting for doorways and transitions
- Substrate preparation standards: sanding, cleaning, and conditioning the subfloor to meet manufacturer specifications for the finish floor
- Moisture testing and remediation: using moisture meters, identifying sources of excess moisture, and applying appropriate solutions before installation
- How do you assess whether a subfloor is structurally sound, and what are the signs that repair or replacement is necessary?
- What is the difference between a vapor retarder and a moisture barrier, and when should each be installed according to your flooring type?
- How do you establish a square layout in a room, and why is accounting for expansion gaps critical before laying any flooring?
- What steps must you take to prepare a subfloor to meet manufacturer specifications, and how do moisture levels affect this process?
- When is sistering joists an appropriate repair, and what are the limitations of DIY subfloor fixes versus professional structural work?
- How do you use a moisture meter, and what moisture content levels indicate that a subfloor is ready for flooring installation?
- Inspect and document the condition of an actual subfloor (or practice space): photograph damage, measure deflection with a straightedge, note squeaks and soft spots, and write a brief assessment report
- Practice establishing square using the 3-4-5 triangle method with chalk lines in a room; verify with a laser level and document the reference lines you create
- Measure and calculate expansion gaps for a sample room layout, accounting for different flooring materials (wood, laminate, tile) and doorway transitions
- Conduct a moisture test on a subfloor sample using a moisture meter; record readings at multiple points and compare against manufacturer thresholds from the Black & Decker guide
- Create a scaled floor plan sketch showing reference lines, expansion gaps, and any subfloor repairs needed; annotate with moisture barrier placement
- Practice identifying and marking high and low spots on a subfloor using a 6–8 foot straightedge; plan how you would level or sand these areas
Next up: Mastering subfloor assessment, repair, and layout establishes the stable, moisture-controlled foundation that allows you to move confidently into material-specific installation techniques—whether you're laying hardwood, tile, laminate, or other finish floors.

The definitive whole-house renovation manual; its subfloor, underlayment, and structural framing chapters give deep context for why proper prep matters and how floors relate to the rest of a home's structure.

Transitions directly from prep into installation with step-by-step photo sequences for subfloor repair, layout planning, and expansion-gap calculation — the ideal bridge from theory to hands-on technique.
Type-by-Type Installation: Hardwood, Laminate, Tile & Vinyl
BeginnerExecute a complete installation of each major floor type — hardwood, laminate, ceramic/porcelain tile, and luxury vinyl — including cutting, fastening or setting, grouting, and seaming.
▸ Study plan for this stage
Pace: 8–10 weeks, ~40–50 pages/day (mix of reading and hands-on practice). Weeks 1–3: "Hardwood Floors"; Weeks 4–6: "Tile Your World"; Weeks 7–10: "The Complete Guide to Ceramic & Stone Tile" with concurrent installation projects.
- Hardwood floor preparation: subfloor assessment, moisture testing, acclimation, and layout planning for grain direction and seams
- Hardwood fastening methods: nailing, stapling, and gluing techniques; when to use each based on subfloor type and wood species
- Tile substrate requirements: cement board vs. drywall, waterproofing membranes, and slope/levelness standards for wet areas
- Tile cutting and shaping: wet saw operation, angle cuts, notches, and managing waste for ceramic and stone materials
- Mortar and grout selection: thinset vs. mastic, grout types (sanded/unsanded), mixing ratios, and application techniques
- Setting tile: trowel angle and pressure, spacing consistency, lippage prevention, and curing times before grouting
- Grout finishing: joint width, tooling profiles, cleanup timing, and sealing for different grout types and tile applications
- Seaming and transitions: managing expansion joints, thresholds, and transitions between different floor types
- What are the critical moisture and acclimation requirements for hardwood installation, and how do you test a subfloor before laying hardwood?
- When would you choose nailing over stapling for hardwood, and what fastening patterns does Bollinger recommend for different subfloor types?
- What substrate preparation steps must be completed before tile installation, and why is waterproofing essential in wet areas?
- How do you select the correct trowel size and angle for your tile dimensions, and what is the proper technique for achieving full mortar coverage?
- What is the difference between sanded and unsanded grout, and how do you determine which is appropriate for your joint width?
- How do you manage grout curing time, and what are the key steps in tooling and cleaning grout joints to achieve a professional finish?
- What expansion joint requirements apply to large tile installations, and how do you transition between hardwood and tile floors?
- Install a 50–100 sq ft section of hardwood flooring on a prepared subfloor, practicing both nailing and stapling techniques; measure and document moisture levels before and after acclimation per Bollinger's protocols
- Conduct a full subfloor assessment on a test area: check levelness with a 10 ft straightedge, perform moisture testing, and prepare substrate (repair, prime, or install cement board) according to Bridge's specifications
- Cut and dry-lay a 20–30 sq ft tile pattern using a wet saw; practice crosscuts, angle cuts, and notches for obstacles; calculate and minimize waste
- Mix and apply mortar to a 15–20 sq ft test section using the correct trowel size and angle; pull back and inspect for full coverage; document curing time
- Grout a completed 15–20 sq ft tile section using both sanded and unsanded grout (if applicable); tool joints to a consistent profile and clean within the recommended window
- Install transition pieces and expansion joints between a hardwood section and an adjacent tile section; measure and document gaps and movement allowances
Next up: This stage equips you with hands-on mastery of the four major floor types in isolation; the next stage will integrate these skills into whole-home projects, teaching you how to plan multi-room installations, manage transitions and subfloor variations across an entire space, and troubleshoot real-world complications.
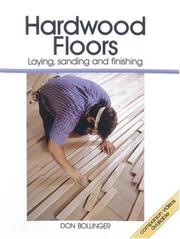
The most respected dedicated guide to solid and engineered hardwood; covers nail-down, glue-down, and floating methods in sequence so readers master the most demanding floor type first.
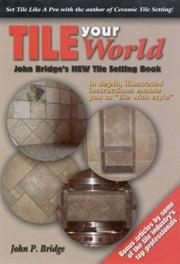
Written by the founder of the leading online tile community, this book demystifies thinset, backerboard, layout, cutting, and grouting for ceramic and porcelain tile in an approachable, beginner-friendly voice.

Pairs perfectly after Bridge's conceptual grounding, providing detailed photo-driven sequences for floor tile patterns, wet-saw technique, and grout finishing that reinforce and expand on what was just learned.
Focuses exclusively on floating laminate and luxury vinyl plank installation — click-lock systems, stair nosing, transitions, and trim — rounding out the learner's ability to handle every common residential floor type.
Finishing, Refinishing & Troubleshooting
IntermediateSand, stain, and apply finish coats to hardwood floors; repair damaged planks, tiles, and seams; and diagnose common failures like cupping, hollow spots, cracked grout, and lifting edges.
▸ Study plan for this stage
Pace: 6–8 weeks, ~40–50 pages/day, with 2–3 days per week dedicated to hands-on practice and troubleshooting exercises
- Surface preparation and sanding techniques: grits, equipment, grain direction, and dust control for hardwood floors
- Stain selection, application methods, and color matching to achieve consistent, professional results
- Finish coat systems: polyurethane, water-based, and oil-based finishes; application techniques and drying times
- Repair and replacement of damaged planks, tiles, and seams using proper tools and materials
- Diagnosis and remediation of common floor failures: cupping, crowning, hollow spots, cracked grout, and lifting edges
- Safety protocols and solo work practices when finishing floors without a team
- Quality control and inspection standards for professional-grade finishes
- What is the proper sanding sequence (grit progression) for preparing hardwood floors, and why does grain direction matter?
- How do you select and apply stain to achieve even color on hardwood, and what are common mistakes that cause blotching or uneven absorption?
- What are the key differences between polyurethane, water-based, and oil-based finishes, and when should each be used?
- What causes cupping and crowning in hardwood floors, and what repair or prevention strategies address each?
- How do you diagnose and repair hollow spots, cracked grout, and lifting edges in tile and hardwood installations?
- What safety precautions and solo work strategies are essential when finishing floors alone, and how do you maintain quality without a second set of hands?
- Sand a 4×4 ft test section of hardwood using the correct grit progression (80→120→150→180), checking for even grain exposure and dust removal at each stage
- Apply stain to three identical wood samples using different application methods (brush, rag, pad) and compare results for consistency and color matching
- Prepare and apply a full finish coat system (primer/sealer + 2–3 topcoats) to a test panel, measuring drying times and inspecting for drips, dust nibs, and adhesion
- Identify and repair a cupped or crowned board by measuring moisture content, assessing the cause, and executing a replacement or remediation strategy
- Diagnose a hollow spot or lifting edge in a sample floor section and document the root cause (substrate failure, moisture, adhesive breakdown) and repair method
- Practice troubleshooting cracked grout in a tile sample by removing damaged grout, cleaning the joint, and regrouting to professional standards
- Conduct a solo finishing project on a 10×10 ft floor section, managing dust control, workflow efficiency, and quality inspection without assistance
Next up: This stage equips you with the technical mastery to execute flawless finishes and diagnose real-world floor failures, preparing you to move into advanced topics such as specialty finishes, commercial-scale installations, or business management and customer relations in flooring contracting.
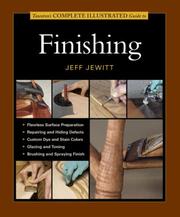
Though wood-finishing focused, its coverage of stains, sealers, and topcoat application translates directly to hardwood floor finishing and gives the learner a professional-level understanding of film-build and sheen.
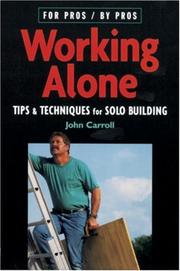
Addresses the practical reality of solo DIY work — staging materials, solo panel handling, and safe tool use without a helper — making it the ideal capstone for a learner ready to tackle a full floor project independently.
Discussion
Keep reading
Paths that share books, cover the same subject, or open a related topic.