Build custom shelves for your home
This curriculum takes a beginner from zero woodworking knowledge all the way to designing and building professional-grade built-in shelving. It starts by building essential hand-tool and shop skills, moves into furniture-grade joinery and casework construction, and finishes with the design principles and finishing techniques that make built-ins look truly custom and polished.
Foundations: Tools, Wood & First Cuts
BeginnerUnderstand wood as a material, set up a basic shop, use hand and power tools safely, and make accurate, repeatable cuts — the non-negotiable baseline for any shelving project.
▸ Study plan for this stage
Pace: 8–10 weeks total. Weeks 1–5: "The Complete Manual of Woodworking" (Jackson) — roughly 20–25 pages/day, 4–5 days/week, prioritizing the chapters on wood anatomy, hand tools, power tools, and joinery basics. Weeks 6–10: "The Anarchist's Tool Chest" (Schwarz) — roughly 15–20 pages/day, 4–5 days/week, r
- Wood anatomy & movement: how grain direction, growth rings, and moisture content cause wood to expand, contract, and warp — and why every shelving decision starts here (Jackson, Wood Section)
- Lumber types & selection: the practical differences between softwoods, hardwoods, and sheet goods (plywood, MDF, melamine) for shelving applications, as laid out in Jackson's materials chapters
- The essential hand-tool kit: saws (rip vs. cross-cut), chisels, planes, marking gauges, squares, and mallets — their anatomy, sharpening, and correct grip as covered in Jackson's hand-tool chapters
- Power-tool fundamentals: safe setup and operation of the circular saw, jigsaw, drill/driver, and router as Jackson presents them — understanding fences, guards, and feed direction before touching a switch
- Sharpening as a prerequisite: Schwarz's core argument in 'The Anarchist's Tool Chest' that a tool that is not sharp is not a tool — the geometry of a cutting edge, honing progressions, and strop use
- Tool selection philosophy: Schwarz's 'core four' categories (layout, cutting, shaping, joinery) and his case for buying fewer, better tools rather than accumulating cheap ones — directly applicable to building a shelving-focused shop
- Measuring, marking & layout accuracy: using a marking knife instead of a pencil, the 'knife wall' technique, and reading a combination square — the foundation of repeatable, tight-fitting shelf parts
- Safe, accurate straight cuts: setting up and using a straightedge guide or shooting board to produce square, tear-out-free crosscuts and rip cuts in both solid wood and sheet goods
- After reading Jackson's wood anatomy section, can you explain why a solid-wood shelf should be oriented with the growth rings in a specific direction, and what happens if it is not?
- Jackson covers both hand saws and circular saws for crosscutting. What are the trade-offs between the two for breaking down shelf boards, and when would you choose one over the other?
- Schwarz argues passionately against disposable or low-quality tools. Based on his reasoning in 'The Anarchist's Tool Chest,' what three criteria should you apply when deciding whether a tool belongs in your shop?
- Can you describe the complete sharpening sequence Schwarz recommends — from a dull or nicked edge through to a polished, shave-ready bevel — and explain why each step matters?
- Using concepts from both books, how would you prepare and verify a piece of rough-sawn lumber before making a single cut for a shelf project (flattening, squaring, checking moisture)?
- What does Jackson identify as the most common causes of inaccurate cuts, and how do the layout and marking techniques in both books directly address each cause?
- Wood identification walk: visit a lumber yard or home center with Jackson's wood-species reference pages bookmarked on your phone; handle at least five species, note grain, weight, and figure, and record which you'd choose for a painted shelf vs. a natural-finish shelf and why
- Sharpen every edge tool you own (or borrow one chisel and one plane iron) using Schwarz's honing progression from 'The Anarchist's Tool Chest' — coarse stone through strop — and do the 'end-grain shaving' test until you pass it
- Build a simple shooting board from scrap plywood following Jackson's joinery/jig guidance, then use it to crosscut 10 identical shelf blanks to the same length, measuring each with a combination square to confirm they are all square and within 1/32" of each other
- Rip a sheet of 3/4" plywood into shelf-width strips using a circular saw with a clamped straightedge guide (as Jackson describes), focusing on consistent feed rate, blade depth, and tear-out control on the good face
- Tool-chest audit (Schwarz exercise): list every tool you currently own, map each to Schwarz's four categories, identify the gaps, and write a prioritized acquisition list limited to tools directly needed for shelving — resist buying anything outside that list for the duration of this stage
- Wood-movement journal: mill or purchase two small boards of the same species, seal the ends of one and leave the other unsealed, weigh and measure both weekly for four weeks, and record dimensional changes — connecting the numbers back to Jackson's moisture-content and movement tables
Next up: ">Mastering wood behavior, tool control, and accurate cutting in this stage gives you the reliable, square parts and the confident hand-tool fluency that the next stage — joinery and case construction — demands, because no dado, rabbet, or shelf pin layout can compensate for parts that are already twisted, out of square, or rough-cut.

A comprehensive, heavily illustrated reference that introduces every major tool, joint, and material in plain language — ideal as a first book to build vocabulary and orient the beginner.

Teaches which tools actually matter and why, building confident, deliberate tool selection and use before the learner invests in a full shop — prevents costly beginner mistakes.
Core Skills: Joinery & Casework Basics
BeginnerMaster the fundamental joints (dado, rabbet, pocket screw, mortise-and-tenon) and understand how a basic box or cabinet carcass is assembled square and strong.
▸ Study plan for this stage
Pace: 3–4 weeks, ~20–25 pages/day; read each project chapter twice — once for the big picture, once to study the joinery details and cut lists closely
- The dado joint: cutting a channel across the grain to house shelves or dividers, and why it resists racking better than nails or screws alone
- The rabbet joint: an L-shaped recess cut along an edge or end, used in 'Box by Box' to capture back panels and create flush corners
- The pocket-screw joint: a fast, strong mechanical connection for face frames and carcass assembly, with proper jig setup and screw selection covered through the box projects
- Mortise-and-tenon fundamentals: the long-grain glue surface, the importance of a snug (not tight) fit, and how the joint transfers load
- Carcass assembly sequence: dry-fitting before glue-up, applying clamps in the correct order, and checking for square with a diagonal measurement
- Wood movement and grain direction: orienting parts so seasonal expansion does not blow apart a joint or buckle a panel
- Reading and building from a cut list: understanding part names, dimensions (thickness × width × length), and how every dimension in 'Box by Box' ties back to a specific joint
- Glue selection and open time: why PVA (yellow glue) is the default for most of these joints and when a longer open-time glue is needed for complex assemblies
- What is the difference between a dado and a rabbet, and which one would you use to capture a fixed shelf versus a back panel — and why?
- Walk through the assembly sequence for one of the boxes in 'Box by Box': what gets glued first, where are clamps placed, and how do you verify the carcass is square before the glue sets?
- How does grain direction affect the strength of a mortise-and-tenon joint, and what happens if the tenon grain runs perpendicular to the mortise walls?
- What pocket-screw length and thread type does the project call for when joining ¾-inch stock face-to-face versus edge-to-face, and why does it matter?
- If your diagonal measurements on a carcass differ by ⅛ inch, which direction do you move the clamps to correct it, and how do you prevent the fix from introducing a twist?
- Build the first (simplest) box in 'Box by Box' using only hand tools or a router for the dado and rabbet cuts — no table saw — to force a deep understanding of the joint geometry before relying on power-tool shortcuts
- After completing any box project, deliberately assemble it dry (no glue), measure diagonals, rack it by hand, and record how much movement each joint type allows; then glue it up and repeat the test to feel the difference rigidity makes
- Make a dedicated joint sample board: cut a dado, a rabbet, a pocket-screw joint, and a basic mortise-and-tenon in scrap ¾-inch plywood and solid wood, label each, and keep it as a tactile reference for the rest of the curriculum
- Re-create the cut list for one completed box project from scratch — measure your finished piece and work backward to write every part's T × W × L — then compare it to the book's cut list and investigate any discrepancies
- Practice a full glue-up under a time constraint: mix up a batch of yellow glue, assemble a box, check for square, and get all clamps on within the glue's open time; repeat until the process feels calm and controlled
- Sketch (by hand, no CAD) an exploded-view diagram of one box from the book, labeling every joint type at each connection point; use this as a self-quiz to confirm you can identify joinery from a drawing
Next up: Mastering how a simple box goes together square and strong — joint by joint, clamp by clamp — gives you the structural vocabulary and muscle memory needed to scale up confidently to full cabinet carcasses, face frames, and built-in shelving runs in the next stage.
Builds casework intuition by starting with small boxes that use the exact same joinery logic as full-size shelving units — low-stakes practice with high payoff.
Shelving & Cabinet Construction
IntermediateDesign and build freestanding and wall-mounted shelving units with proper load-bearing structure, adjustable shelf hardware, backs, and face frames.
▸ Study plan for this stage
Pace: 4–5 weeks, ~20–25 pages/day — read actively with a pencil, marking measurement techniques, layout strategies, and structural notes as you go; revisit diagrams before each shop session
- Precision measurement and marking: using rules, squares, marking gauges, and story sticks to transfer dimensions accurately before any cut is made
- The 'measure twice, cut once' philosophy: planning and verification workflows that eliminate costly errors in shelving and cabinet stock
- Understanding wood movement and how it affects shelf span, panel width, and joinery choices in freestanding and wall-mounted units
- Load-bearing structure: calculating shelf thickness, span limits, and the role of back panels and stretchers in preventing racking and sag
- Adjustable shelf hardware systems: pin holes, shelf standards, and dado-routed tracks — laying them out consistently and squarely
- Face frame construction: sizing stiles and rails, dry-fitting, and attaching frames flush to a carcase for a finished appearance
- Wall-mounting strategy: locating studs, using ledger boards or French cleats, and distributing weight safely across a wall-mounted unit
- Squaring and truing a carcase: diagonal measurements, winding sticks, and clamping sequences that lock a unit in square before the glue sets
- According to Tolpin, what is the single most common source of measurement error in woodworking, and what specific habits does he recommend to eliminate it?
- How does Tolpin advise you to use a story stick, and how would you apply that technique when laying out a column of adjustable shelf-pin holes on both side panels simultaneously?
- What span-to-thickness ratios or rules of thumb does Tolpin provide for preventing shelf sag under load, and how would you apply them to a 36-inch-wide bookcase shelf?
- How does Tolpin's approach to squaring a carcase (diagonal measurement and clamping) translate to assembling a wall-mounted cabinet with a back panel?
- What does Tolpin say about reading and compensating for wood movement when sizing solid-wood face frame parts versus sheet-good carcases?
- How would you use Tolpin's layout and verification methods to ensure that a French cleat wall-mounting system is level, evenly loaded, and properly anchored?
- Story-stick layout drill: Mill two identical side panels for a small bookcase (approx. 10" × 36"). Use a story stick — not a tape measure — to transfer all shelf-pin hole locations to both panels simultaneously, then verify alignment with a square and a straightedge before drilling.
- Span-sag test: Build two identical 36-inch shelf blanks, one from ¾" plywood and one from ¾" solid wood. Load each with 20 lbs of books for 48 hours and measure deflection at center; compare results against Tolpin's span guidelines.
- Carcase squaring practice: Assemble a simple plywood box (top, bottom, two sides — no back) with glue and clamps. Use diagonal measurements to pull it square before the glue sets, then add the back panel and re-check; record how much the back panel corrected or introduced twist.
- Face frame build: Mill, fit, and glue up a face frame (two stiles, two rails) sized to the carcase above. Practice dry-fitting for gap-free joints, then attach it flush to the carcase front using Tolpin's marking and alignment techniques.
- Adjustable hardware layout: On a scrap panel, lay out and drill two parallel columns of shelf-pin holes (32mm system) using a shop-made jig derived from Tolpin's story-stick method; test with actual shelf pins and a shelf blank to confirm level and consistent spacing.
- Wall-mount simulation: Attach a French cleat to a sheet of plywood standing in for a wall (screwed into a solid backing). Using Tolpin's measurement and leveling principles, hang a small cabinet, verify it is plumb and level, then apply a calculated test load (25–30 lbs) and inspect the cleat and anchor points.
Next up: Mastering Tolpin's precision layout and structural verification methods gives you the measurement confidence and carcase-building fundamentals needed to tackle more complex built-in shelving — where units must be scribed to irregular walls, stacked or ganged together, and integrated seamlessly with trim and architecture.
Drawn from Fine Woodworking magazine's best projects, this book covers the full spectrum of shelf and cabinet builds with real shop-tested techniques — the most direct resource for the stated goal.
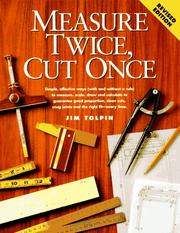
Focuses on layout, story sticks, and precision measurement — the skills that separate wobbly amateur shelves from tight, professional-looking built-ins.
Built-Ins: Design, Fit & Installation
IntermediatePlan built-ins that integrate with real (imperfect) walls and rooms, scribe to out-of-plumb surfaces, install securely, and achieve a furniture-quality, architecturally integrated look.
▸ Study plan for this stage
Pace: 4–5 weeks, ~25–35 pages/day — Litchfield's "Renovation" is dense and reference-heavy, so pace yourself by chapter theme: read framing/walls chapters in week 1, finish/trim chapters in week 2, built-ins/cabinetry sections in week 3, then spend weeks 4–5 re-reading key sections with pencil in hand, sk
- Reading a room: using a level, plumb bob, and story pole to document out-of-plumb walls, uneven floors, and racked openings before any design is committed to paper
- Scribing fundamentals: how to transfer irregular wall profiles onto a cabinet or shelf panel using a compass/scribe tool so the unit fits flush against imperfect surfaces
- Structural integration: locating studs, blocking, and load paths to anchor built-ins safely — distinguishing between decorative attachment and load-bearing fastening
- Rough vs. finish carpentry sequencing: understanding how drywall, baseboard, crown, and casing interact with a built-in so reveals and shadow lines read as intentional, not accidental
- Design proportions for architectural integration: using classical rules (golden ratio, cornice-to-cabinet height ratios) and room-specific cues (window head height, chair rail) to make built-ins feel 'of the house'
- Face-frame vs. frameless (European) cabinet construction and when each is appropriate for a built-in context
- Shimming, leveling, and plumbing a run of cabinets or shelving across an imperfect floor and wall plane, then hiding the corrections with scribe molding and toe-kick
- Finishing details that read as furniture quality: consistent reveals, applied moldings, paint-grade vs. stain-grade material choices, and hardware selection
- Before cutting a single board, what measurements and wall-condition checks does Litchfield recommend, and how do you record them on a story pole or rod?
- Explain the scribing process step by step: how do you set the compass gap, hold the scribe tool, and then cut and test-fit the scribed edge against an out-of-plumb wall?
- Where and how does Litchfield say you should add blocking or use existing framing to anchor a tall built-in bookcase so it cannot tip or rack over time?
- How does the sequencing of drywall, baseboard, and crown molding installation change when a built-in is involved — what gets installed first, and what gets scribed or coped to meet the unit?
- What visual and proportional cues does Litchfield use to ensure a built-in reads as architecturally integrated rather than 'furniture pushed against a wall'?
- How do you handle a floor that drops 1 inch over 8 feet when installing a run of base cabinets or a window-seat built-in — what does Litchfield advise about shimming, scribing the toe-kick, and maintaining a level top?
- Story-pole survey: Choose one wall in your home. Using a 6-ft level, plumb bob, and tape measure, document every deviation — out-of-plumb, bow, floor drop — on a full-height story pole (a straight 1×2 works). Annotate it with actual measurements. This is your 'room reality check' before any design.
- Scribe practice board: Clamp a scrap panel (plywood or MDF, ~12" wide) against your most irregular wall. Set a compass to the widest gap, run it top to bottom, then cut the scribed line with a jigsaw and belt-sand to the line. Test fit until no light shows. Repeat until the process feels automatic.
- Blocking installation drill: Open a small section of wall (or practice on a stud-bay mock-up with 2×4 studs on a workbench). Install horizontal blocking at the heights Litchfield recommends for upper and lower cabinet attachment. Practice driving lag screws into the blocking and confirm pull-out resistance.
- Proportions sketch exercise: Using the ceiling height, window head height, and baseboard profile of one room, sketch three different built-in bookcase elevations at scale (1"=1'). Apply at least one classical proportion rule. Evaluate which design feels most 'of the room' and annotate why.
- Dry-run cabinet leveling: Set two base cabinet carcasses on your actual (uneven) floor. Using shims only, bring them to level and coplanar across the top. Then scribe and cut a toe-kick board to follow the floor contour. Photograph each step for a personal reference document.
- Molding integration mock-up: Build a small (24"×24") corner mock-up with a cabinet box, a piece of baseboard, and a short run of crown. Practice coping the baseboard return and fitting the crown so it transitions seamlessly from wall to cabinet — the exact detail Litchfield identifies as the mark of furniture-quality built-ins.
Next up: Mastering how built-ins physically integrate with imperfect rooms — the scribing, blocking, leveling, and molding sequencing covered in Litchfield — gives you the structural and spatial confidence to move into the next stage, where the focus shifts to designing and building the cabinet and shelf components themselves with greater refinement in joinery, material selection, and interior organization

Provides the essential contractor-level knowledge of walls, framing, and fastening into structure that every built-in installer needs to anchor work safely and cleanly.
Professional Finish: Trim, Molding & Surface
ExpertApply architectural moldings (crown, base, casing), achieve seamless paint or stain finishes, and add the fine details that make built-ins indistinguishable from high-end millwork.
▸ Study plan for this stage
Pace: 3–4 weeks, ~20–25 pages/day; Flexner's book is dense with chemistry and technique, so budget extra time to re-read chapters on stain and topcoat application before moving to hands-on practice sessions
- Understanding wood species and grain porosity — how open-grain vs. closed-grain woods (oak vs. maple) absorb stain and finish differently, a critical factor when matching built-ins to existing millwork
- Surface preparation hierarchy — Flexner's core argument that 80% of a professional finish is in the prep: proper sanding grits (80→120→150→180→220), raising the grain with water, and filling pores with grain filler for a glass-smooth result
- Stain chemistry and application — distinguishing pigment stains from dye stains, how each interacts with wood fibers, and Flexner's techniques for achieving even color without blotching on problematic species like pine and cherry
- Blotch control and pre-conditioners — using washcoats (diluted shellac or commercial wood conditioner) before staining to tame uneven absorption, essential for built-ins built from common softwoods or poplar
- Topcoat selection and film-building — comparing oil-based polyurethane, water-based finishes, lacquer, and shellac on the axes of durability, sheen, dry time, and compatibility with underlying stains
- Application methods and defect prevention — Flexner's guidance on brush vs. wipe-on vs. spray application, avoiding runs, sags, brush marks, and fisheye, and how to sand between coats for a level film
- Architectural trim integration — applying finishing knowledge to crown molding, base molding, and casing so that paint-grade and stain-grade trim reads as a unified, seamless assembly with the built-in carcass
- Rubbing out and final polishing — using steel wool (0000), synthetic abrasive pads, and paste wax or polishing compounds to bring a cured topcoat to a consistent, furniture-grade sheen
- According to Flexner, why does sanding past 180-grit before staining sometimes produce worse color results, and how should you adjust your prep sequence for stain-grade work?
- What is the functional difference between a pigment stain and a dye stain, and which would Flexner recommend for achieving a rich, even color on a blotch-prone wood like pine built-in shelving?
- How does a shellac washcoat act as a blotch controller, and at what dilution ratio does Flexner suggest applying it before a pigment stain?
- Flexner identifies compatibility between stain and topcoat as a common source of finish failure — what are the key rules he provides for layering products safely (e.g., oil-based stain under water-based poly)?
- What is 'rubbing out' a finish, and what sequence of abrasives and lubricants does Flexner recommend to move from a satin sheen to a high-gloss or dead-flat result on a built-in face frame?
- When finishing paint-grade trim (crown, base, casing) alongside a built-in, what surface prep and primer steps does Flexner's framework suggest to ensure the paint film is hard, level, and free of grain telegraph?
- Stain comparison panel: Mill or purchase six 6"×12" boards of at least three species (pine, poplar, oak). Apply the same pigment stain to one half and a dye stain to the other half of each board, with and without a shellac washcoat pre-treatment — photograph and label all 12 results to build a personal reference library.
- Topcoat shootout: On identical sanded poplar panels, apply oil-based polyurethane, water-based polyurethane, and dewaxed shellac (each in three coats, sanded between coats at 320-grit). Rub out each with 0000 steel wool and paste wax; compare durability, clarity, and sheen side-by-side.
- Trim finishing mock-up: Cut short lengths of crown, base, and door casing from paint-grade MDF and finger-jointed pine. Prime with a shellac-based primer, fill nail holes with lightweight spackle, sand to 150-grit, and apply two coats of semi-gloss latex — practice achieving crisp, drip-free edges on the profile details.
- Blotch-control challenge: Take a pine board and intentionally finish one half with no prep and one half with Flexner's recommended washcoat sequence; apply the same stain to both halves and document the visual difference as a reminder of why prep matters.
- Rub-out progression drill: Apply three coats of oil-based polyurethane to a flat panel, allow full cure (minimum 72 hours), then work through the full abrasive sequence — 400-grit wet/dry paper → 600-grit → 0000 steel wool → automotive swirl remover → paste wax — stopping to photograph the sheen at each stage.
- Integrated built-in finishing simulation: On a small shop-built box (face frame + one fixed shelf + applied base molding), execute a complete finishing sequence from bare wood to final wax: fill, sand, washcoat, stain, seal coat, two topcoats, sand between coats, rub out — treating the casing and molding as part of the same unified finish system.
Next up: Mastering surface prep, stain, topcoat, and trim finishing here gives you the quality-control eye and hand-skill baseline needed to tackle the next stage's focus on full-room built-in integration — where consistent finish across multiple units, site-finishing constraints, and matching existing architectural woodwork become the central challenges.

Demystifies stains, paints, and topcoats in plain language so the learner can choose and apply the right finish for their built-in, completing the project to a furniture-grade standard.
Discussion
Keep reading
Paths that share books, cover the same subject, or open a related topic.