Tiling floors and walls: the best books to lay tile like a pro
This curriculum takes a beginner from zero tiling knowledge to confident, professional-quality results across floors, walls, and backsplashes. Each stage builds on the last — starting with core trade vocabulary and tool familiarity, moving through layout and installation technique, then tackling waterproofing and complex surfaces, and finally mastering advanced patterns and troubleshooting for durable, lasting work.
Foundations: Tools, Materials & Trade Language
BeginnerUnderstand the essential vocabulary, tools, tile types, thinset, and grout so every later instruction makes immediate sense.
▸ Study plan for this stage
Pace: 2–3 weeks, ~20–25 pages/day, with 2–3 days dedicated to hands-on material exploration
- Essential tile terminology: substrate, grout joint, layout, backerboard, and mortar vs. grout distinctions
- Tile types and their applications: ceramic, porcelain, natural stone, and glass—when and where each belongs
- Thinset composition, consistency, and application principles for proper tile adhesion
- Grout types (sanded vs. unsanded) and their role in waterproofing and structural integrity
- Core hand tools and power tools used in tile installation: trowels, spacers, cutters, and mixing equipment
- Trade language and industry conventions that appear throughout tile installation instructions
- Substrate preparation requirements and why proper foundation prevents costly failures
- What is the difference between thinset and grout, and what role does each play in a tile installation?
- How do ceramic, porcelain, and natural stone tiles differ in durability, water absorption, and appropriate use cases?
- What does 'substrate' mean, and why is substrate preparation critical before laying any tile?
- What is the correct consistency of thinset, and how do you know when it's ready to use?
- Name at least five essential hand tools for tile installation and describe the primary function of each.
- What is the difference between sanded and unsanded grout, and when would you use each type?
- What does 'backerboard' do, and in what situations is it necessary rather than optional?
- Create a personal glossary: as you read, compile a list of 30–40 trade terms with brief definitions and sketches where helpful (e.g., 'grout joint,' 'trowel notch,' 'float').
- Visit a tile showroom or home improvement store and physically examine samples of ceramic, porcelain, natural stone, and glass tiles; note differences in weight, texture, water absorption, and cost.
- Prepare a thinset batch following Bridge's instructions (or a manufacturer's guide); practice achieving the correct consistency by feel and appearance—record what 'peanut butter' consistency actually looks like.
- Inspect three different substrate types in your home or a construction site (drywall, concrete, wood subfloor); photograph and document their condition and why each would or wouldn not be suitable for tile without preparation.
- Lay out a small practice grid (2–3 feet square) with tile spacers on a flat surface to understand layout principles, grout joint spacing, and how tiles align before any adhesive is involved.
- Sketch or photograph the key tools mentioned in Bridge's book and label their parts; practice holding and positioning a notched trowel at the correct angle (typically 45°) to understand how trowel angle affects thinset ridges.
Next up: This foundation in vocabulary, materials, and tools ensures that when you move into the next stage—layout, cutting, and installation techniques—every instruction will reference concepts you've already internalized, allowing you to focus entirely on method and execution rather than decoding unfamiliar terminology.
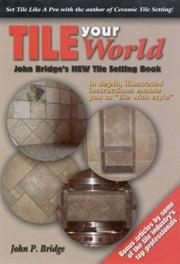
Written by the founder of the most respected online tiling community, this book demystifies mortar beds, backer boards, and setting materials in plain language that prepares beginners for real decisions on the job.
Core Skills: Layout, Cutting & Setting
BeginnerPlan and execute a proper tile layout, make accurate cuts, and set tile correctly in thinset on floors and walls.
▸ Study plan for this stage
Pace: 4–5 weeks, ~25–30 pages/day, with 2–3 days per week dedicated to hands-on practice
- Tile layout planning: measuring spaces, calculating grout lines, and creating balanced designs that avoid slivers and awkward cuts
- Substrate preparation: ensuring floors and walls are flat, level, and properly primed before tiling begins
- Cutting techniques: using wet saws, snap cutters, and nippers to make straight cuts, angled cuts, and notches with precision
- Thinset mortar application: mixing to proper consistency, spreading with the correct trowel angle, and achieving full coverage behind tiles
- Setting tiles: pressing tiles firmly into thinset, maintaining consistent grout lines, and checking for level and plumb as you work
- Tile types and materials: understanding how ceramic, porcelain, and stone tiles differ in absorption, durability, and cutting requirements
- Safety practices: proper use of cutting tools, dust control, and handling heavy materials
- How do you plan a tile layout to minimize cuts and avoid thin slivers at edges or corners?
- What are the key steps for preparing a substrate before applying thinset and setting tile?
- What is the difference between a wet saw, snap cutter, and nippers, and when should you use each tool?
- How do you mix thinset mortar to the correct consistency, and what trowel angle should you use when spreading it?
- What does it mean to achieve 'full coverage' when setting tiles, and how do you check for it?
- How do the absorption rates and hardness of ceramic, porcelain, and stone tiles affect your cutting and setting approach?
- Create a scaled layout drawing for a 5×8 foot bathroom floor using 12×12 inch tiles, calculating grout lines and identifying where cuts will occur
- Practice measuring and marking tiles for straight cuts, then execute cuts on scrap tiles using a wet saw, aiming for clean edges
- Prepare a small test substrate (2×2 foot plywood section) by cleaning, priming, and checking for level
- Mix a batch of thinset mortar to proper consistency (peanut butter-like texture) and practice spreading it with a notched trowel at the correct angle
- Set a practice section of 20–30 tiles on your prepared substrate, maintaining consistent grout lines and checking level frequently
- Make angled cuts and notches on scrap tiles using a wet saw and nippers to practice fitting tiles around obstacles
- Inspect your practice tile section for full thinset coverage by lifting a few tiles and checking the back for complete mortar contact
Next up: This stage equips you with the foundational skills to plan, cut, and set tile correctly; the next stage will build on these core competencies by teaching you how to grout, seal, and finish tiled surfaces to a professional standard.
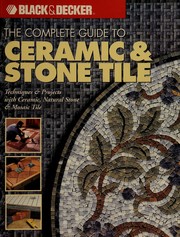
A comprehensive, project-based manual covering floor, wall, and backsplash installations with detailed photography — read here to see layout and cutting principles applied to multiple real scenarios.
Advanced Patterns, Grouting & Finishing
ExpertExecute complex tile patterns (herringbone, diagonal, mosaic), apply and seal grout flawlessly, and troubleshoot common defects for a truly professional finish.
▸ Study plan for this stage
Pace: 4–5 weeks, ~25–30 pages/day, with 2–3 days per week dedicated to hands-on practice and pattern layout work
- Complex tile pattern geometry: herringbone, diagonal, and mosaic layouts—calculating cuts, offsets, and starting points
- Substrate preparation and layout techniques specific to intricate patterns—using chalk lines, guides, and spacers for precision
- Thin-set mortar application methods for complex patterns—maintaining consistent thickness and coverage on irregular tile shapes
- Grout selection, mixing, and application for professional results—timing, consistency, and technique for different grout types
- Grout sealing and curing protocols—understanding when and how to seal to prevent staining and moisture damage
- Troubleshooting and correcting common defects—lippage, hollow spots, grout haze, efflorescence, and cracking
- Finishing techniques—caulking transitions, edge trim, and final cleanup for a polished, professional appearance
- Quality control and inspection standards—recognizing professional-grade work and identifying substandard installations
- How do you calculate tile cuts and layout starting points for a herringbone or diagonal pattern to minimize waste and maintain symmetry?
- What are the key differences in substrate preparation and layout between simple grid patterns and complex patterns like mosaics?
- How should thin-set mortar be applied and maintained when working with irregular tile shapes in advanced patterns?
- What factors determine which grout type to use, and how do mixing ratios and application technique affect the final result?
- What is the proper timeline and method for sealing grout, and why is this critical for long-term durability?
- How do you identify, prevent, and correct common defects such as lippage, hollow spots, and grout haze in advanced tile installations?
- Plan and execute a full herringbone pattern layout on a 4×8 ft substrate—calculate cuts, create a detailed layout drawing, and dry-lay tiles before setting
- Install a diagonal tile pattern on a 3×3 ft test area using thin-set mortar, focusing on consistent thickness and proper coverage with a notched trowel
- Create a small mosaic or complex multi-tile pattern (12×12 in minimum) incorporating at least three different tile shapes or sizes; document layout challenges and solutions
- Mix and apply grout to a completed tile installation, practicing proper consistency, joint filling, and timing; photograph and evaluate grout lines for uniformity
- Seal a grouted tile surface following manufacturer instructions; test water resistance and document the curing timeline
- Inspect and troubleshoot a deliberately flawed tile installation (created by you or a peer)—identify lippage, hollow spots, grout haze, and efflorescence; propose and execute corrections
Next up: Mastering complex patterns, flawless grouting, and defect correction positions you to tackle specialized applications—such as wet areas, exterior installations, and custom artistic designs—where precision and durability are non-negotiable.

Byrne is a master tile setter whose book goes deep into advanced layout geometry, large-format tile, and pattern work — the definitive reference for moving beyond basic grid installations.
Discussion
Keep reading
Paths that share books, cover the same subject, or open a related topic.