Repair drywall like a pro
This curriculum takes a beginner from zero drywall knowledge to professional-quality invisible repairs by building in three clear stages: first, understanding materials and basic trade skills; second, mastering the core techniques of taping, mudding, and sanding; and third, tackling advanced finishing, texturing, and the painter's eye needed to make repairs truly disappear.
Foundations: Tools, Materials & the Trade Mindset
BeginnerUnderstand how drywall is made, how it fails, what tools and compounds do what, and how professionals think about a repair before touching a knife.
▸ Study plan for this stage
Pace: 6–8 weeks total. Week 1–4: Ferguson's "Drywall" — read ~20–25 pages/day, focusing on the introductory chapters covering materials, tools, and basic techniques. Week 5–8: Litchfield's "Renovation" — read ~25–30 pages/day, concentrating on the drywall and wall-system chapters to absorb how a seasoned
- Drywall anatomy: the gypsum core, paper facing, and how each layer contributes to strength, fire resistance, and finish quality (Ferguson)
- The full tool kit: the purpose and correct use of taping knives (4", 6", 10"+), corner tools, mud pans, sanders, and screw guns — and why using the wrong tool creates more work (Ferguson)
- Joint compound types: all-purpose, lightweight, topping, and setting-type (hot mud) — their open times, shrinkage rates, and the right situation for each (Ferguson)
- The three-coat taping system: why each coat (tape/fill, second, finish) exists and what failure looks like when a coat is skipped or rushed (Ferguson)
- How drywall fails: nail pops, seam cracking, corner bead damage, moisture damage, and impact holes — and the structural vs. cosmetic root causes behind each (Ferguson & Litchfield)
- The professional mindset — assessing before cutting: reading the wall for hidden causes (settling, moisture, fastener failure) before deciding on a repair strategy (Litchfield)
- Drywall in renovation context: how existing drywall interacts with framing, plumbing, electrical, and insulation, and why a repair plan must account for what's behind the wall (Litchfield)
- Material selection logic: matching drywall type (standard, moisture-resistant, fire-rated) and thickness to the location and existing construction (Ferguson & Litchfield)
- After reading Ferguson, can you name every tool in a professional taping kit, state what each one does, and explain what goes wrong if it is substituted or skipped?
- What are the differences between setting-type and drying-type joint compounds, and when would a professional choose one over the other for a repair?
- Walk through the three-coat taping process step by step: what is the purpose of each coat, how wide should each coat be, and how long must you wait between coats?
- You find a repeating crack along a horizontal seam in a room. Using Litchfield's renovation mindset, what are three possible root causes you would investigate before picking up a knife?
- How does the type of drywall (standard, moisture-resistant, fire-rated, impact-resistant) affect both the original installation and any future repair strategy?
- What does Litchfield's broader renovation framework teach you about the relationship between drywall repairs and the systems (framing, moisture, mechanical) behind the wall?
- Tool identification drill: Visit a hardware store or lay out your own tools and physically handle each knife size, a mud pan, a corner bead crimper, and a pole sander. For each tool, say aloud what coat or task it belongs to before you leave the aisle — no notes allowed.
- Compound comparison test: Buy small buckets of all-purpose, lightweight, and a bag of 20-minute setting compound. Mix and spread a thin layer of each on a scrap piece of drywall or cardboard. Note the working time, how each feels under the knife, and how much each shrinks as it dries. Record observations in a repair journal.
- Failure-mode photo log: Walk through your home (or a friend's) and photograph every drywall defect you can find — cracks, pops, stains, dents, bowed seams. For each photo, write a one-sentence diagnosis using Ferguson's failure categories and a one-sentence note on what Litchfield would say to investigate behind the wall.
- Anatomy sketch: Without looking at Ferguson, draw and label a cross-section of a drywall panel (paper face, gypsum core, paper back) and a taped seam (tape, fill coat, finish coat). Then open the book and check your labels for accuracy.
- Pre-repair assessment checklist: Using Litchfield's renovation mindset, create a written checklist of 8–10 questions a professional should answer before starting any drywall repair (e.g., Is there active moisture? Is the framing sound? Are fasteners the cause?). Use this checklist on every future repair.
- Reading integration exercise: Choose one specific repair scenario from Ferguson (e.g., a nail-pop repair) and write a half-page plan that incorporates Litchfield's diagnostic thinking — what you'd check first, what materials you'd select and why, and which Ferguson technique you'd apply.
Next up: Mastering the vocabulary of tools, materials, and professional diagnosis in this stage gives you the mental framework to follow along when the next stage introduces actual repair techniques — you'll already know *why* each step is done, not just *what* to do.
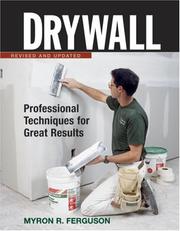
The single most-cited beginner-to-pro drywall reference; it establishes the vocabulary of panels, joints, compounds, and coats that every later book assumes you already know.
A canonical whole-house renovation manual that places drywall work in real-world context — framing, moisture, substrate prep — so repairs make structural sense, not just cosmetic sense.
Core Skills: Patching, Taping & Mudding
BeginnerExecute clean patches of any size, apply tape without bubbles, build correct coat sequences, and sand to a flat, feathered surface ready for paint.
▸ Study plan for this stage
Pace: 3–4 weeks, ~20–25 pages/day; focus on the drywall-specific chapters first, then revisit surface-prep and finishing sections for context on why a paint-ready surface matters
- Types of drywall damage and choosing the right patch method (butterfly patch, California patch, backer-board patch) based on hole size and location
- Mixing and consistency control for setting-type vs. drying-type joint compound — knowing when to use each for base coats vs. finish coats
- Tape application fundamentals: embedding paper tape or mesh tape in the first coat of mud with no air bubbles, voids, or wrinkles
- The three-coat sequence (taping/embedding coat → filler/second coat → finish/skim coat) and why each coat must be fully dry before the next
- Feathering technique: progressively widening each coat 2–4 inches beyond the last to create an invisible, gradual transition to the surrounding wall
- Sanding strategy: using a pole sander with the correct grit progression, wet sanding for dust control, and reading the surface with a raking light to find high spots and depressions
- Corner bead selection and installation (metal vs. vinyl vs. paper-faced bead) and how to mud and feather inside vs. outside corners
- Surface inspection and priming: why a drywall primer-sealer (PVA) is essential before paint to prevent flashing over patched areas
- What are the key differences between setting-type (hot mud) and drying-type joint compound, and when should each be used during a patch and finishing sequence?
- Walk through the three-coat taping sequence step by step — what is the purpose of each coat, how wide should each coat be, and what must happen between coats?
- What causes tape bubbles and ridges, and what corrective actions can you take during the embedding coat before the mud dries?
- How do you select the correct patch method for a nail-pop, a small screw hole, a 3-inch hole, and a 12-inch hole — and what materials does each require?
- How do you use a raking light to evaluate a sanded surface, and what does the surface need to look and feel like before it is considered paint-ready?
- Why must patched drywall receive a PVA primer before the finish coat of paint, and what visual defect occurs if this step is skipped?
- Damage inventory drill: Walk through your home and catalog at least five different types of drywall damage (nail pops, screw holes, cracks, medium holes, large holes). Sketch each one and write down which patch method and compound type Jewitt's guidance would prescribe for each.
- Compound consistency lab: Mix small batches of both a setting-type compound and a pre-mixed drying-type compound, adjusting water until each reaches the correct 'peanut butter' or 'mayonnaise' consistency described in the book. Practice spreading each on a scrap piece of drywall and note the working-time difference.
- Full three-coat patch project: Cut a deliberate 4–6 inch hole in a scrap drywall panel, install a backer board, and execute all three coats (embedding, filler, finish) on a schedule — letting each coat dry completely. Document each coat with a photo and written notes on what worked and what didn't.
- Tape bubble troubleshooting exercise: Intentionally apply a short section of paper tape with too little mud underneath, let it partially set, then practice the corrective technique of slitting, re-embedding, and feathering over the repair.
- Feathering and sanding sequence: After your three-coat patch is dry, sand using the grit progression appropriate for joint compound, then hold a work light at a raking angle to the wall. Mark any highs or lows with a pencil, apply a spot skim coat, re-sand, and repeat until no shadows appear under raking light.
- Corner bead installation: Install a short section of both an outside corner bead and an inside corner on scrap panels, apply two coats of mud, feather each side, sand, and compare the straightness of each corner against a level or straightedge.
Next up: Achieving a flat, feathered, primed surface through Jewitt's finishing principles is the essential prerequisite for the next stage, where texture matching, skim coating entire walls, and advanced surface preparation techniques build directly on the muscle memory and material knowledge developed here.
Bridges the gap between raw repair and a paintable surface; its step-by-step photo sequences on surface prep and filling build the hand-eye intuition needed before advancing to full finishing systems.
Advanced Finishing: Levels, Texture & the Invisible Repair
ExpertMatch any existing texture, achieve a Level 5 finish where required, and develop the critical eye to make a repaired area indistinguishable from the surrounding wall under raking light.
▸ Study plan for this stage
Pace: 4–5 weeks; spend roughly 3 weeks on the Painting and Decorating Contractors of America manual (~25–30 pages/day, focusing on surface prep, leveling systems, and texture chapters) and 2 weeks on Carroll's "Working Alone" (~20 pages/day, focusing on solo workflow strategies, tool setups, and finishing
- The drywall finish level system (Levels 0–5) as defined in trade practice: what each level requires, where each is specified, and why Level 5 is the non-negotiable standard for high-gloss or raking-light environments
- Surface chemistry and substrate preparation: how porosity, pH, and residual texture affect paint and compound adhesion — drawn from the PDCA manual's surface-prep chapters
- Skim-coating mechanics: achieving a true flat plane with a 12"+ finishing knife, feathering compound to zero edge, and the role of successive thin coats over a high-build base
- Texture matching taxonomy: identifying and replicating the most common textures (orange peel, knockdown, skip trowel, sand, popcorn/acoustic) using the spray, stomp, and hand-trowel techniques covered in the PDCA manual
- Raking-light inspection discipline: using a single strong side-light source at multiple angles to reveal every ridge, hollow, and tool mark before painting — the professional's quality-control standard
- Solo workflow engineering from Carroll's 'Working Alone': staging materials, sequencing coats, and setting up jigs or braces so that large finishing passes can be executed by one person without sacrificing quality or safety
- Paint system selection as the final finish layer: the PDCA manual's guidance on primers, sealers, and topcoat sheens and how they interact with a Level 5 surface to either reveal or conceal imperfections
- The 'invisible repair' mindset: reading the surrounding wall's texture pattern, light direction, and paint sheen before touching the repair, then working backward from the desired final appearance
- According to the PDCA manual, what specific additional steps — beyond a standard Level 4 finish — are required to achieve a certified Level 5 finish, and in what project contexts is Level 5 typically specified?
- How does the PDCA manual distinguish between a skim coat applied for leveling purposes and one applied as the final Level 5 surface layer, and what material or technique differences does it recommend for each?
- What texture-matching process does the PDCA manual outline for replicating a knockdown or skip-trowel texture on a small repair patch, and how do you control splatter size and density to blend with the surrounding field?
- Using Carroll's 'Working Alone' as your guide, how would you reorganize a multi-coat finishing sequence — mixing, applying, and sanding — so that a single worker can maintain a wet edge, avoid lap marks, and keep pace with drying times on a large wall section?
- Under raking light, what are the five most common surface defects that reveal an imperfect repair, and what corrective technique does the PDCA manual prescribe for each?
- How do primer selection and topcoat sheen (flat vs. eggshell vs. semi-gloss) amplify or mask surface irregularities on a Level 5 finish, and what does the PDCA manual recommend when the existing wall sheen cannot be exactly matched?
- Finish-level audit: Walk through your home or a job site and classify every wall and ceiling surface by its actual finish level (0–5) using the PDCA manual's criteria. Photograph at least one example of each level you find and annotate what visual cues confirmed your classification.
- Raking-light mapping exercise: In a single room, move a bare work light in a full 360° arc at low angle while examining one repaired or patched wall. Mark every visible ridge, hollow, and tool mark with a pencil tick. Then skim-coat only those marked areas, re-inspect under raking light, and repeat until the surface passes with zero marks.
- Texture sample board series: On six 12"×12" drywall scraps, practice replicating a different texture on each (orange peel, knockdown, skip trowel, sand finish, smooth Level 5 skim, and one texture sampled directly from your own wall). Label each board with the tool, compound consistency, and technique used, building a personal reference library.
- Solo large-wall skim coat: Using Carroll's workflow principles, plan and execute a full skim coat on a wall no smaller than 8'×8' entirely alone. Pre-stage all tools and compound before starting, time each coat, and log where you had to stop and why — then revise your staging plan for the next attempt.
- Invisible repair challenge: Introduce a deliberate 4"×4" repair (fill a screw-pop or small hole) on an already-painted textured wall. Carry it through all steps — patching, texture matching, priming, and painting — then photograph the result under raking light and have someone unfamiliar with the wall try to locate the repair.
- Paint-system interaction test: On a single primed Level 5 sample board, apply four vertical strips of paint in different sheens (flat, eggshell, satin, semi-gloss). Deliberately leave a faint skim-coat ridge under each strip. Photograph under raking light and document how each sheen level reveals or hides the defect, correlating your findings with the PDCA manual's guidance.
Next up: Mastering Level 5 finishing and invisible texture matching establishes the perceptual precision and surface-reading skills that are the direct prerequisite for the next stage — full-room renovation sequencing and project management — where every trade's work must be coordinated so that finished surfaces are protected, schedules are respected, and the Level 5 standard is maintained from first frami
The trade-school standard for the painting side of the equation; it teaches how light, sheen, and color interact with surface imperfections — essential knowledge for making a mud repair truly invisible.
Covers the practical problem of executing professional-quality drywall and finishing work without a crew, including staging, tool setups, and texture-matching tricks that solo DIYers and small contractors rely on.
Discussion
Keep reading
Paths that share books, cover the same subject, or open a related topic.