English Paper Piecing: Best Books in Order
This curriculum takes a beginner from the very first stitch through to confident, complex English paper piecing (EPP) and hand-quilting projects. Each stage builds on the last — starting with core technique and hexagon basics, moving into shape variety and design thinking, and finally tackling ambitious heirloom-level work and modern creative applications.
Foundations: Hexagons & Core Technique
BeginnerUnderstand what English paper piecing is, master the basic basting and whip-stitch method, and complete a first hexagon project with confidence.
Covers the foundational mechanics of EPP in clear step-by-step detail, reinforcing the vocabulary and hand-stitching habits needed before moving to more complex shapes.
Going Deeper: Design, Colour & Larger Quilts
IntermediatePlan and execute a full-size EPP quilt, make intentional colour and design decisions, and understand how to combine multiple block types.
▸ Study plan for this stage
Pace: 6–8 weeks, ~20–25 pages/day plus 2–3 hours/week of design work and colour planning
- Millefiori design principles: how to combine multiple geometric block types into cohesive, large-scale patterns with visual flow
- Colour theory fundamentals: understanding value, saturation, temperature, and contrast to create intentional colour schemes
- Designing a full-size EPP quilt: scaling blocks, planning layout, calculating yardage, and managing complexity across multiple block types
- Colour selection strategies: using the colour wheel, creating focal points, and achieving balance in multi-block quilts
- Translating inspiration (florals, nature, traditional patterns) into EPP block combinations and colour palettes
- Managing the technical and creative challenges of larger projects: organization, block assembly sequences, and maintaining design intent
- How do you combine multiple different EPP block types into a single quilt while maintaining visual coherence and flow?
- What are the key colour theory principles (value, saturation, temperature) and how do you apply them to create intentional colour schemes in a multi-block quilt?
- How do you plan a full-size EPP quilt design, including determining block arrangement, calculating yardage, and scaling blocks appropriately?
- What strategies can you use to select and test colours before committing to a full quilt, and how do you create focal points and balance?
- How do Millefiori quilts use repetition, variation, and block placement to create the illusion of movement and depth?
- What organizational and technical systems help you manage a complex, multi-block EPP project from design through completion?
- Study 3–4 finished Millefiori quilts (from the book or online galleries): map out the block types used, trace the colour flow, and identify how visual movement is created through repetition and variation
- Create a colour palette for a hypothetical 60–80 block quilt using The Quilter's Colour Club principles: select 4–6 colours, test them in small swatches, and explain your choices using colour theory language (value, temperature, contrast)
- Design a small practice quilt (12–16 blocks) combining 2–3 different EPP block types; sketch the layout, plan colour placement, and identify potential focal points
- Complete a full design plan for your intended full-size EPP quilt: finalize block types and quantities, create a colour map, calculate yardage, and write out an assembly sequence
- Piece a sample block in each block type you plan to use in your quilt, testing your colour selections and refining your fabric choices based on how they interact
- Create a visual mood board or inspiration collage (digital or physical) showing the colour palette, block arrangement, and overall aesthetic you're aiming for; use it to guide fabric purchasing and block piecing
Next up: This stage equips you with the design thinking, colour confidence, and project management skills needed to move into advanced techniques—such as precision finishing, innovative block variations, and gallery-quality presentation—while maintaining the intentional aesthetic and technical mastery that define accomplished EPP work.

A landmark EPP book featuring intricate multi-shape rosette designs; reading it at this stage teaches design logic and how shapes interlock, elevating the learner's visual thinking.
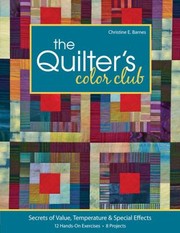
Provides the colour theory foundation that EPP quilters need when planning large, complex projects — pairs perfectly with Hammerstein's design complexity.
Hand Quilting & Finishing
IntermediateLearn to layer, baste, and hand-quilt an EPP top, mastering running stitch, quilting patterns, and professional finishing techniques.
▸ Study plan for this stage
Pace: 4–5 weeks, ~20–25 pages/day with frequent breaks for hands-on practice; allow 2–3 days per week for actual quilting practice
- Proper layering technique: batting selection, grain alignment, and securing the quilt sandwich
- Basting methods (spray, needle, or thread) and their trade-offs for hand quilting
- Running stitch fundamentals: hand position, needle control, stitch length consistency, and rhythm
- Quilting design planning: marking techniques, pattern selection, and adapting designs to EPP piecing
- Thread selection and needle choice for hand quilting across different fabric types
- Tension management and avoiding puckering, bunching, and distortion during quilting
- Binding attachment and finishing: hand-sewing binding, mitering corners, and achieving professional edges
- Troubleshooting common hand-quilting problems and refining technique through practice
- What are the three main basting methods Alex Anderson recommends, and when would you use each one for hand quilting?
- How do you achieve consistent running stitch length and tension while hand quilting, and what hand positions does Anderson advocate?
- What factors should you consider when selecting a quilting pattern for an English paper-pieced top, and how do you mark it?
- How do you layer a quilt sandwich properly to minimize shifting and ensure successful hand quilting?
- What are the steps for hand-sewing binding to finish a quilt, and how do you achieve professional-looking mitered corners?
- What are three common hand-quilting mistakes and how do you prevent or correct them?
- Practice running stitch on scrap fabric and batting before quilting your actual top; aim for 8–10 stitches per inch with consistent length
- Prepare a small practice quilt sandwich (12×12 inches) using different basting methods; quilt each one and compare ease and hold
- Mark and quilt a simple straight-line or grid pattern on your practice sandwich to build confidence and muscle memory
- Layer, baste, and hand-quilt a full EPP top using Anderson's recommended techniques, documenting any adjustments needed
- Practice binding attachment on a finished quilt block or small project, focusing on hand-stitching and corner mitering
- Quilt at least two different quilting patterns on your EPP top (e.g., outline quilting and a secondary pattern) to develop design versatility
Next up: Mastering hand quilting and finishing transforms a pieced EPP top into a complete, professional quilt, establishing the foundational skills and confidence needed to tackle advanced finishing techniques, specialty quilting stitches, and design refinement in subsequent stages.
A thorough reference for hand-quilting technique — stitches, frames, thimbles, and finishing — giving EPP makers everything needed to take a pieced top to a finished quilt.
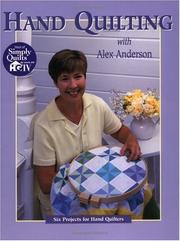
A concise, practical guide focused entirely on hand quilting; its approachable style bridges the gap between EPP piecing skills and confident hand-quilting execution.
Mastery: Heirloom Complexity & Creative Freedom
ExpertTackle advanced multi-shape EPP designs, develop a personal creative voice, and produce heirloom-quality work with sophisticated patterning.
The third volume in Hammerstein's celebrated series introduces her most complex rosette and medallion designs, providing a true masterclass challenge for the accomplished EPP quilter.
Discussion
Keep reading
Paths that share books, cover the same subject, or open a related topic.